Some riders say that the difficulty finding neutral gear, the dragging clutch or jammed gearbox is just a quirk of this or that motorcycle model. But we are too lazy to accept these riding discomforts and deal with them every riding day, so we are simply fixing them out of DR350 today
The vulnerable side of DR350
DRs might be called the Swiss army knives – immune to every common motorcycle maladies and capable of riding anywhere any style. But, unfortunately, this two-wheeled tank has a weak spot just like any other vehicle.
We’ve learnt at the stage of choosing the bike model, that there are three major problems reported most often for DR: the difficulty finding neutral gear, the dragging clutch and the jammed gear box.
Why all these three problems at once? you may ask.
Well, they often might be connected – the same worn out parts might cause both dragging clutch and difficulty finding neutral gear. Additionally, the jammed gearbox might be a side effect of the first two issues or … a result of not entirely properly handled fix of the first two issues.
The dragging clutch disease can be diagnosed, when the bike in gear is creeping forward, although the clutch lever is pulled all the way in or when you’re changing the gears from neutral to first and you feel the bike is jerking forward. Because the dragging clutch is caused by the clutch not disengaging fully from the gears, it happily coexists with the problem of difficulty finding neutral, when we actually want the clutch to release and to stay in this released state, but it doesn’t. No matter how much you’ll focus on the precise and delicate movement of your foot is, when you try to find neutral gear.
You can easily observe this, when you don’t have the clutch cable aligned properly. Just make the cable too loose – the clutch will drag and you can forget that there was any neutral ;)
The jammed gearbox problem, when you just have a hard time moving the gear shift lever up the 3rd gear, however, seem to not fit in this story. But in fact it’s core cause lies very close to the source of the problems with neutral gear.
It is said in different sources that all those issues are more apparent, when the motorcycle’s engine is cold, others say that it’s worse, when the engine is… warm ¯\_(ツ)_/¯ Though either way, some riders say that difficulty finding neutral or difficulty switching gears is just how the motorbikes are or how this or that exact model is. It’s just its quirk (or charm) and you should deal with it (⌐■_■)
But our thoughts were that Suzuki engineers can’t be dumb, something is off and can end bad on a longer journey. So instead of accepting the dragging clutch and difficulty finding neutral gear as they are, we’re going to fix them now.
Before you start the clutch basket disassembly
The parts
Before you start clutch basket disassembly, make sure you tried to align the clutch cable first. If the cable is set too loose – looking to clutch basket won’t help. You will still end up with neutral gear problems or the clutch dragging. (Only the jammed gearbox problem is independent of the clutch cable adjustment.)
If the cable is fine – here’s the list of parts needed to complete the fix.
| Part | Part Number | Quantity |
|---|---|---|
| Shift drum bolt | 25312-38A00 | 1 |
| Lock washer | 09167-20009 | 1 |
| Clutch cover gasket | 11482-14D03 | 1 |
| Clutch bracket spacer | 09180-20109 | 1 |
| Clutch bracket spacer washers | 08211-20363 | 2 |
| Shift drum stopper (Detent arm) – only for jammed gearbox | 25350-14D01 | 1 |
Below we’re fixing DR produced in 1993, but we checked and all the part numbers should match any other DR, including DRs with electric starter.
The tools
Besides the parts we will have to change, there are other tools that will come in handy:
- torque wrench
- thread locking fluid
- engine silicone sealant
The torquing cheat sheet
Below is a little table for fast torque look up, also in foot-pounds. If you don’t know, which part is which now, don’t worry, you will know in a minute. Everything is explained in the rest of the post below.
| Part | Torque in Nm | Torque in ft-lb |
|---|---|---|
| Shift drum bolt | 12 | 8.85 |
| Clutch basket nut | 40 | 29.5 |
| Clutch spring bolt | 4.5 | 3.32 |
| Shift drum stopper (Detent arm) | 12 | 8.85 |
| Clutch spring bolt | 4.5 | 3.32 |
Clutch basket disassembly
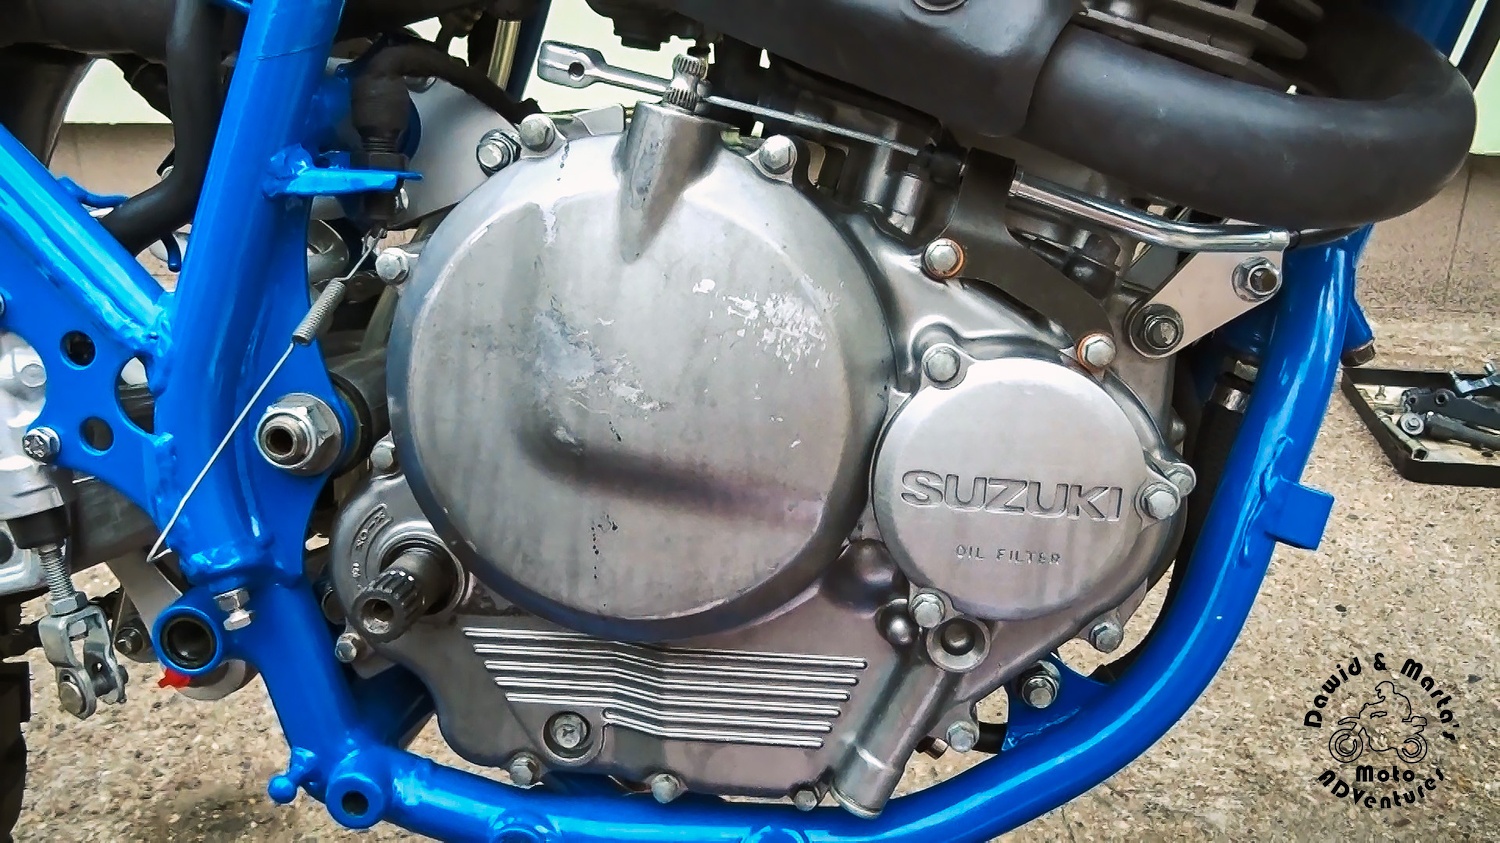
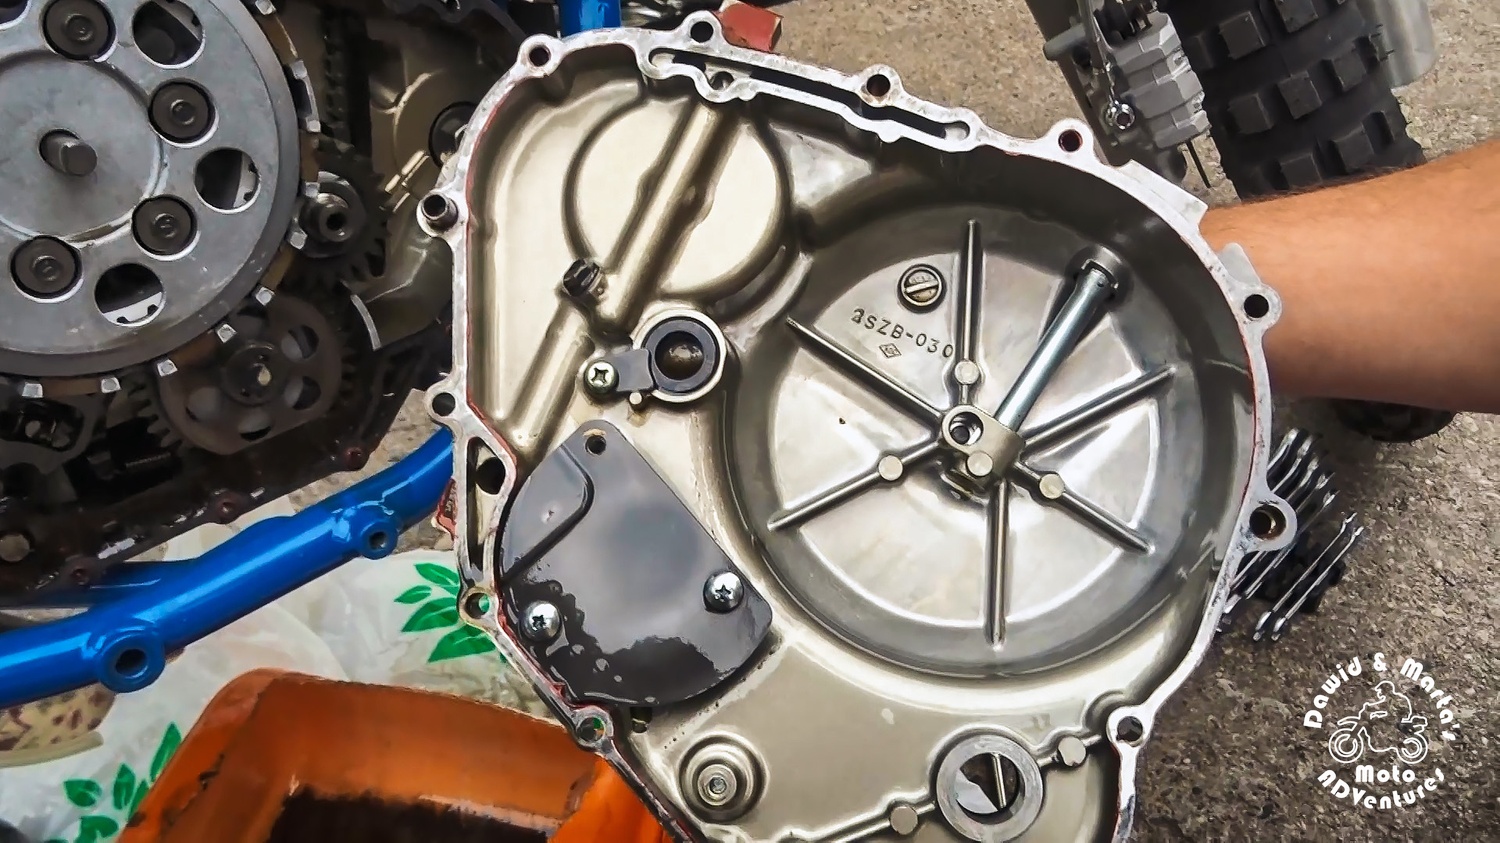
We will start our neutral gear repair guide from the moment when we have the clutch cover already taken off and clutch basket awaits our screwdriver. If you need a little help to get to this step with your clutch, check out the post on how to replace a clutch in DR350 here [COMING SOON].
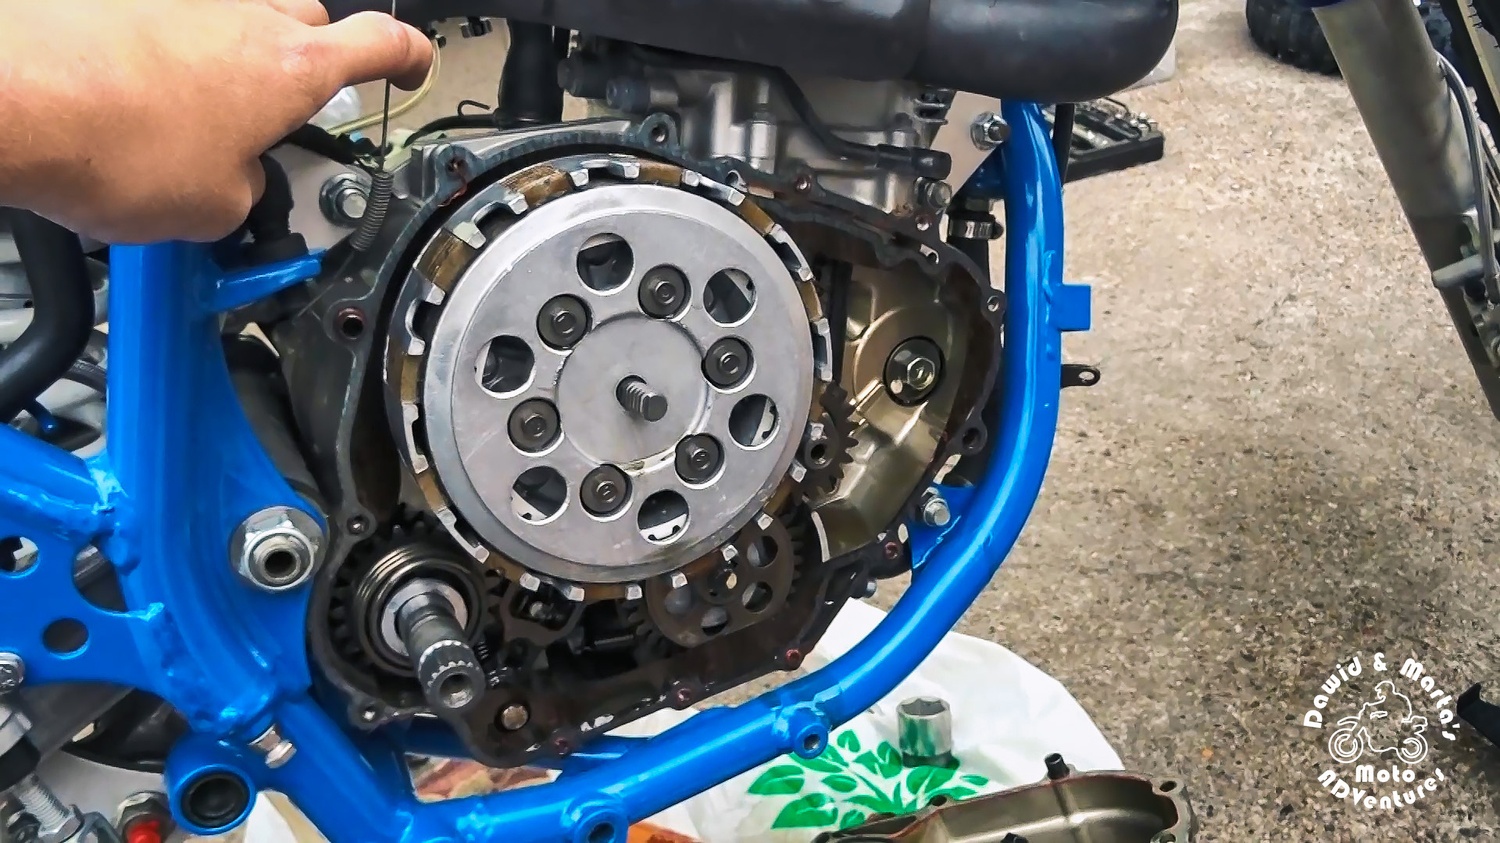
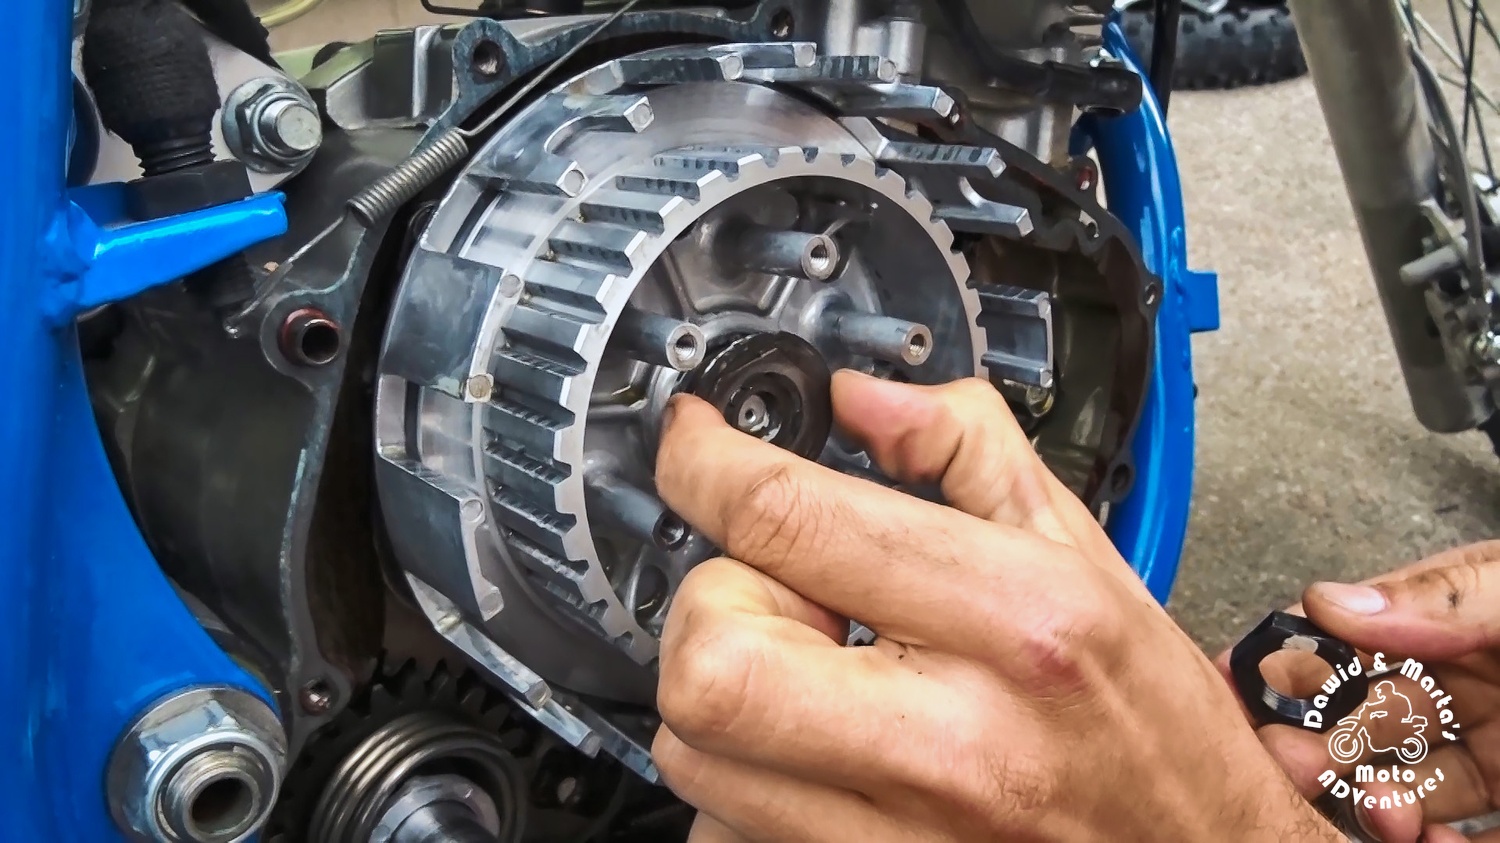
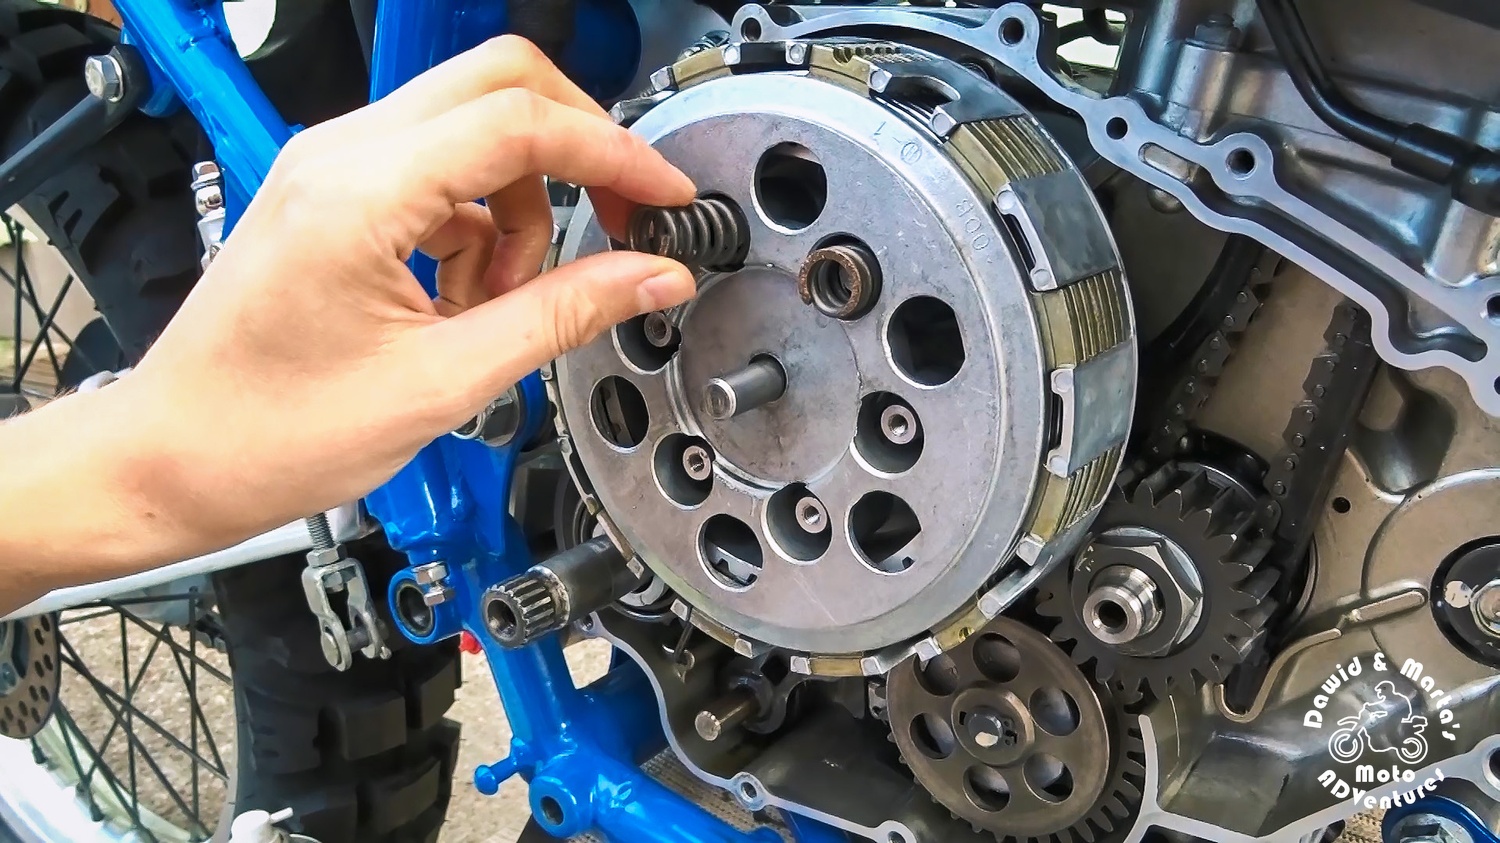
We start with taking out the clutch plates.
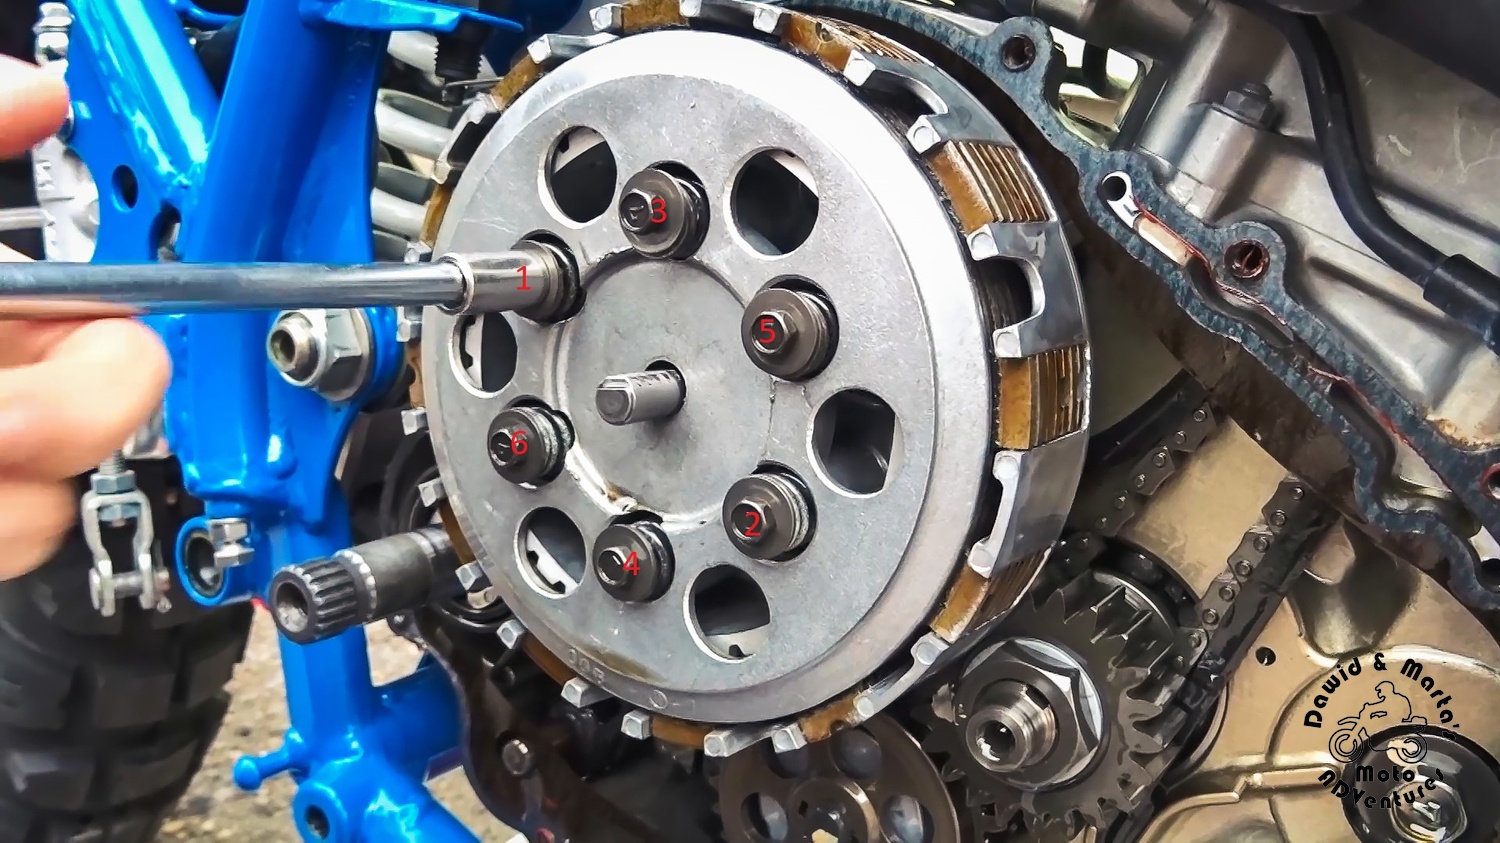
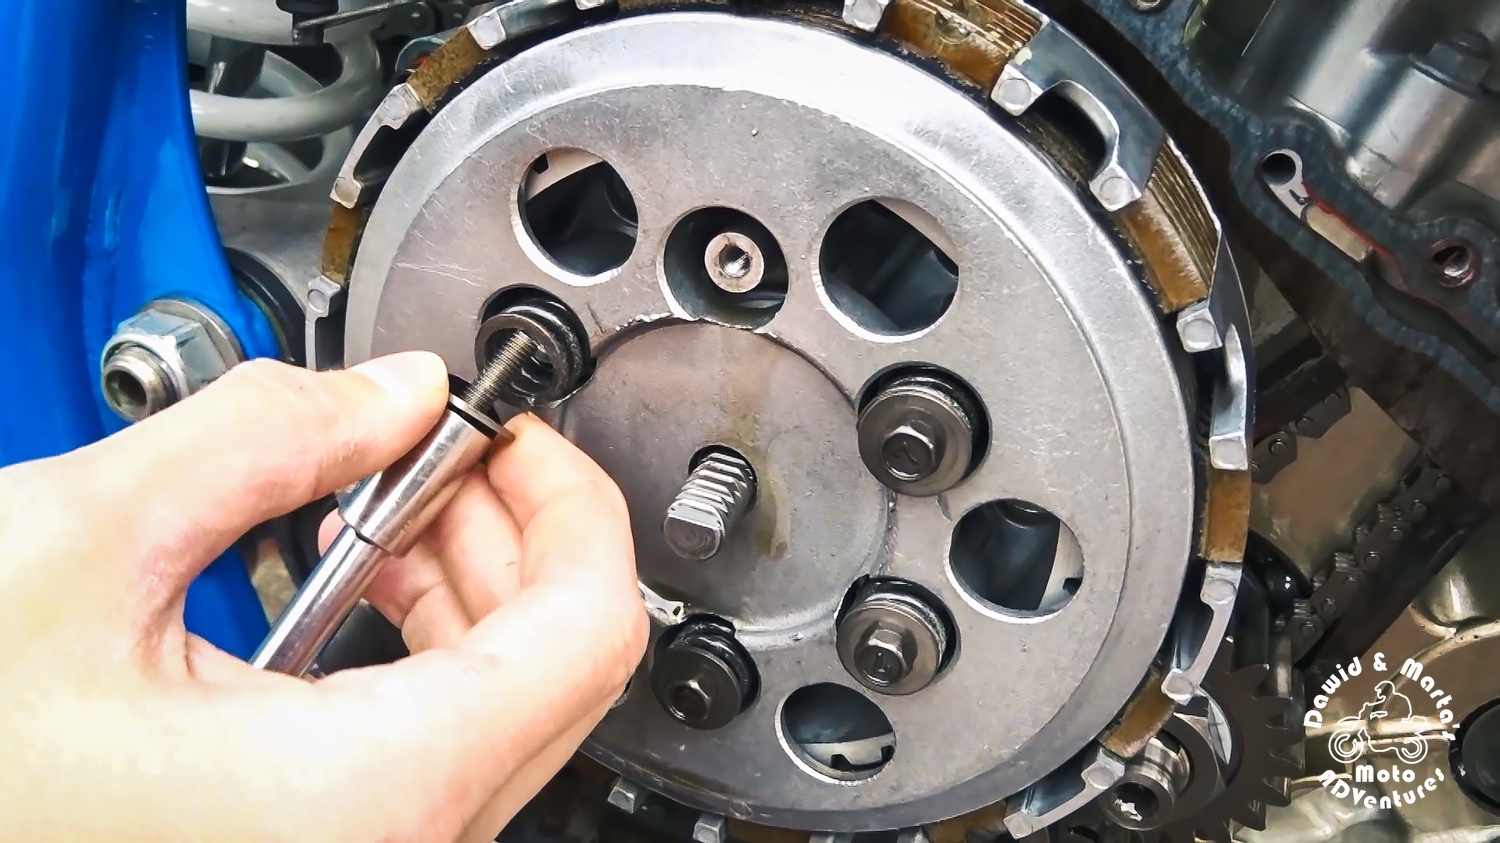
To do this we first remove the six bolts, which hold the clutch springs underneath. Just remember to go diagonally with the unscrewing.
Then we can easily remove the springs and let them wait for the clutch assembly.
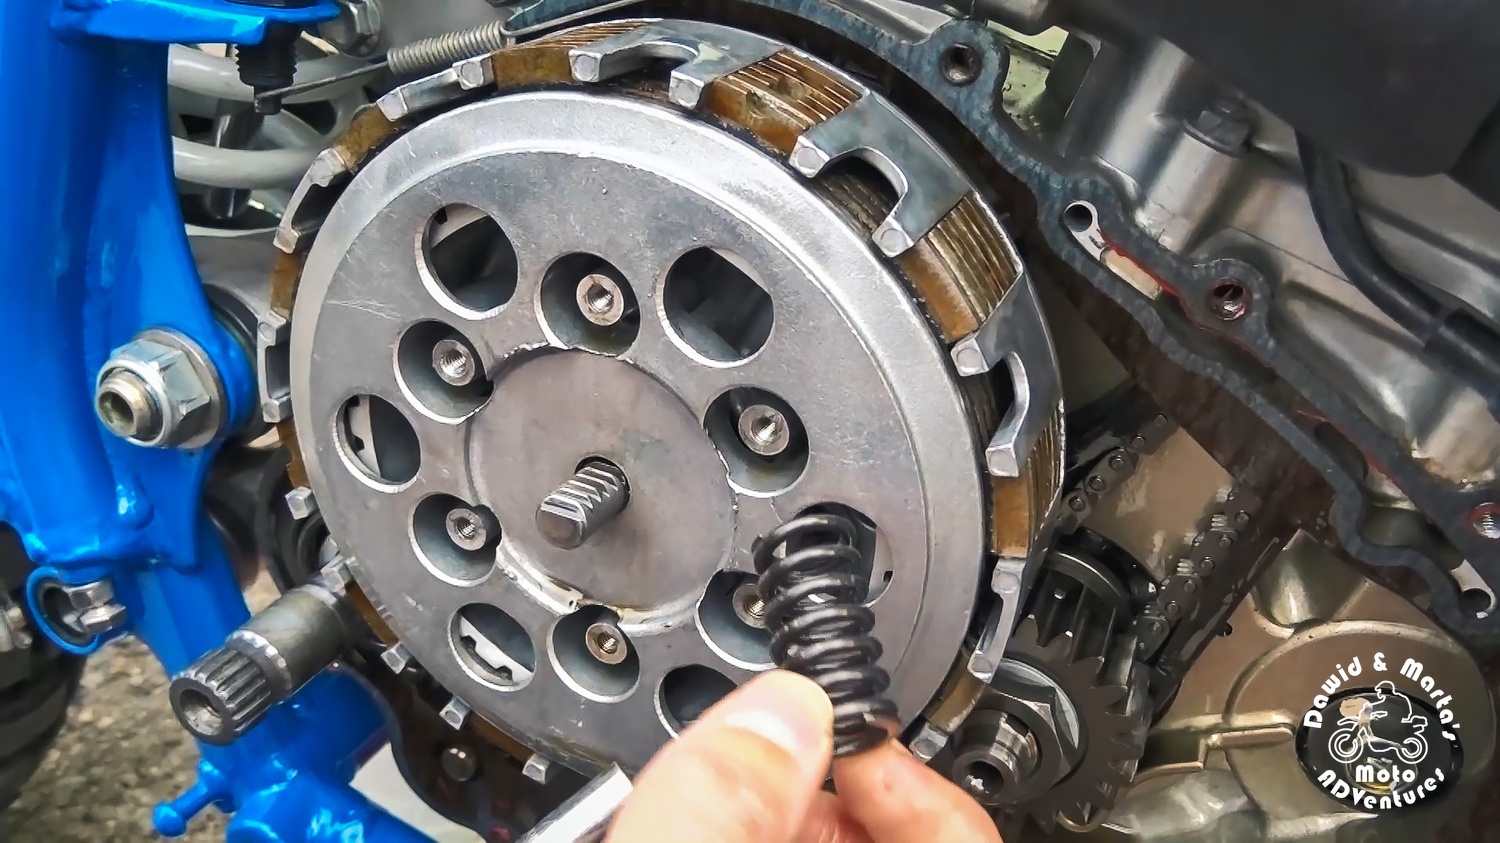
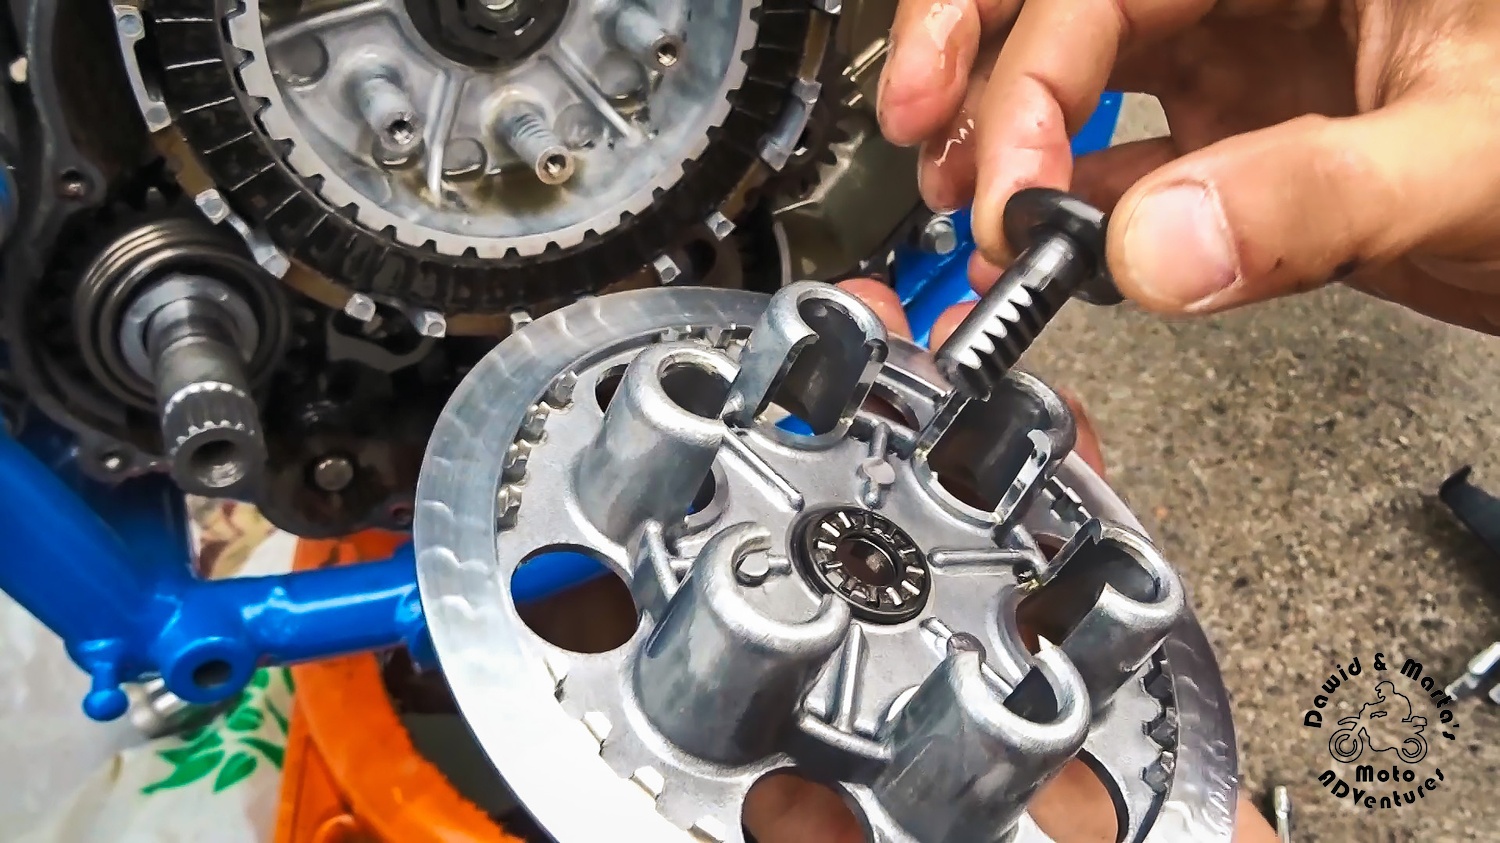
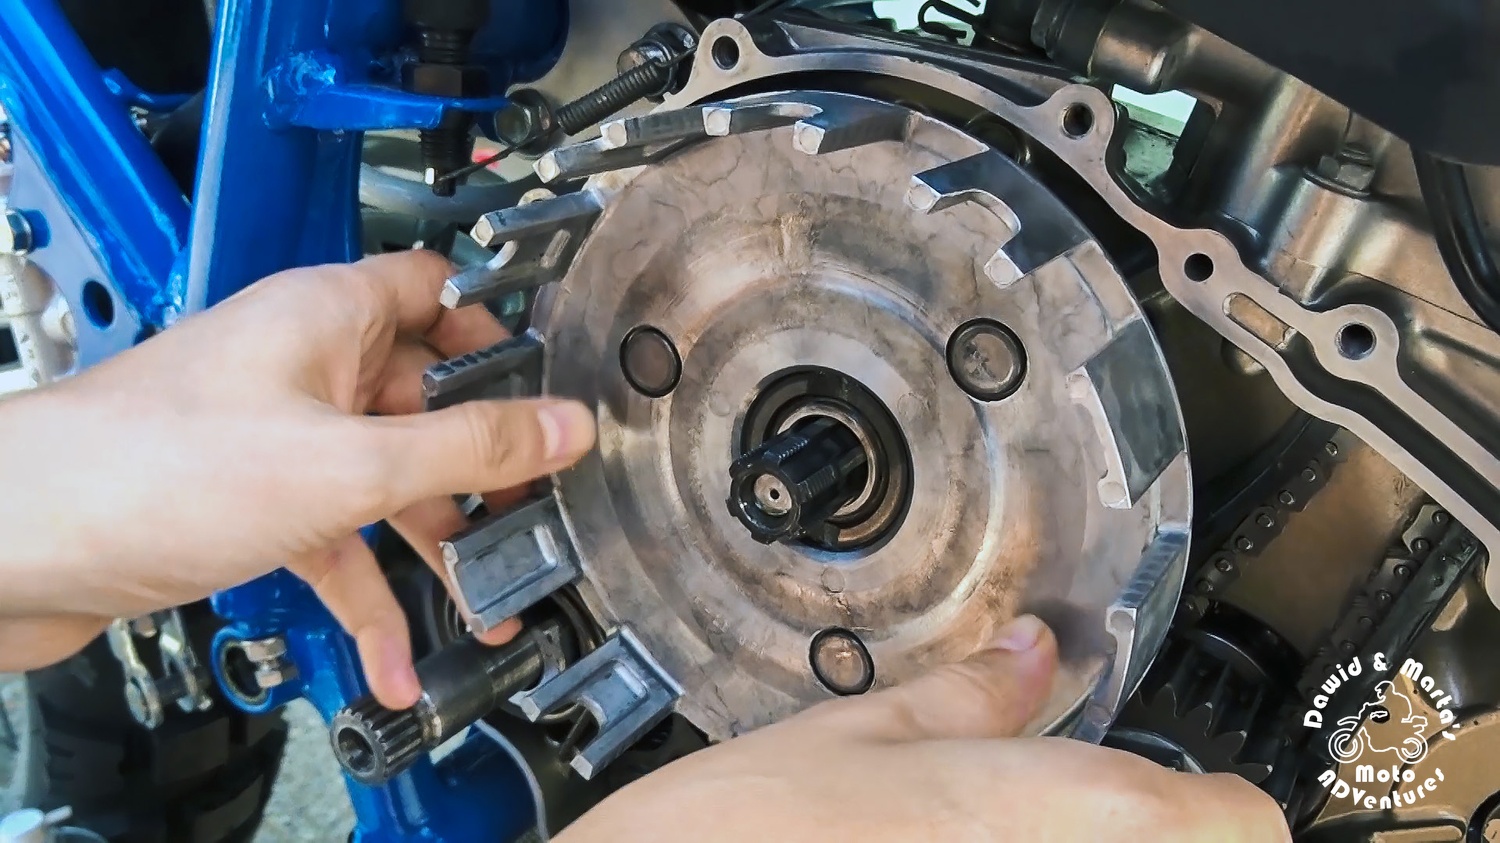
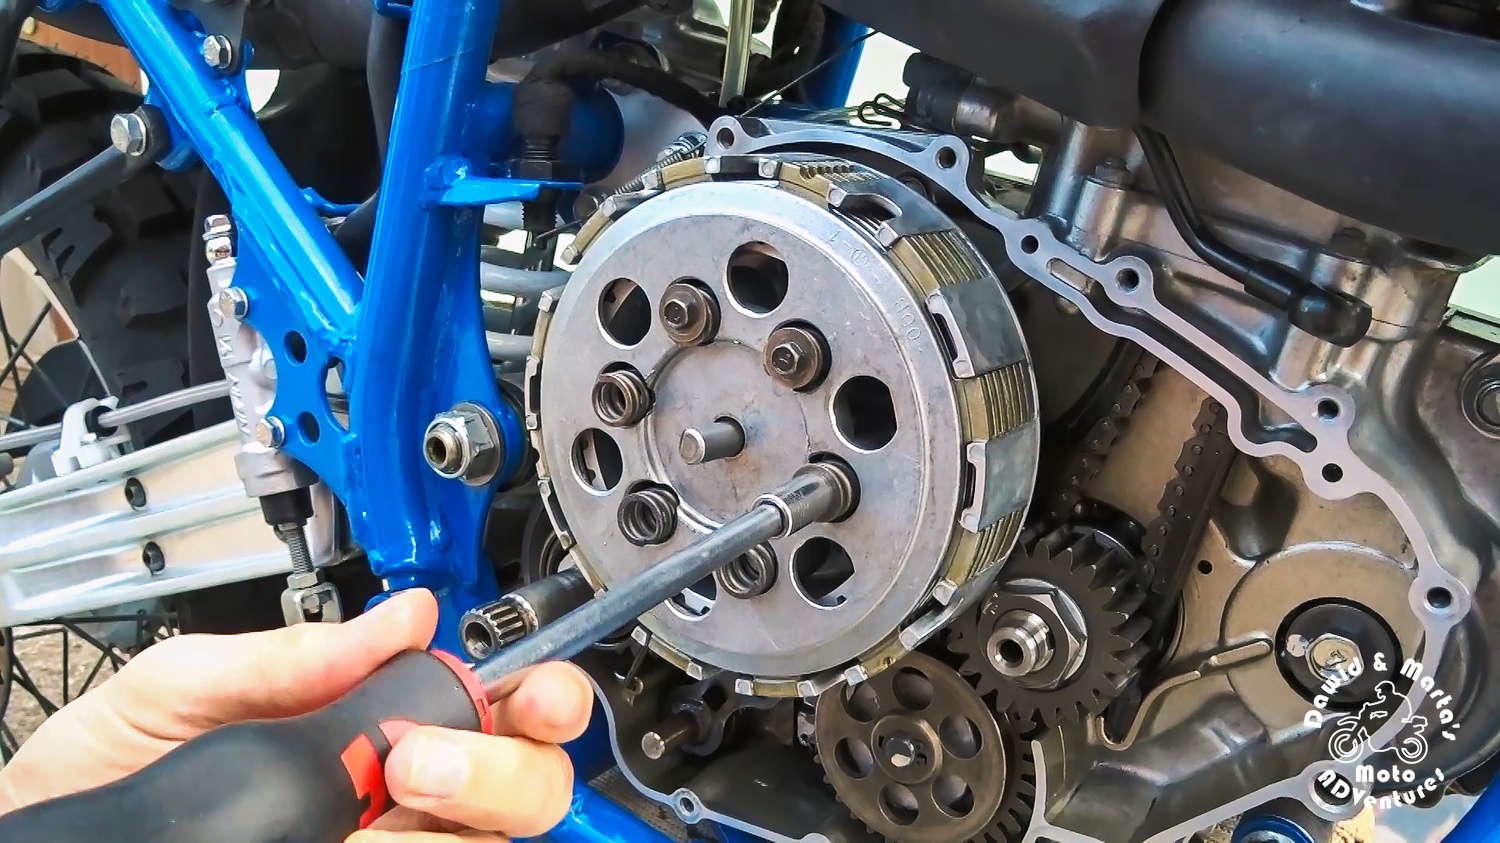
Now we can take off the disc pressuring the clutch plates.
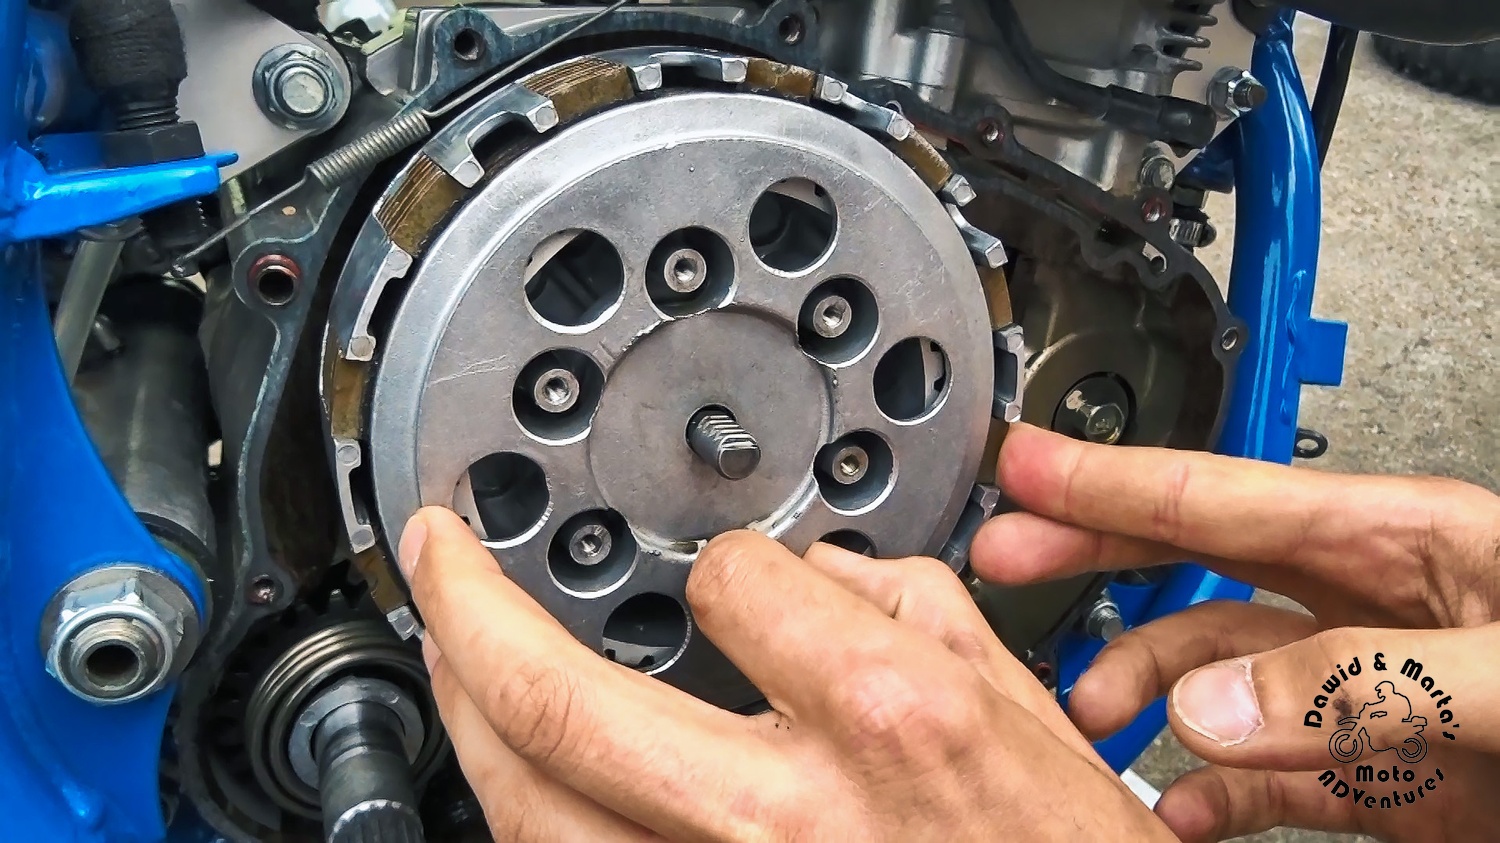

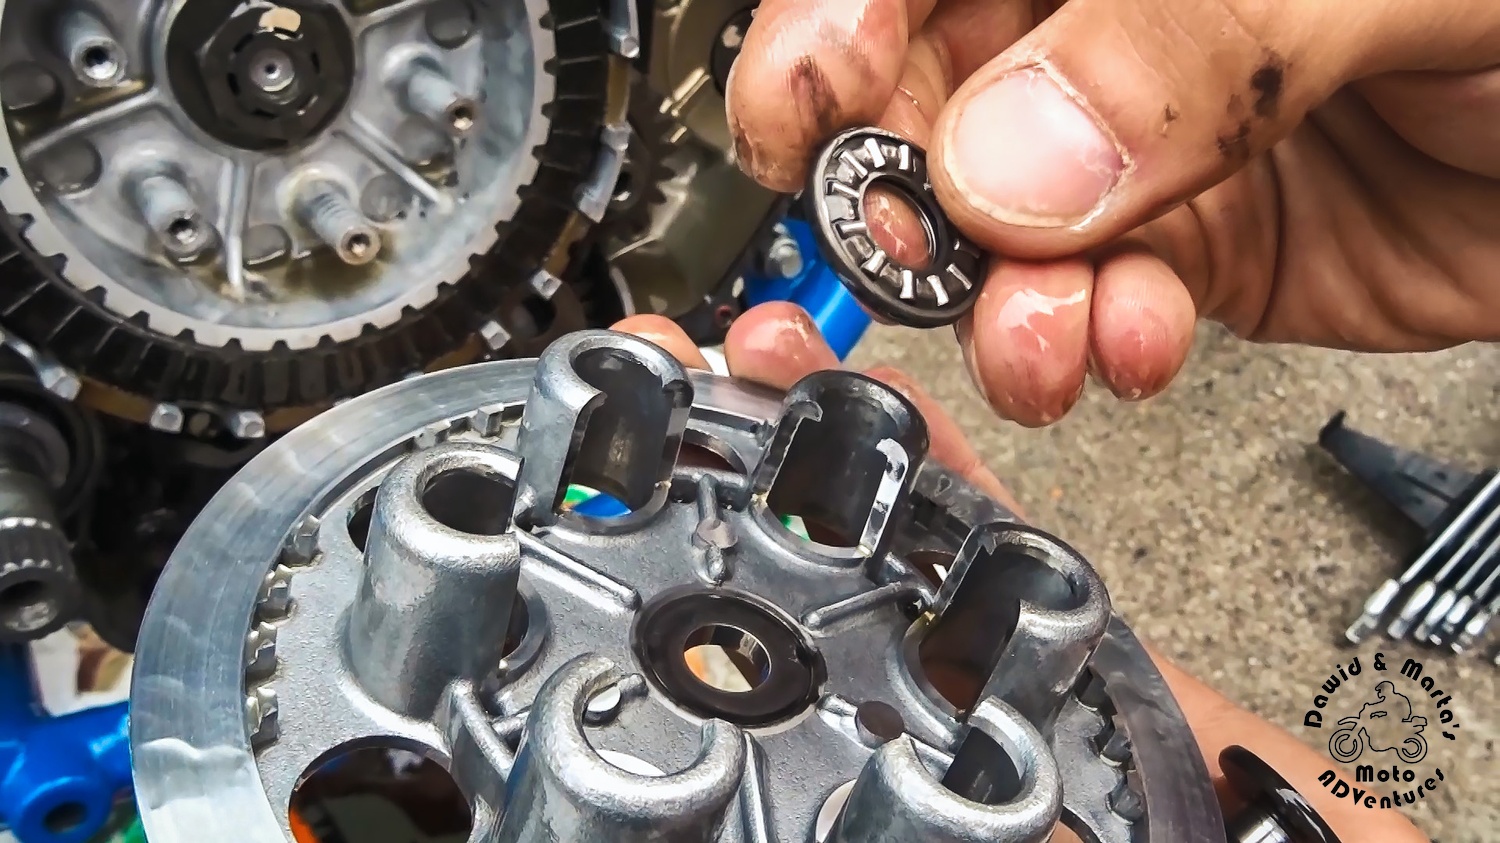
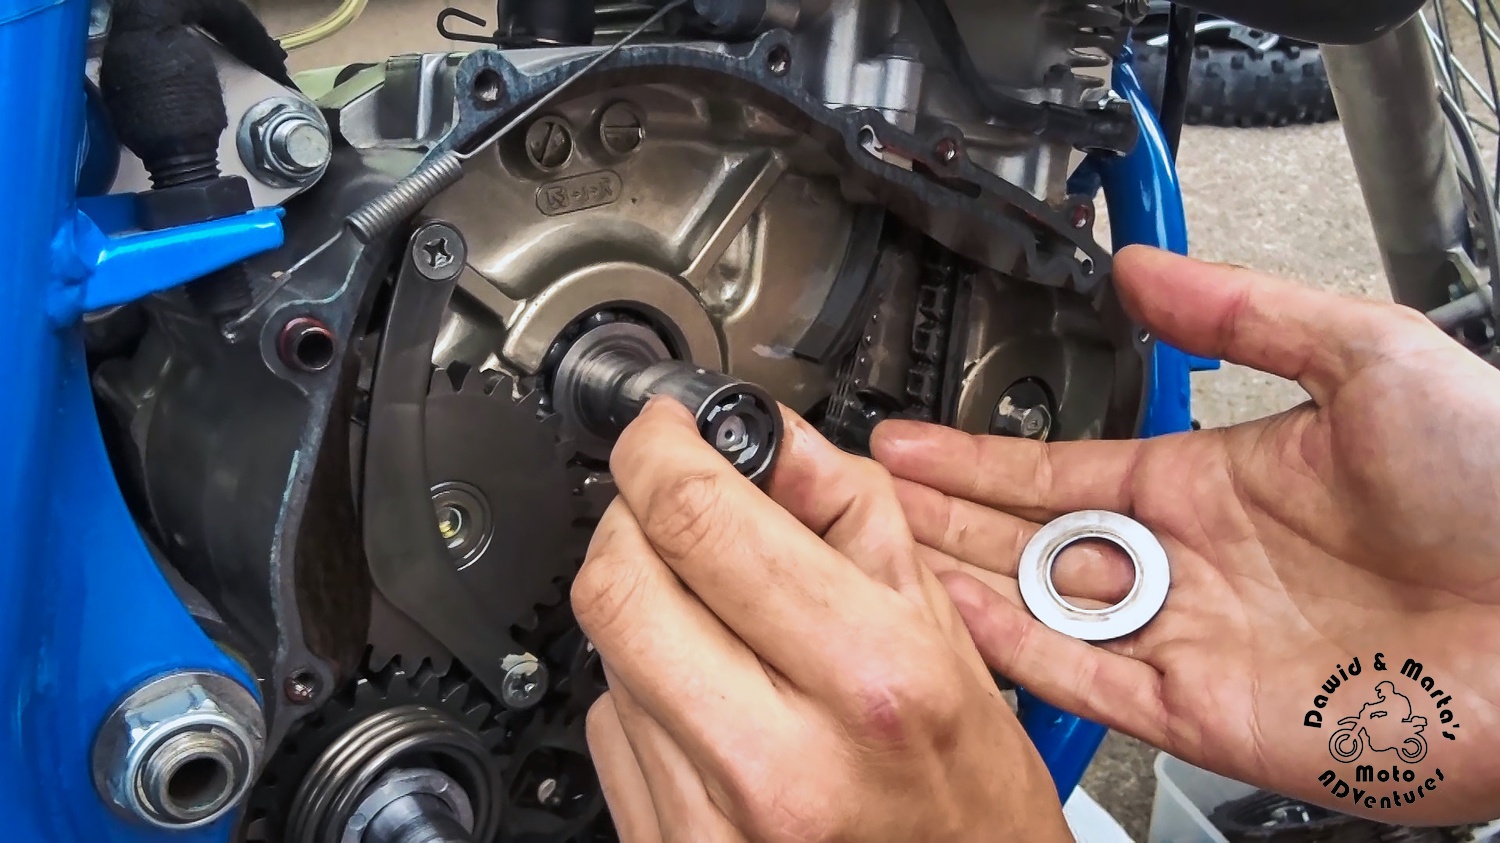
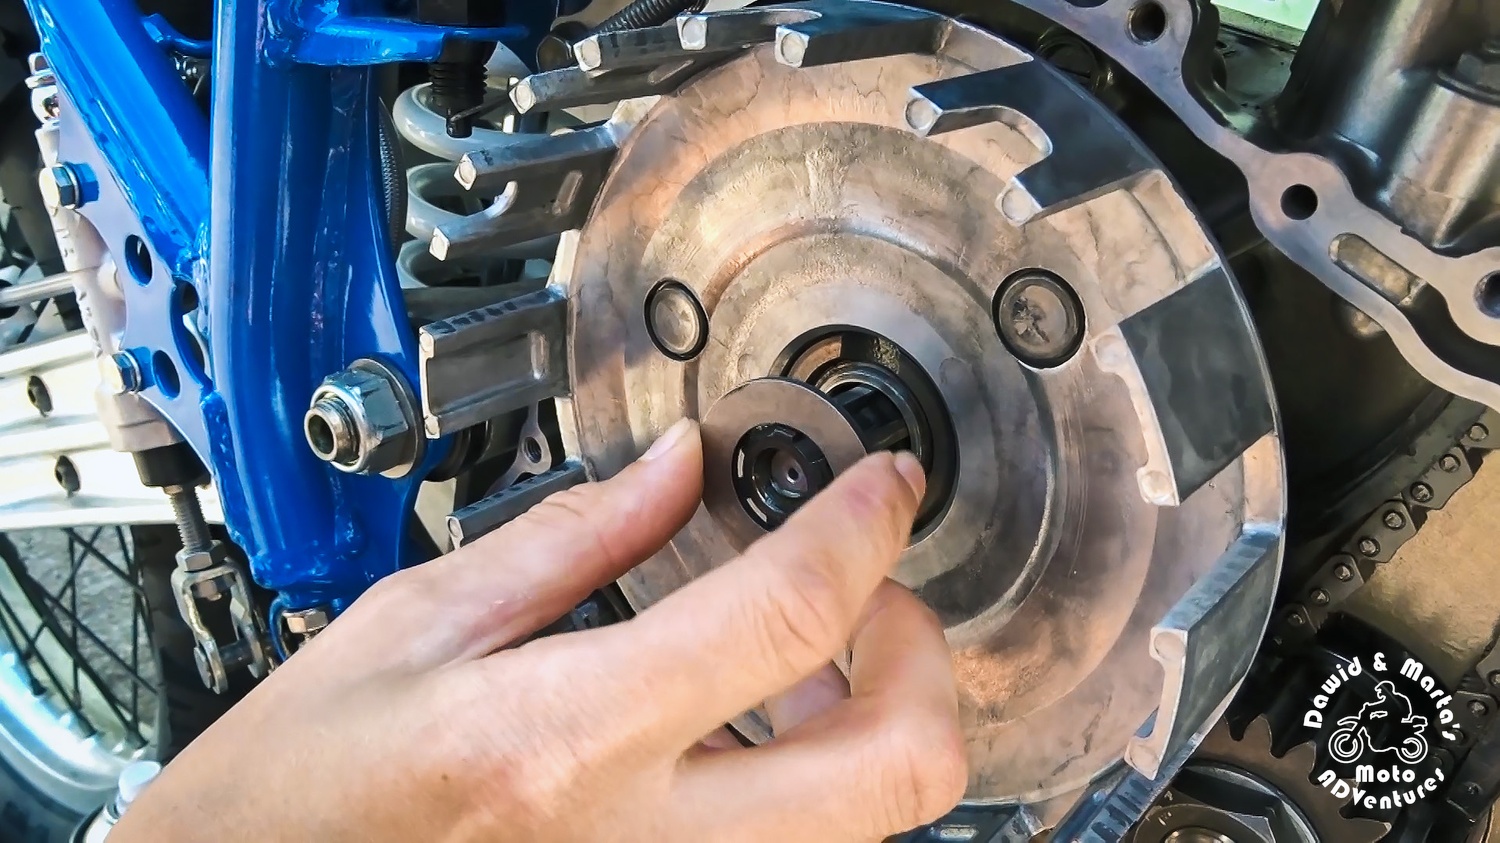
We can take this opportunity to inspect how’s the puller and it’s bearing. Just to be sure it is fine.
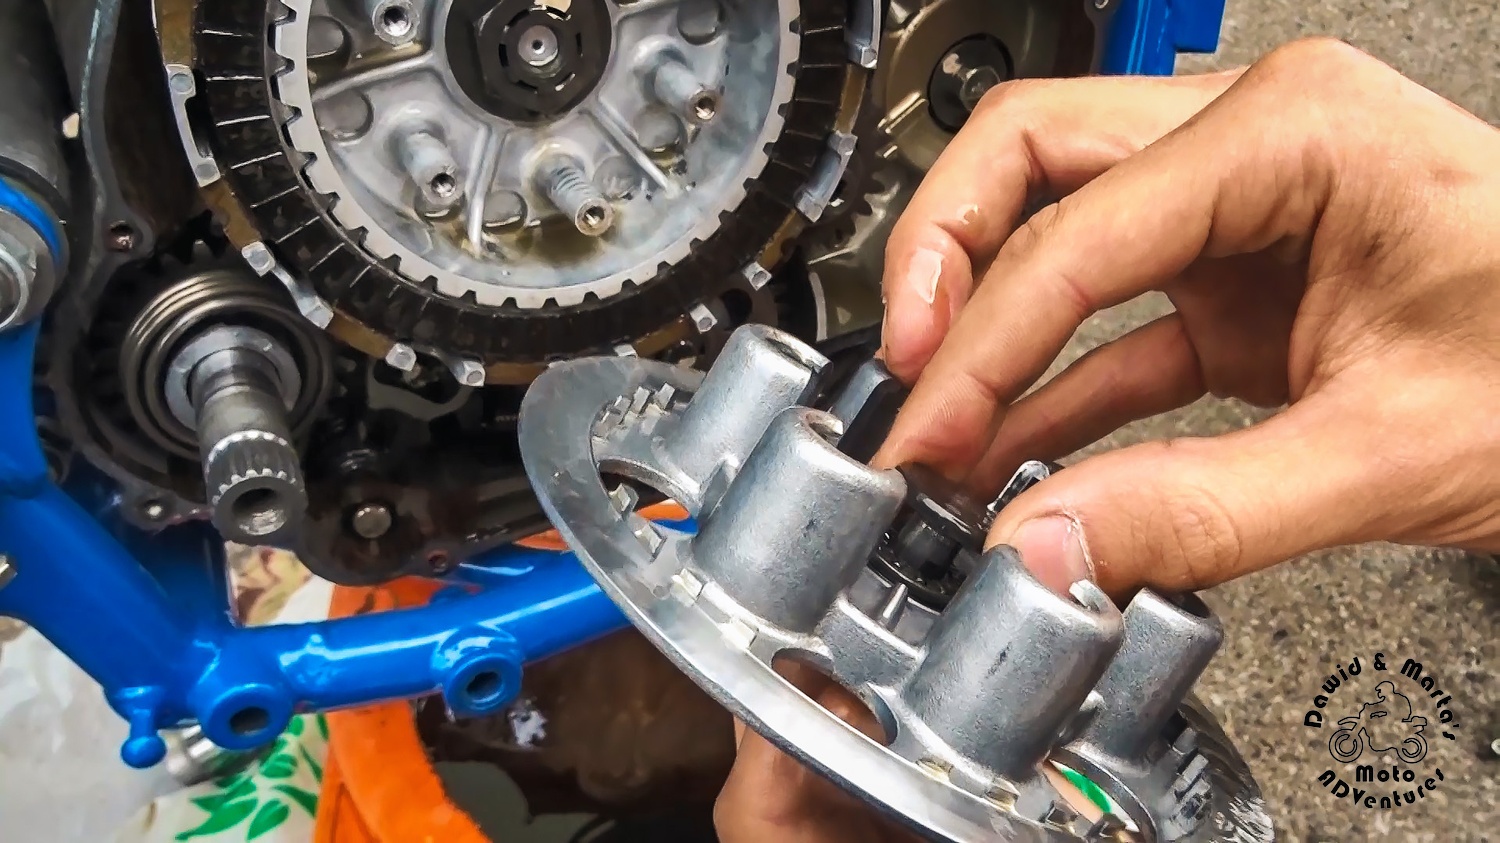
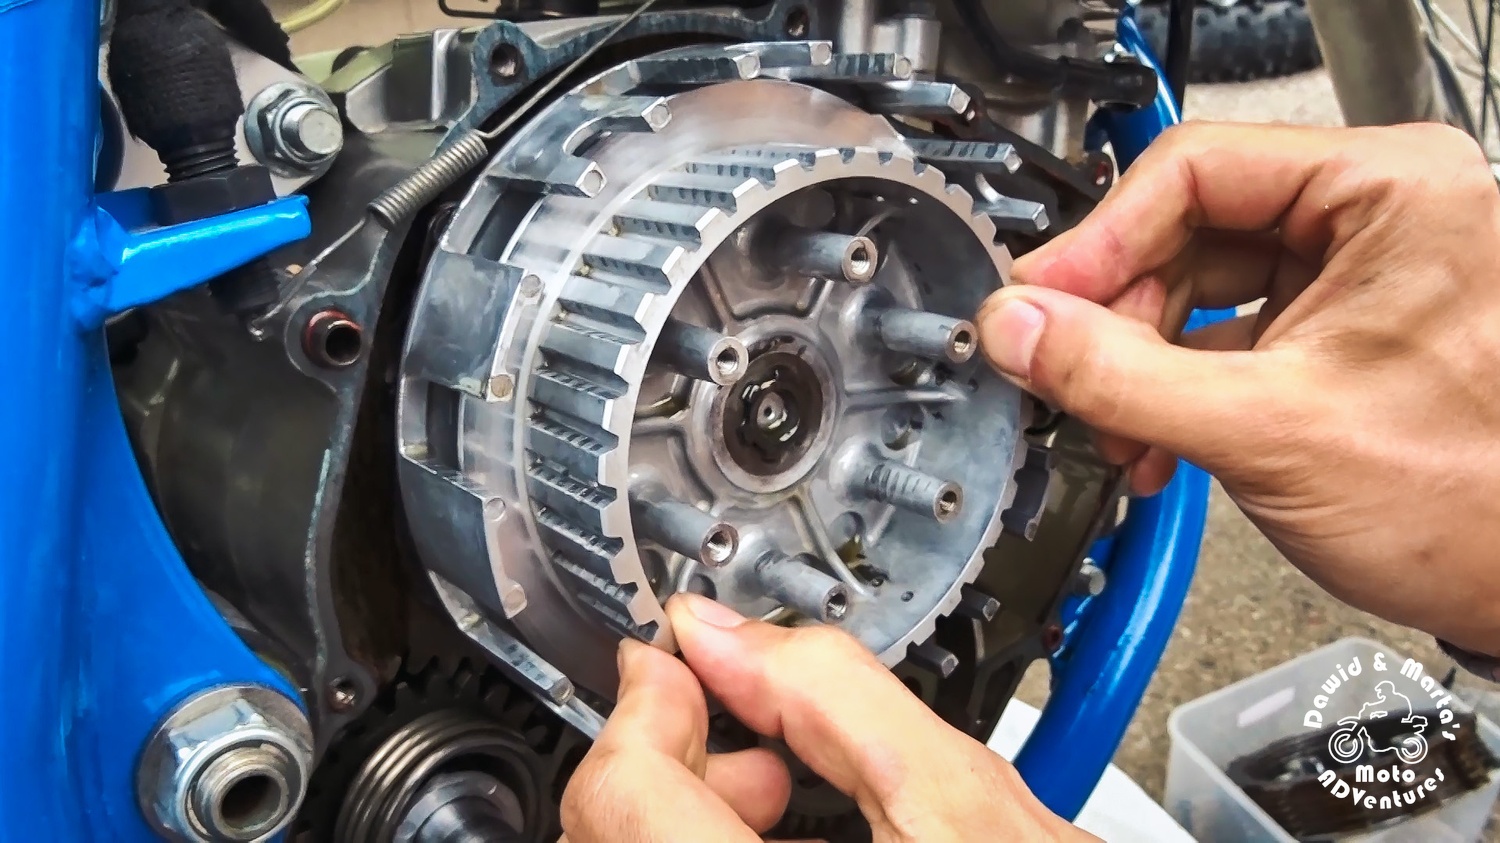
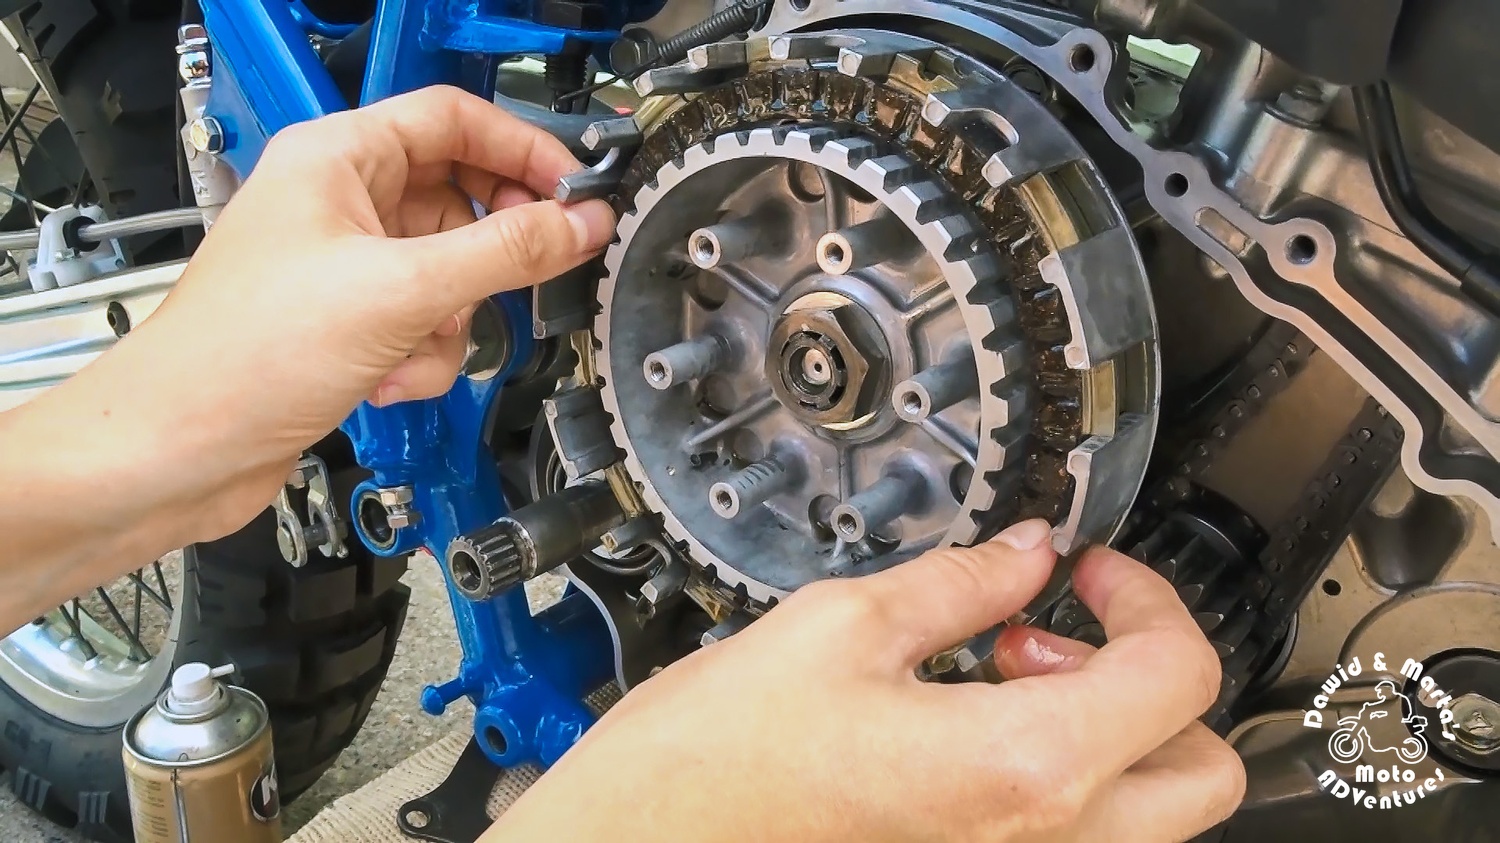
Now the only thing left to do is pulling out the clutch plates.

We also take a look on those. Maybe the possibility is small, but it still exists, that the plates are a little crooked and this also can impact the difficulty finding neutral gear. So if we have the plates on plate, then it won’t hurt to check. It would actually be a little pain if we assembly everything back after our awesome fixes and the clutch still wouldn’t cooperate (╯⸌ロ⸍)╯︵ ┻━┻
Solving problem with finding neutral gear – the shift drum bolt is missing
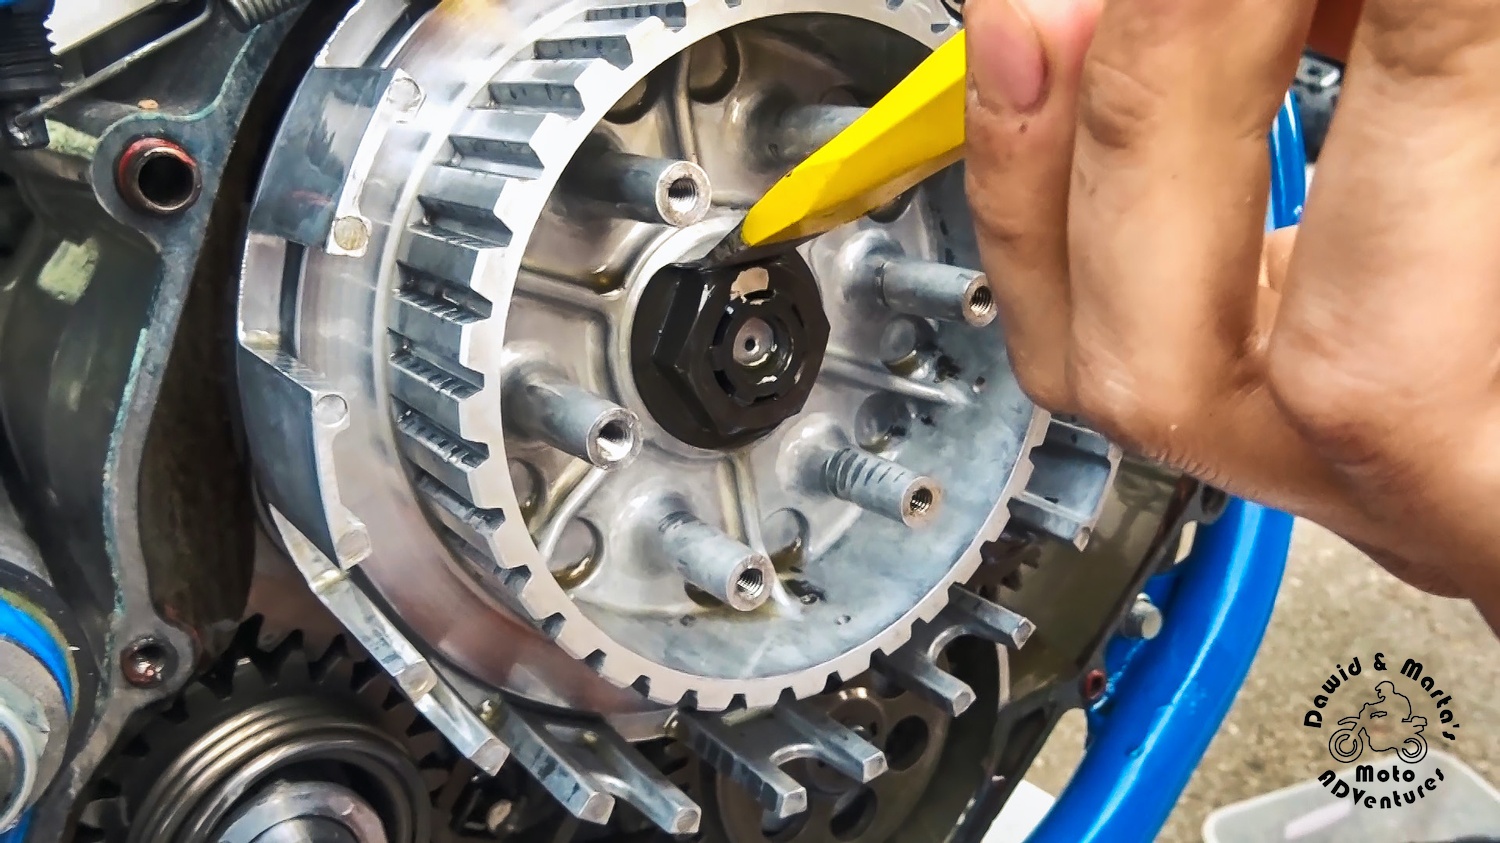
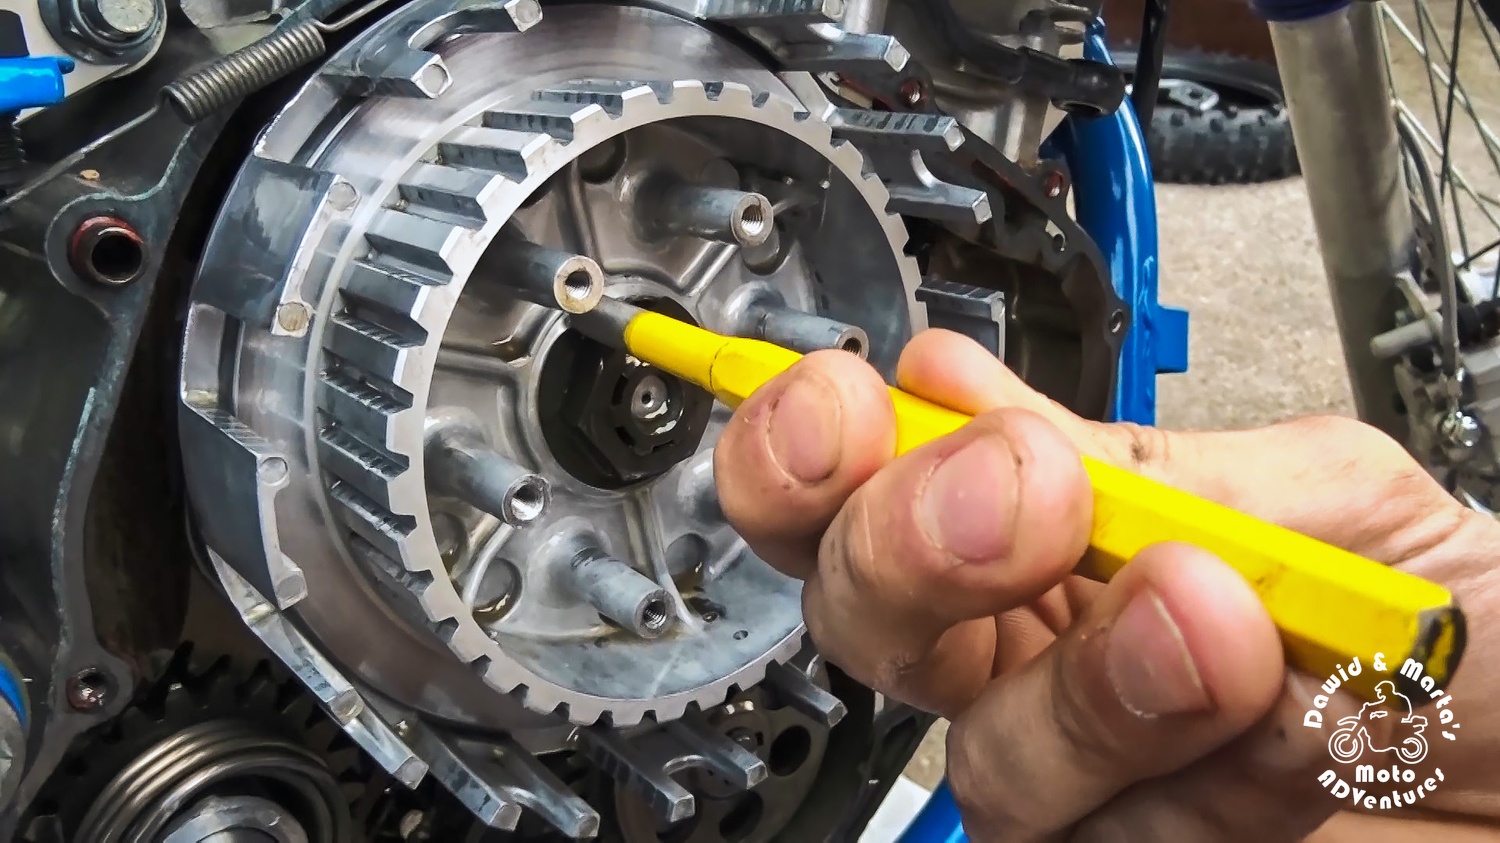
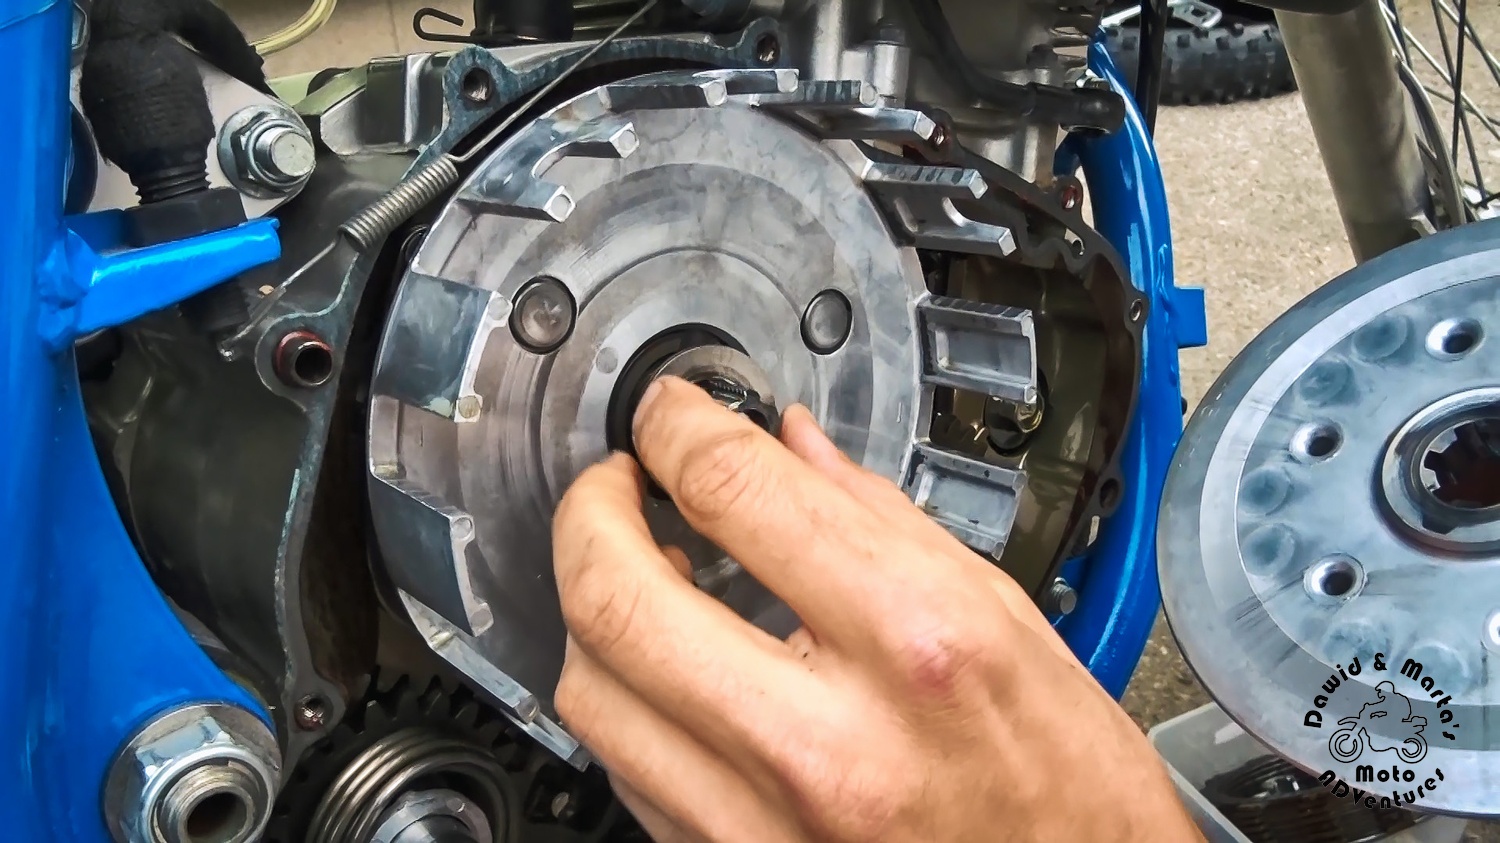
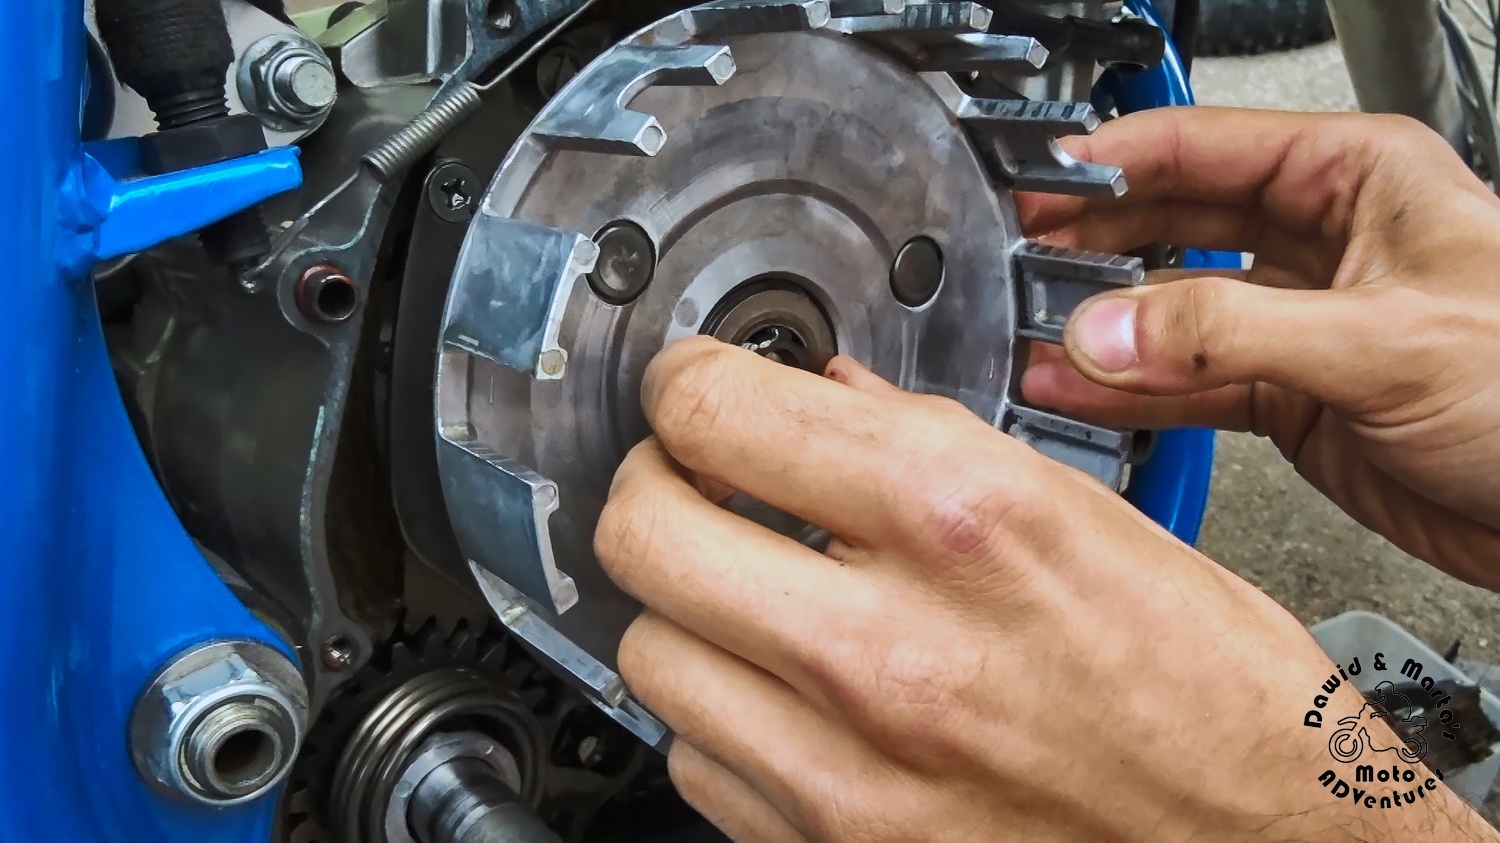
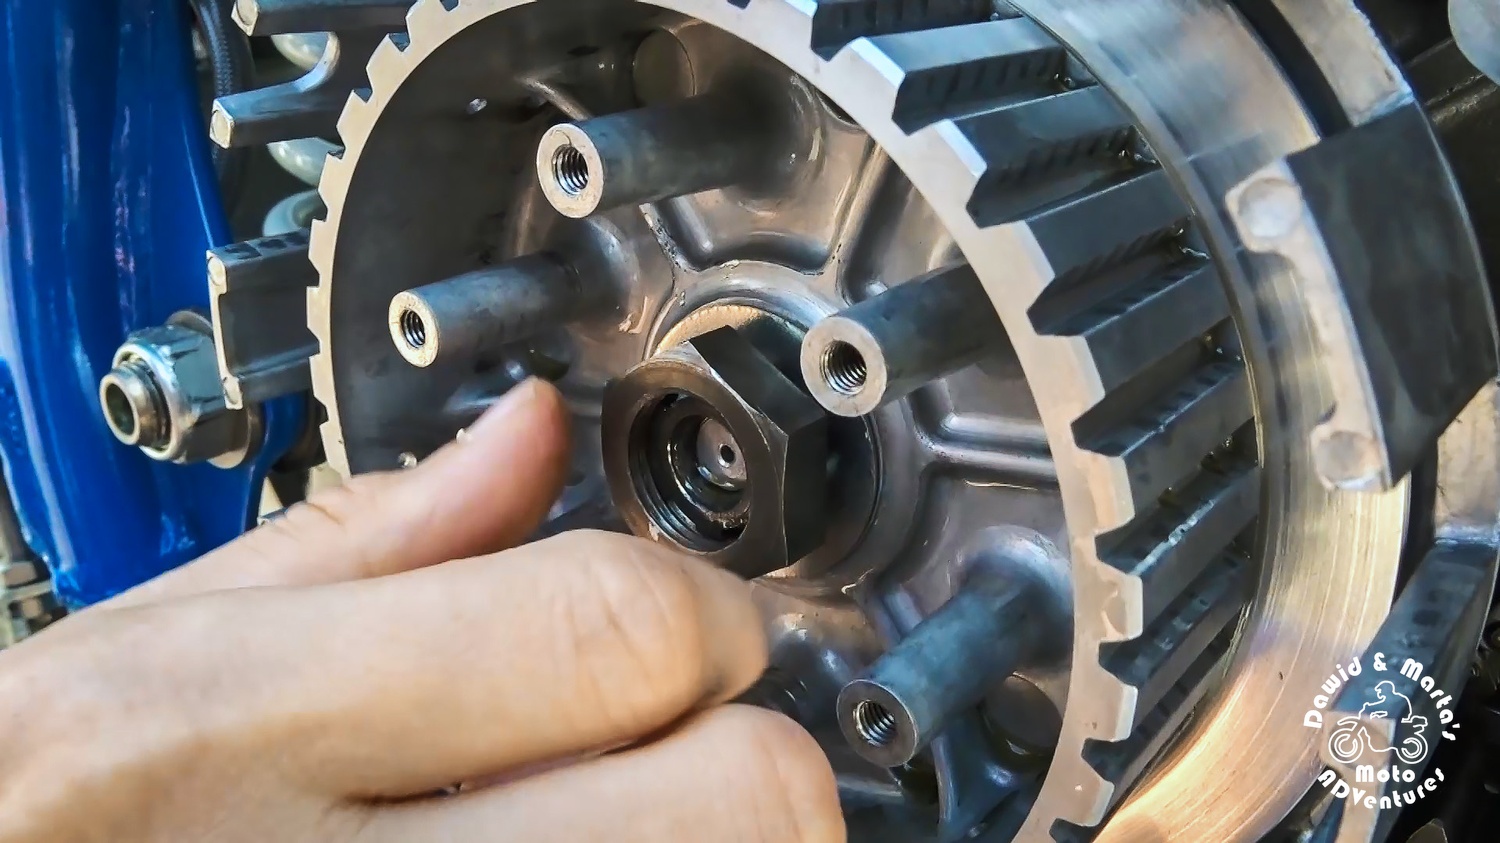
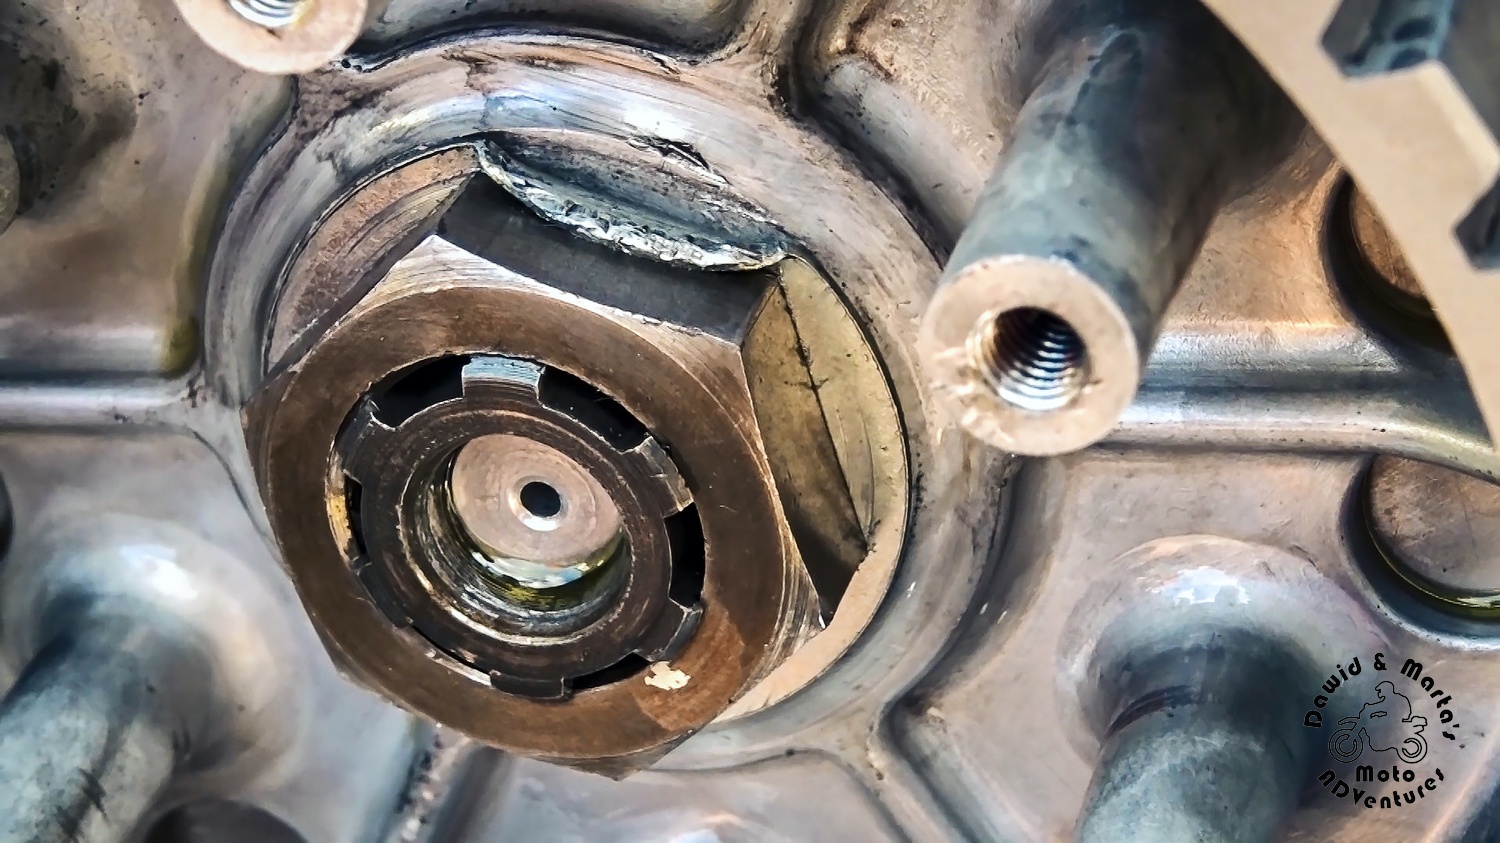
Now that we inspected the plates, we take our time and carefully look, because we might spot something odd, like…
And not a bolt. The shift drum bolt. You can even see that there is only half of the white paint, which was suppose to indicate the bolt was installed at the Suzuki’s factory.
Without the shift drum bolt, when you switch the gears, you can notice that the gears go all loosey-goosey and tilt aside. So this is the first culprit of our problems with neutral gear in DR.
The DR350 shift drum bolt is quite known of fleeing from its proper place and making a mess. It either comes out whole or breaks down into half, where its thread stays in its socket and the other part flies into the gears to finally become a metal spam.
This was a little stressful acknowledgment, but in our case – we were the lucky ones. Our shift drum bolt was safe and sound. It just had enough and wanted to try the oil jacuzzi in the oil sump.
We tried to take it out with a magnet, but it turned out to be impossible. The bolt head was too big.
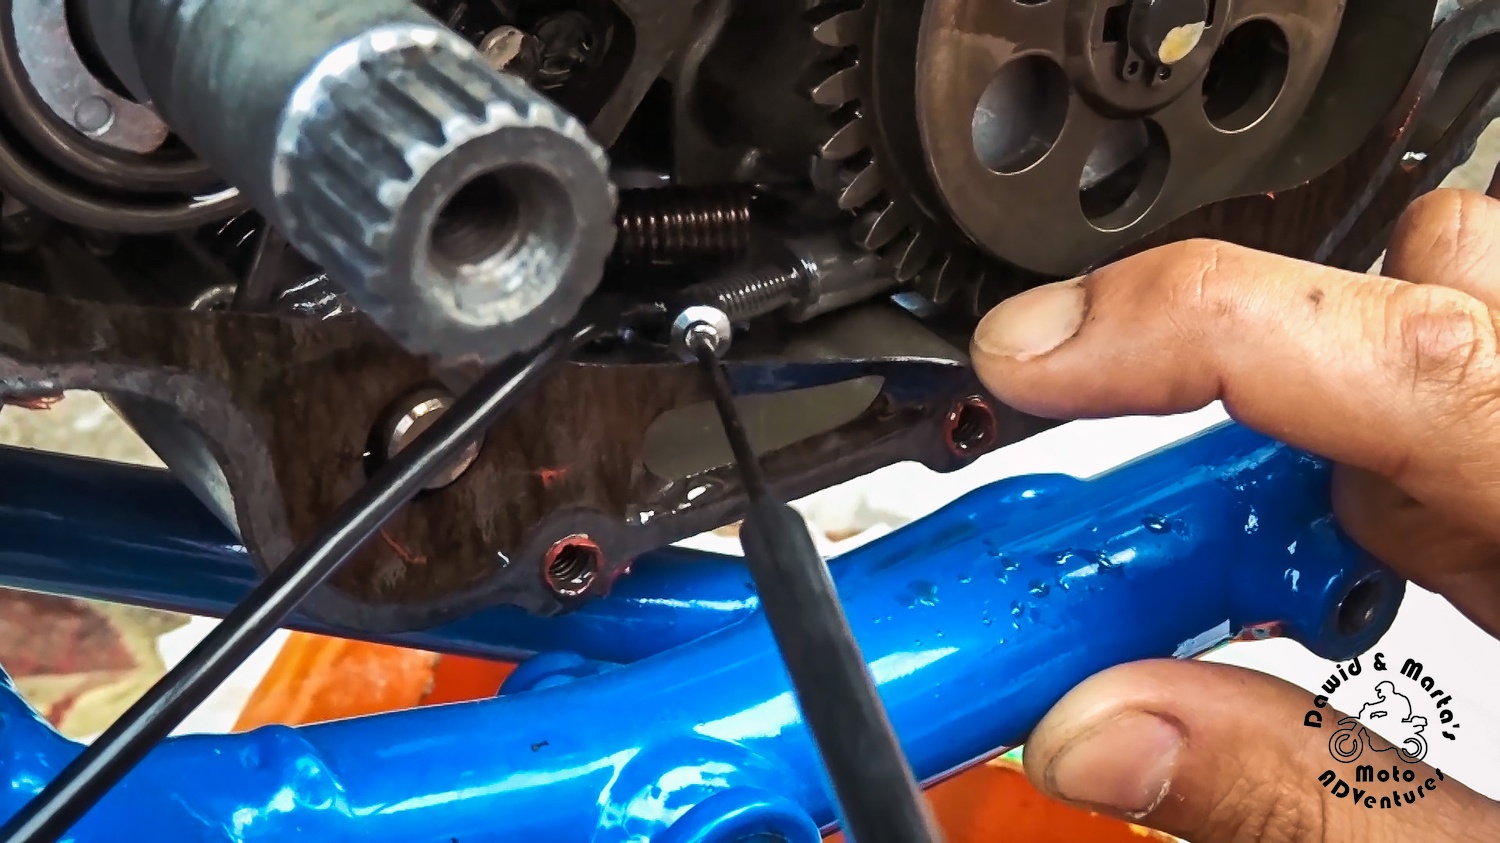
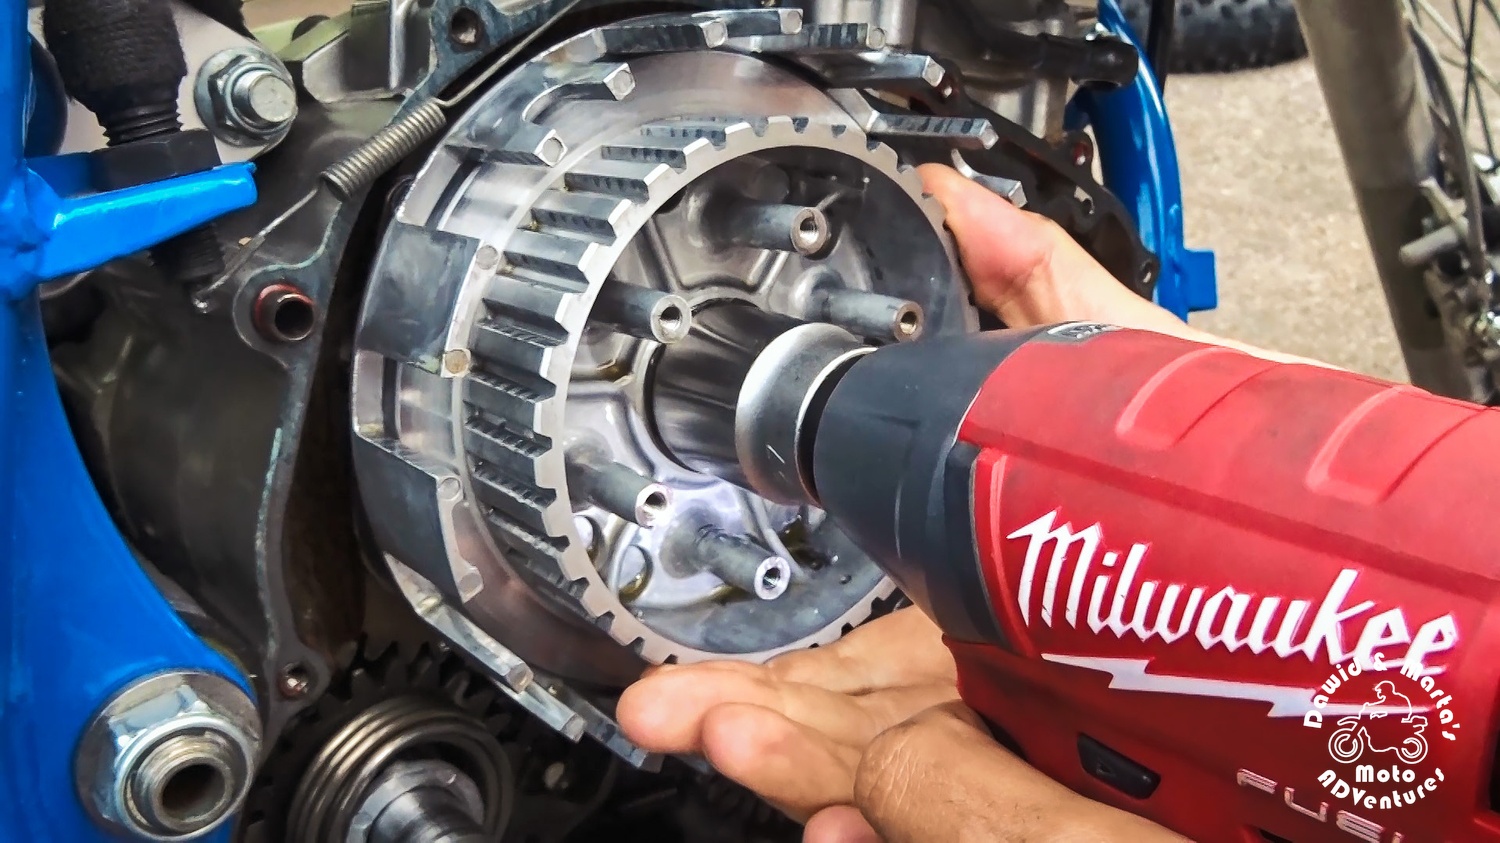
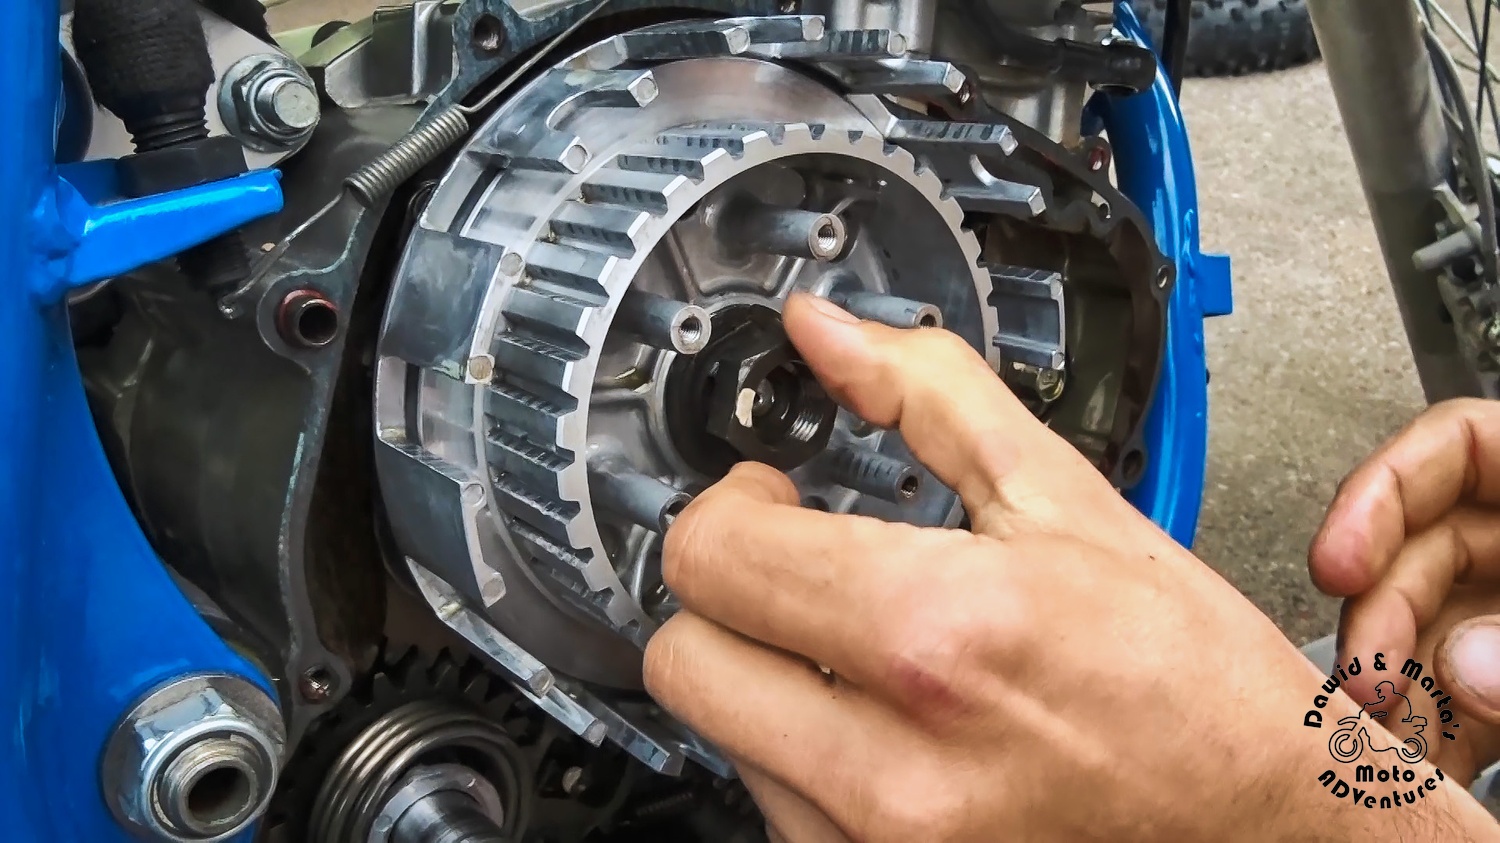
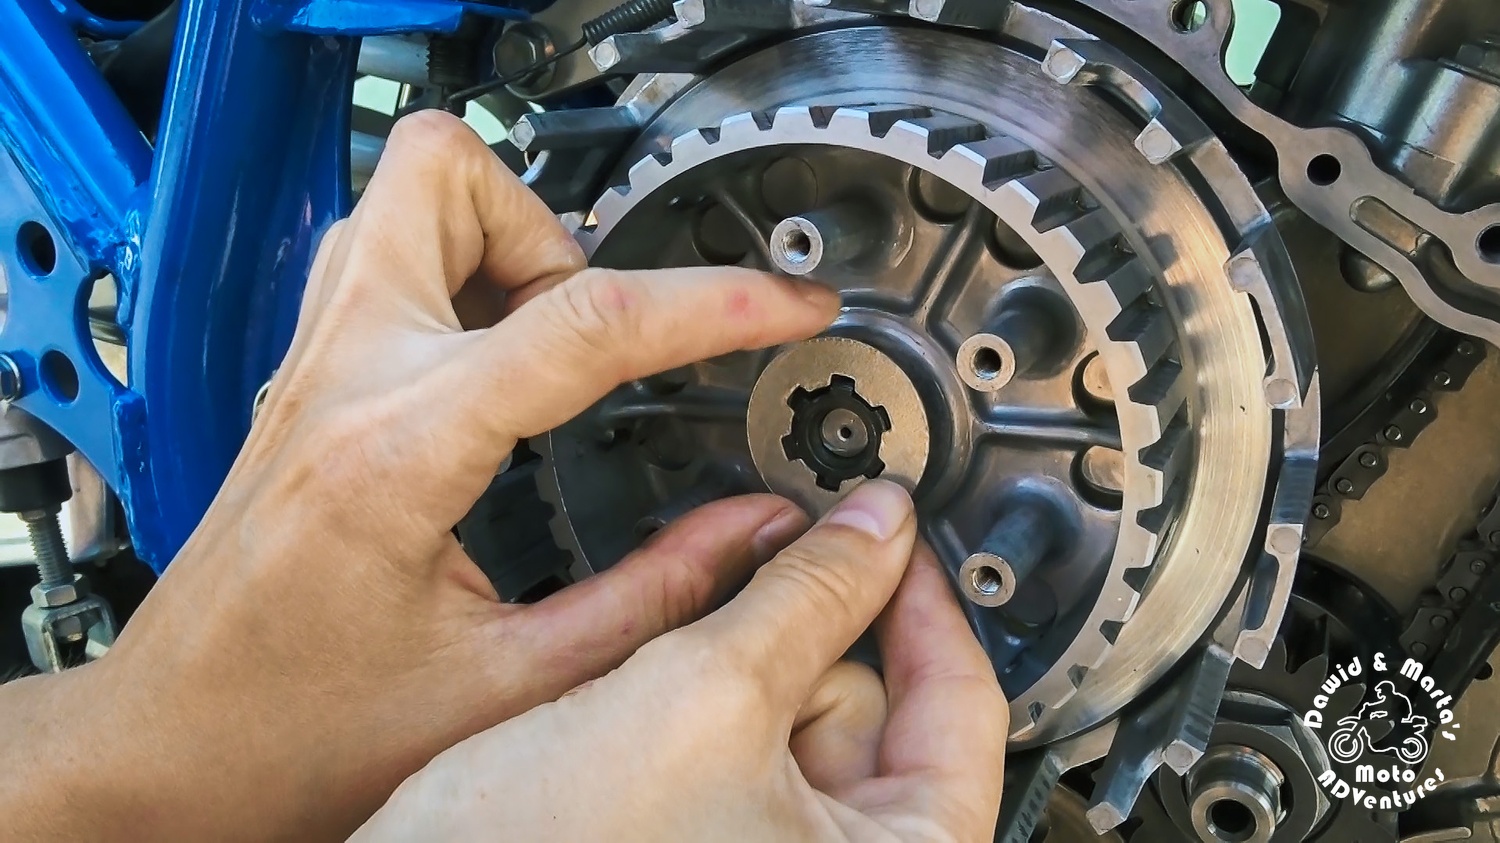
So instead of trying for ages with rotating and getting the right angle to get the bolt out, we remove the oil sump driven gear.
To take the gear off we just remove the securing ring.
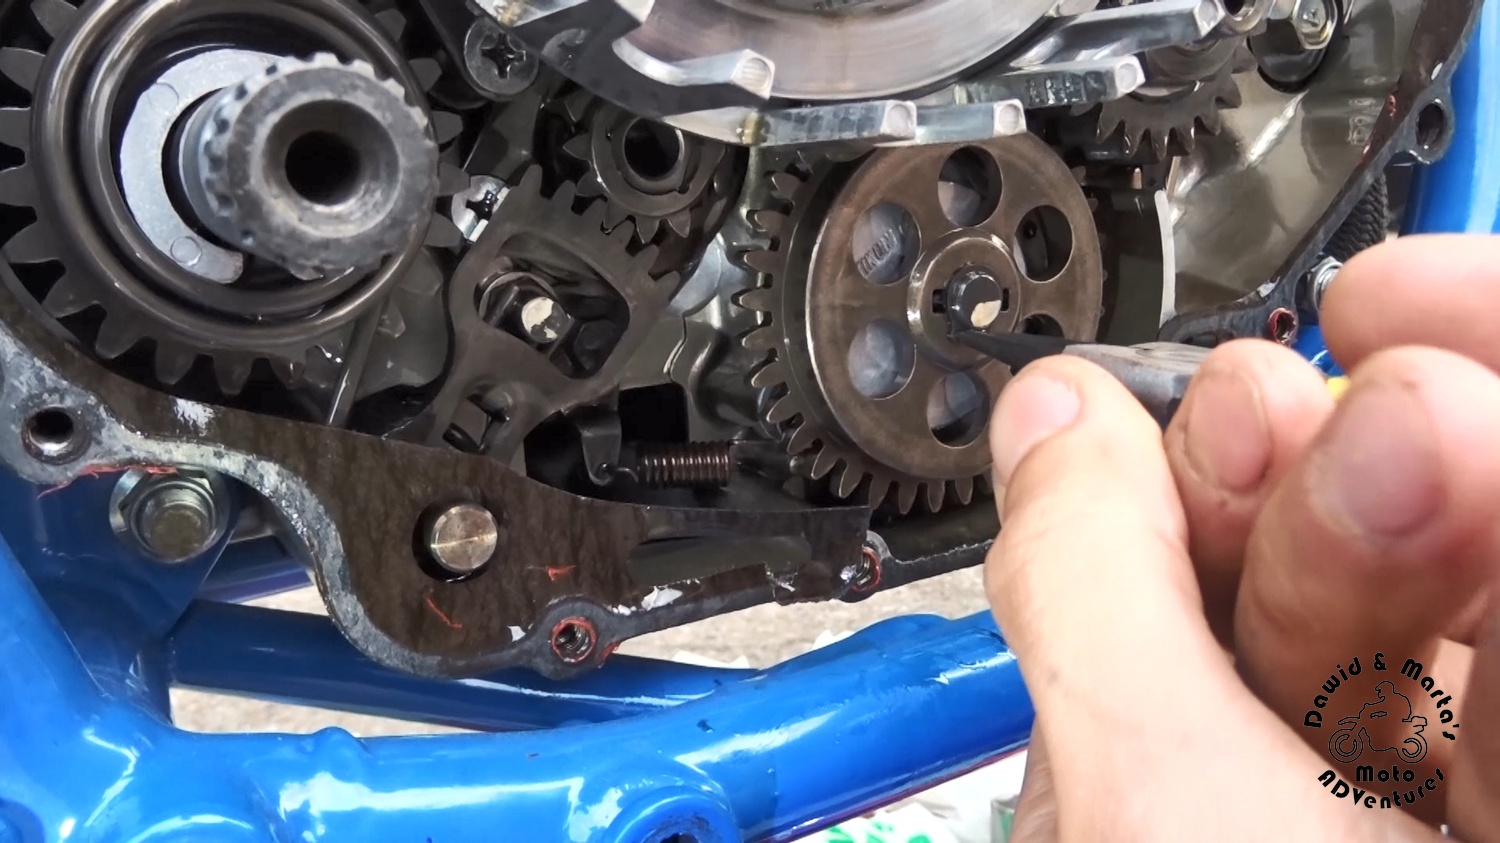
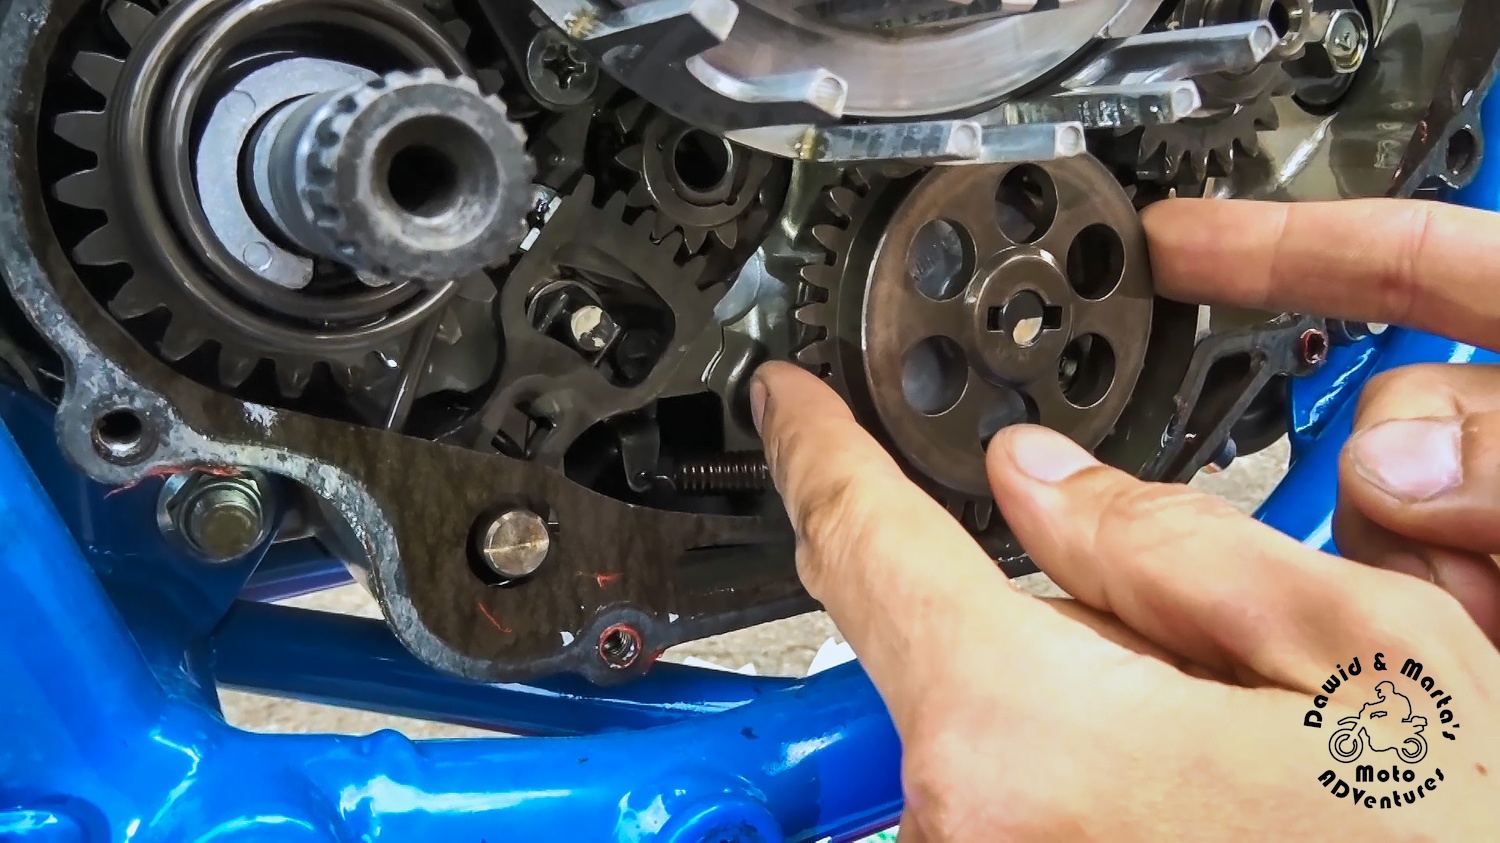
Remember to secure this gear’s pin, which you will see better after you remove the gear. It likes to slide off, when it’s unseen and if you will loose it, your engine will die. So secure it in place with some tape, so it won’t run away and you won’t forget about this little fellow.
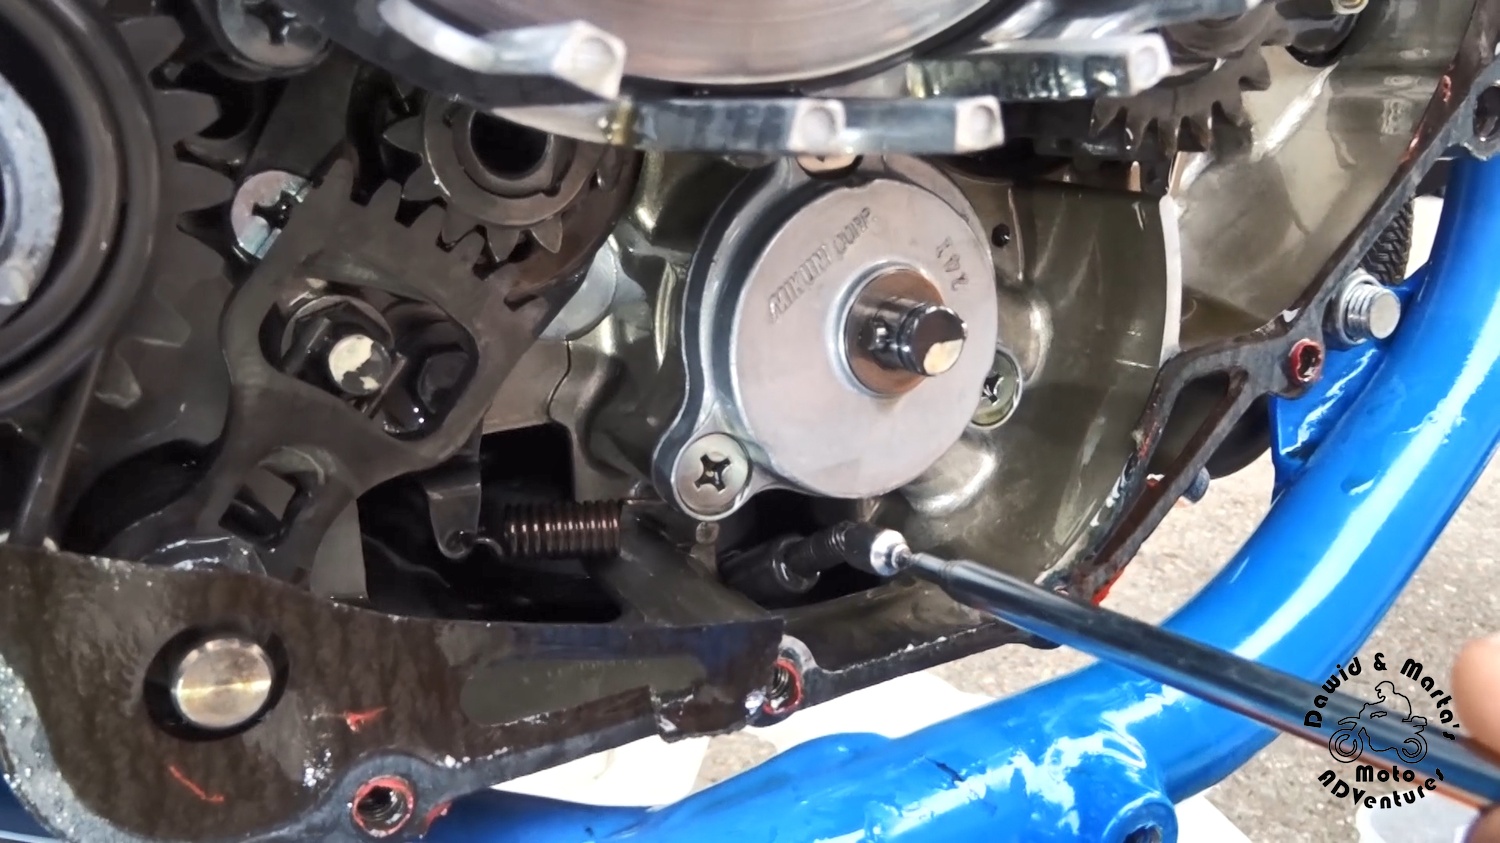
When the shift drum bolt is finally caught in our hands we can place back the oil sump driven gear. Don’t forget about the securing ring!
Now we could install the shift drum bolt back, but wait! There are more culprits!
Solving problem with dragging clutch
Before we will lock our fugitive bolt, we will check other parts suspected of not only making problems with finding neutral, but also causing the clutch dragging.
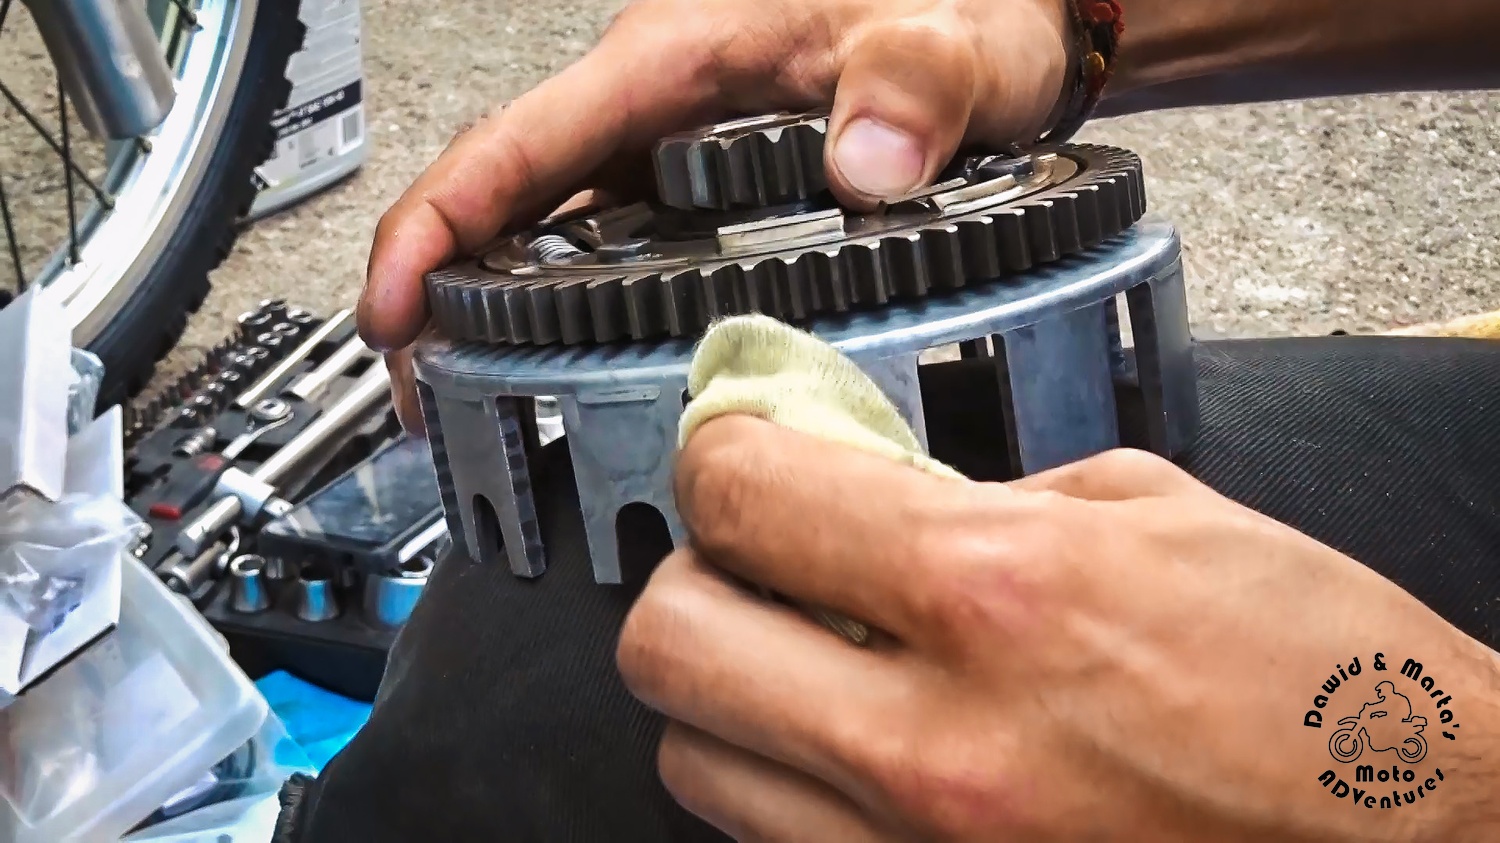
So now we’re moving back to the clutch basket.
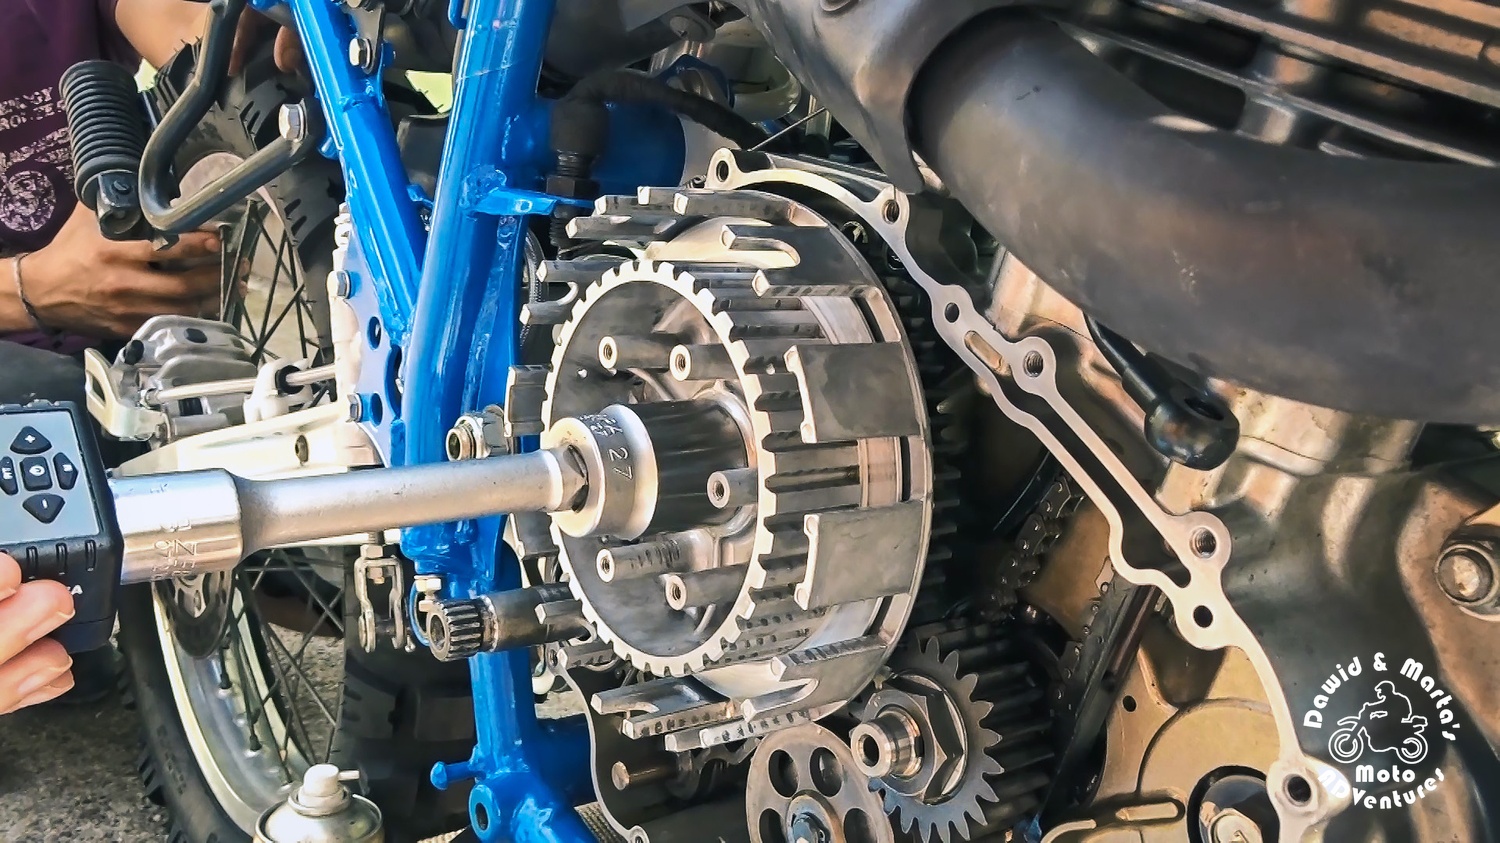
First we unlock the locking washer with some punch tool and a hammer. But don’t puch too hard! You may damage clutch basket washers! (☉‸☉)
When the washer fold is straighten, we unscrew the bolt holding the inner part of the basket.
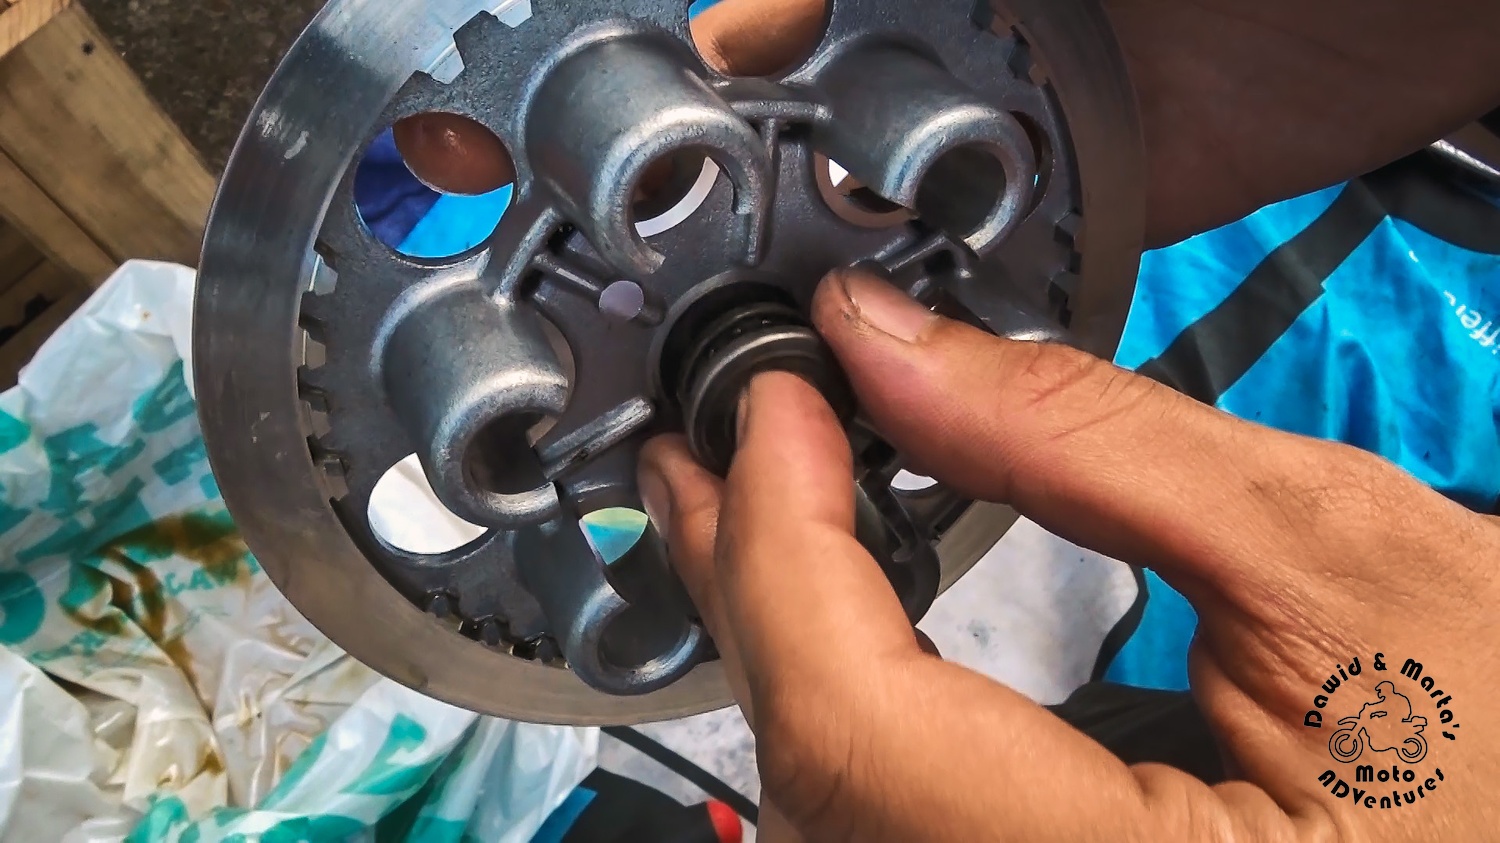
Now we can tug the inner part out.
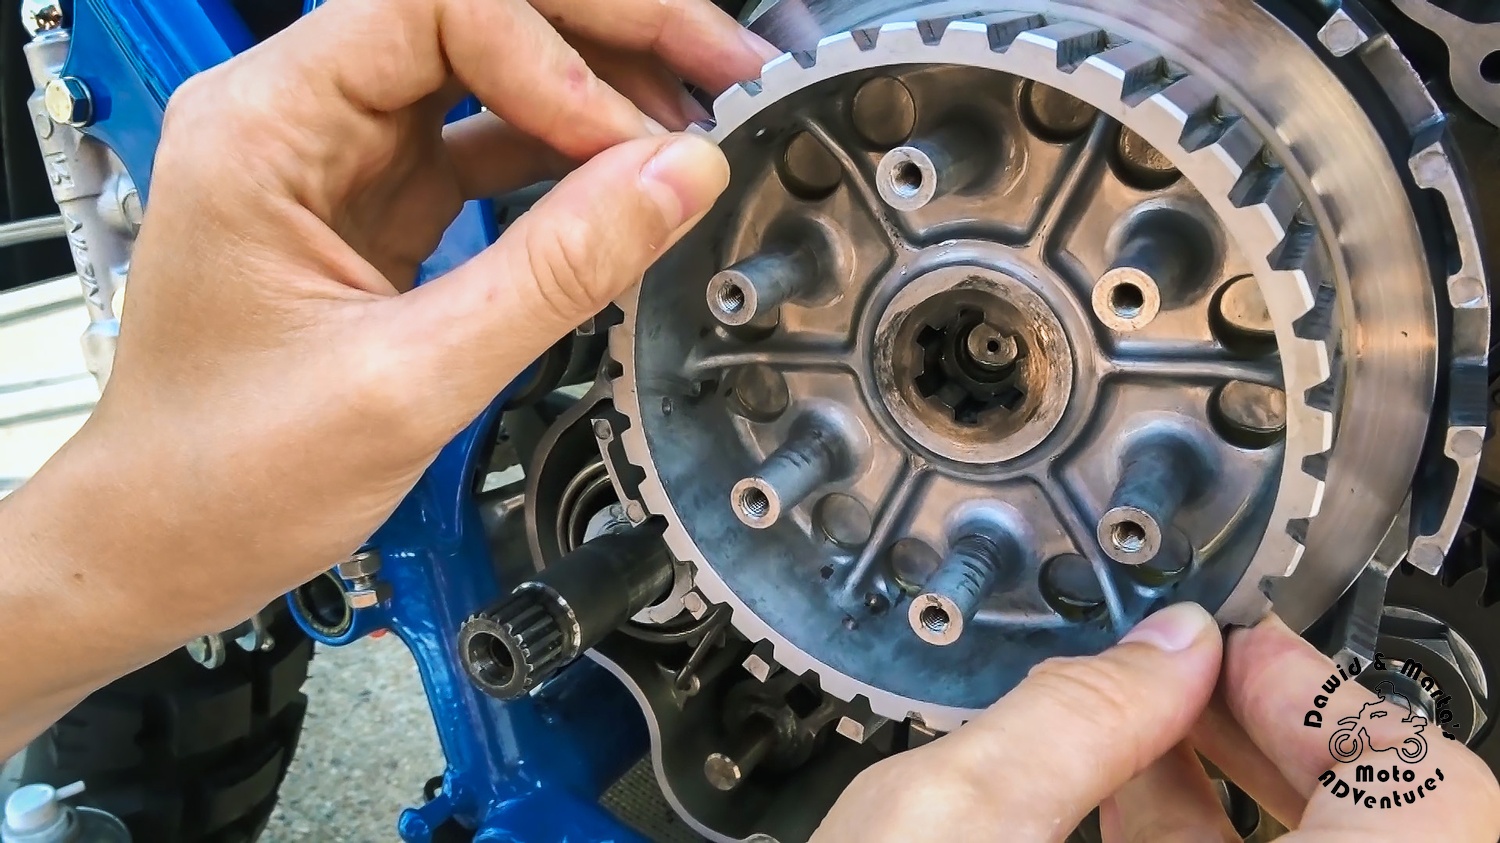
After that we’re ready to take off the clutch basket itself and finally see in what condition the clutch basket spacer and spacer washers are.

In our case you can notice straight away the round ugly grooves on the washers surfaces.
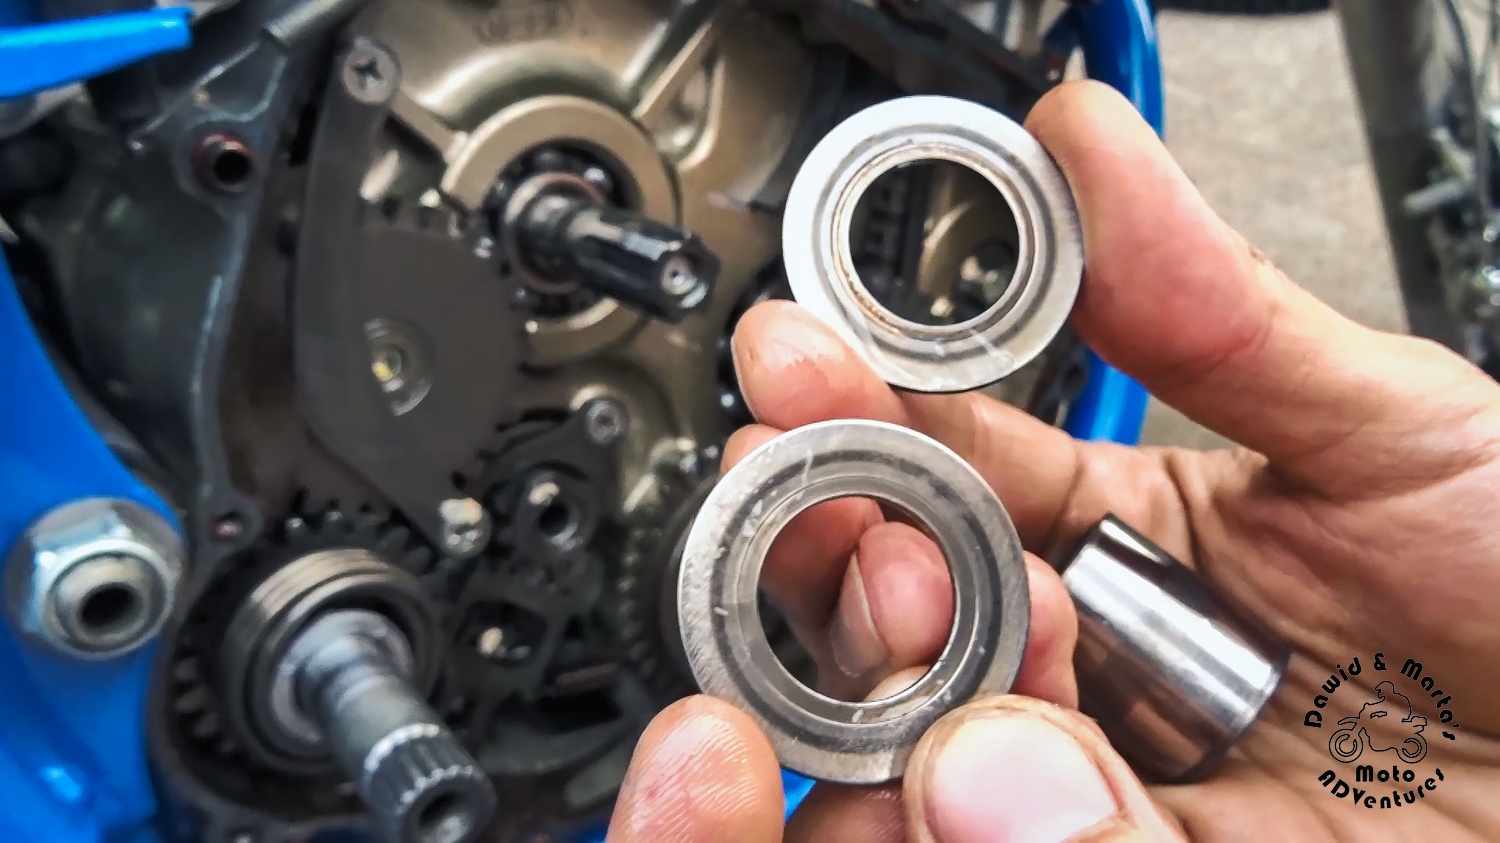
Grooves like that lead to the situation, where there isn’t sufficient space for the outer clutch basket to move freely and so “the clutch” is dragging.
Other things to check if clutch is dragging
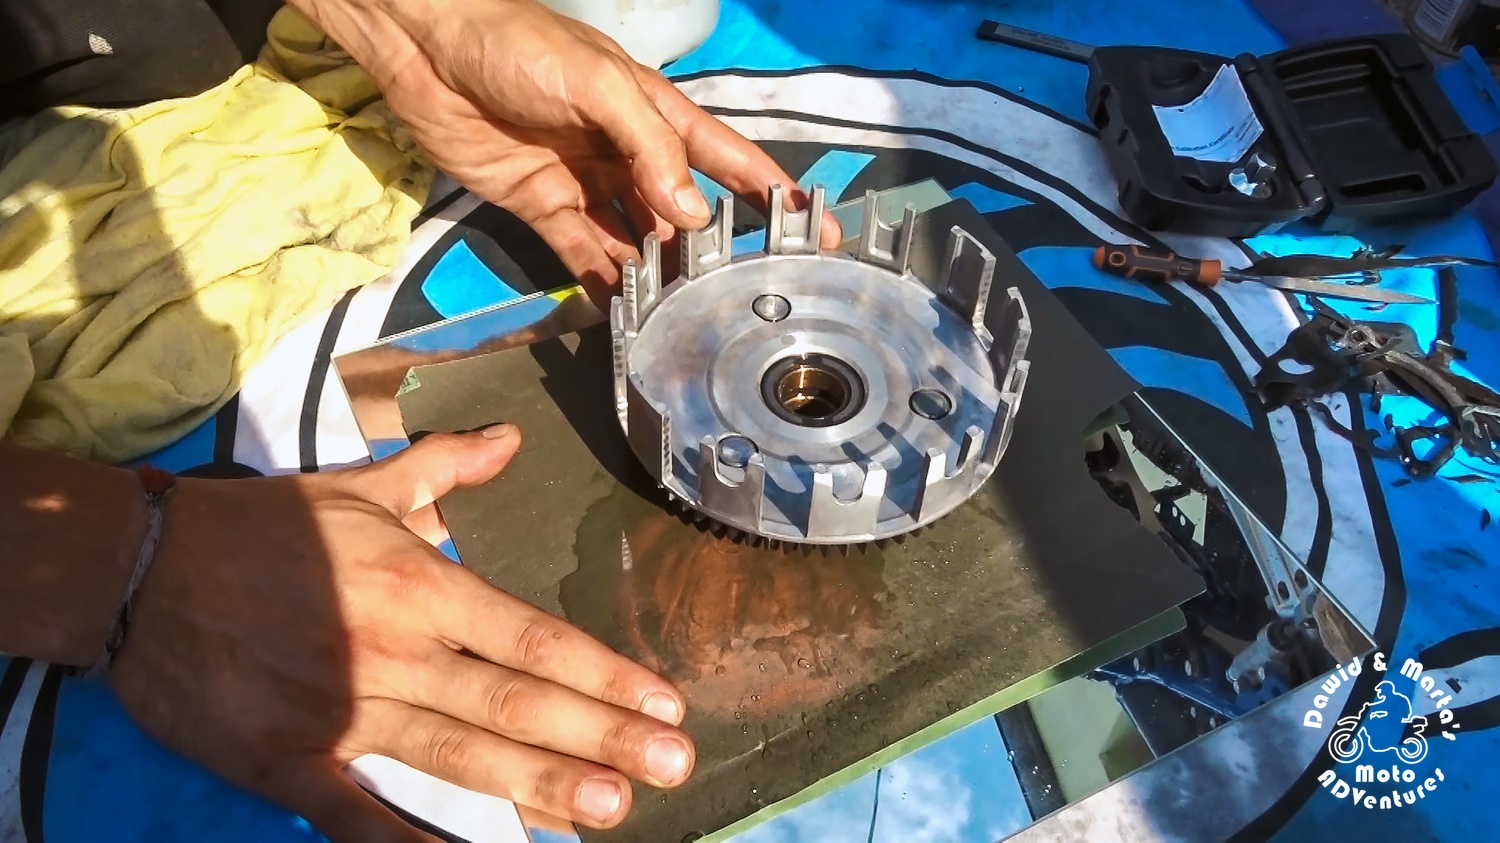
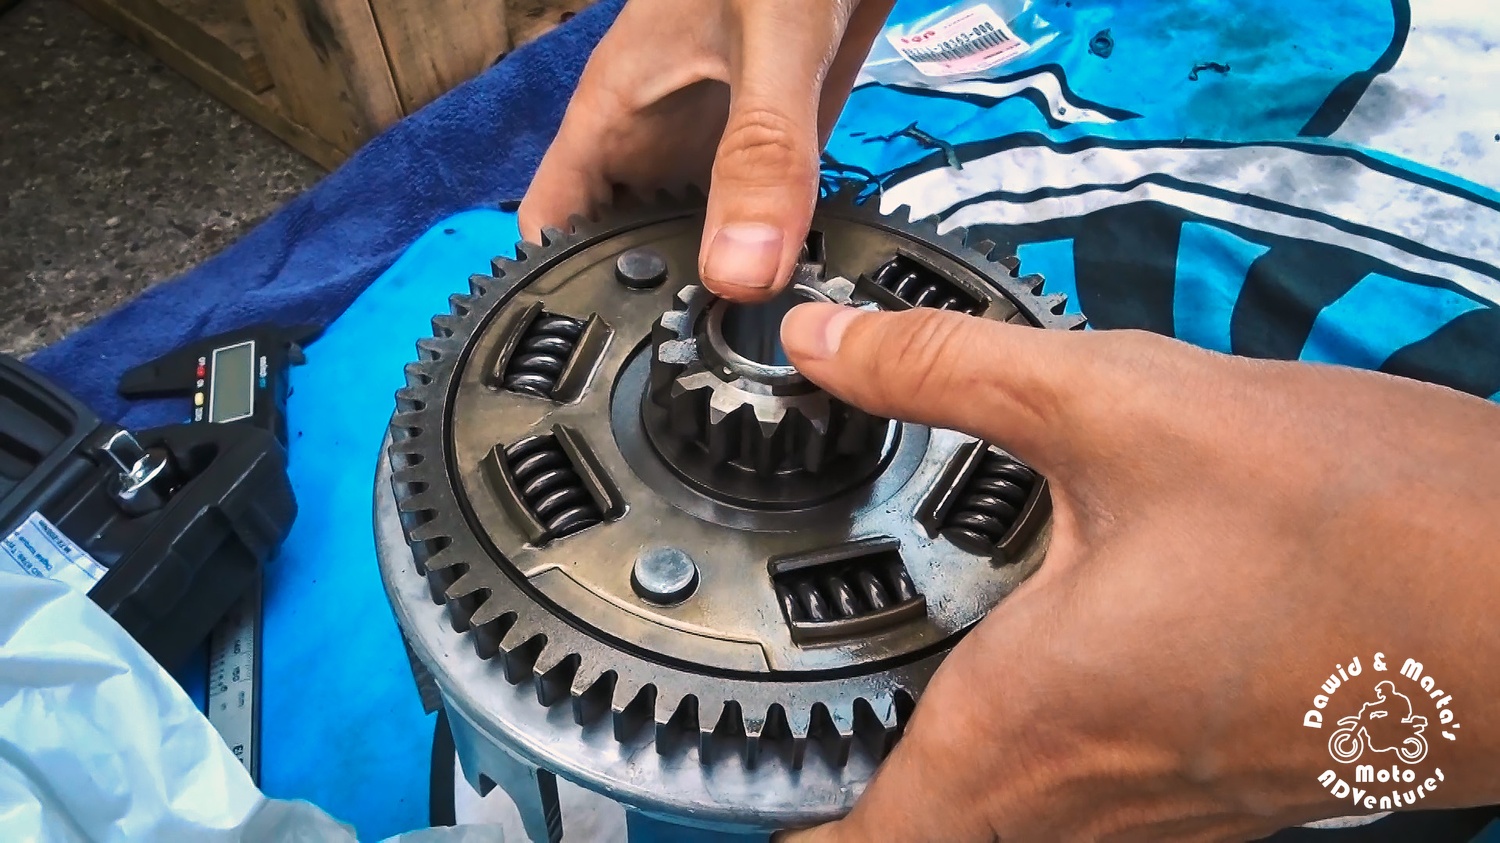
We will replace the spacers in the next step, but before this, as we have the clutch basket already dismounted, we can also spend more time with this fellow. If your clutch basket is aged as ours, you also may notice grooves on the sides of his teeth.
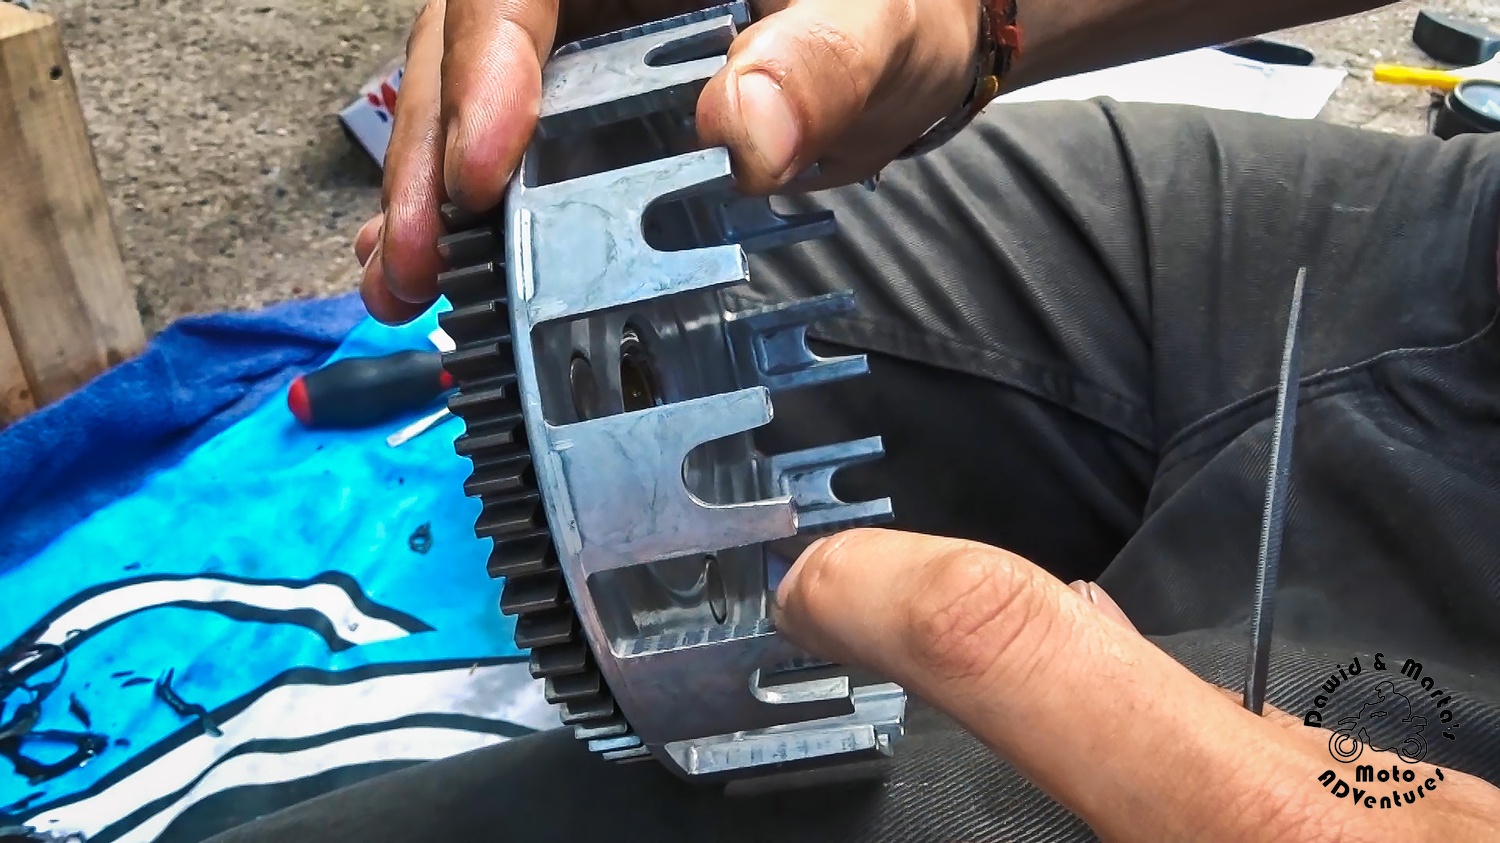
Those stripes look harmlessly, but according to some sources and voices we’ve found around, they also can lead to problem with dragging clutch. The reasoning behind this suspicion is that two clutch plates may fall together to such groove and due to that be less likely to disengage, when we pull in the clutch lever.
So to just be sure we won’t have to open the clutch again, we take a file and scrub the grooves a little.
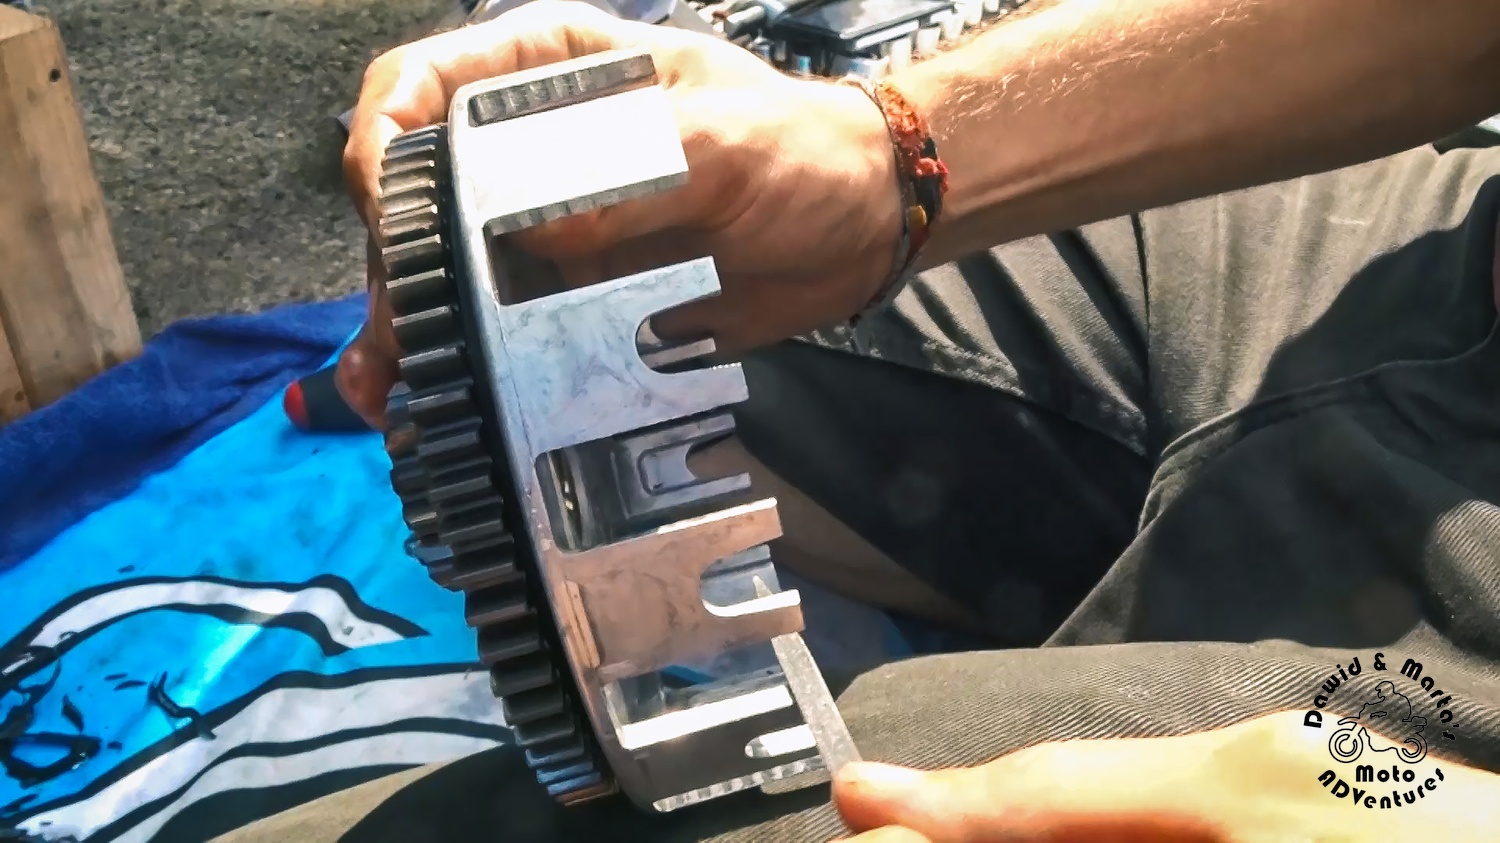
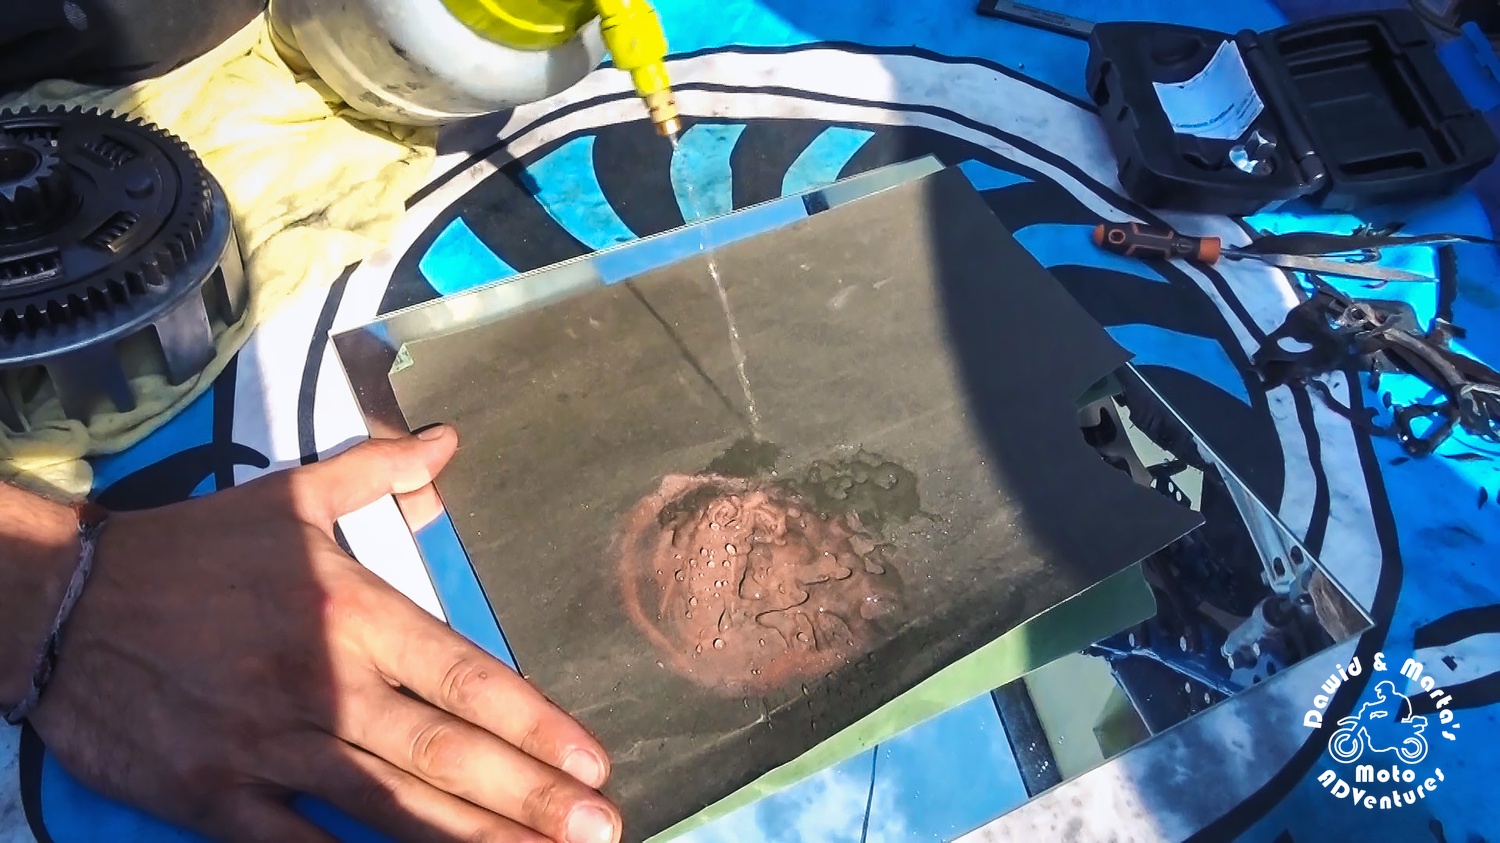
Remember to make sure you got rid of any metal swarf left after filing. Use compressed air, brush or brake cleaner to make it clean.
When the grooves are flatten, there is still one last thing to do, before we assemble everything. You can increase the free play of clutch basket on spacer by grinding it using sandpaper. To do so we just have to make sure to do it on flat surface, for examples on a glass.
This step isn’t obligatory and probably most DRs would run without it just fine. But word is that there were some cases, in which the dragging clutch and difficulty finding neutral gear were caused by the clutch basket made improperly right at its birth at the factory. Wrong machining led to too small clutch basket end play. So if shaft drum bolt is ok, the spacers are new and there are no grooves in the clutch basket teeth – this can also be worth a try.
Installing shift drum bolt and getting rid of jammed gearbox
Now we can move back to the first culprit of our problems with the clutch – the shift drum bolt. What’s left here is just screwing it back to the socket it belongs to.
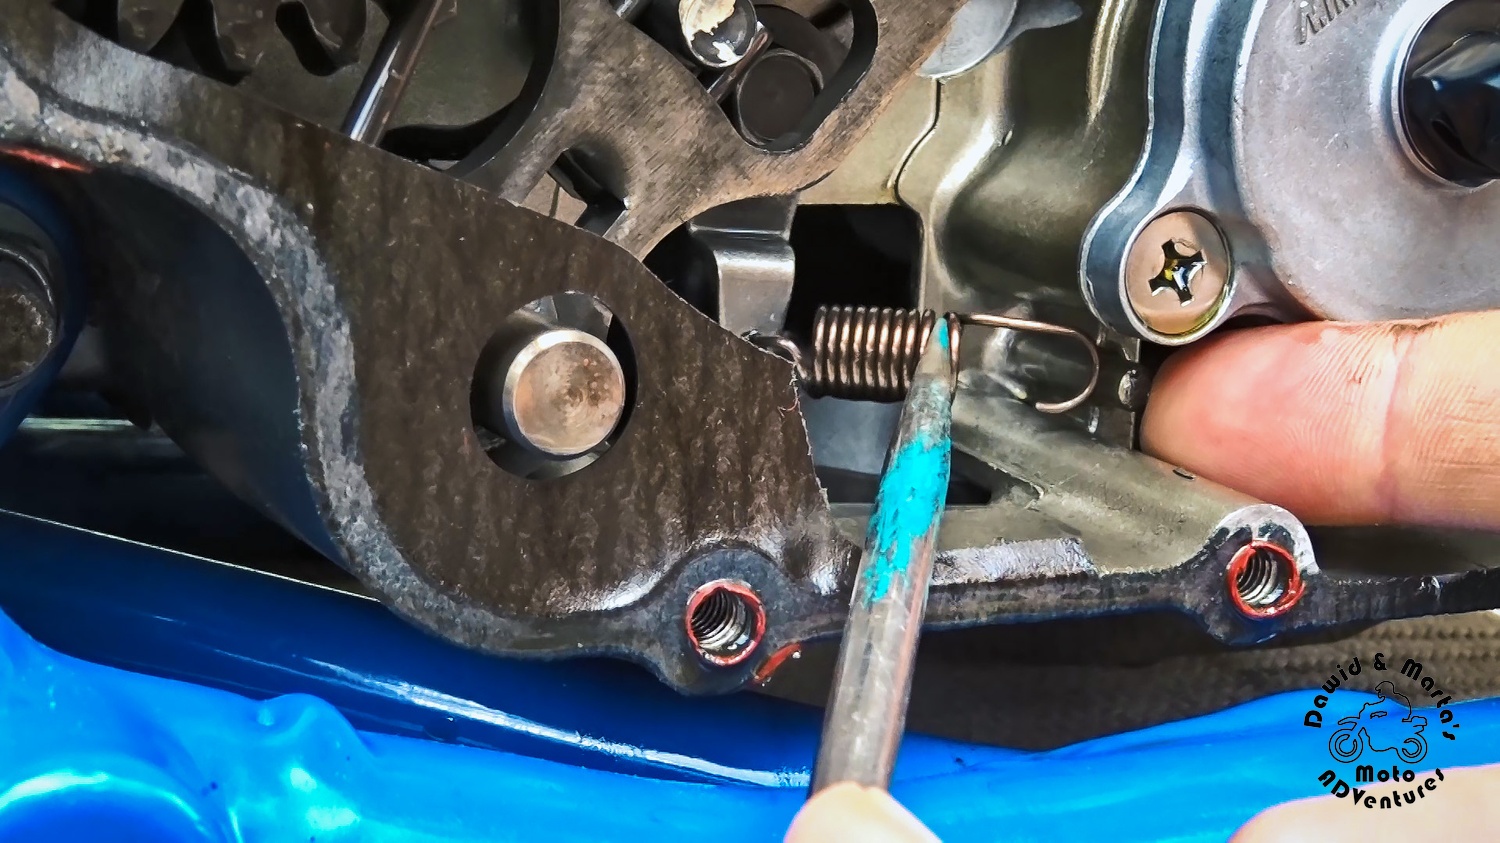
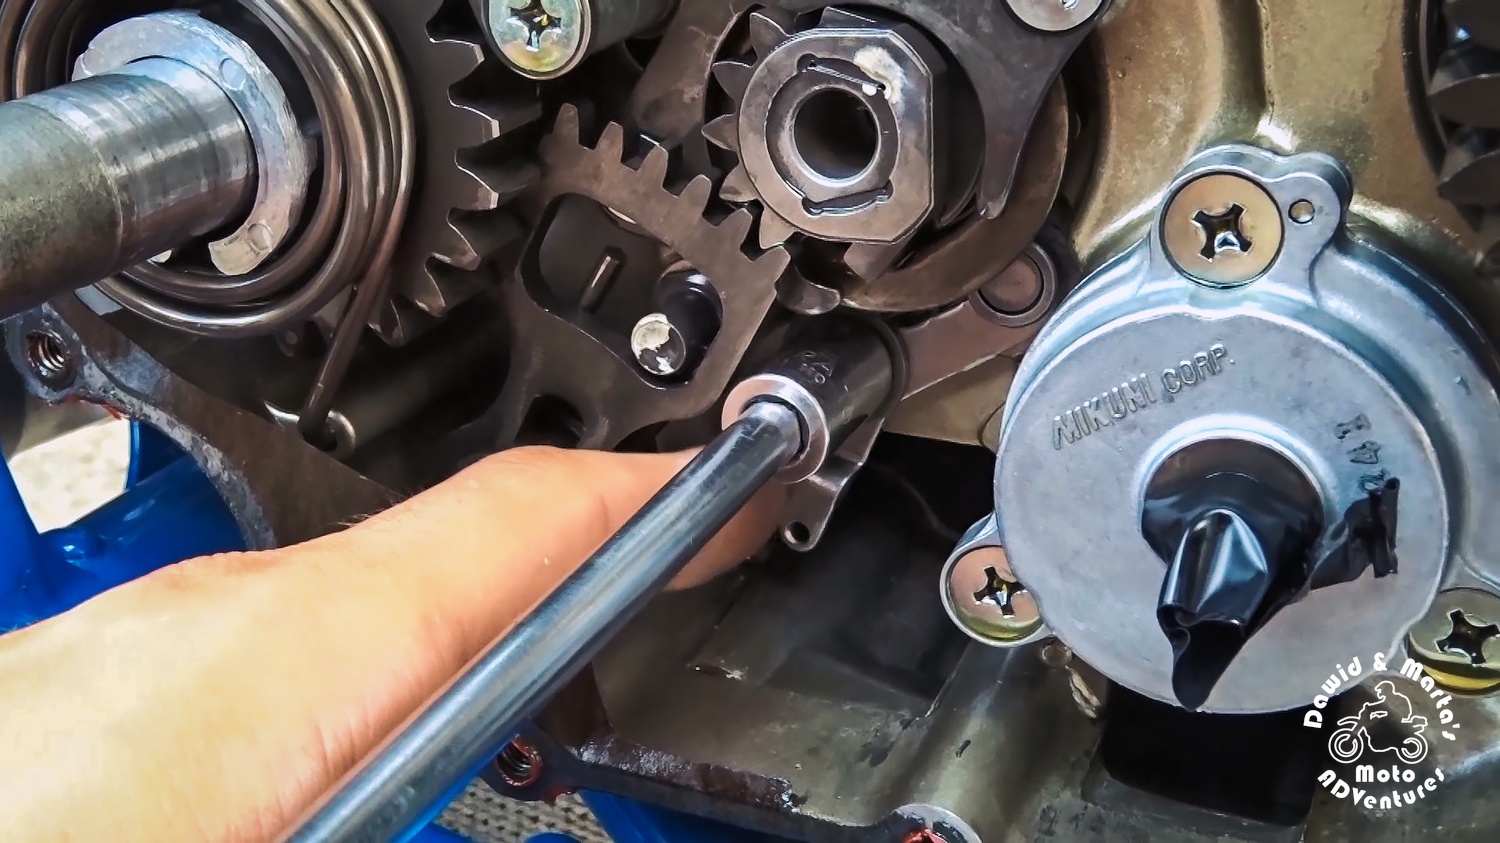
We will begin our mission of returning the shift drum bolt to its motherland with releasing the detent arm tensioning spring, which is located below the shift drum bolt socket. I’m putting this in bold, because this is a really important step. If you omit it now, you may (most probably) bend the detent arm, while screwing in the shift drum bolt. And from this point there will be no other option than to buy a new detent arm. So lose 2 minutes and save some money for a few, if not many more, triumphant beers after our repairs ;)
The bent detent arm leads to jammed gearbox problem in the first place. You lose 2 minutes now, but save many more later as you won’t have to open the clutch basket again
Now if you’re bike suffers from jammed gearbox too, then hold on here for a minute. When you have the tensioning spring free – remove also the detent arm and check it’s condition.
I also couldn’t switch gears higher than to the 1st. And this is how the detent arm in my DR looked like, also in comparison to a new one:
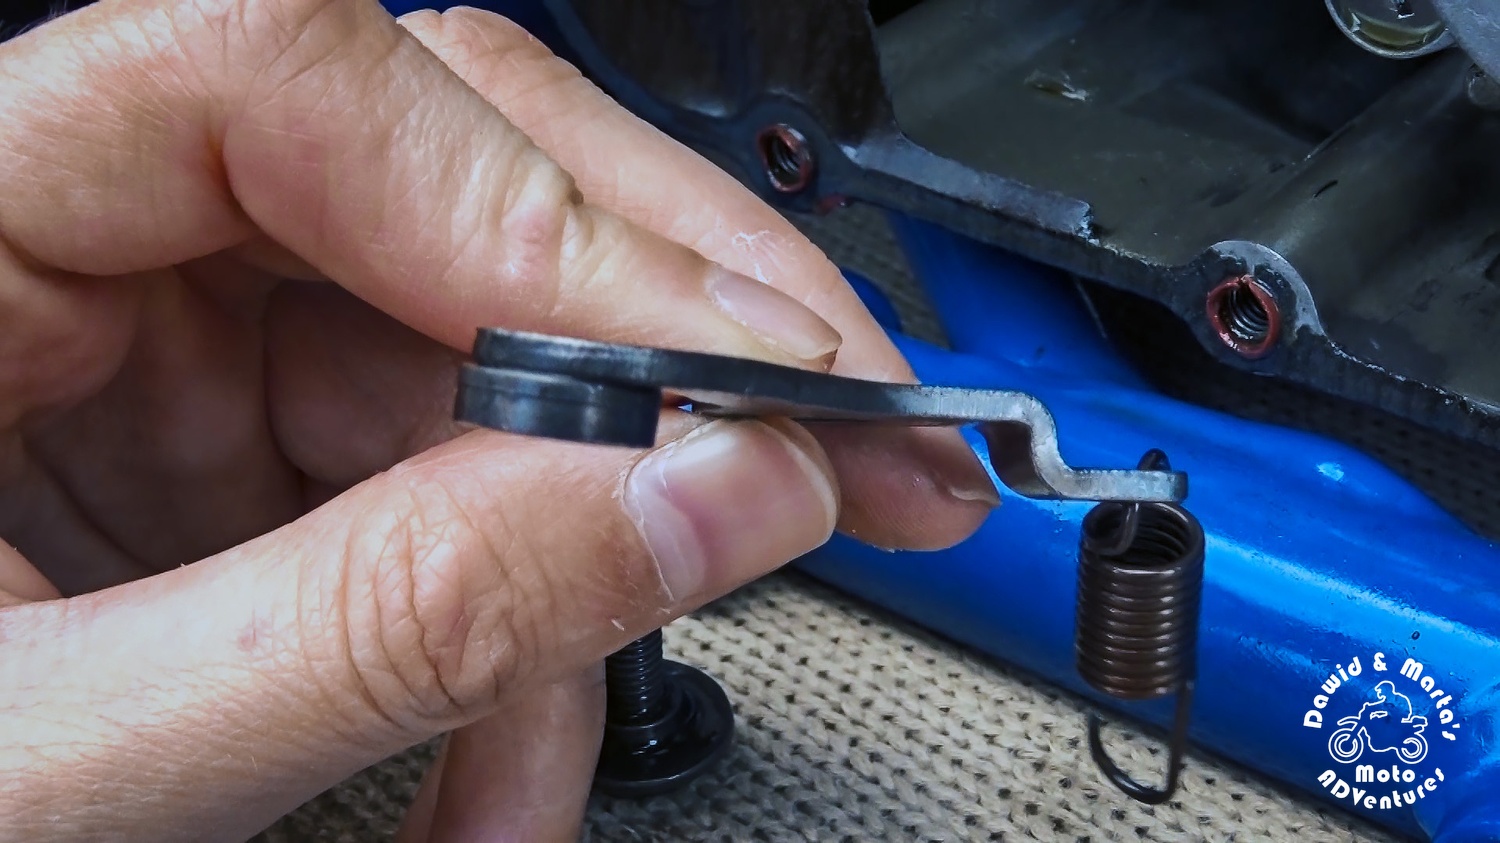
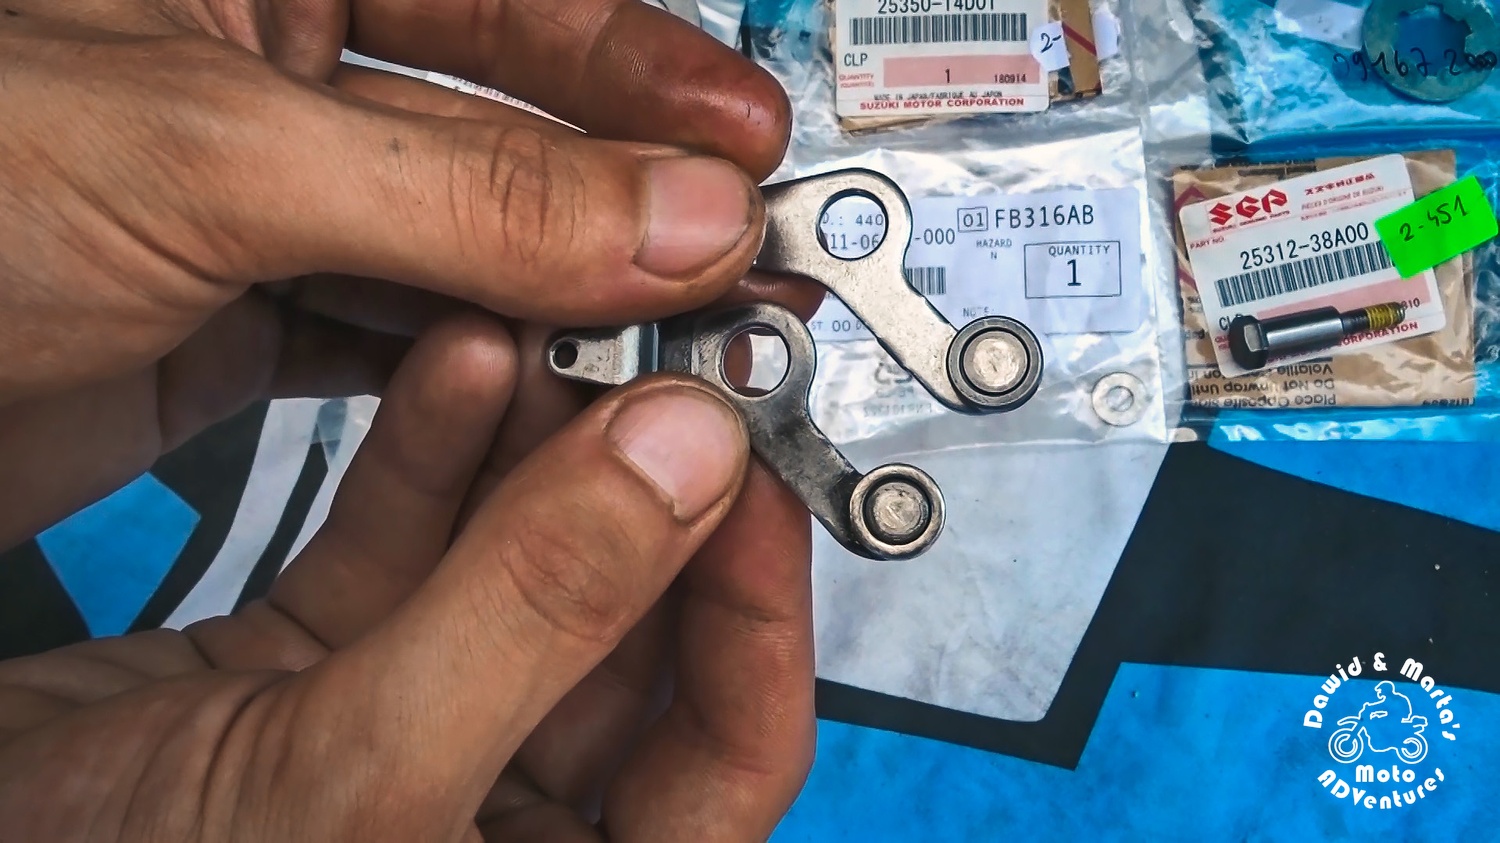
It wasn’t the straightest detent arm for sure as you can see ¯\_(ツ)_/¯ And when detent arm is bent, then during the gear change it will stuck between engine block and detent star. In result you can’t turn the shift drum – the gearbox is jammed.
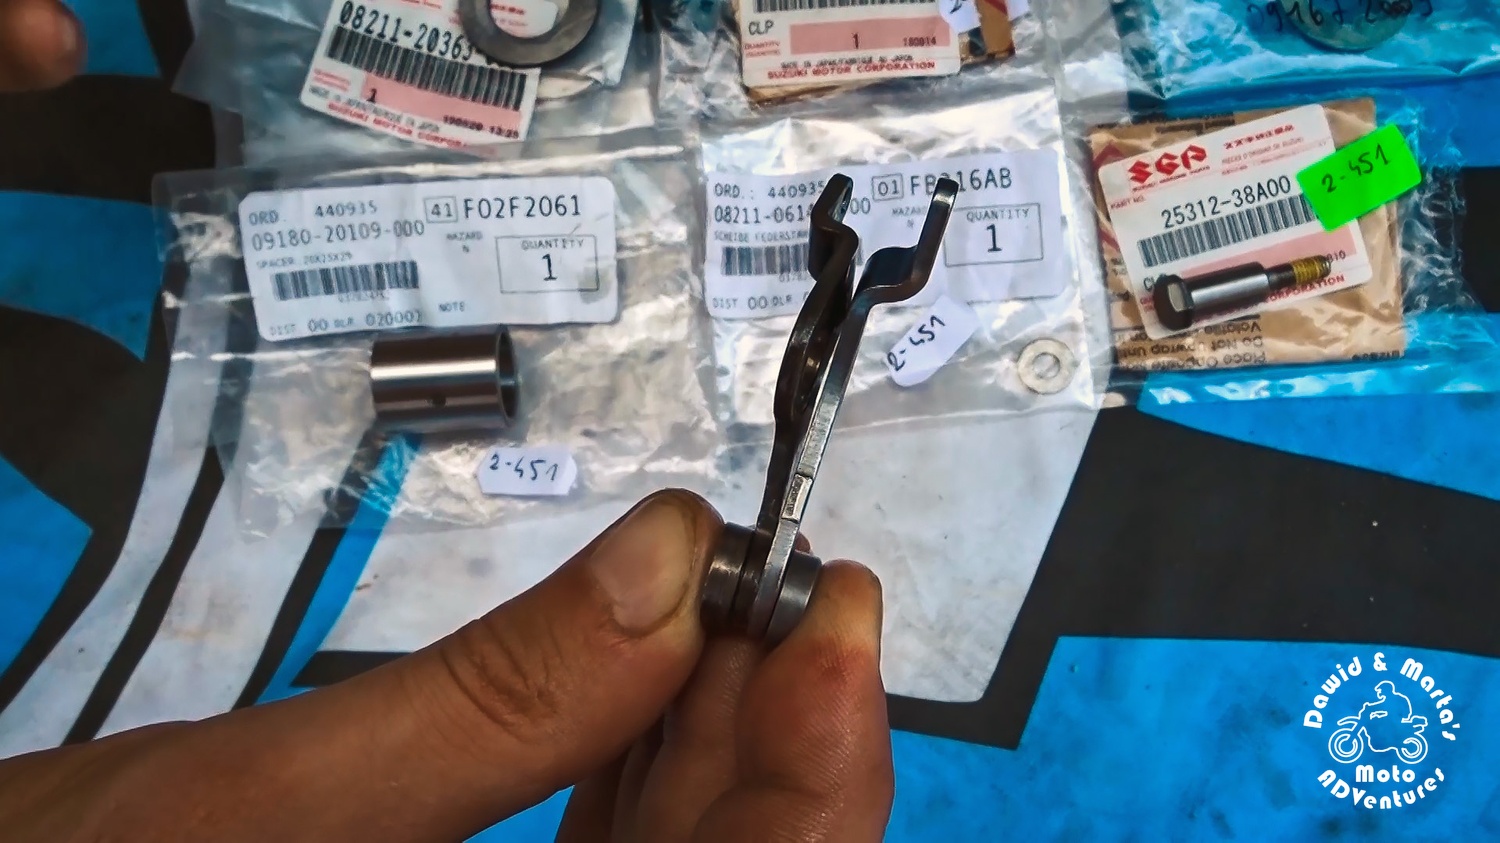
So in order to make the gears switchable again, you can straighten back the detent arm or simply buy a new one, like I did (you can check the part number at the beginning of this post, if you’ve missed it).
When we have a proper detent arm again, we screw it back, where it belongs, before we move to the shift drum bolt.
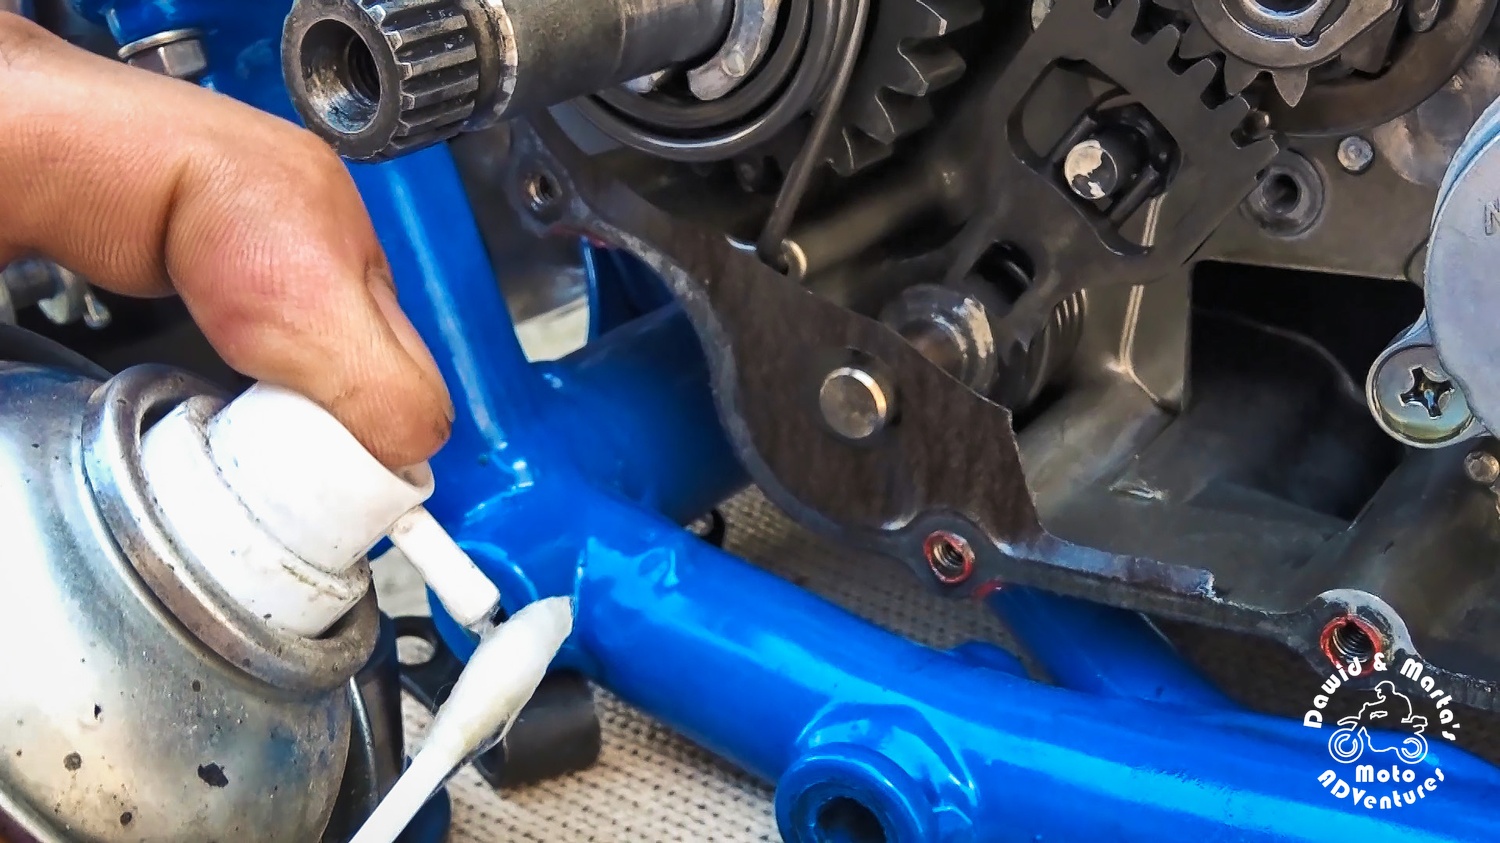
But before we eagerly grab for a screwdriver, we clean the detent arm socket with a brake cleaner. We will use a thread locking fluid in just a moment, therefore it’s crucial to remove all the greasy oil from all the nooks, so everything will stick well.

After that we can put on the thread locking fluid on the bolt holding the detent arm and screw it in. Remember to NOT forget that the detent arm should neighbor with a washer on each side.
Now we can mount back the detent arm and torque it with 12Nm. The arm should be able to move freely, when we touch it.
Now we can get back to the shift drum bolt and clean its socket with a brake cleaner the same way we did for the detent arm bolt. We will use the thread locking fluid here too.

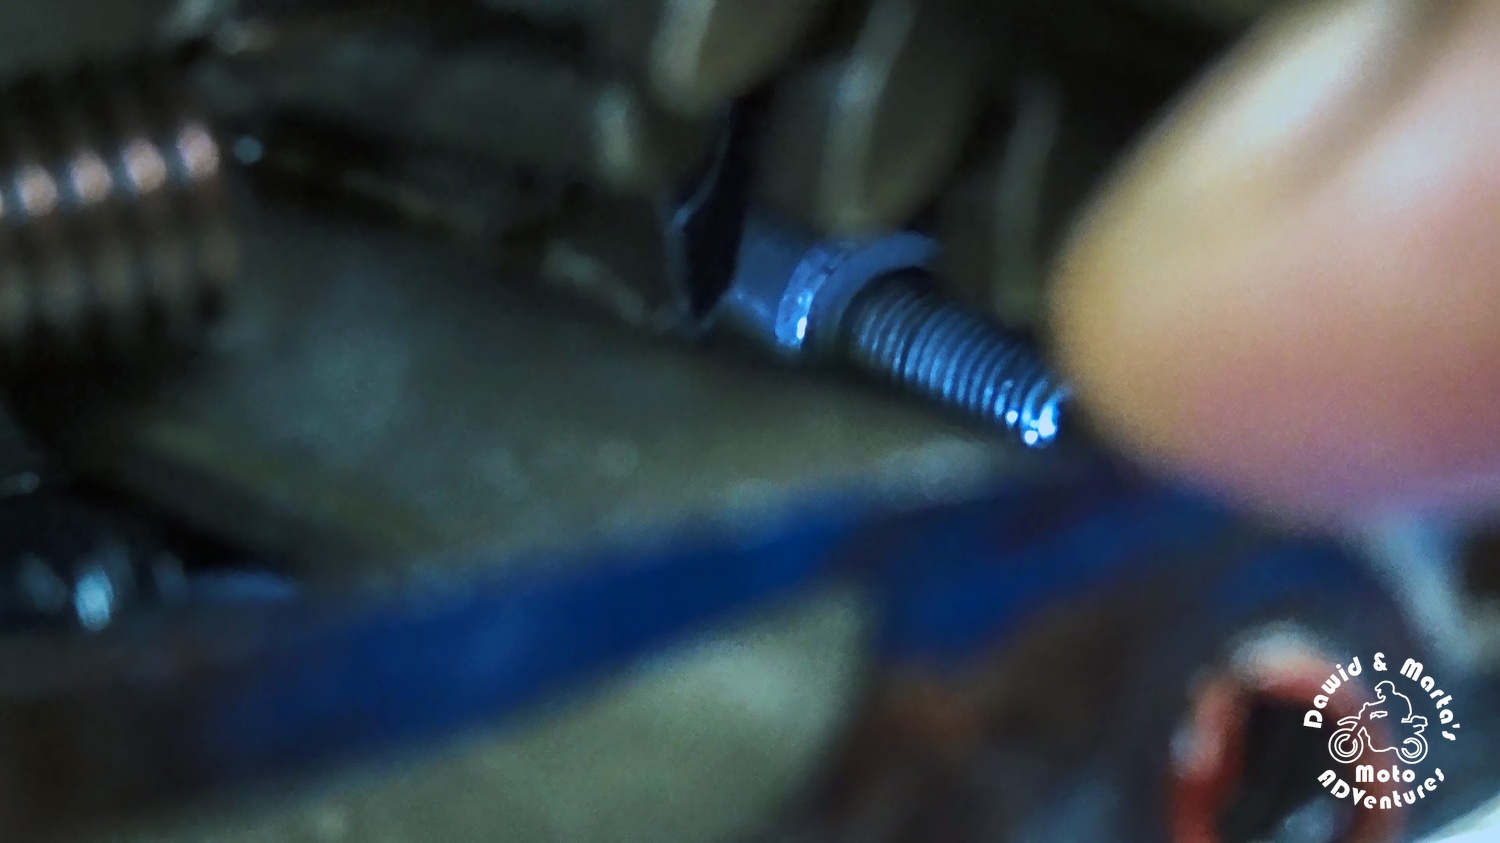
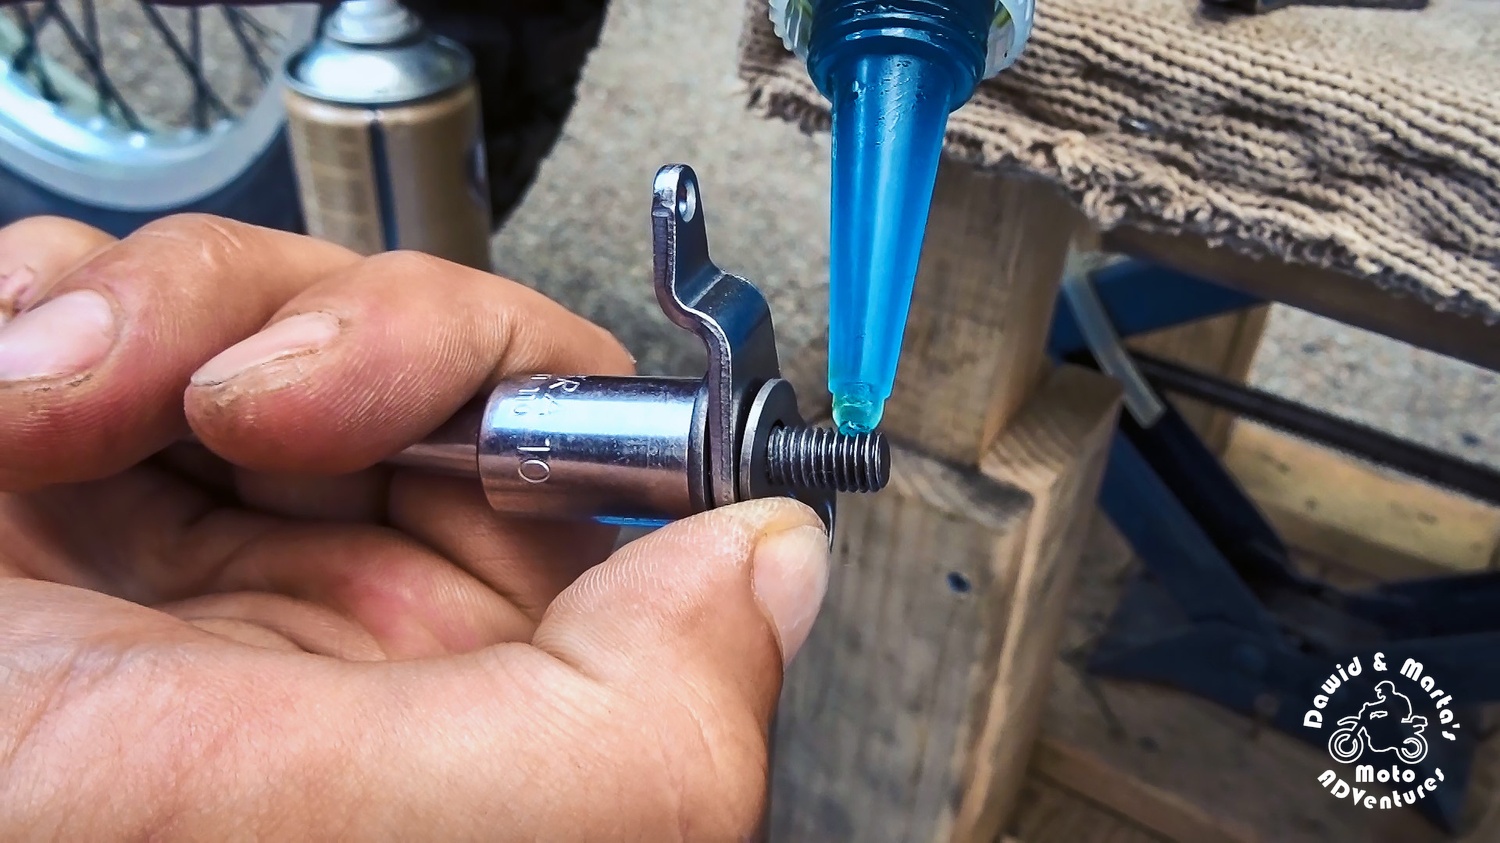
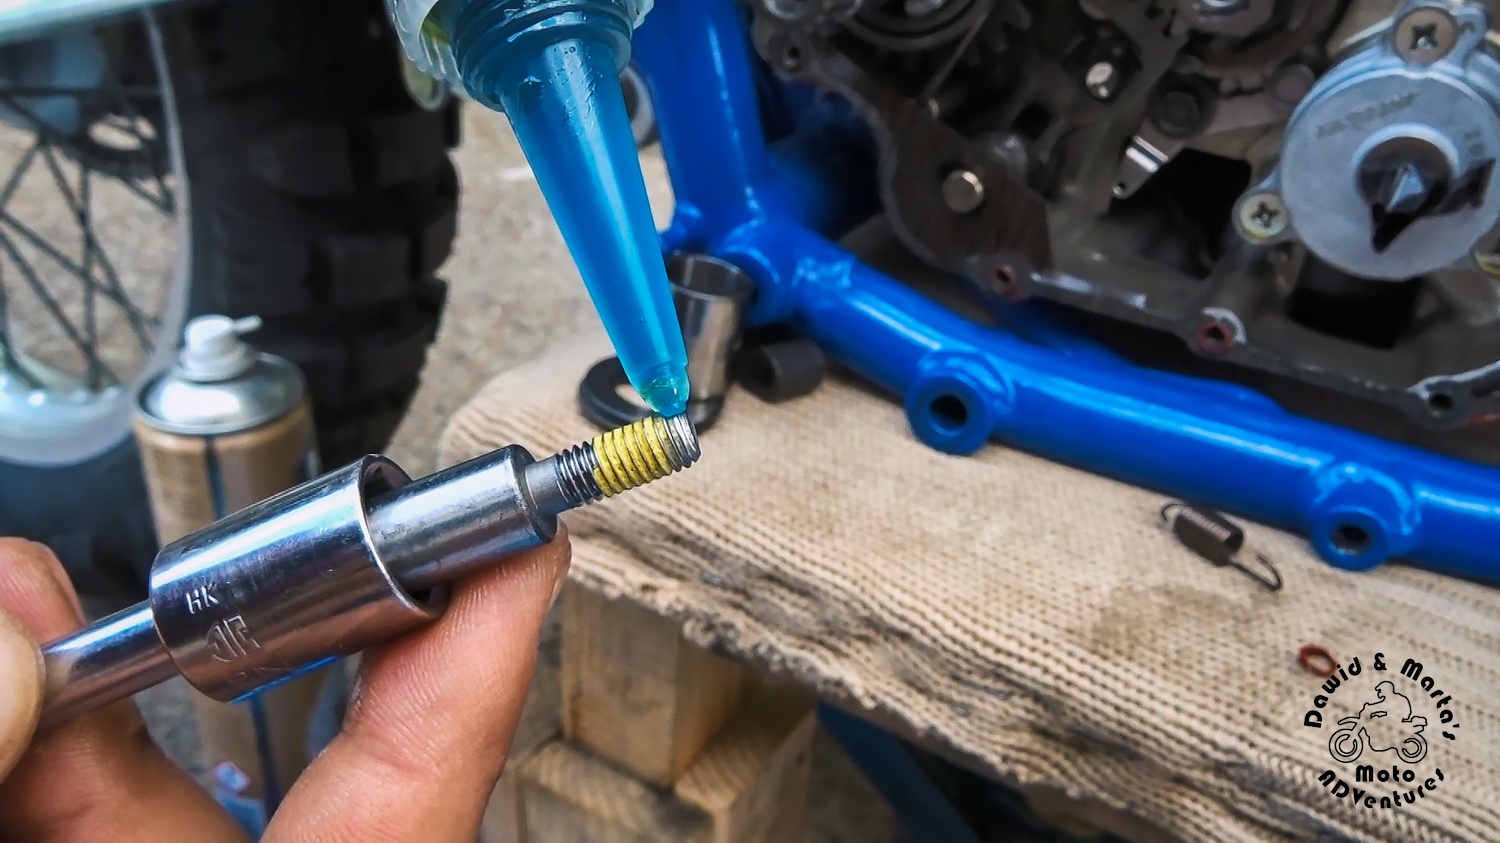
As we have nice, degreased surfaces now, we put the thread locking fluid on our new shift drum bolt (for part number check the table at the post beginning).
There is already some thread locking substance provided by the manufacturer on the bolt surface, but we add a little more to sleep well ;) But just a little bit.
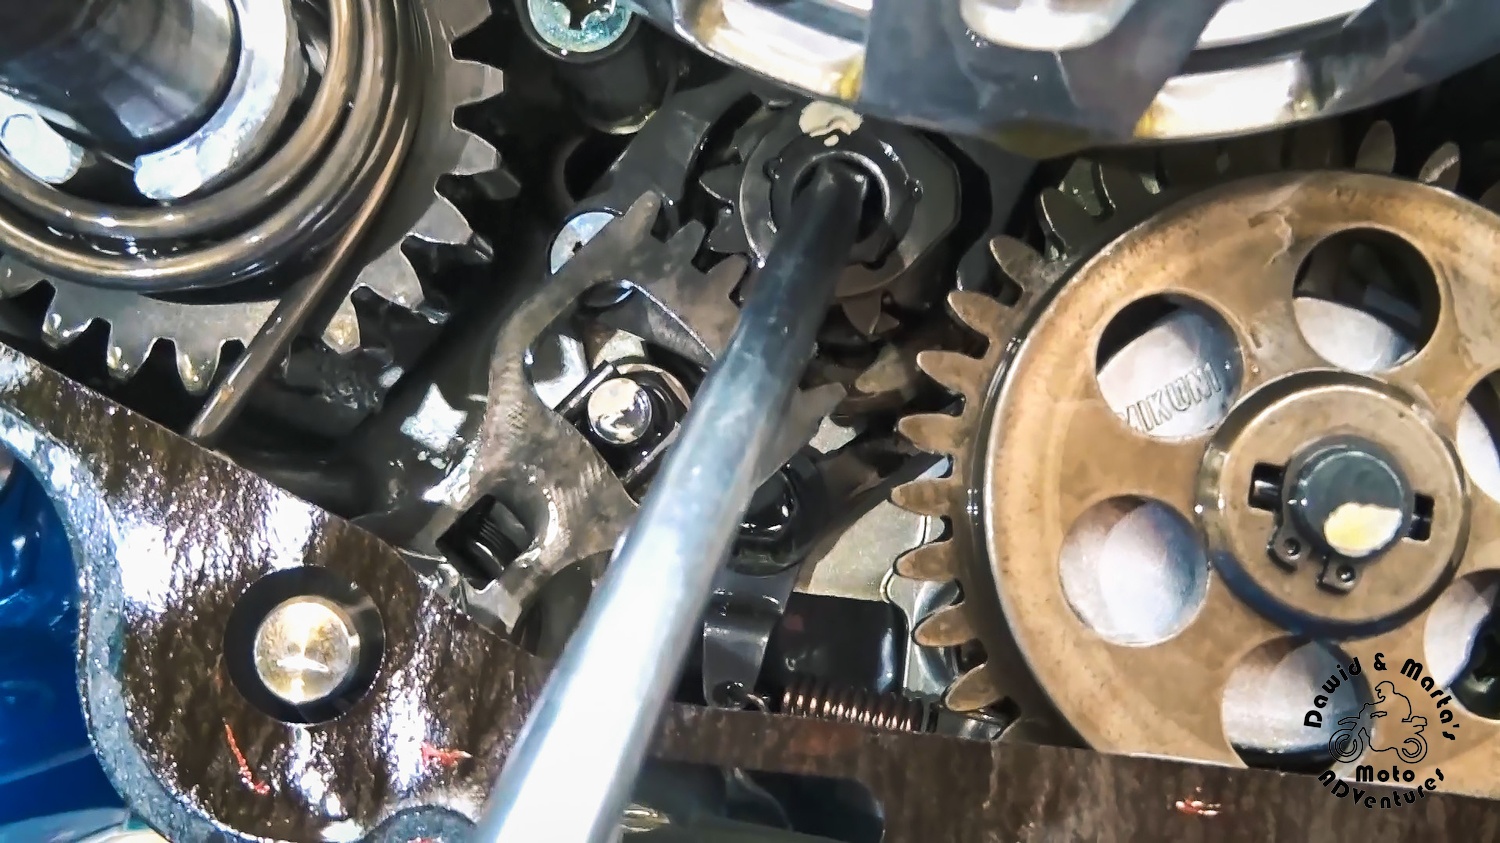
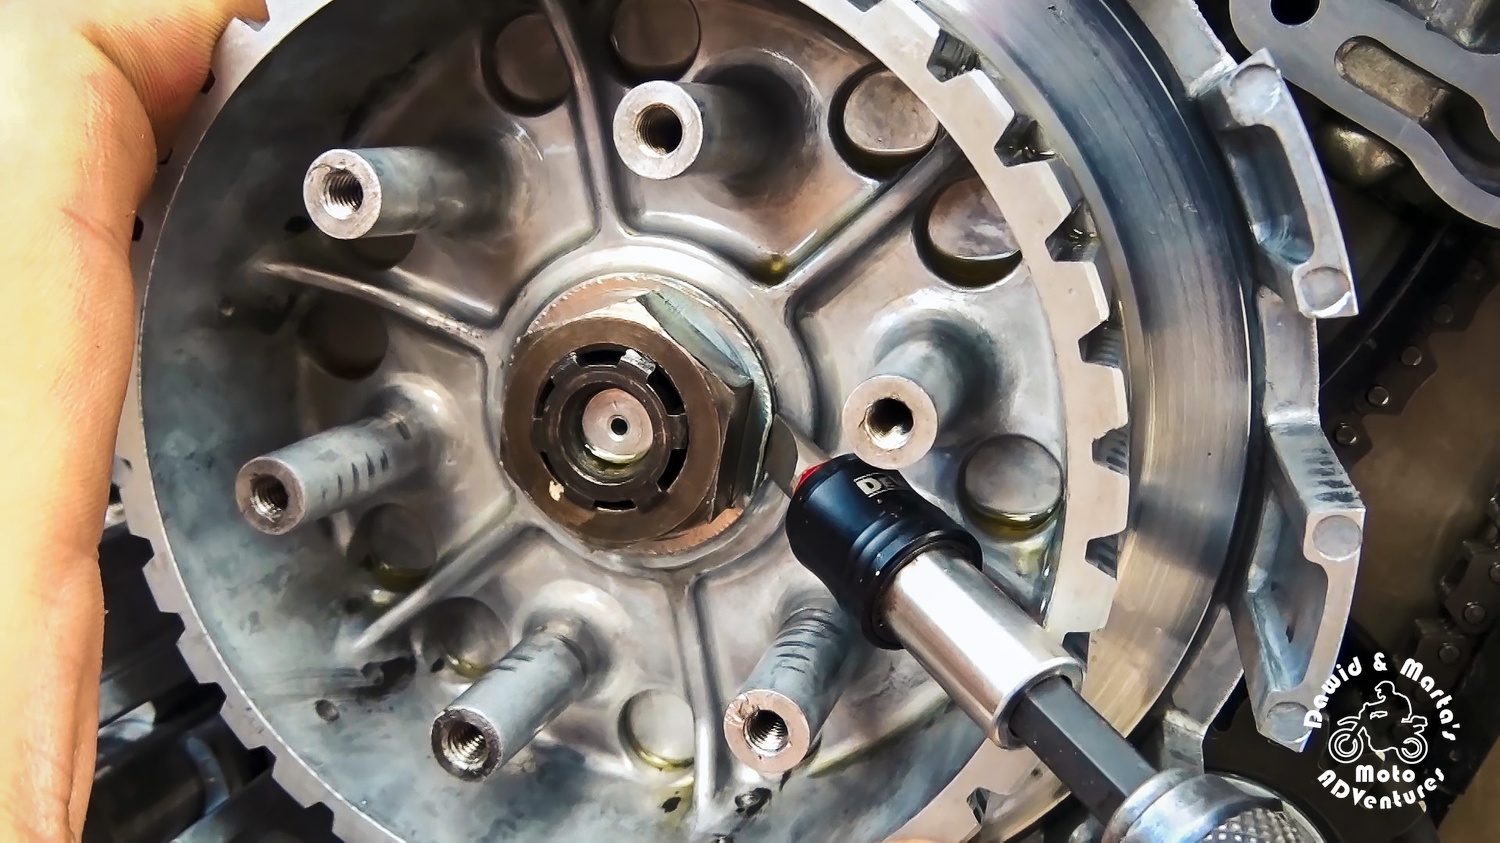
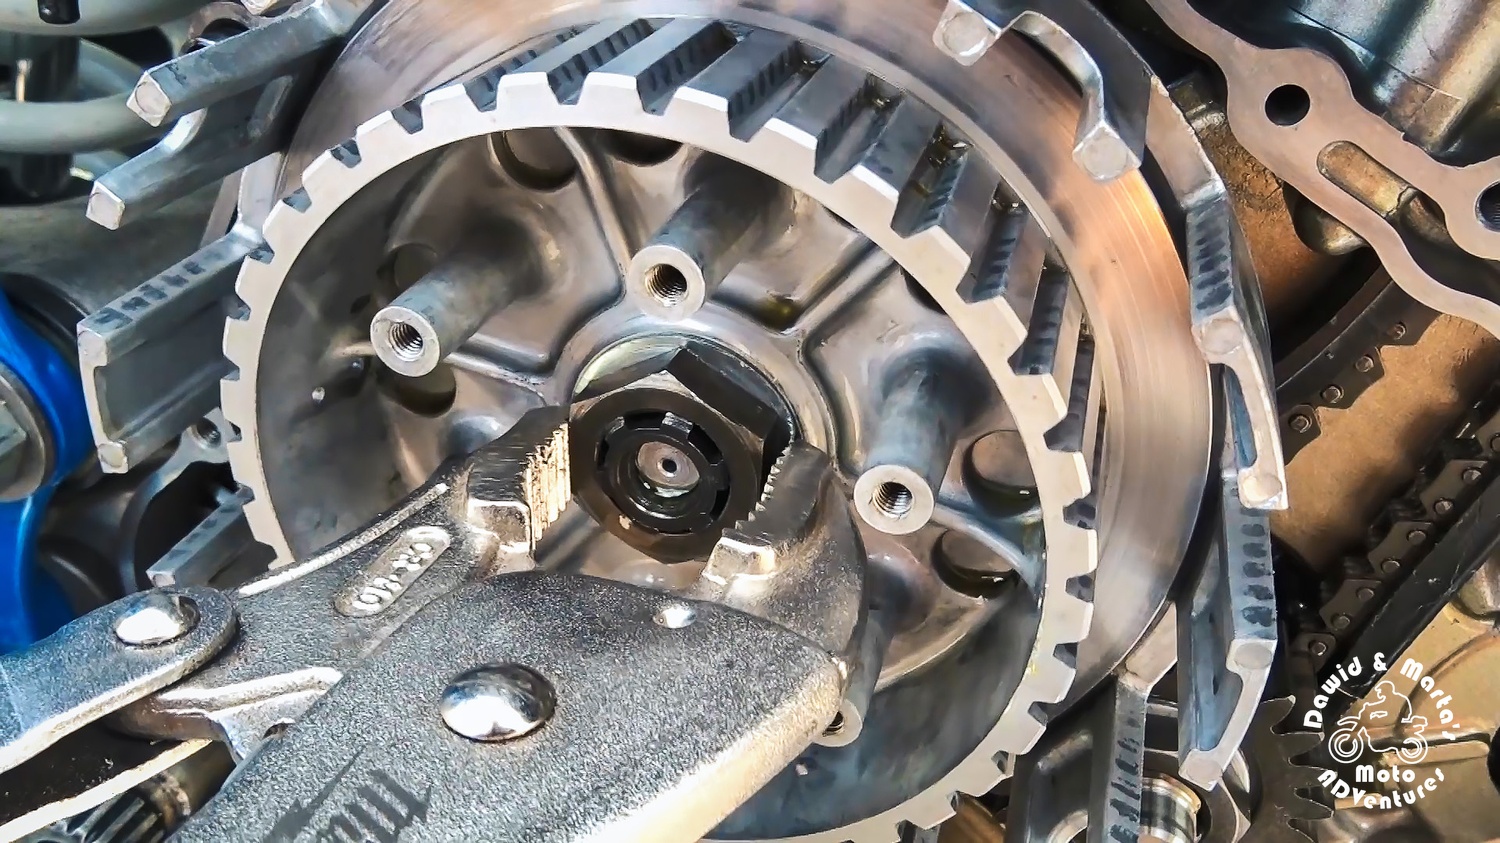
With the fluid on, there’s nothing else left to do. We gently screw in the shift drum bolt.
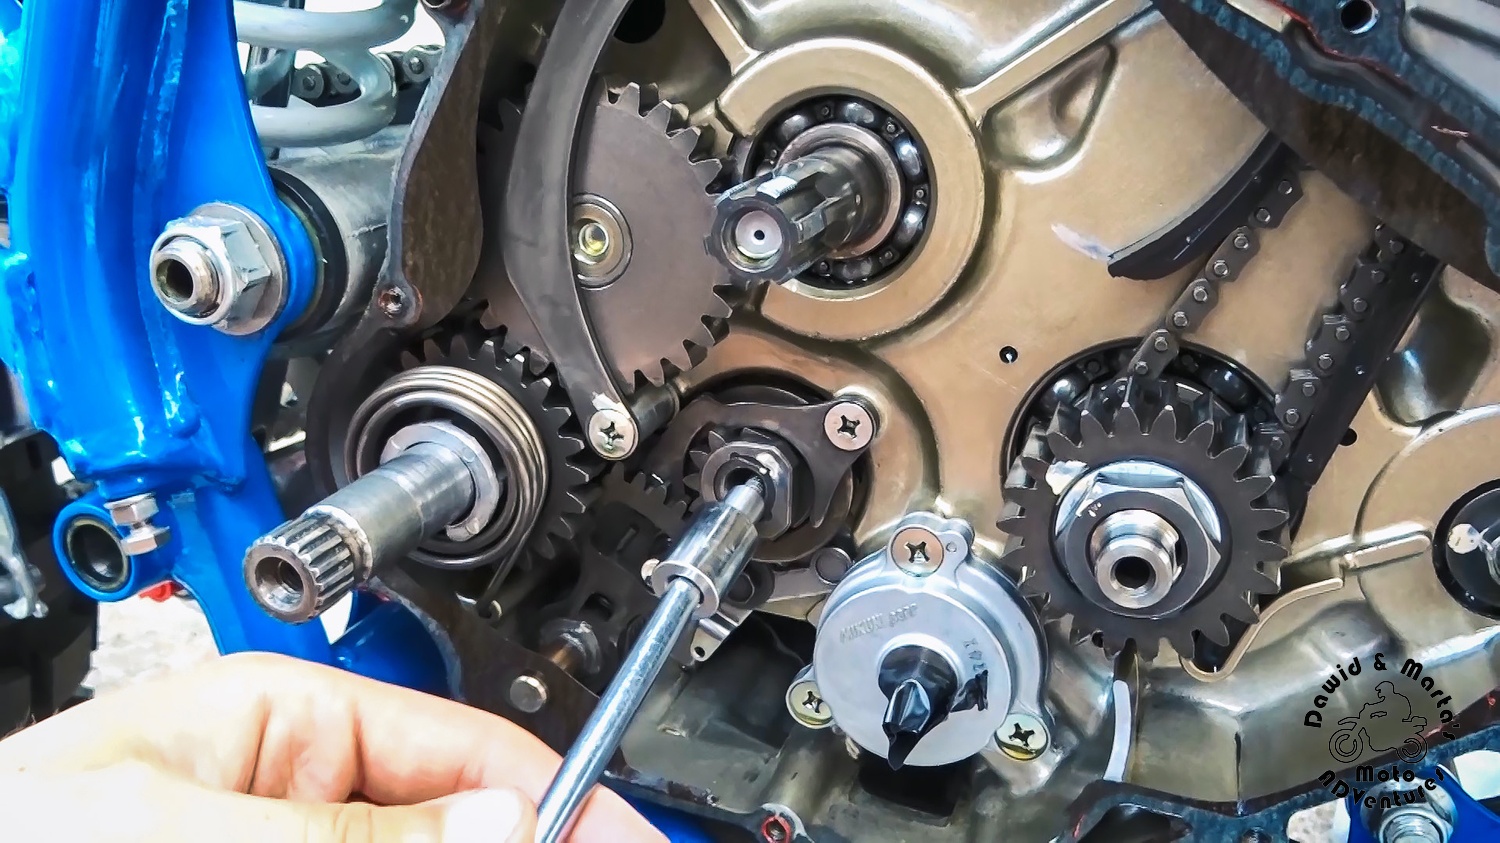
Then we can make use of our torque wrench and torque the bolt with 12Nm. (Remember that detent arm below should lie freely during this step, don’t hold it.)
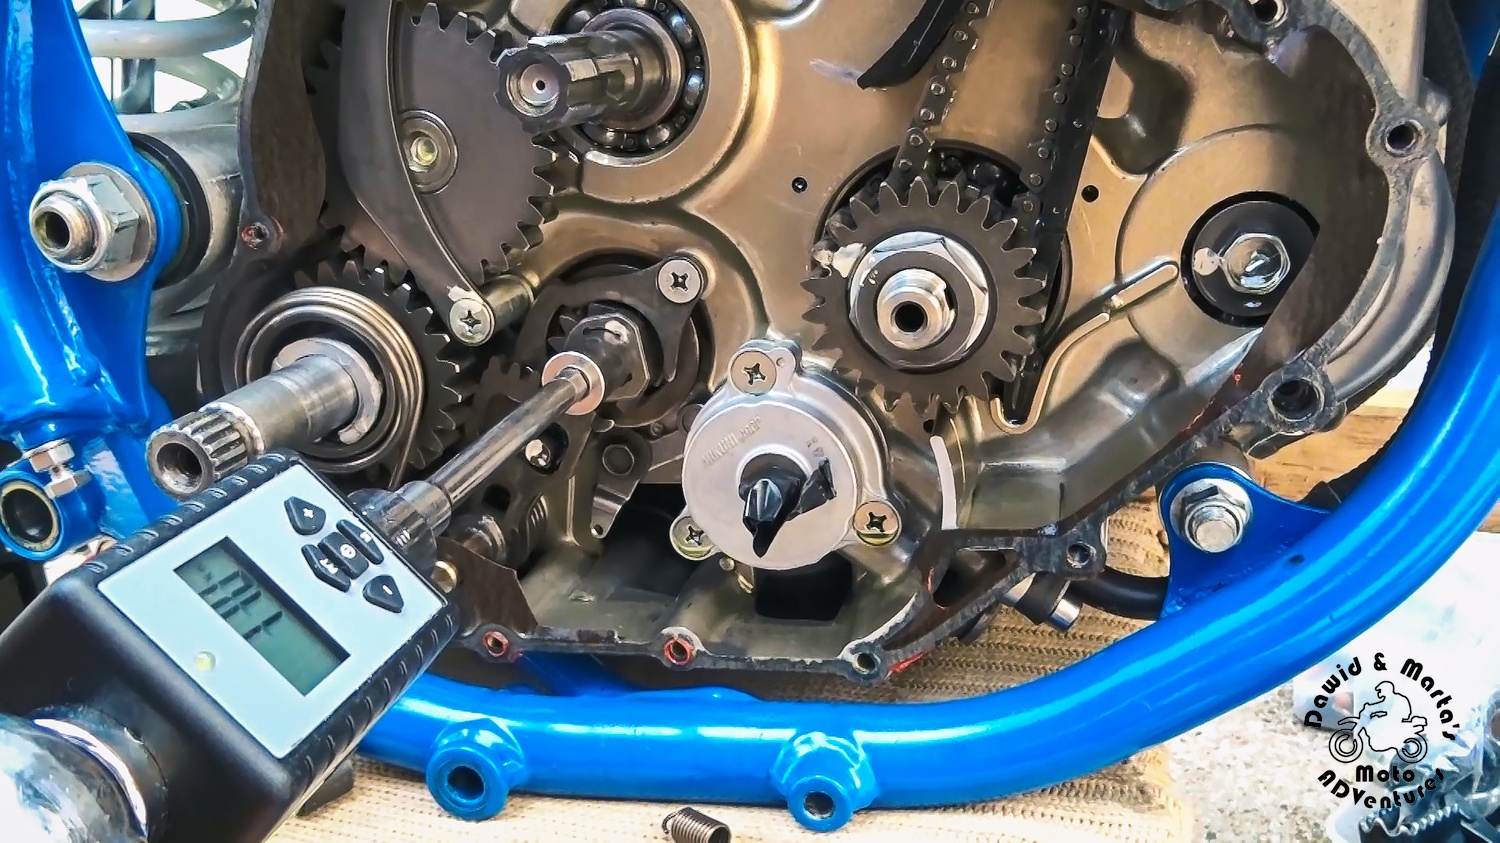
12 Nm may seem like nothing, but this is a value recommended by Suzuki manual and we don’t want to break the precious thread on our shift drum bolt. Furthermore the whole gear switching mechanism should work smoothly, without any resistance, like this:
So let’s not make its life harder and stick to the service manual recommendations :)
Of course, remember about putting back the clutch detent arm tensioning spring we removed earlier.

Replacing clutch bracket spacer and spacer washers
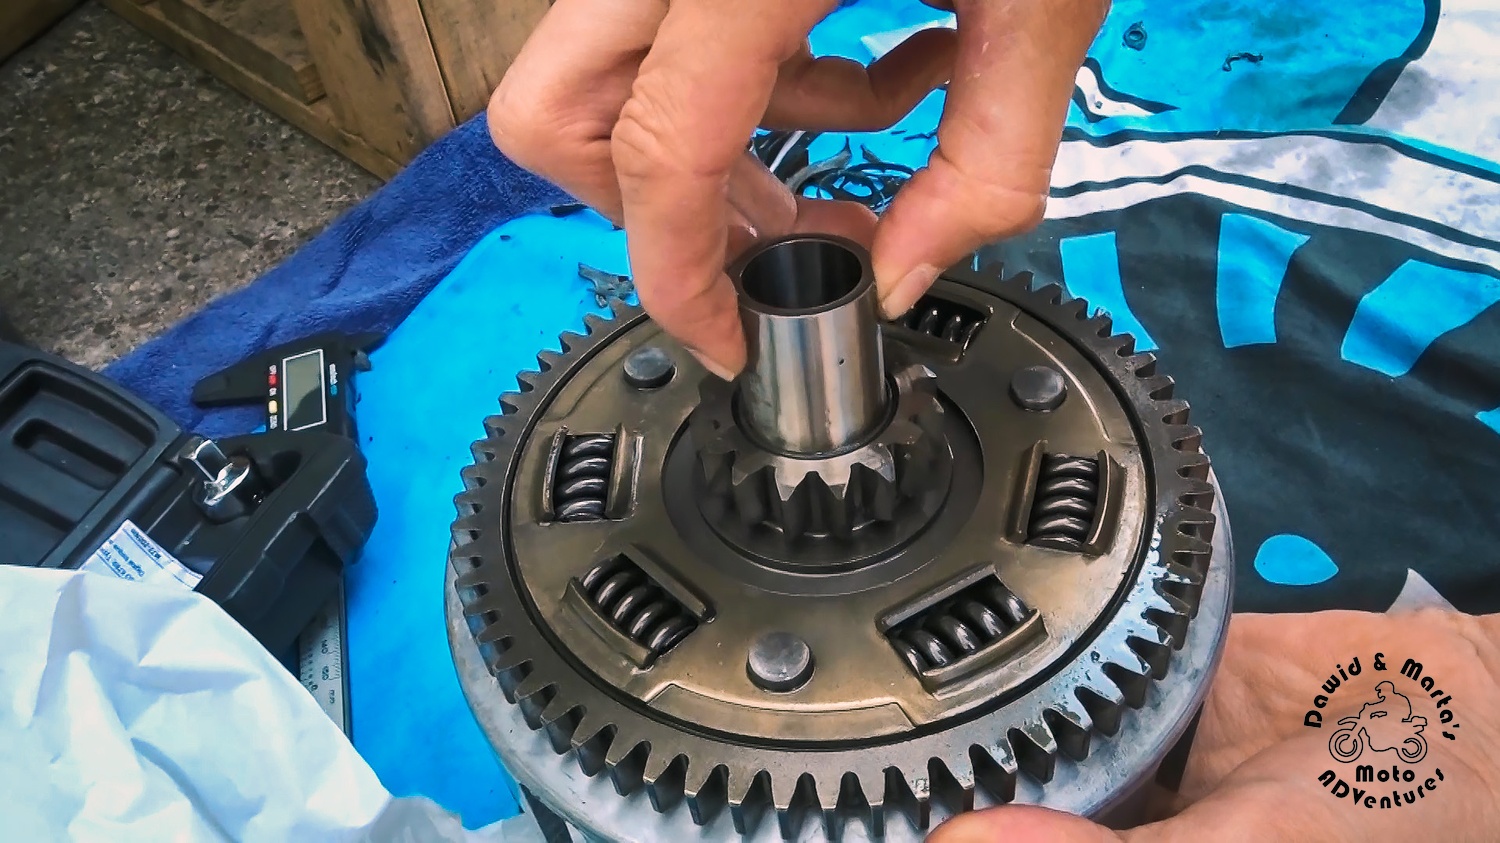
As the shift drum bolt is safe and sound now, we will now take care of the clutch bracket spacer and spacer washers. It’s really easy, but let’s do that together.
So first we take one of the two new spacer washers we have mentioned in the table at the post beginning and we put it on the clutch basket shaft.

Next we push the new clutch bracket spacer into the clutch basket bearing bush.
After that we can place back the clutch basket and another new spacer washer we have.
Now we can mount back the clutch inner hub basket.
Next goes the new lock washer (also from the table at the top of the post) and the nut holding the clutch basket on the shaft.
We tighten the nut with 40 Nm torque as you should still be able rotate outer clutch basket freely. It should have a small amount of free play. If you try to tighten the nut harder – you can crush the spacers below and all your effort will be for nothing. The clutch will drag again.
Of course, when the nut is tightened we lock it with the lock washer beneath.
At first we can use a punch tool or a screwdriver to fold the washer a bit and then some pliers might come in handy to bend it evenly.
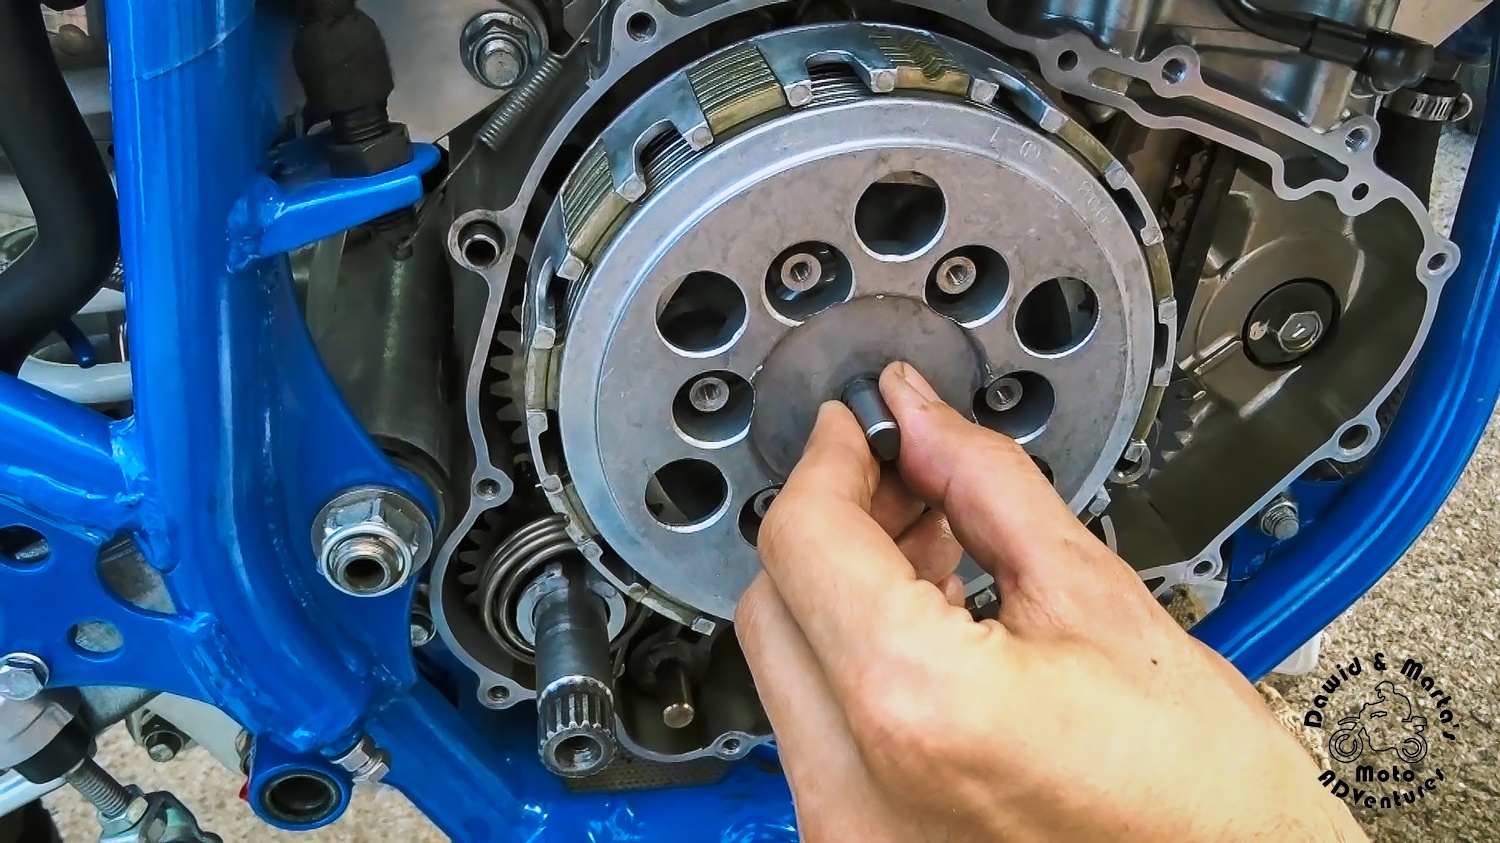
Now we just have to put back the clutch plates and the clutch plates pressure disc.
But before you put back the pressure disc, remember to not forget about the puller and its bearing we were checking at the very beginning.
If you got the puller in place, then let’s mount the disc.
The only thing left now are the clutch springs and the bolts holding them.
For the clutch spring bolts we use the torque wrench and we torque each bolt with 4.5Nm. So easy-peasy.
Just remember to again screw in the bolts diagonally, so after you screw in one bolt, the next you want to take care of is the one at the opposite side of the shaft.
And victory! We’re back where we begun! ᕙ(⇀ᗜ↼)ᕗ
Summary
There are lost touches to the clutch like mounting back the cover and its gasket, but for this, if you’ re not sure, check out the post about changing clutch plates here or check out the video below. It may also help if this post lacks some detail.
But as always let us know if something in the post is missing. We want it to be as clear and helpful as possible for other DR (and maybe even non-DR) riders :)
If you have more problems with your Dr – check out our DR rebuild series.
Ride safe! :)
Comments