This time we will take care of one of the, I think, most NOT recommended to do on your own procedures. But who doesn’t like some challenge! Let’s start unscrewing and see how it goes :)

Which DR350 rear shock model we will rebuild today?

As far as I’ve researched, there were (at least) three rear shock models mounted to DRs.

The first one was fitted to the dirt versions of DRs and had both the rebound and compression dampening adjustments. Later similar shock was mounted on street legal DRs (DR350SE), which left the factories from 1997 to 1998.
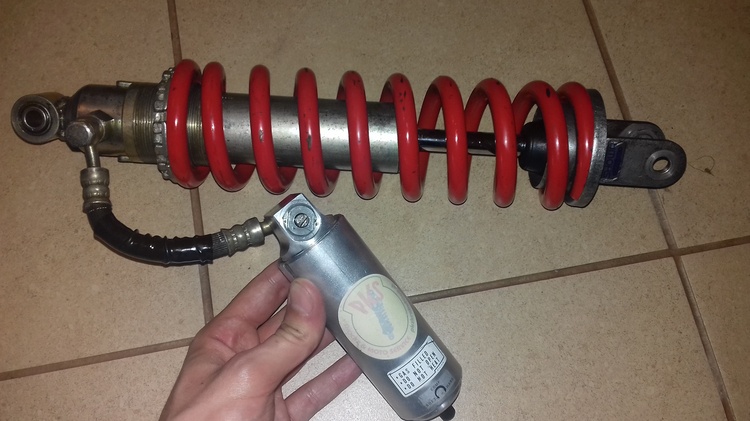
The second DR350 rear shock model was very similar to the dirt one and was mounted to the street legal models produced from 1990 to 1993.  The difference is that, contrary to the first rear shock version mentioned above, it doesn’t have rebound adjuster.
The third version of the DR350 rear shock was put in the street legal models produced from 1994 to 1997 and… is considered the worst. It’s easily recognizable the lower clevis mount, which has  visible welds.

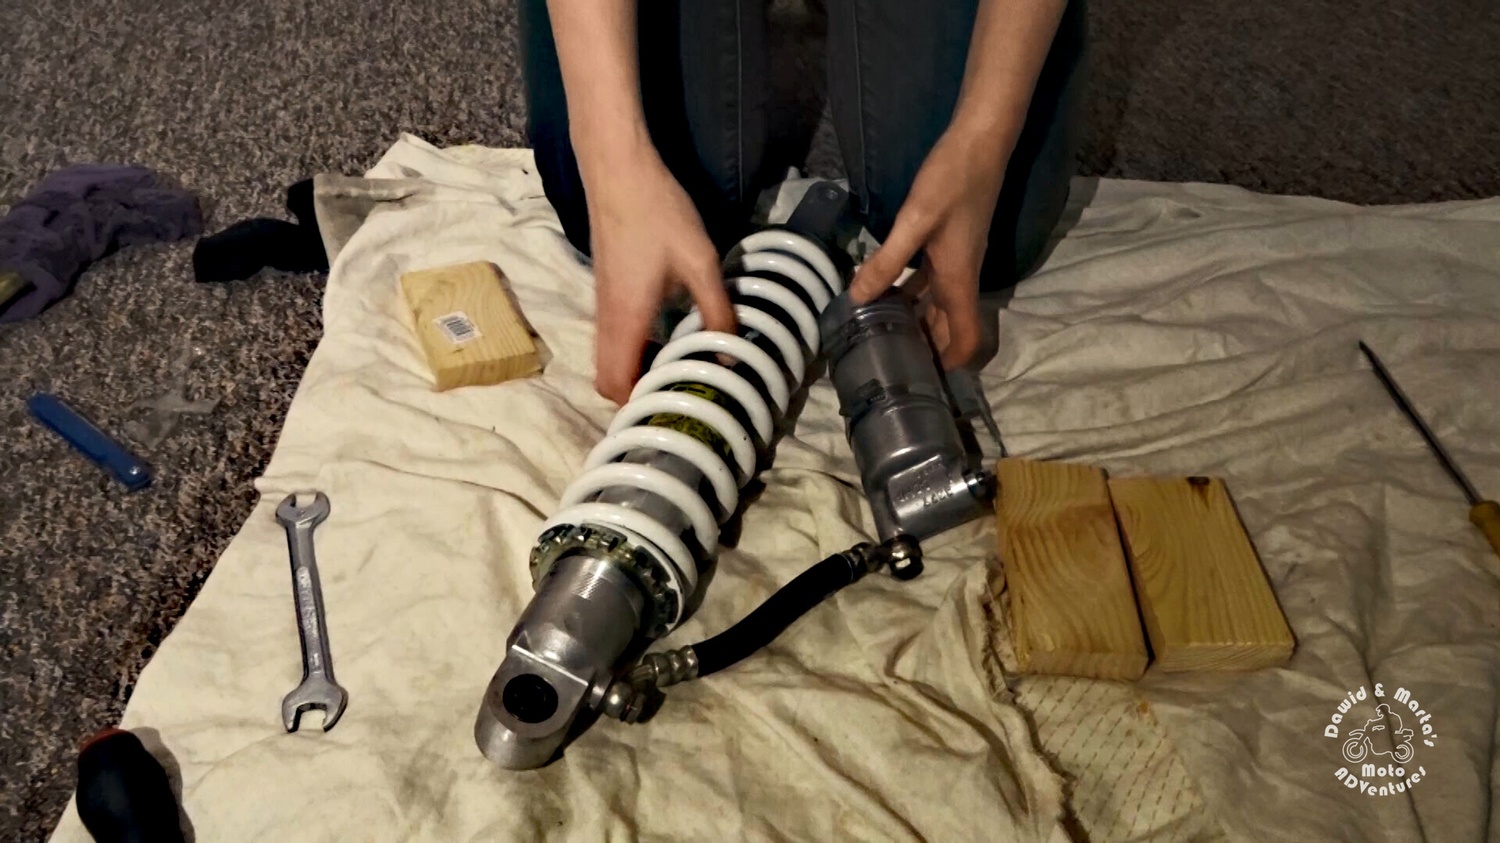
Today we will disassemble a 90-93S rear shock. But I think the procedure should be quite similar to the other models. Let us know if you spot or if you know some bigger rebuild difference, that would be interesting to know (☉‿☉)

The first dismantling steps

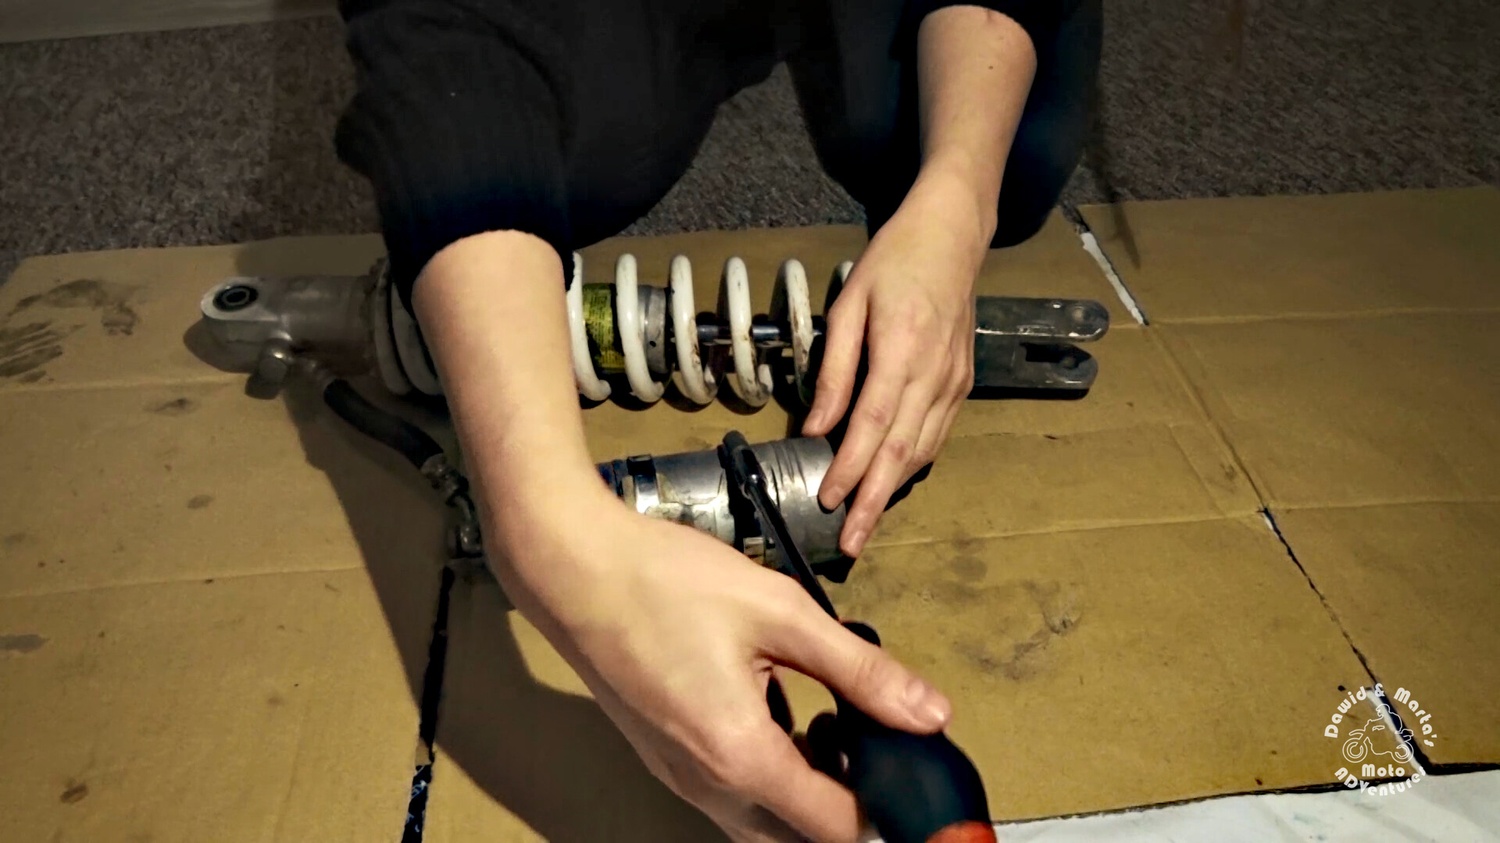
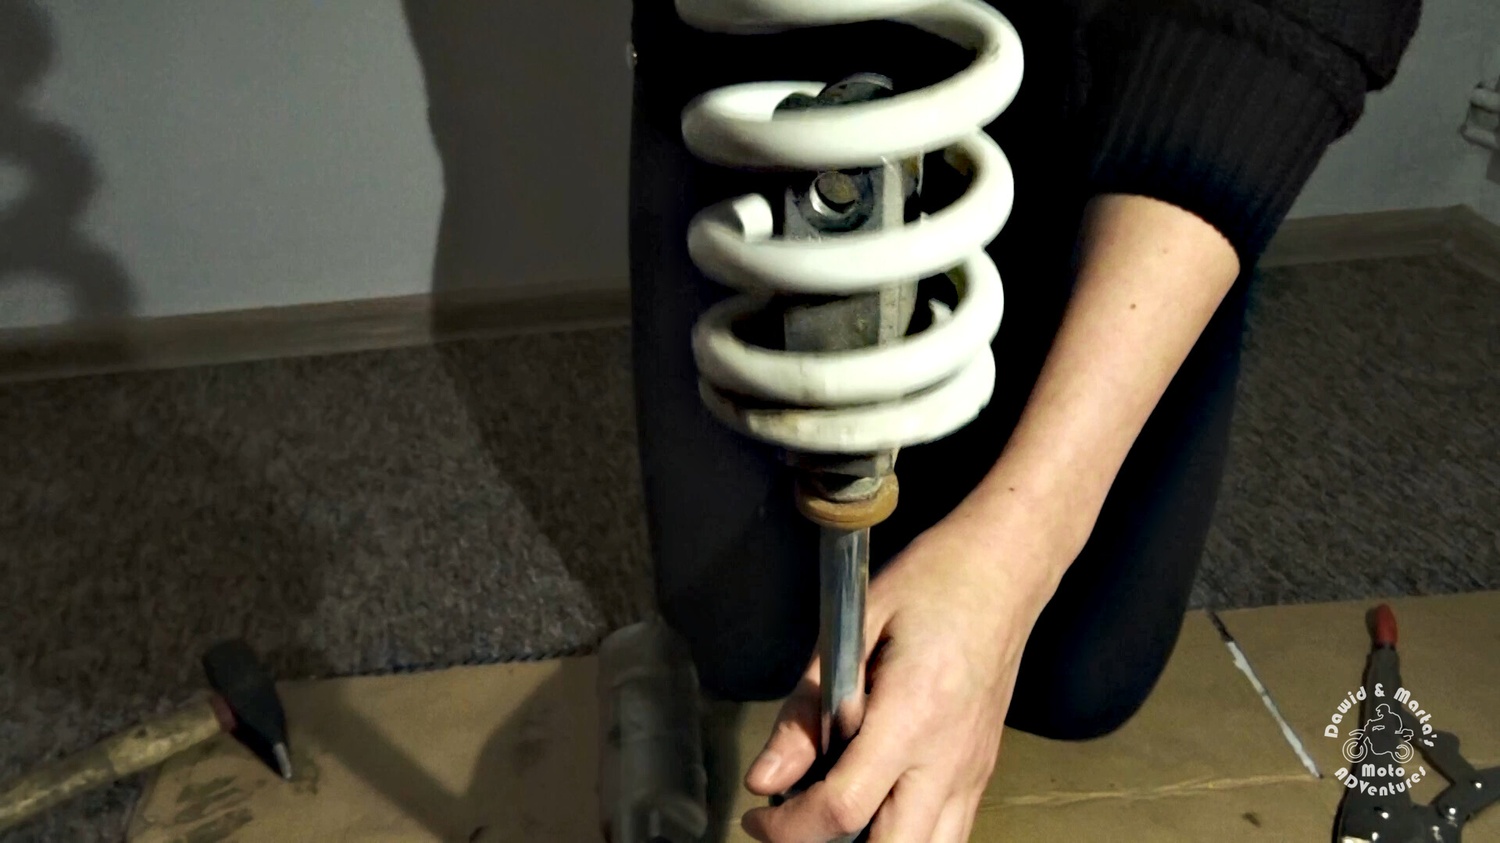
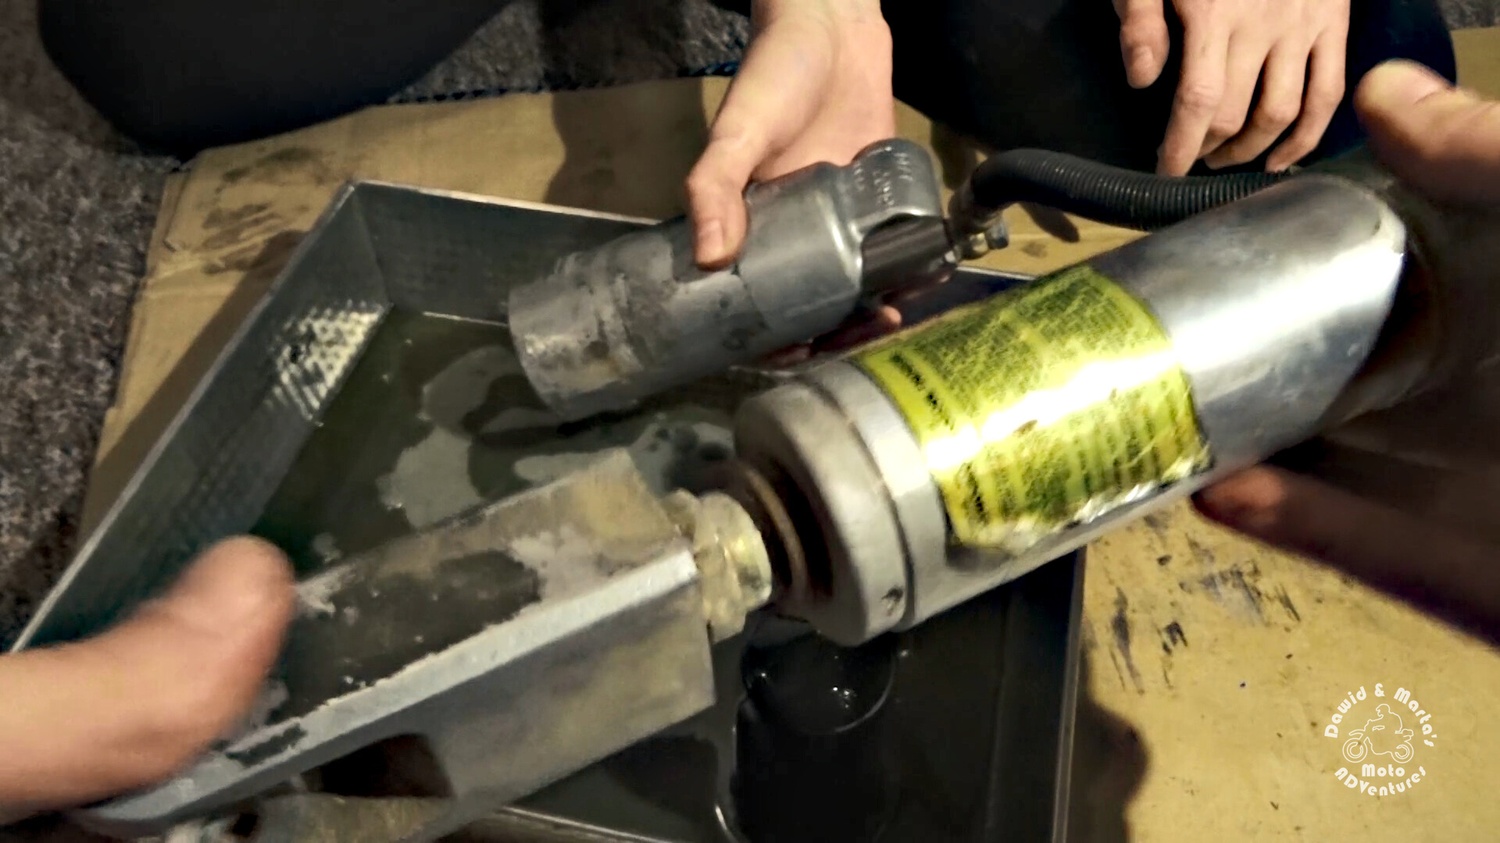
Naturally, we have to start with freeing the shock a little, so we can work on the air can and the shock body separately.

First we take apart the air can handle by removing two clamps, which are holding it.

1. Removing air can handle from the rear shock
Removing the air can handles
1. Removing air can handle from the rear shock
Removing the air can handles

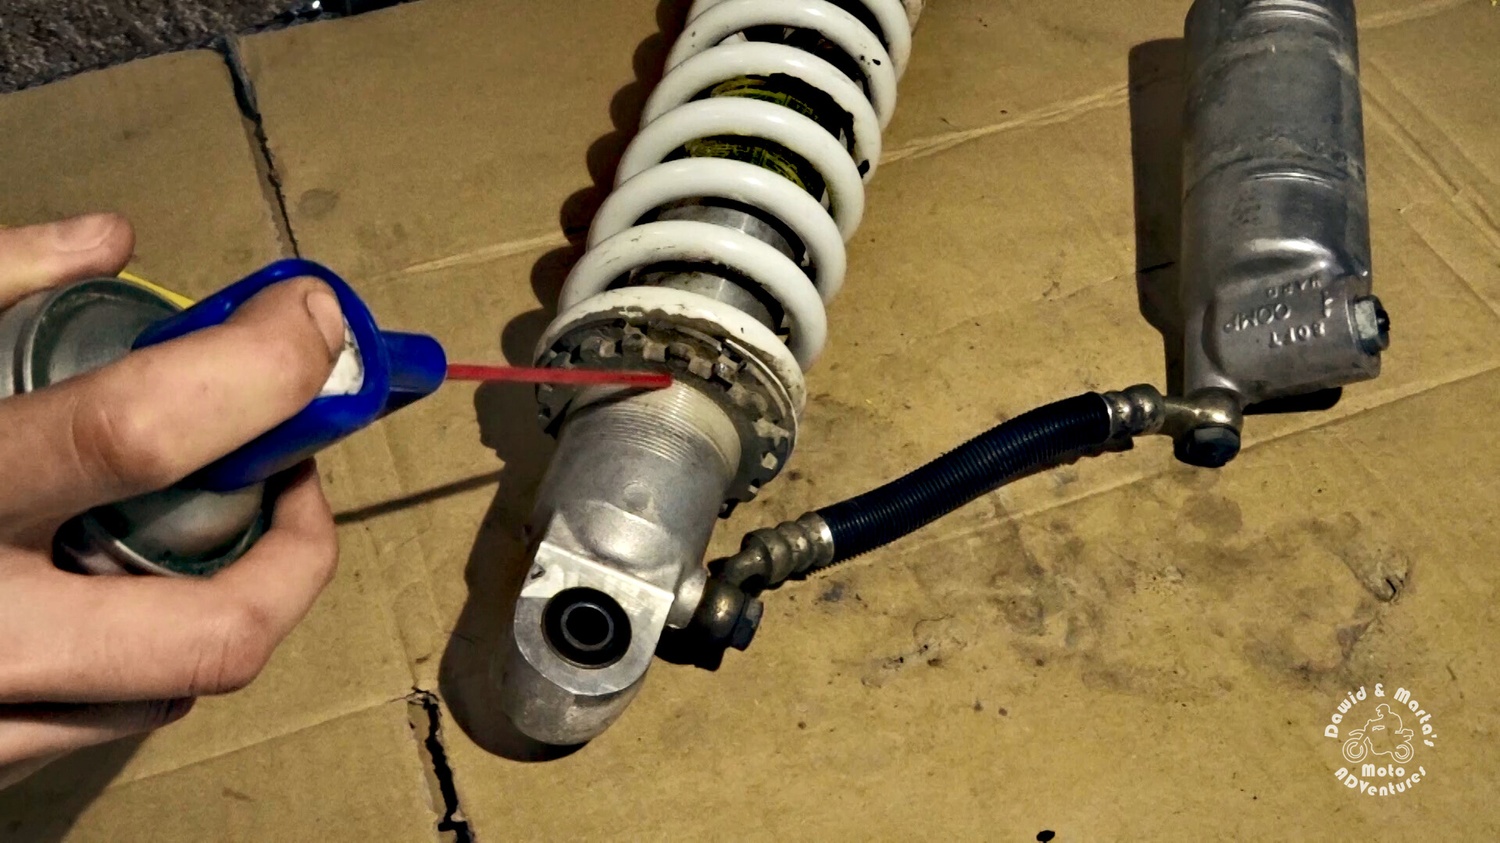
Next we can unscrew the spring preload adjuster locking ring. It will probably be a little stuck, so we can go for it and use a hammer with a punch tool, though gently ;)

2. Preload adjuster locking ring removal from the rear shock of DR350SPreload adjuster locking ring removal from the rear shock of DR350S
Preload adjuster locking ring removal
2. Preload adjuster locking ring removal from the rear shock of DR350SPreload adjuster locking ring removal from the rear shock of DR350S
Preload adjuster locking ring removal

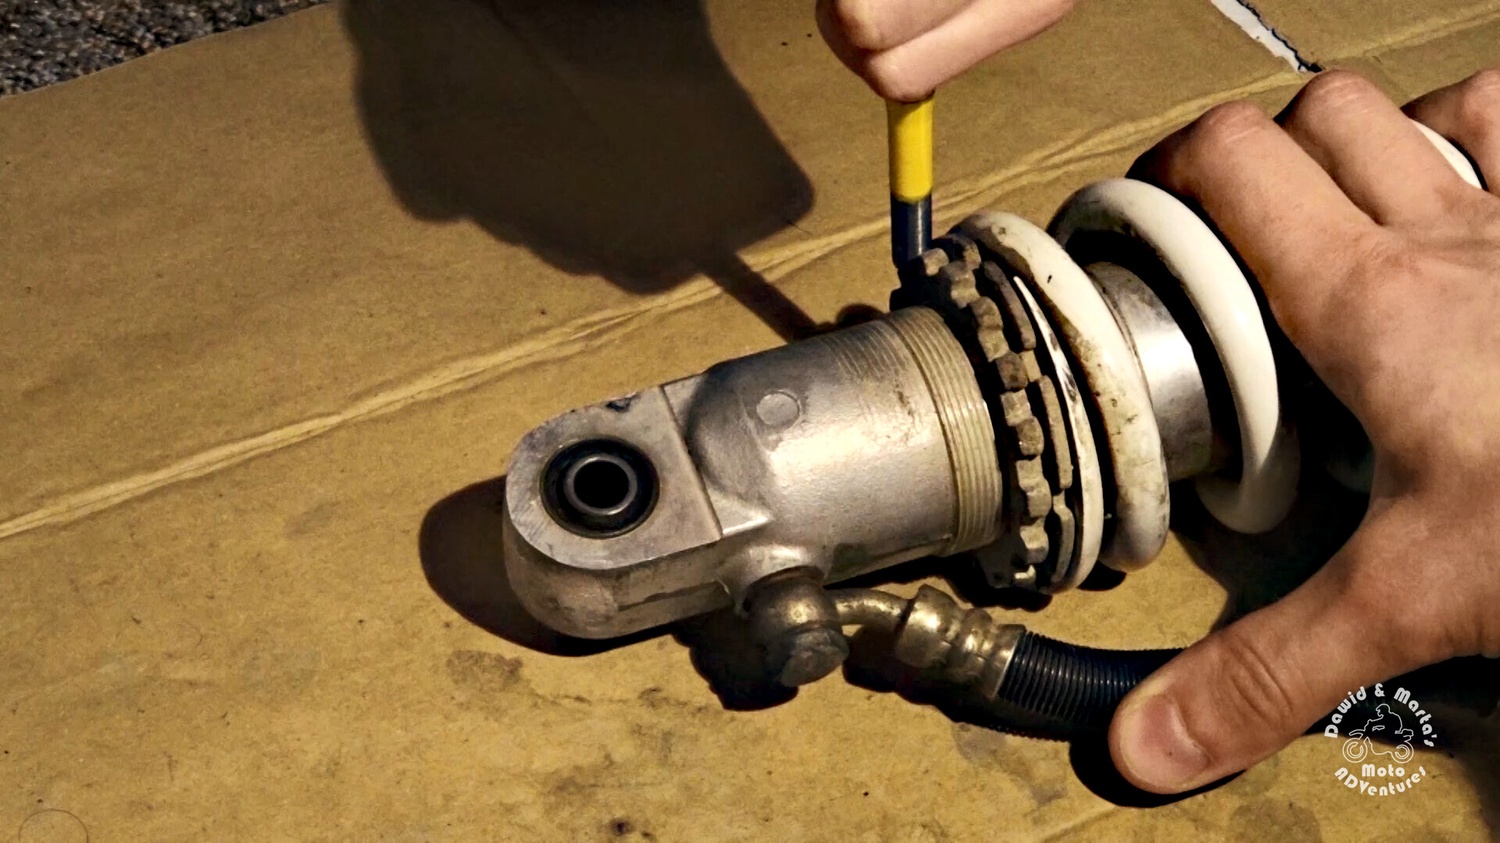
In my case the nut was seized, so I also used a penetrating oil.

3. Using penetrating oil on the preload adjuster locking ring
Good old WD-40…
3. Using penetrating oil on the preload adjuster locking ring
Good old WD-40…

When it’s  finally loosened, we unscrewed it together with the spring preload adjuster.

4. Uncrewing the nut and the spring preload adjuster
Unscrewing the nut and the spring preload adjuster
4. Uncrewing the nut and the spring preload adjuster
Unscrewing the nut and the spring preload adjuster

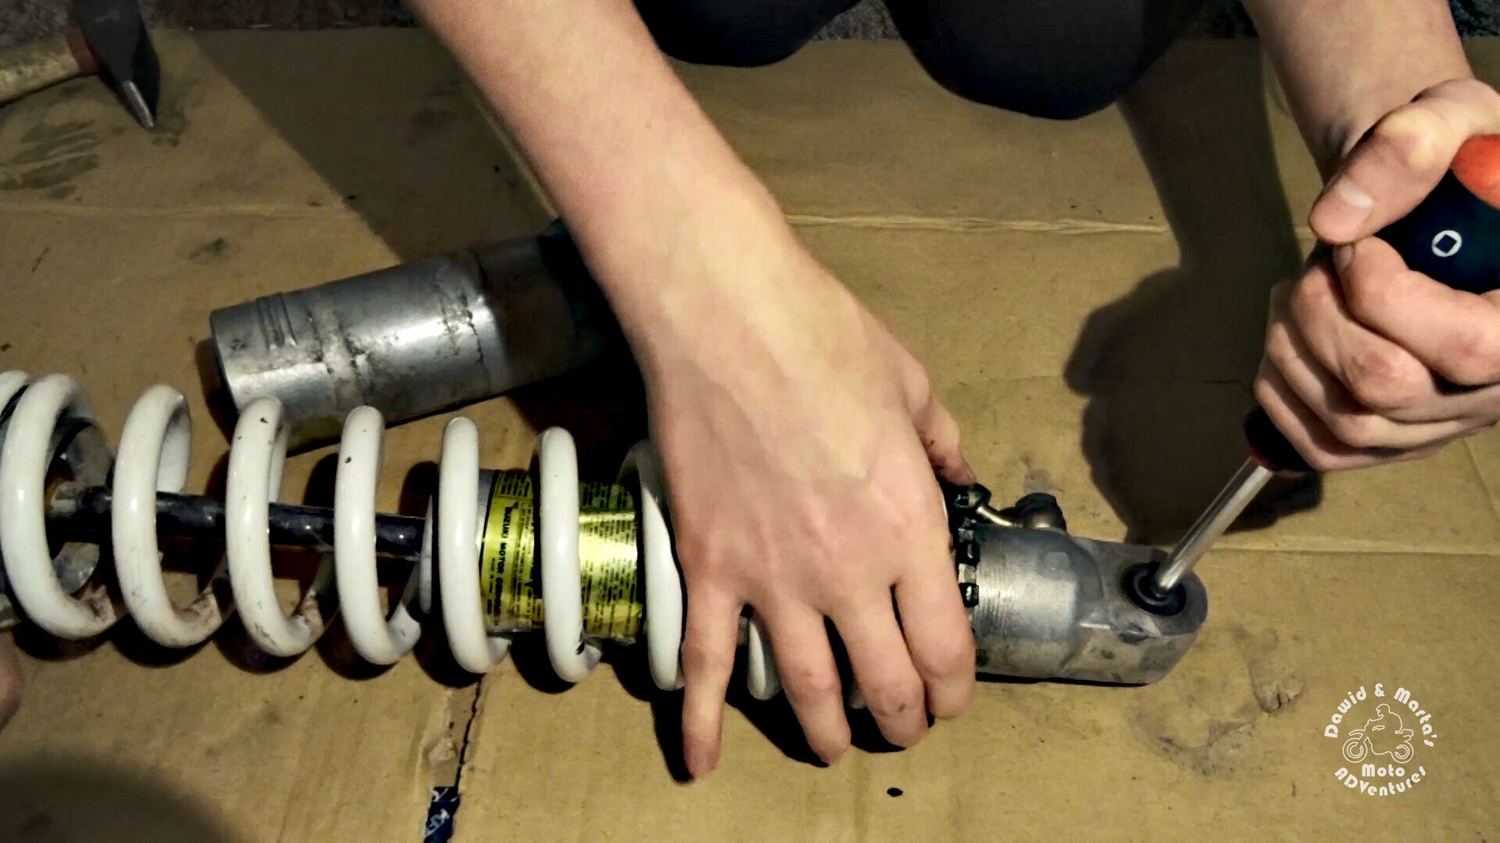
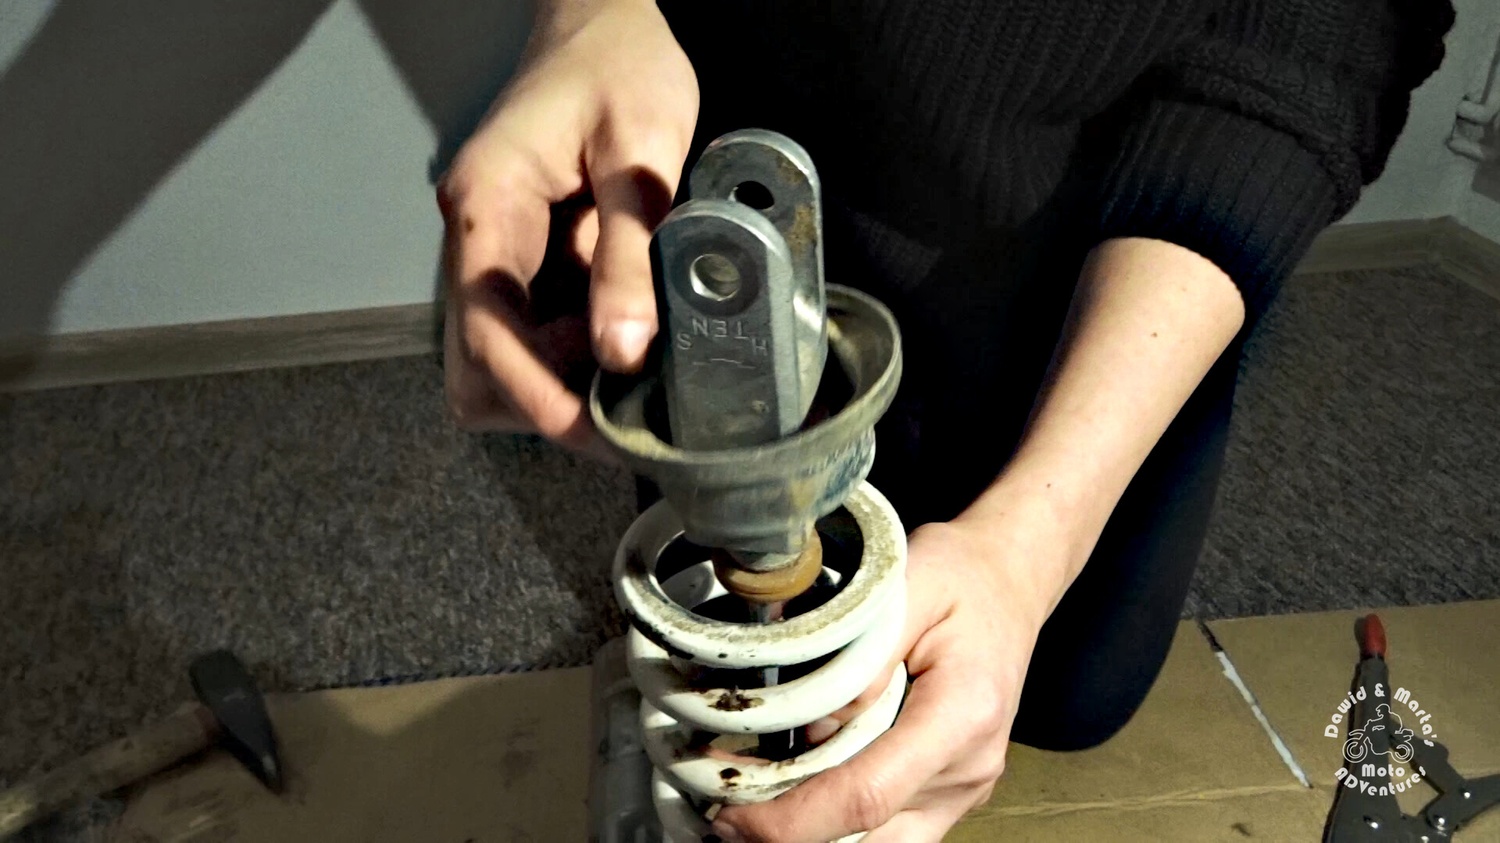
After that we should have enough space to remove two semicircle spring blockers at the clevis side.

5. Removing spring blockers
Removing spring blockers
5. Removing spring blockers
Removing spring blockers

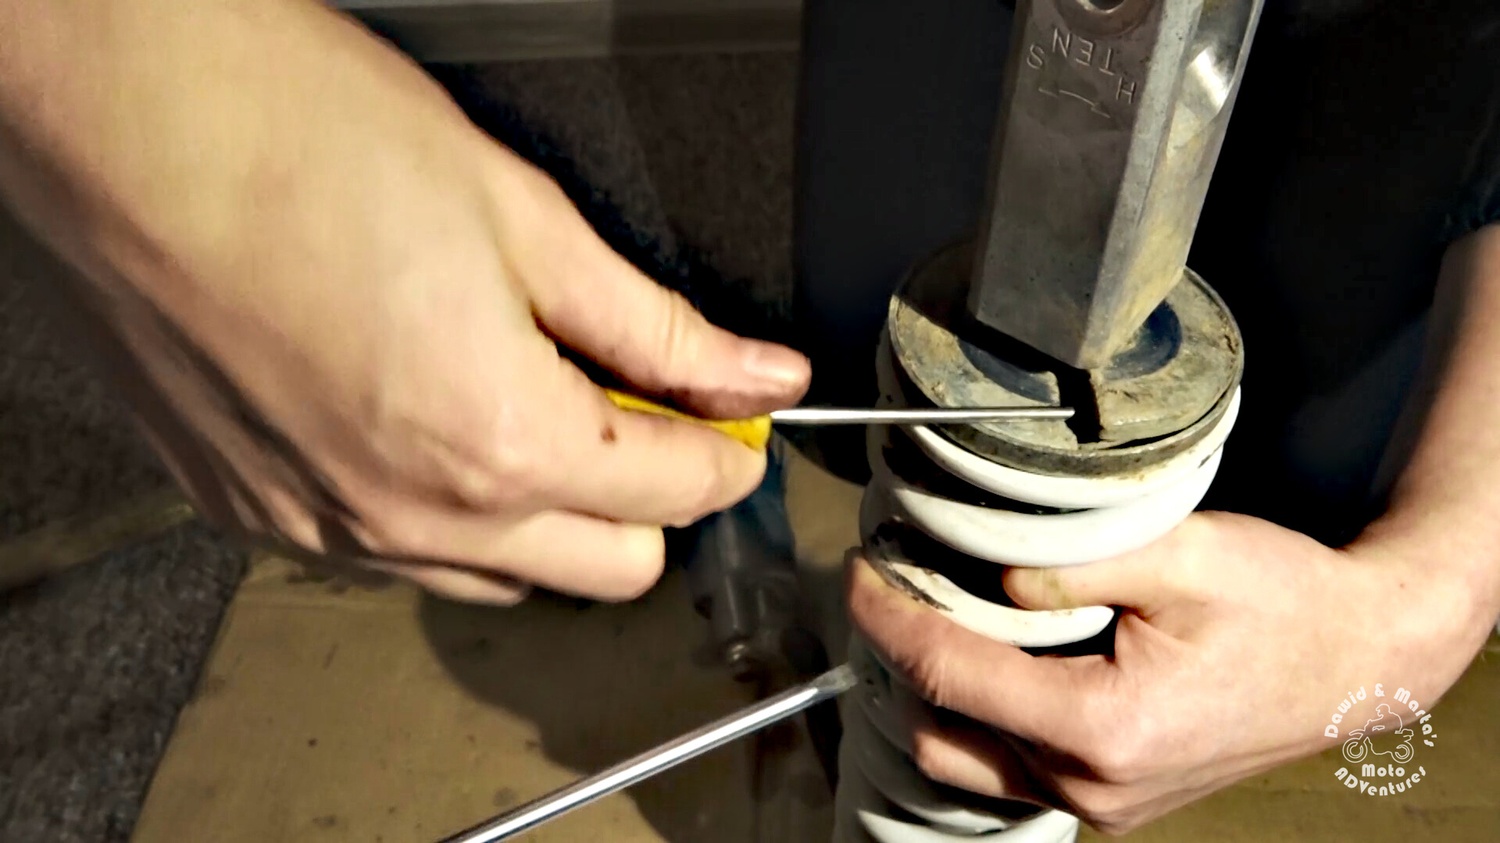
When the blockers are gone, we can release the spring.

6. Rear shock spring disassemble in DR350
First the collar…
6. Rear shock spring disassemble in DR350
First the collar…
6. Removing spring during rear shock rebuild for DR350
And then the spring
6. Removing spring during rear shock rebuild for DR350
And then the spring

Finally we can remove the spring preload adjuster locking ring and the spring preload adjuster.

10. Spring preload adjuster removal from the rear shock of DR350
Unscrew down until it gets off the shock body
10. Spring preload adjuster removal from the rear shock of DR350
Unscrew down until it gets off the shock body

Disassembling the air can

After those first dismantling steps, we can take care of the air can now.

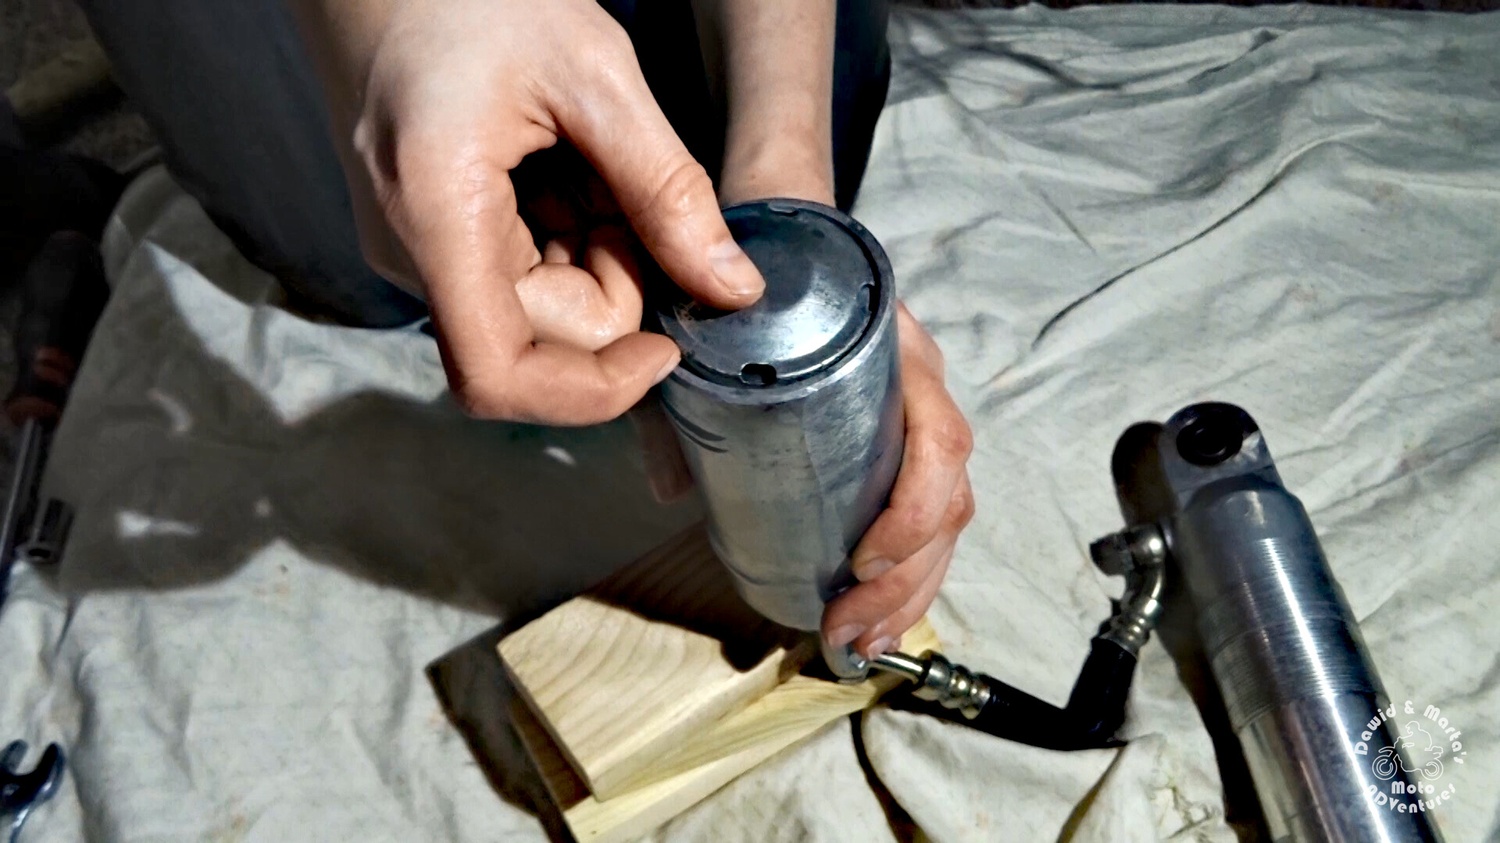
First we have to remove the air from it, so in order to get at the air valve, we take off the air can cap.

7. Removing the air can cap from the rear shock of DR350
A gentle prizing with a screwdriver should suffice
7. Removing the air can cap from the rear shock of DR350
A gentle prizing with a screwdriver should suffice

The air valve you’ll find under the cap is a standard one, so we just unscrew the air valve cap and push the valve core in.

8. Unscrewing the air valve in the rear shock air can of DR350
Just unscrew…
8. Unscrewing the air valve in the rear shock air can of DR350
Just unscrew…
9. Pushing the air valve in the air can of the rear shock of Suzuki DR350
And push
9. Pushing the air valve in the air can of the rear shock of Suzuki DR350
And push

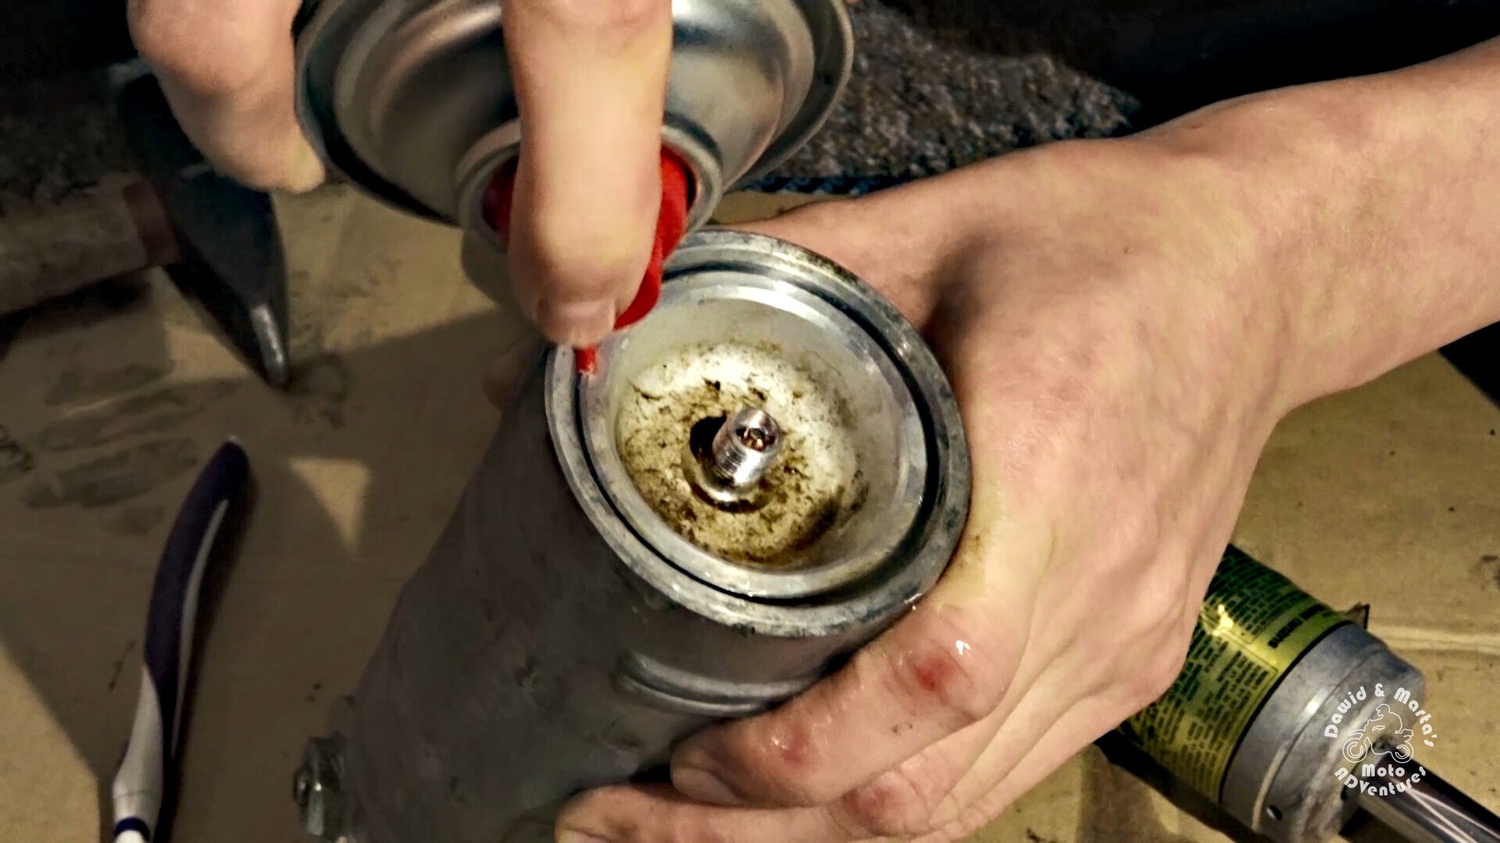
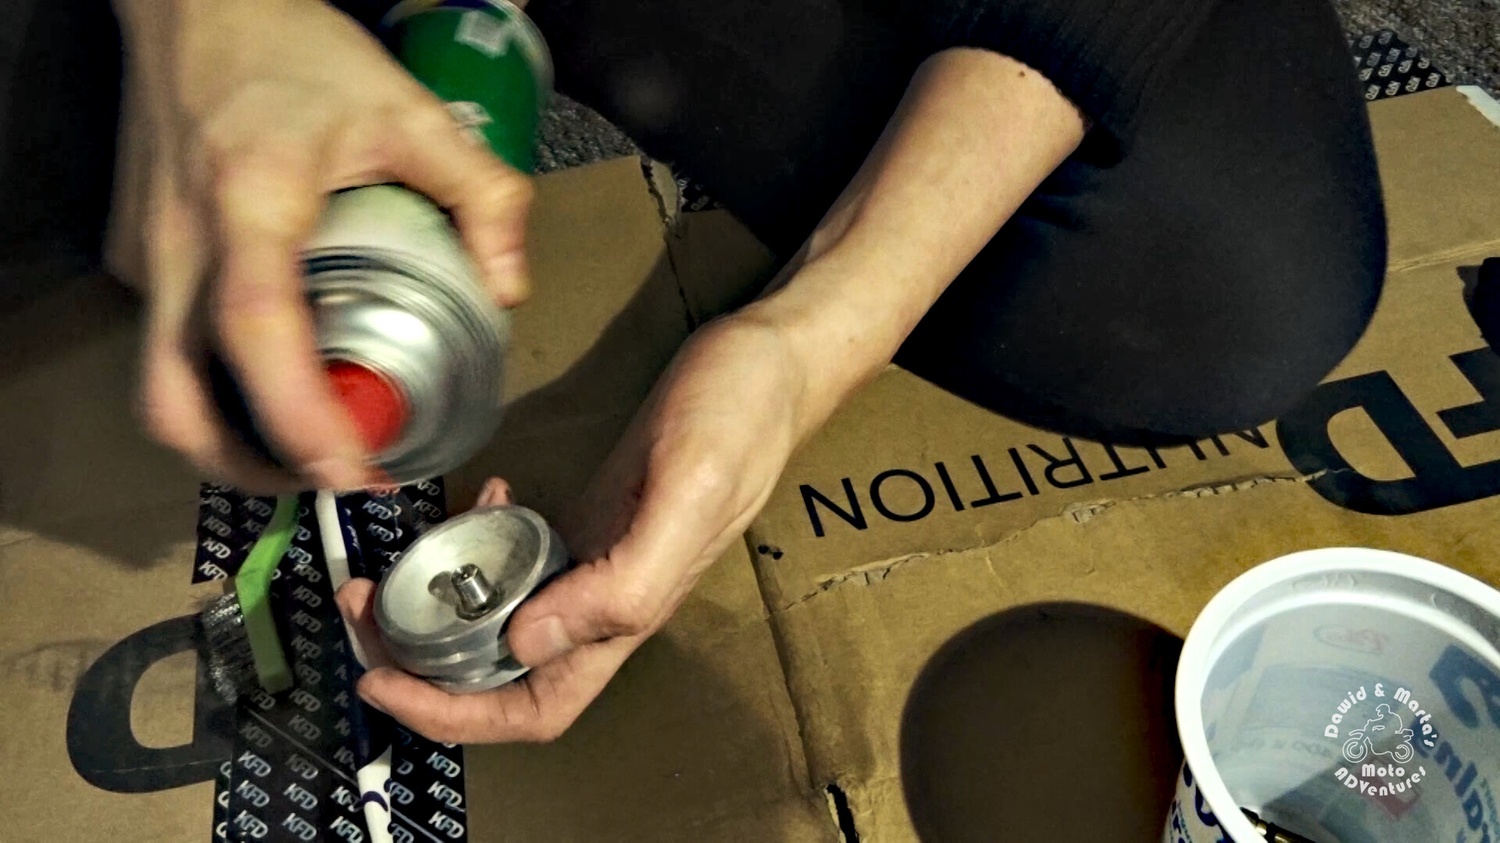
Before opening the air can, we clean up the groove from dirt using a brake cleaner and a brush. In the end I’ve also used compressed air to limit the probability that some sand will come into the can. It may be hard to then turn it out from the can (╯︵╰,)

12. Cleaning air can opening during the rear shock rebuild for Suzuki DR350
Applying some break cleaner
12. Cleaning air can opening during the rear shock rebuild for Suzuki DR350
Applying some break cleaner
13. Cleaning air can opening with compressed air during the rear shock rebuild of Suzuki DR350
Getting rid of sand with compressed air
13. Cleaning air can opening with compressed air during the rear shock rebuild of Suzuki DR350
Getting rid of sand with compressed air

When the cleaning is done, in order to open the can, we push the cover with valve inside it.

14. Opening the rear shock air can with a hammer
You may need to use some hammer help in the beginning
14. Opening the rear shock air can with a hammer
You may need to use some hammer help in the beginning

If you decide that you also need a hammer for this step, then be gentle. You only want to make it more easy to push further with hands.

15. Opening the air can with hands - rear shock rebuild of DR350
Now we can utilize our precious hands
15. Opening the air can with hands - rear shock rebuild of DR350
Now we can utilize our precious hands

After pressing the cover a little, it’s good to release the pressure by opening the valve. It will be easier to push the cover further.

16. Releasing the prssure in the air can
Just push the valve core in again
16. Releasing the prssure in the air can
Just push the valve core in again

When the cover securing ring in its groove is visible and there is enough space to remove it, then we can stop wrestling with the cap. The cap will be released when we get rid of the ring.

17. The air can cover securing ring in the rear shock of DR350
The securing ring for which we are looking for
17. The air can cover securing ring in the rear shock of DR350
The securing ring for which we are looking for

I used a small flat screwdriver and a thin metal plate for this.

17.1 Removing air can cap securing ring
I prized the ring with a common feeler gauge
17.1 Removing air can cap securing ring
I prized the ring with a common feeler gauge

Now we have to pull the cover back out. The simplest way to do it is just to connect an air pump to the valve and pump some air inside.
It should pop out by itself.

18 Opening the air can cover with pumped air
Just a little pumping…
18 Opening the air can cover with pumped air
Just a little pumping…
19 Opening the air can cover with pumped air
And it’s done!
19 Opening the air can cover with pumped air
And it’s done!

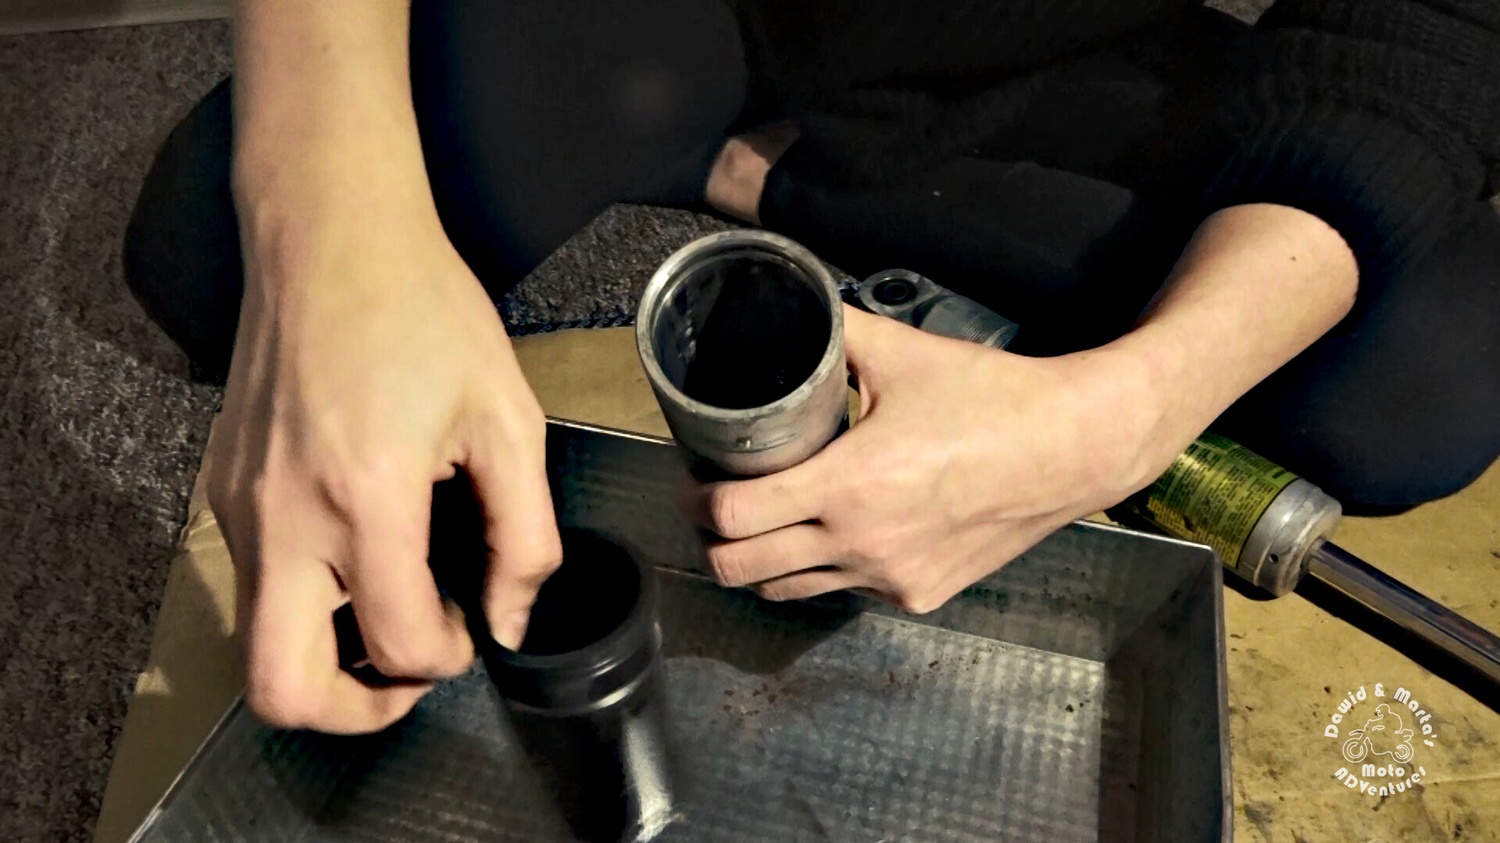
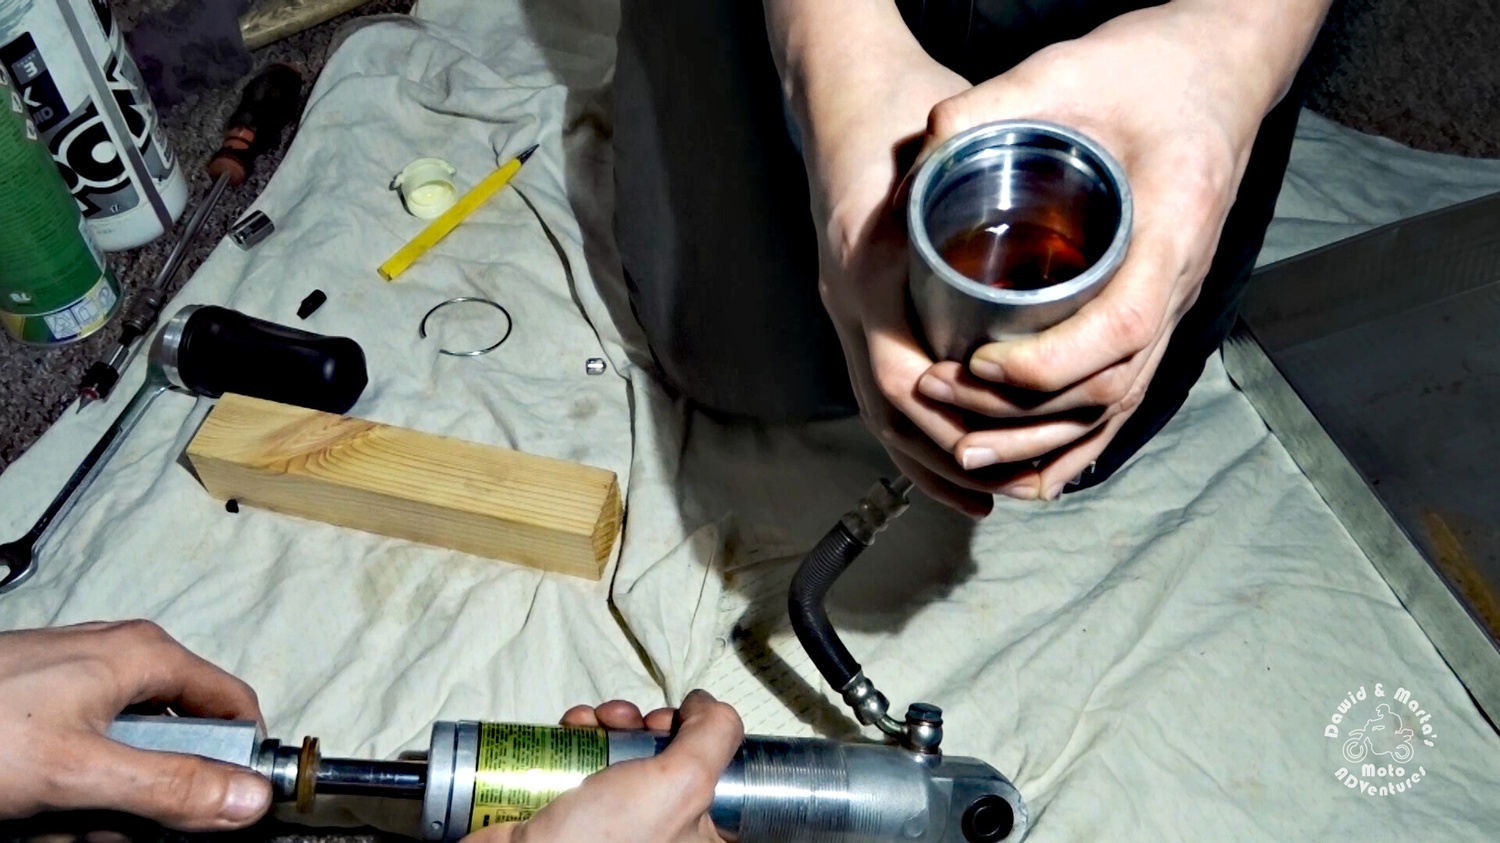
Now as the can is open, we can take out the rubber sleeve sitting there and pour out the old, nasty looking oil

19 Taking out the air can rubber sleeve during the rear shock rebuild of DR350
Out you go, sleeve
19 Taking out the air can rubber sleeve during the rear shock rebuild of DR350
Out you go, sleeve
20 Pouring out the old oil for the air can of the DR350
Blargh!
20 Pouring out the old oil for the air can of the DR350
Blargh!

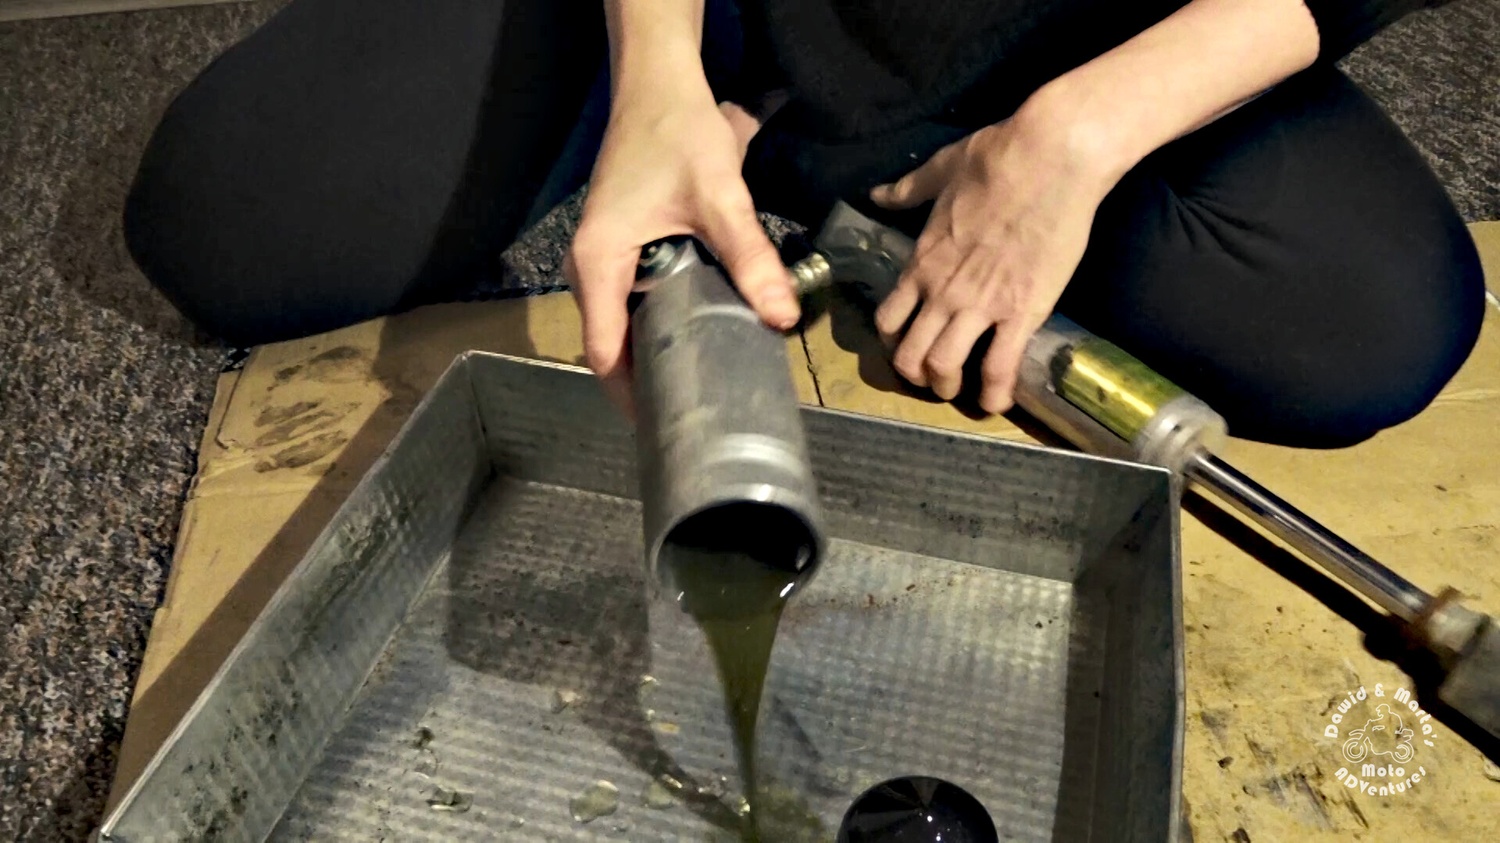
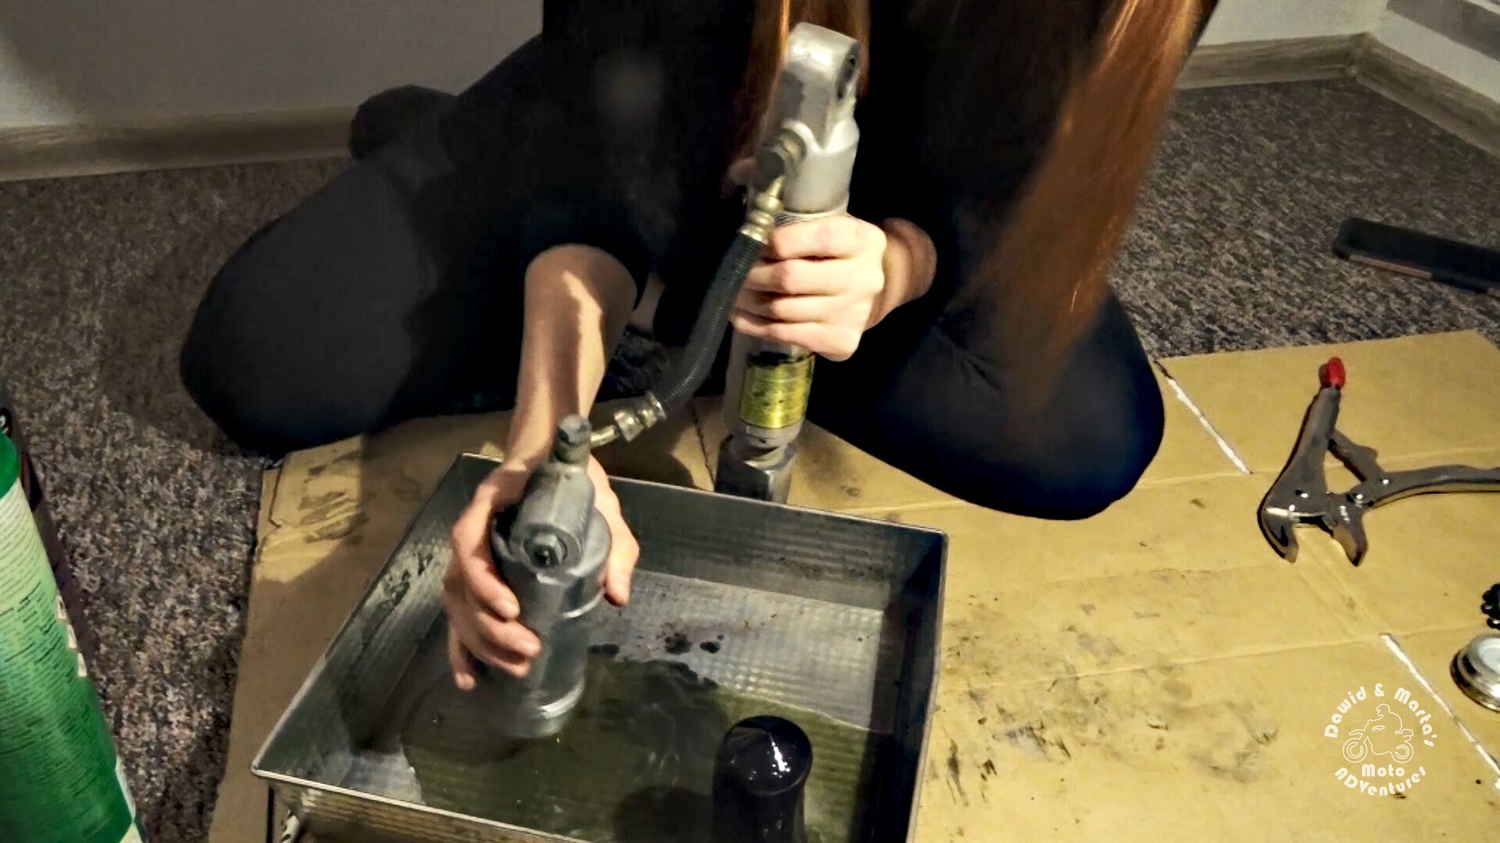
To remove the yucky oil leftovers, we need to pump the shock a little up and down.

20 Removing the old oil leftovers from the air can during the rear shock rebuild for DR350
Got to use some strength ᕙ(・‿‿・)ᕗ
20 Removing the old oil leftovers from the air can during the rear shock rebuild for DR350
Got to use some strength ᕙ(・‿‿・)ᕗ
20 Removing the old oil leftovers from the air can during the rear shock rebuild for DR350
Or find someone stronger ᕙ(・﹏・)ᕗ
20 Removing the old oil leftovers from the air can during the rear shock rebuild for DR350
Or find someone stronger ᕙ(・﹏・)ᕗ

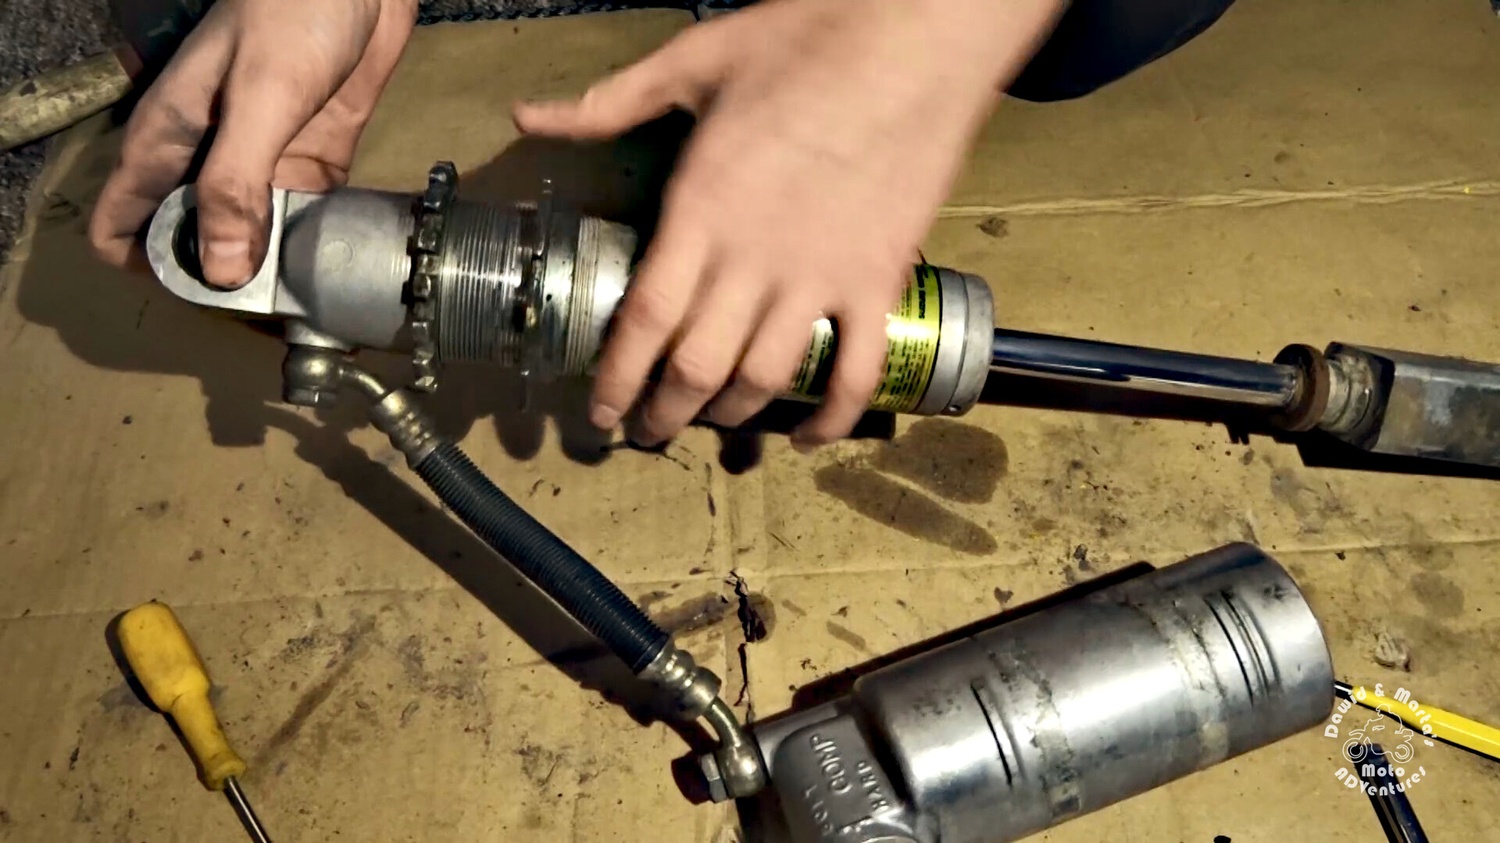
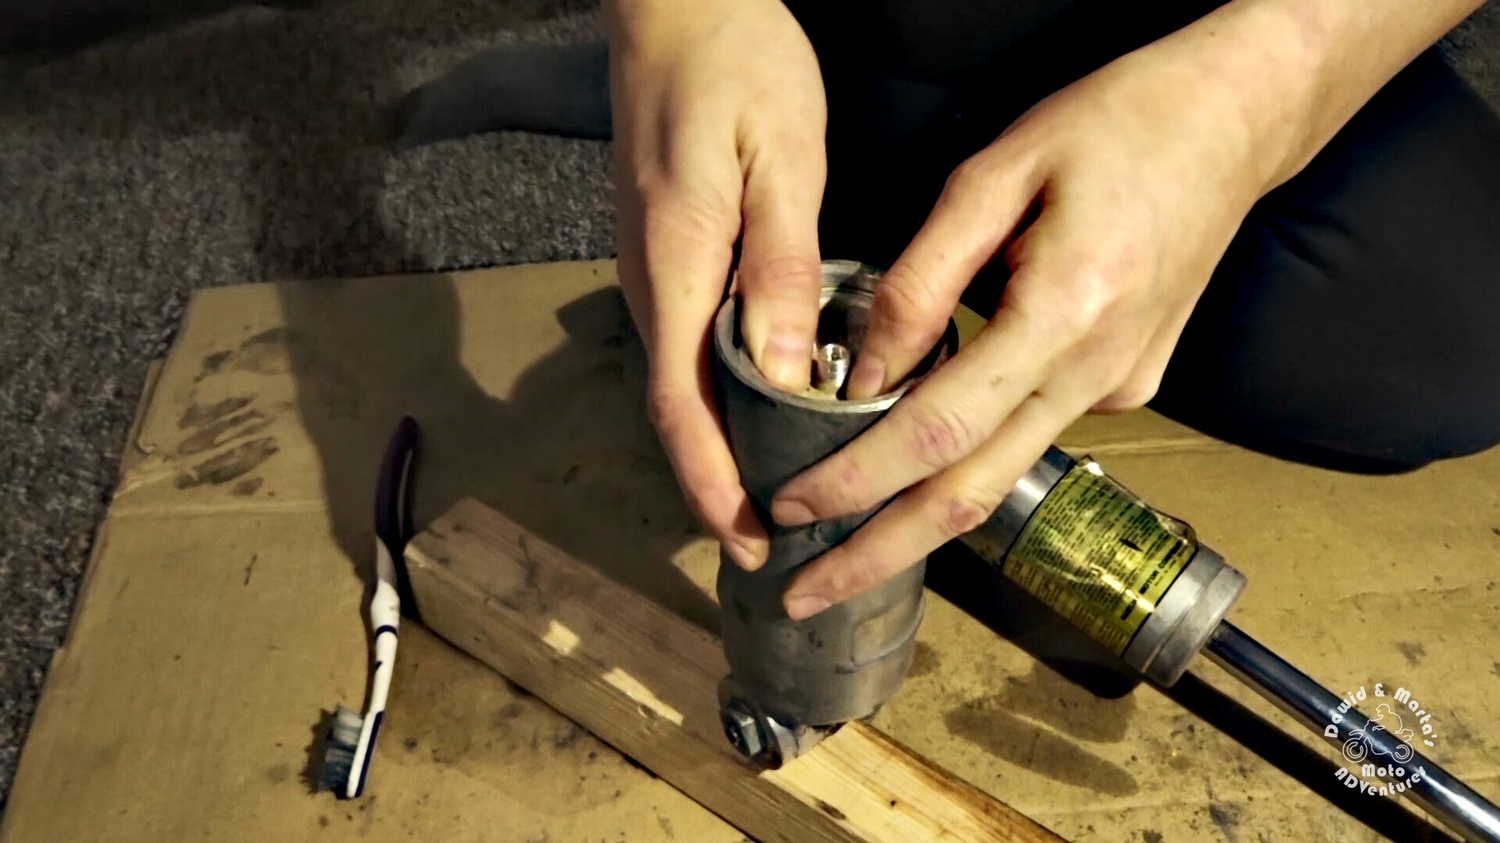
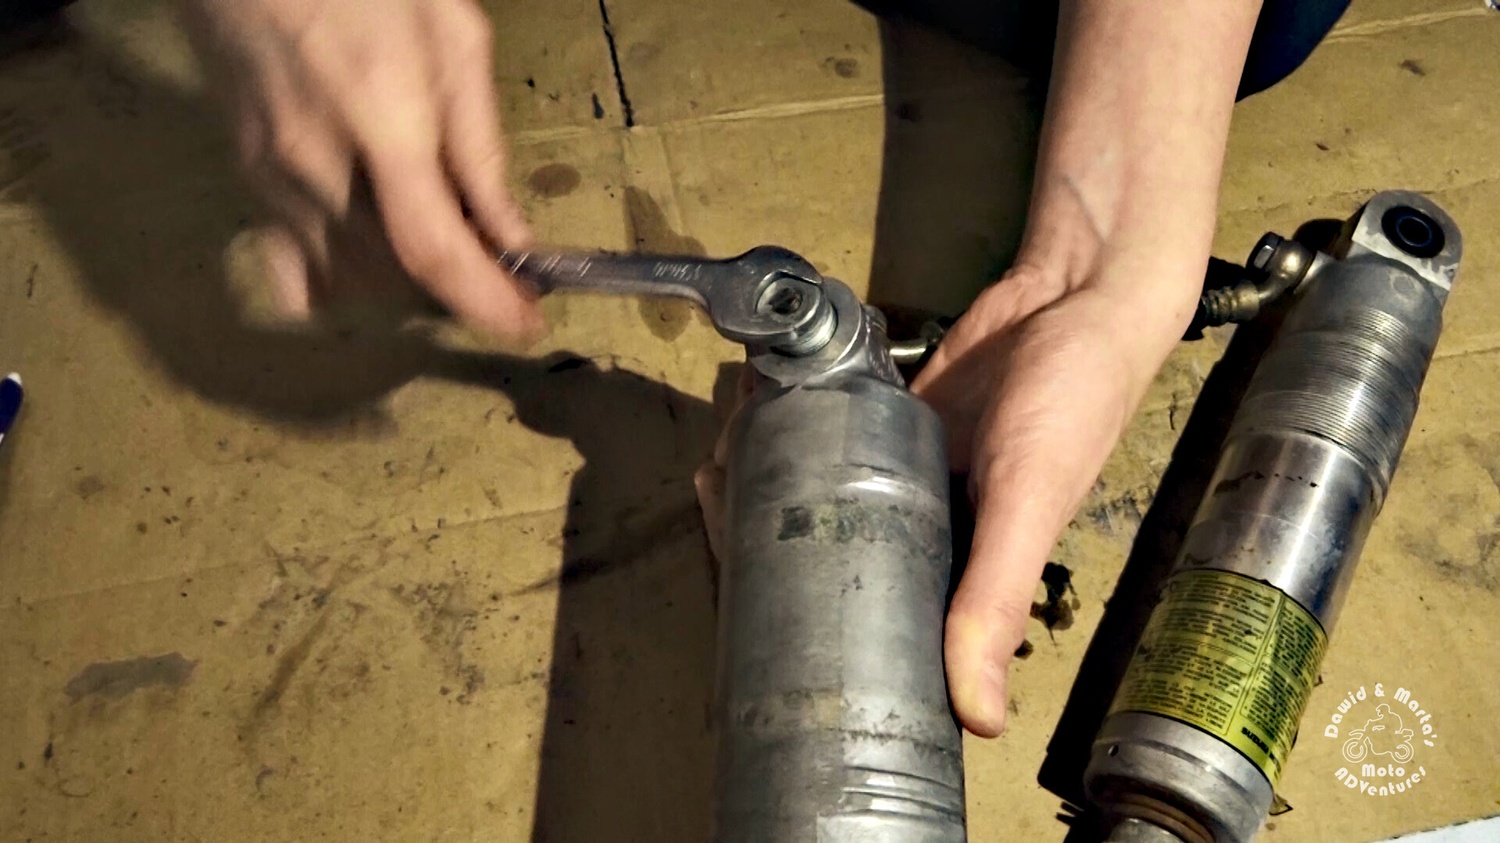
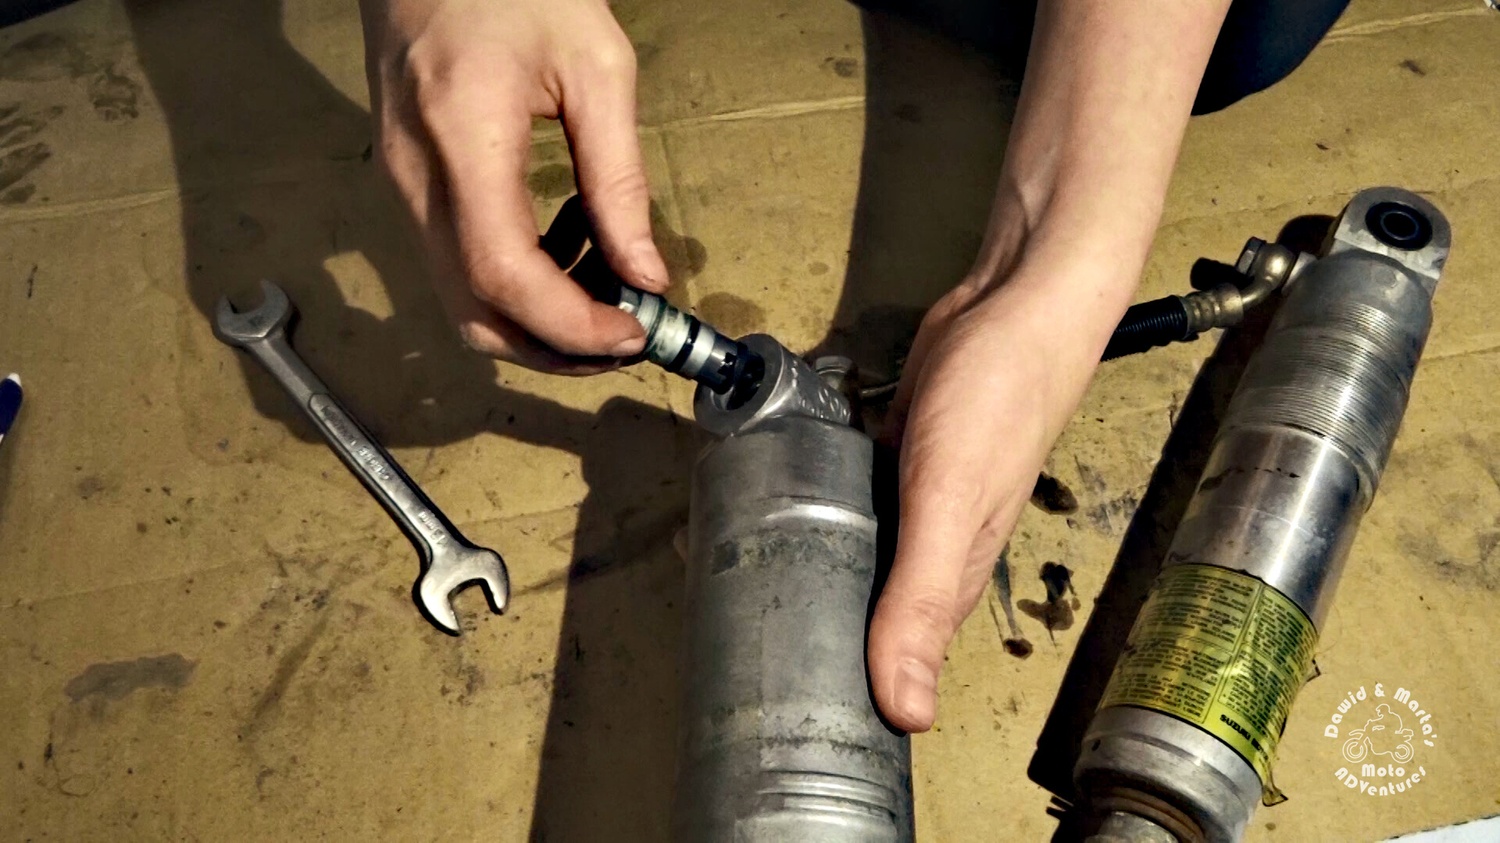
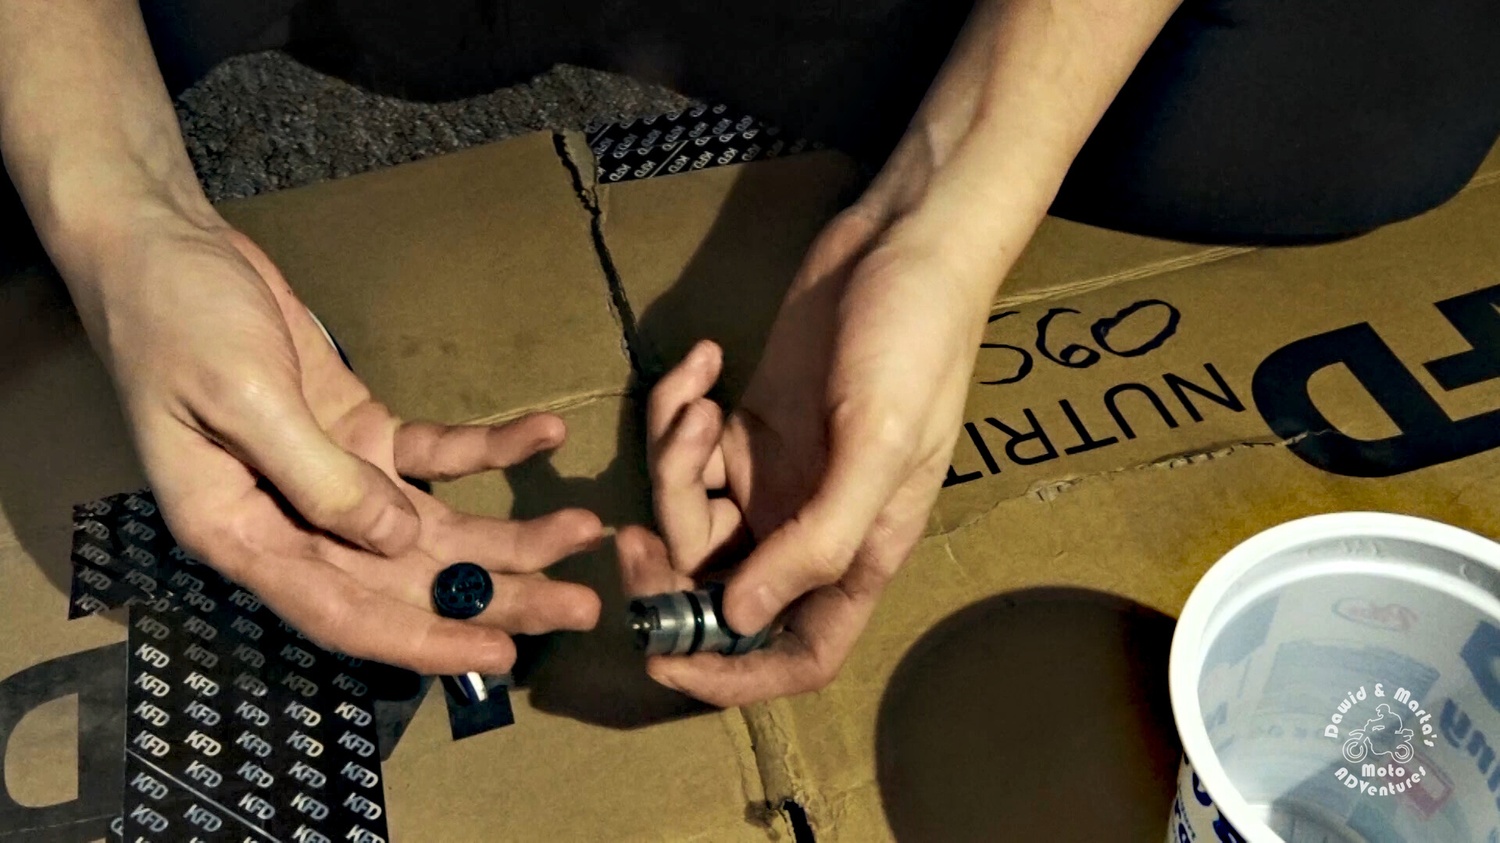
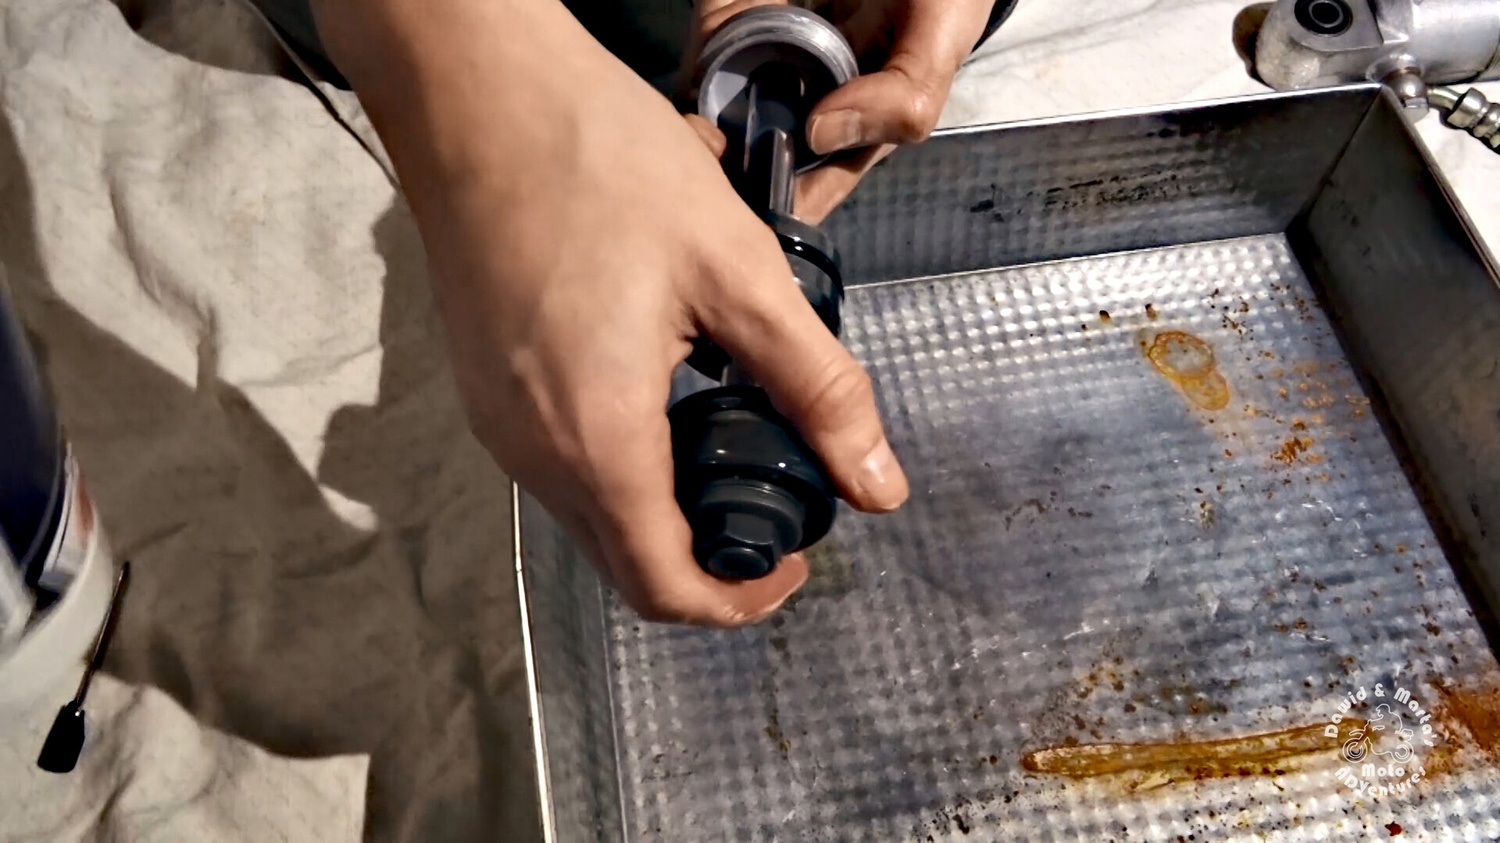
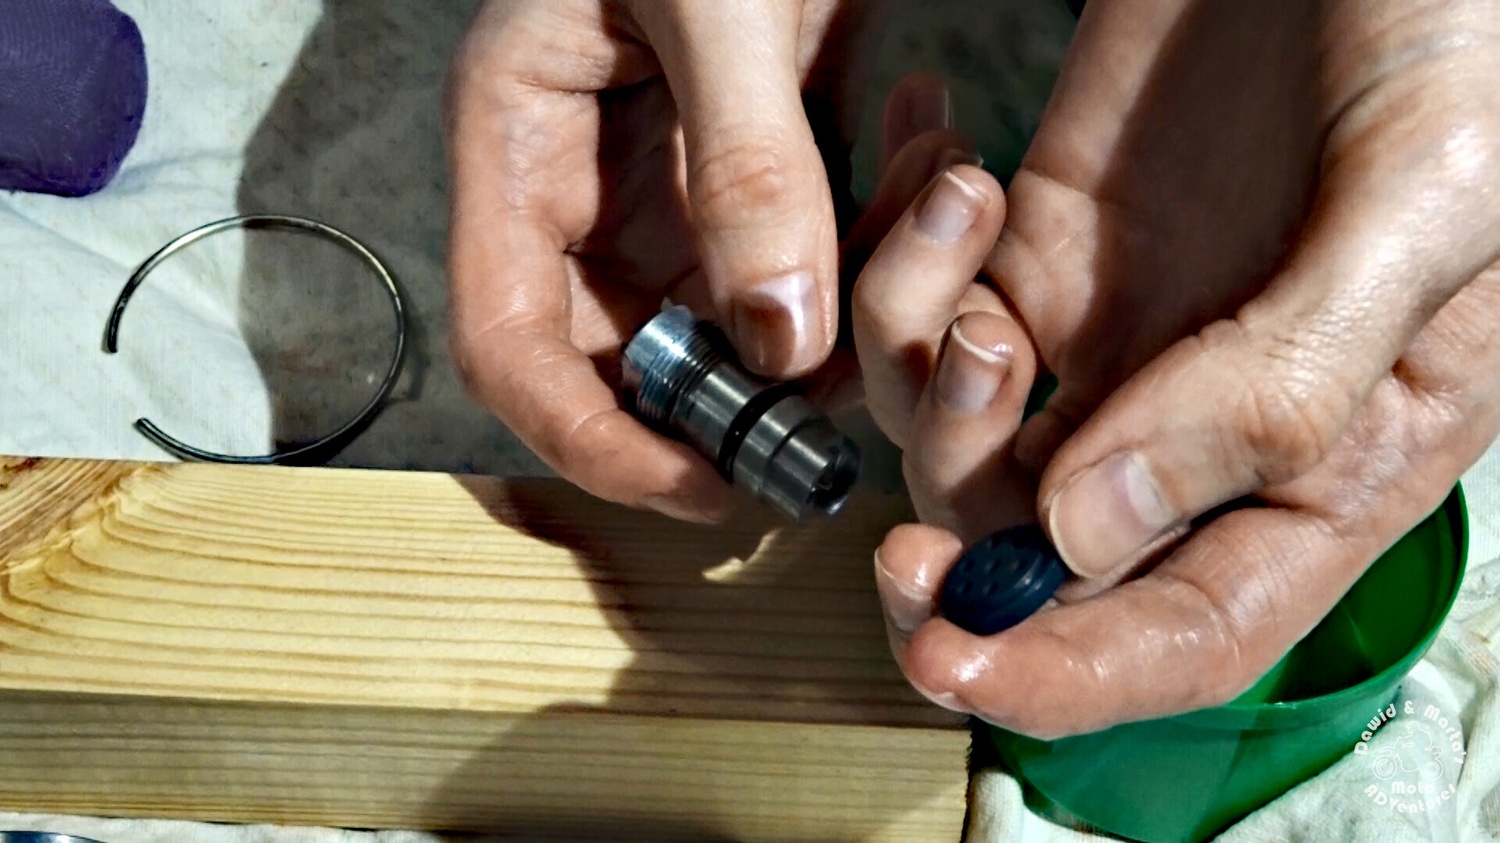
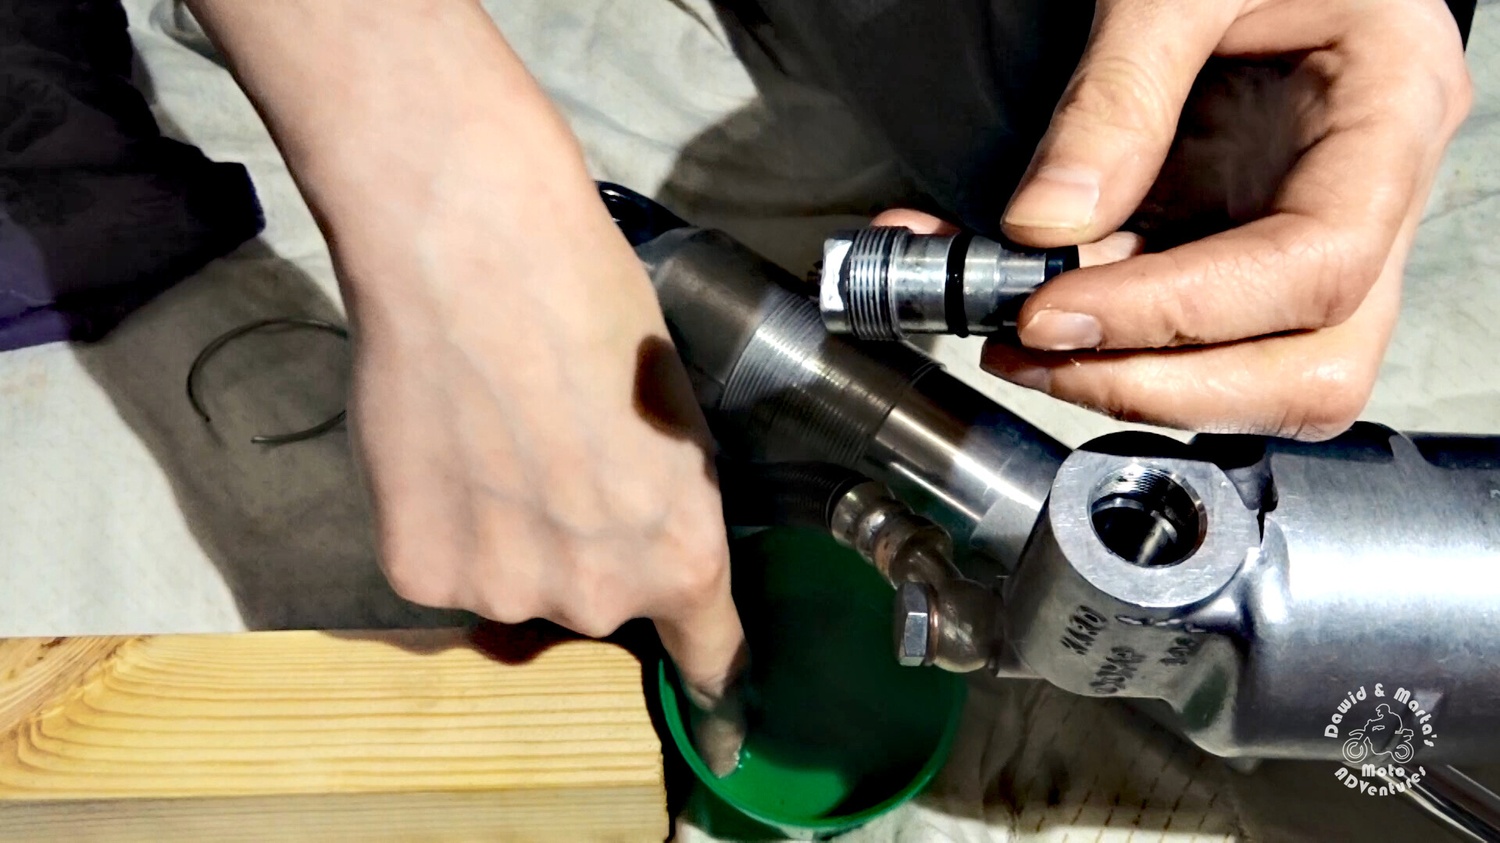
Taking the compression adjuster into parts

Next we remove the compression adjuster.

21 Unscrewing the compression adjuster during reaar shock rebuild for DR350
Unscrewing the compression adjuster
21 Unscrewing the compression adjuster during reaar shock rebuild for DR350
Unscrewing the compression adjuster
21 Unscrewing the compression adjuster during reaar shock rebuild for DR350
Here’s how the adjuster looks like at first sight…
21 Unscrewing the compression adjuster during reaar shock rebuild for DR350
Here’s how the adjuster looks like at first sight…

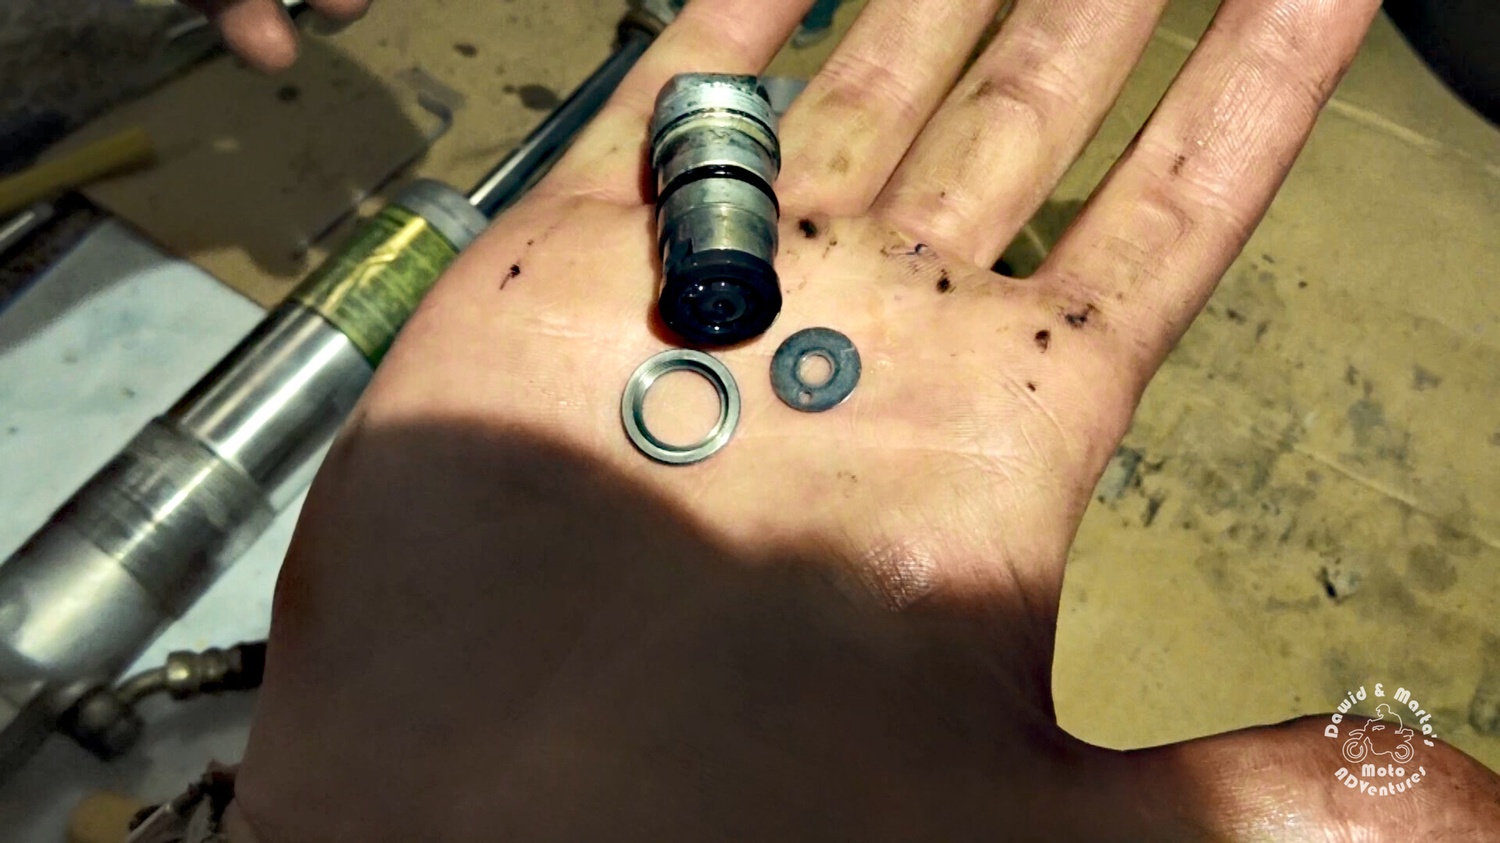
But! Be careful, as there should be two additional pieces of one way valve inside the air can and it’s better not to lose it. Make sure you take them out too. Here you can see all pieces you should collect at this step ;)

22 Suzuki DR350 compression adjuster
All the parts you should find
22 Suzuki DR350 compression adjuster
All the parts you should find

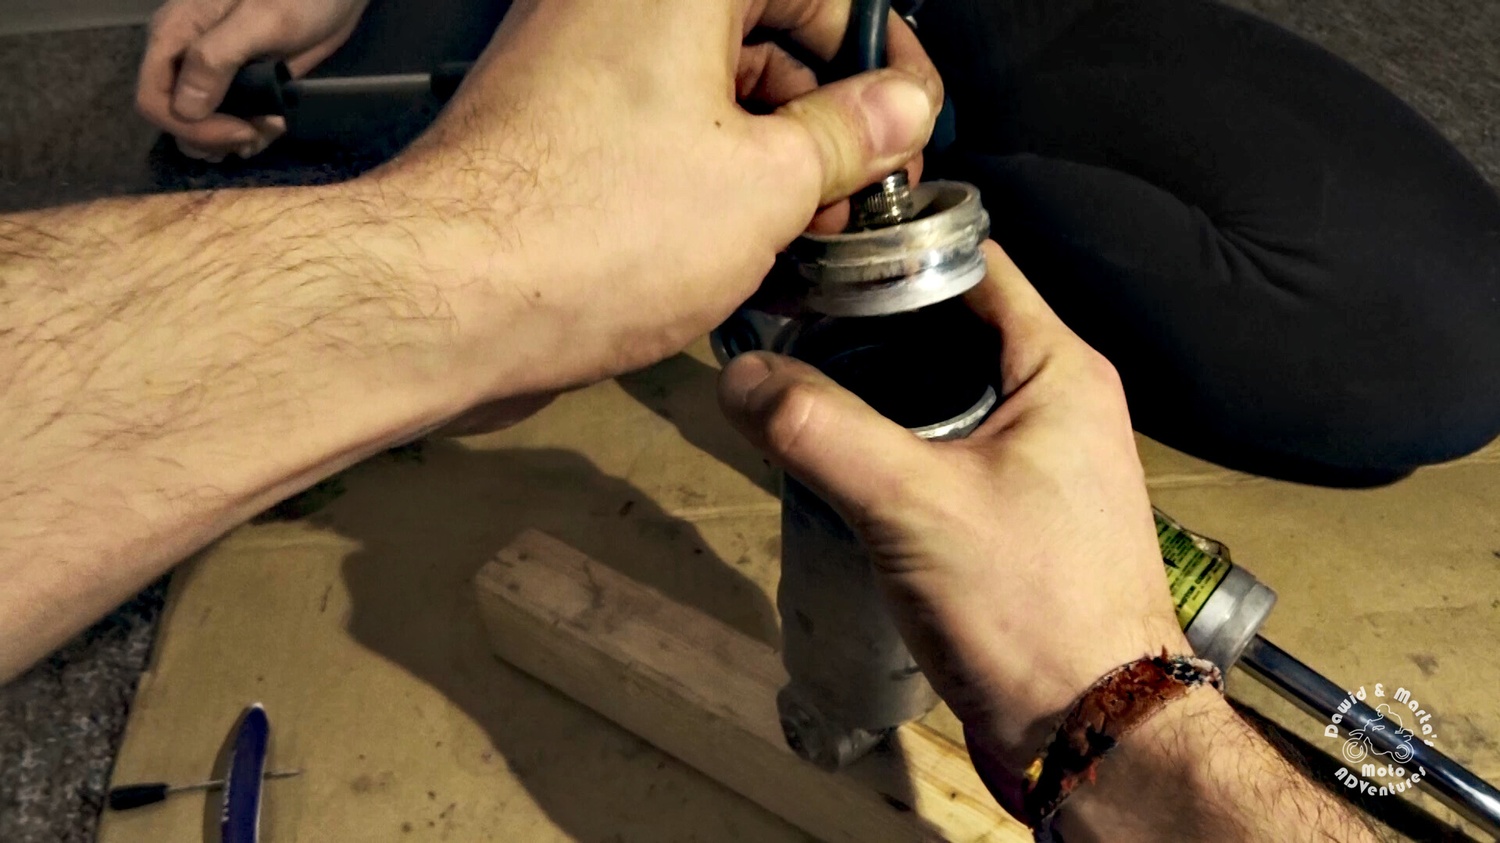
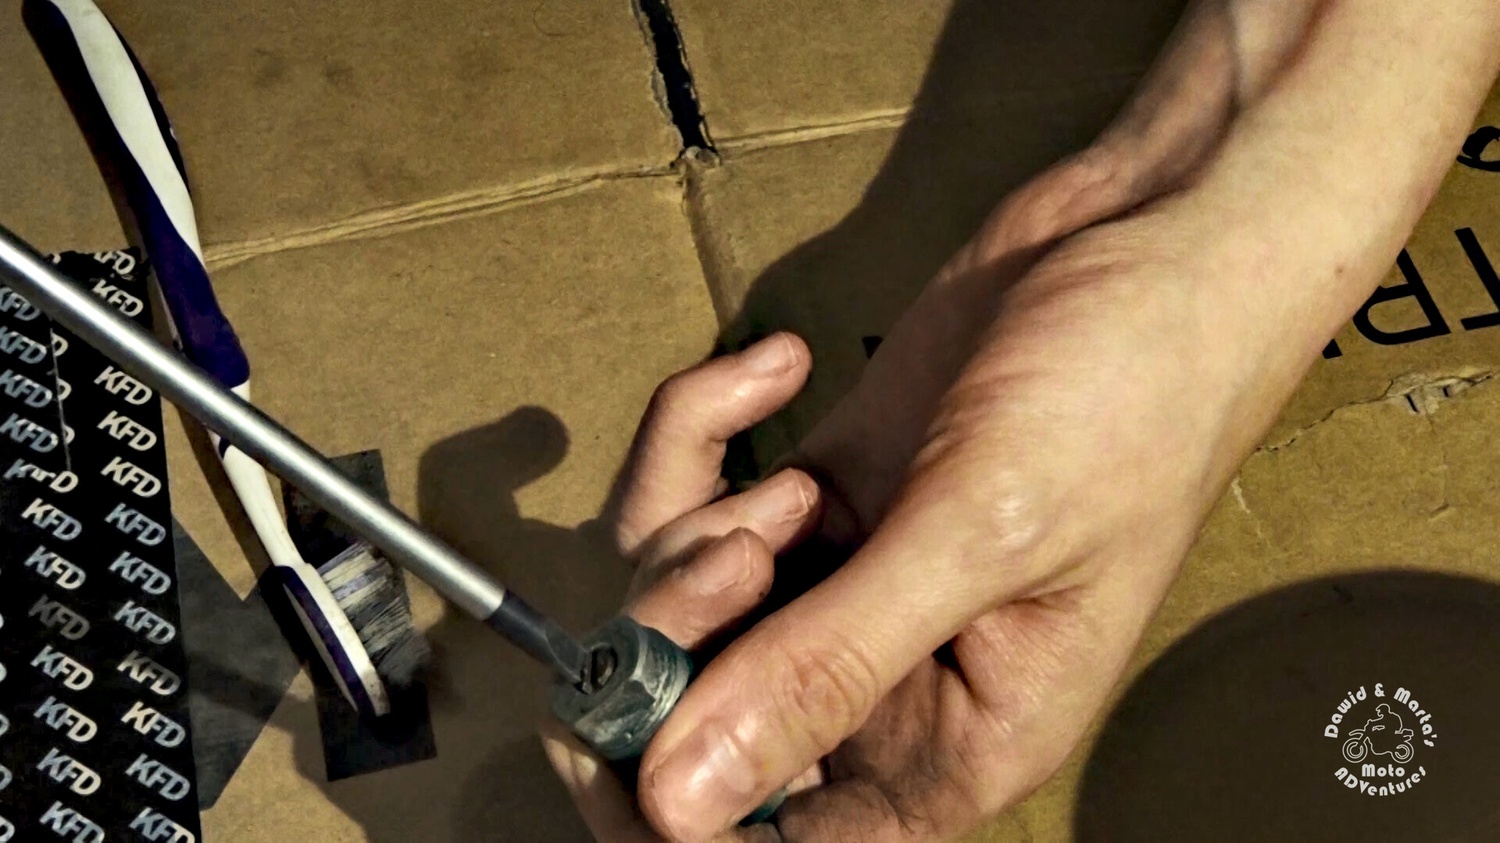
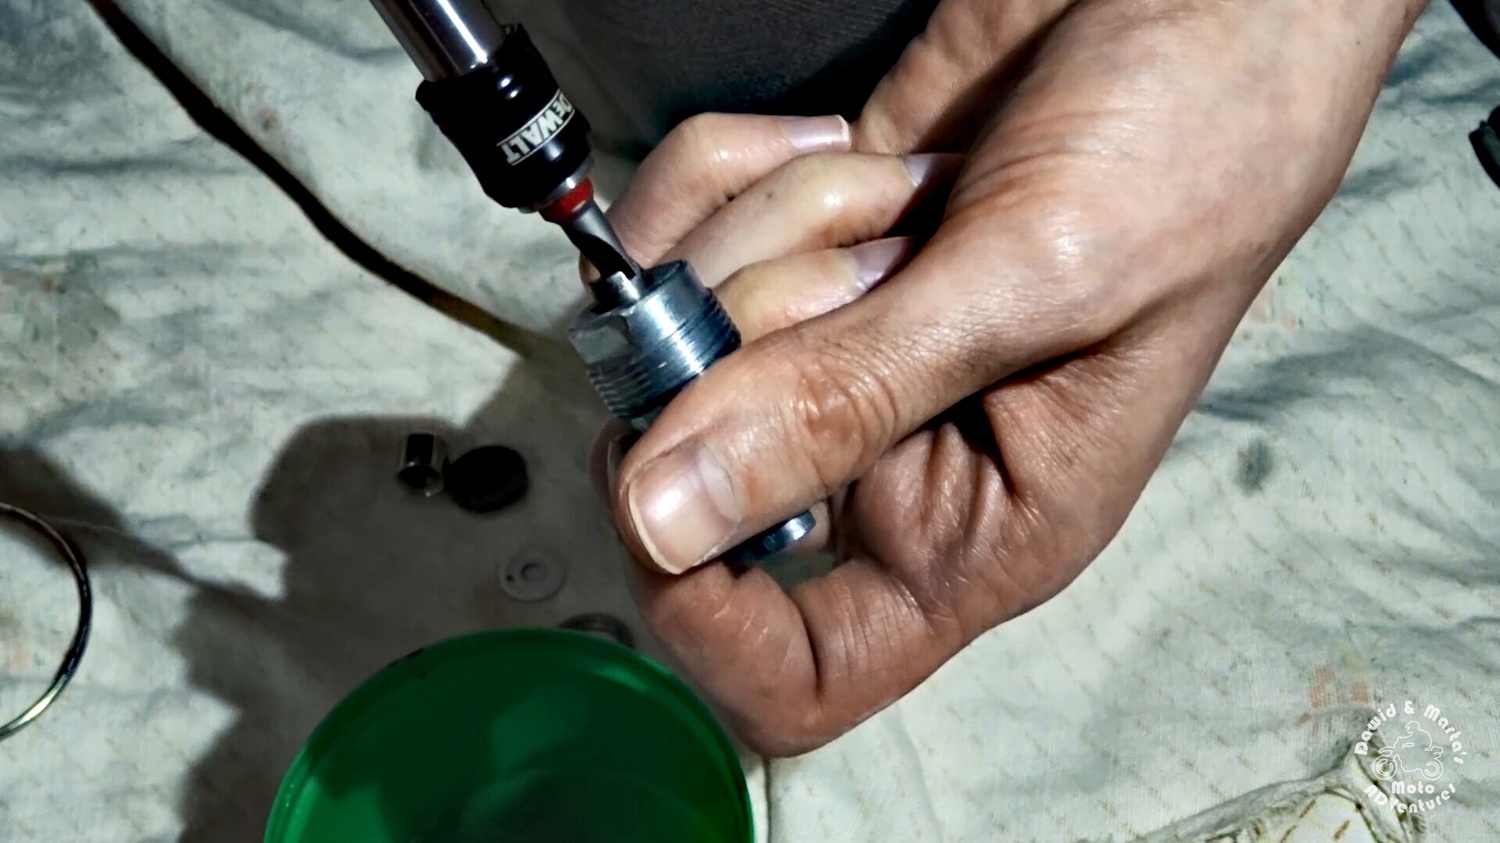
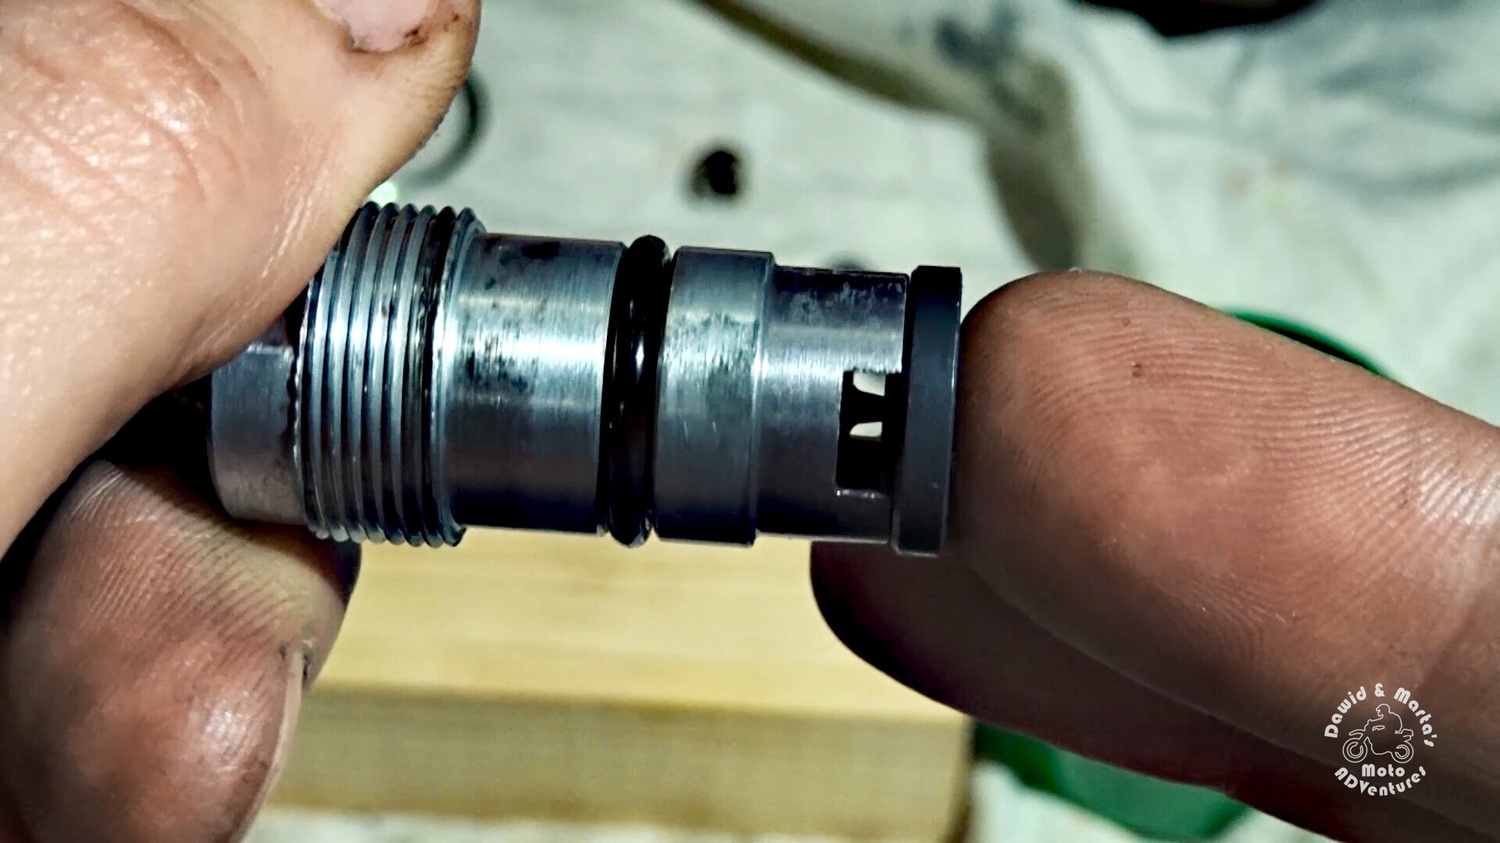
To disassemble compression adjuster first we remove the black cap and screw in the adjuster screw all the way until it will be free.

23 Compression adjuster disassembly for DR350 rear shock rebuild
Here’s the black cap off the adjuster
23 Compression adjuster disassembly for DR350 rear shock rebuild
Here’s the black cap off the adjuster
23 Compression adjuster disassembly for DR350 rear shock rebuild
Now we screw in the only screw we’ve got there
23 Compression adjuster disassembly for DR350 rear shock rebuild
Now we screw in the only screw we’ve got there
23 Compression adjuster disassembly for DR350 rear shock rebuild
And it’s freed
23 Compression adjuster disassembly for DR350 rear shock rebuild
And it’s freed

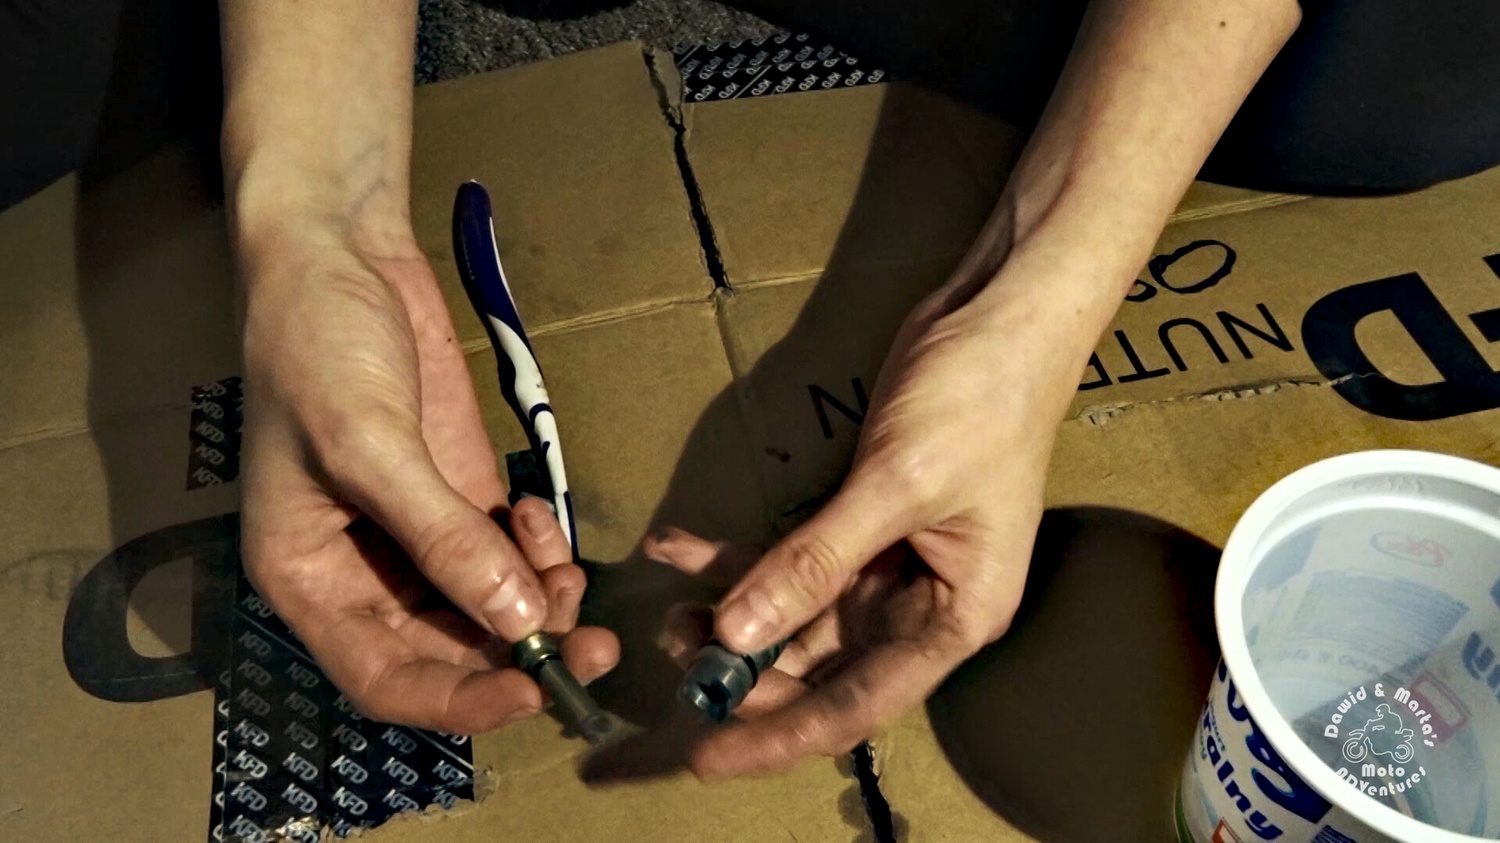
Now we have just some cleaning left. For the the air can I used the brake cleaner again. For other parts – I used an engine cleaner.

24 Cleaning the rear shock during rebuild
Using break cleaner for the air can parts
24 Cleaning the rear shock during rebuild
Using break cleaner for the air can parts
24 Cleaning the rear shock during rebuild
For other parts I used an engine cleaner
24 Cleaning the rear shock during rebuild
For other parts I used an engine cleaner
24 Cleaning the rear shock during rebuild
Spring had bath in engine cleaner too
24 Cleaning the rear shock during rebuild
Spring had bath in engine cleaner too

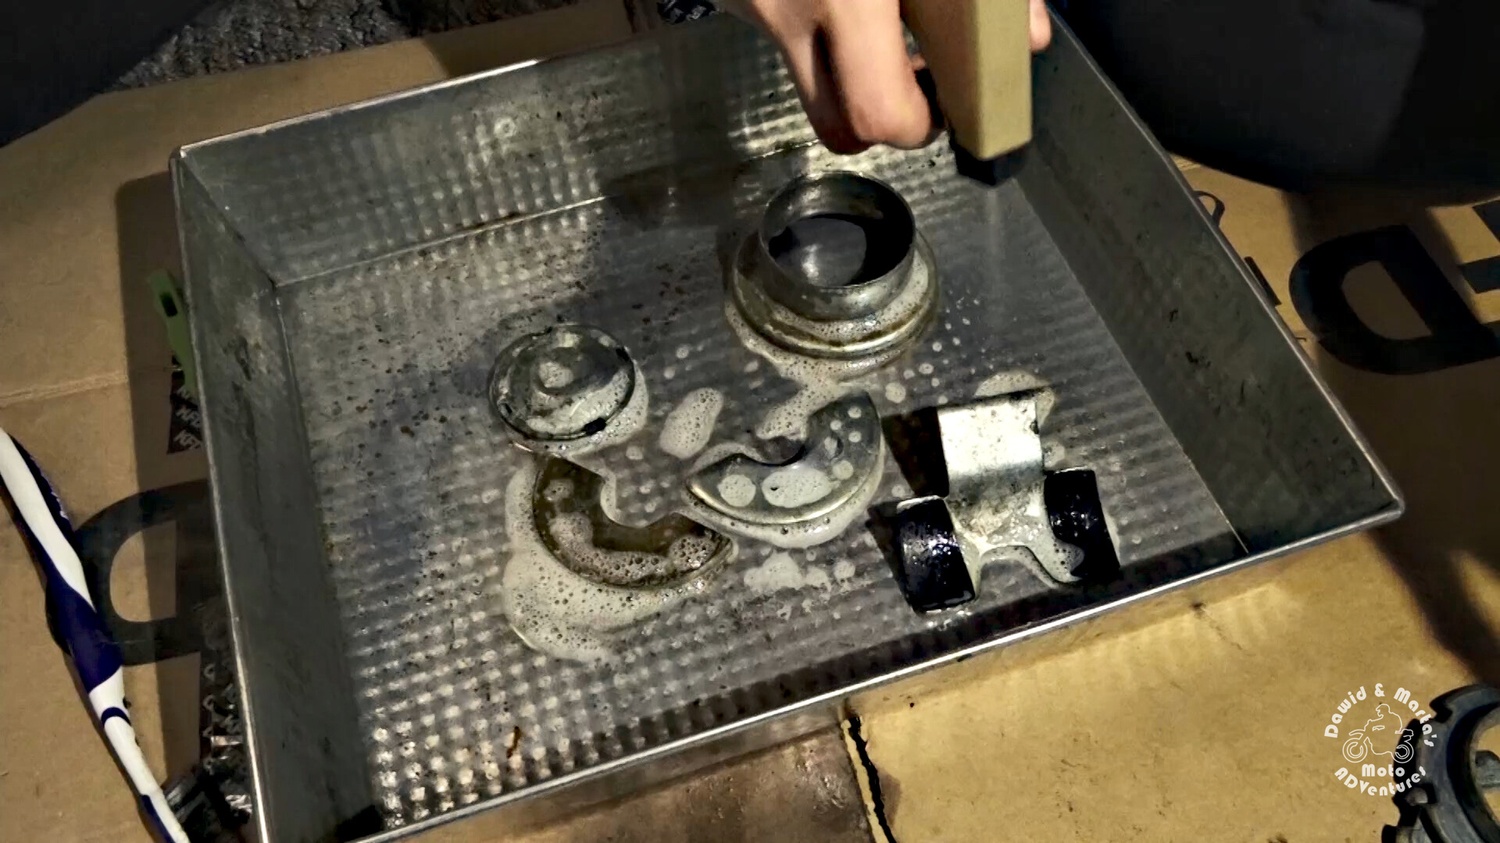
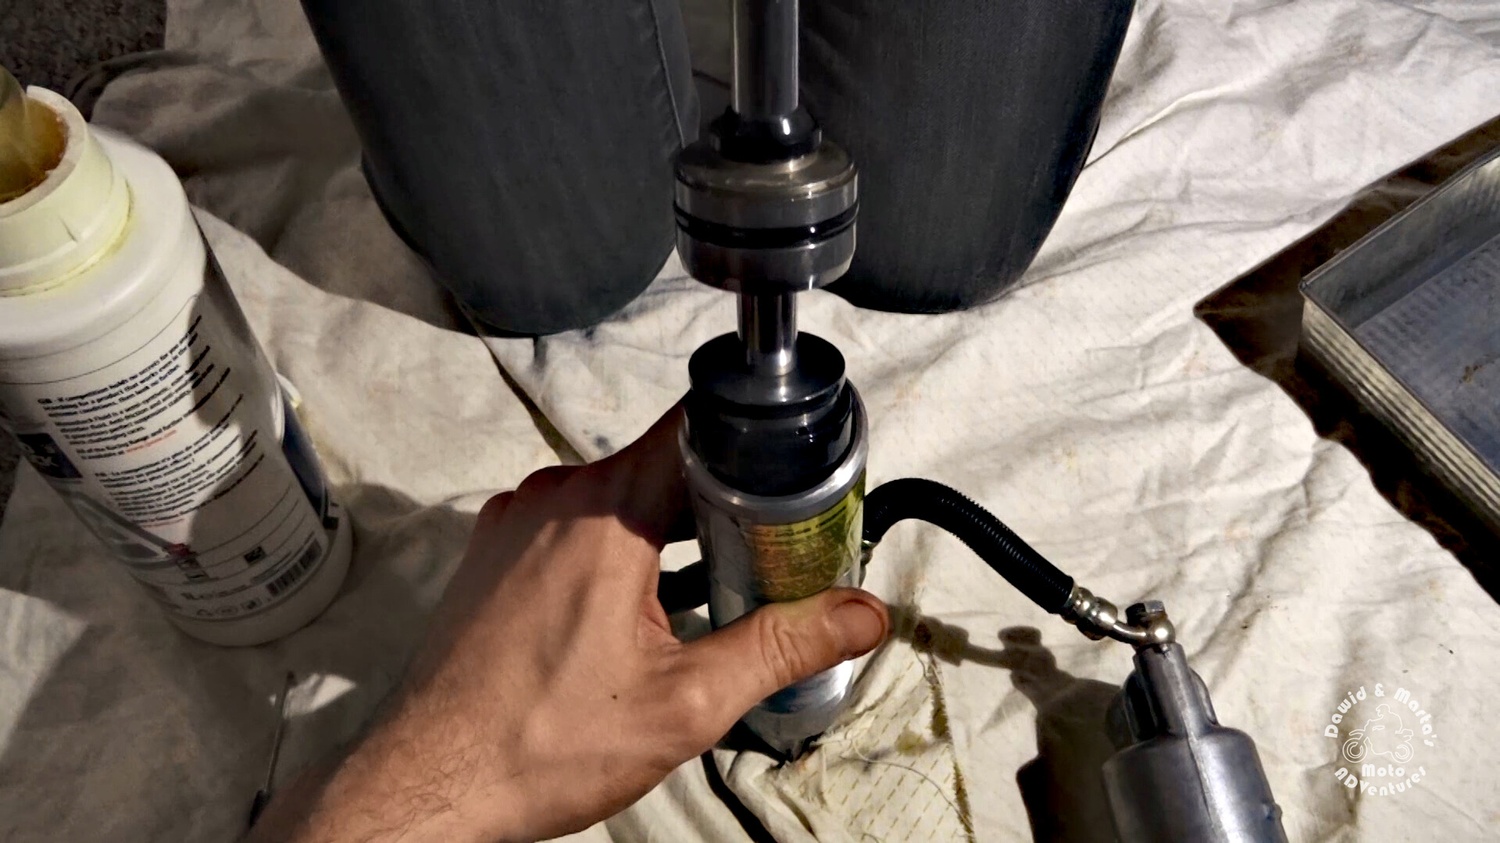
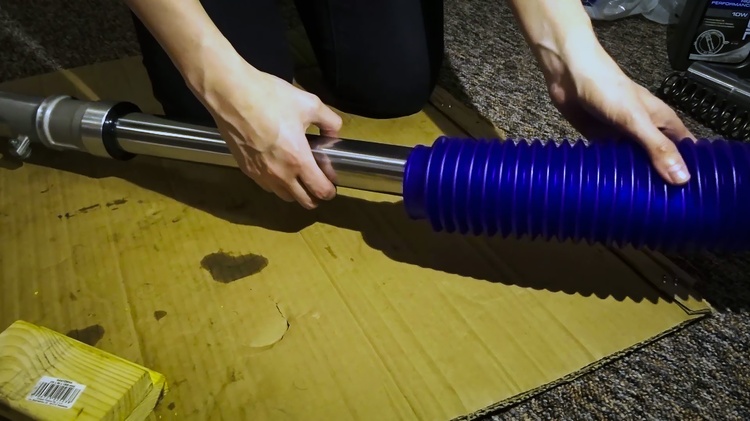
Disassembling the shock cylinder body

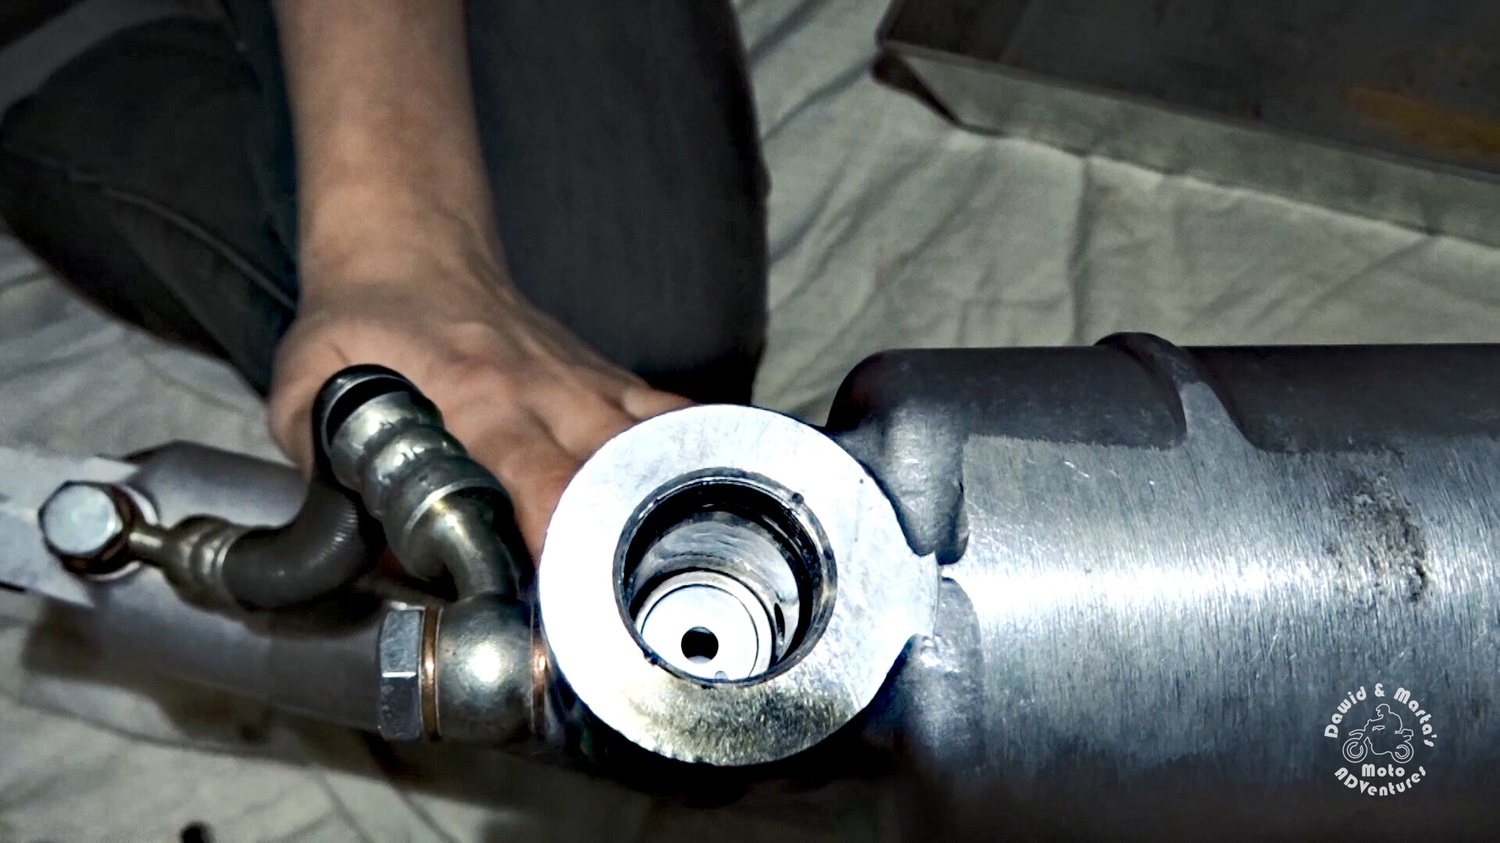
Next we will dismantle the shock cylinder body and check the piston and the sealing head.
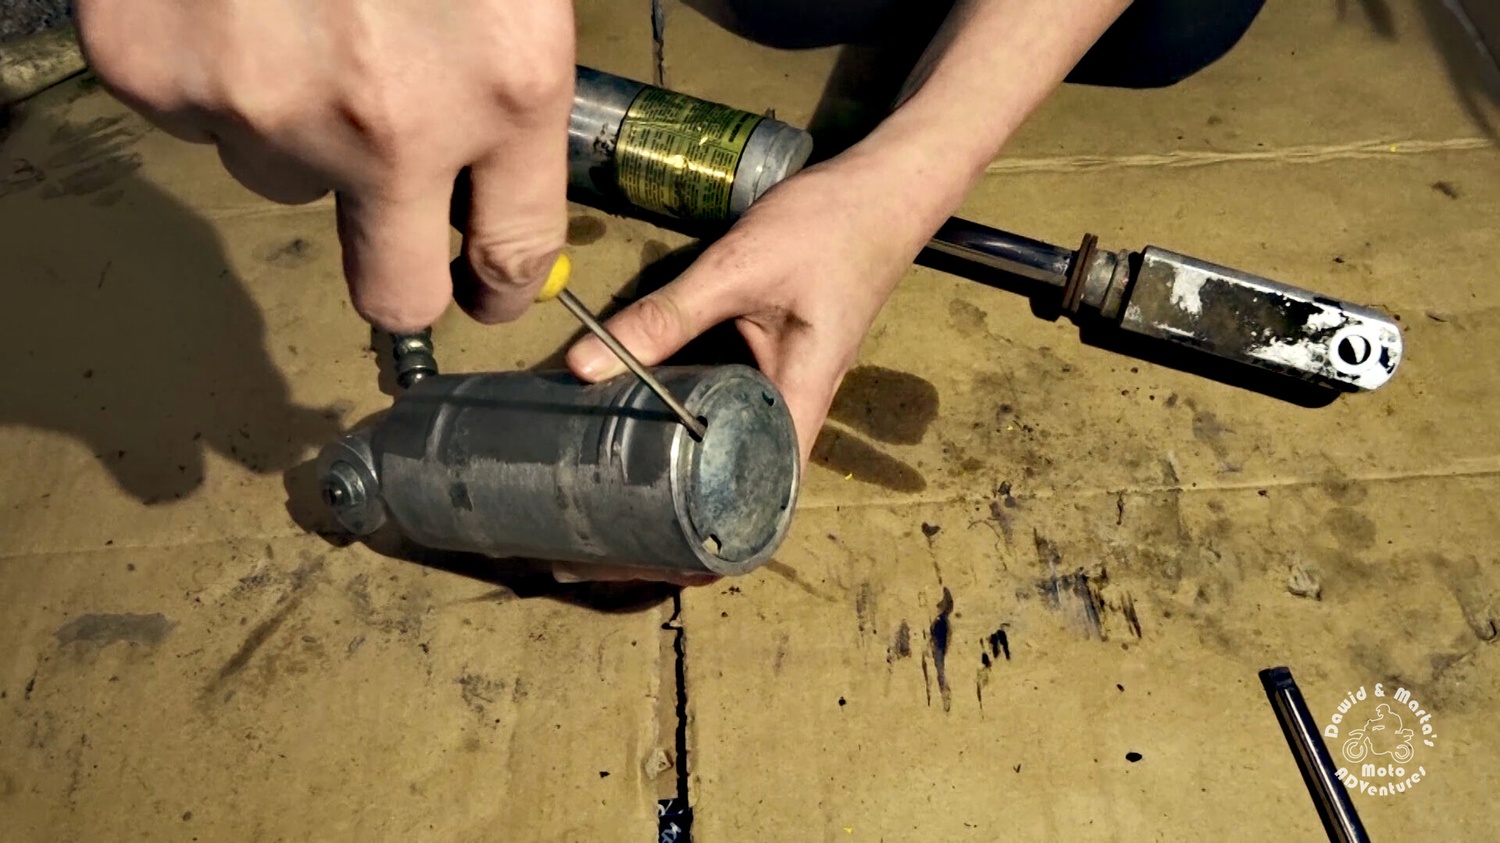
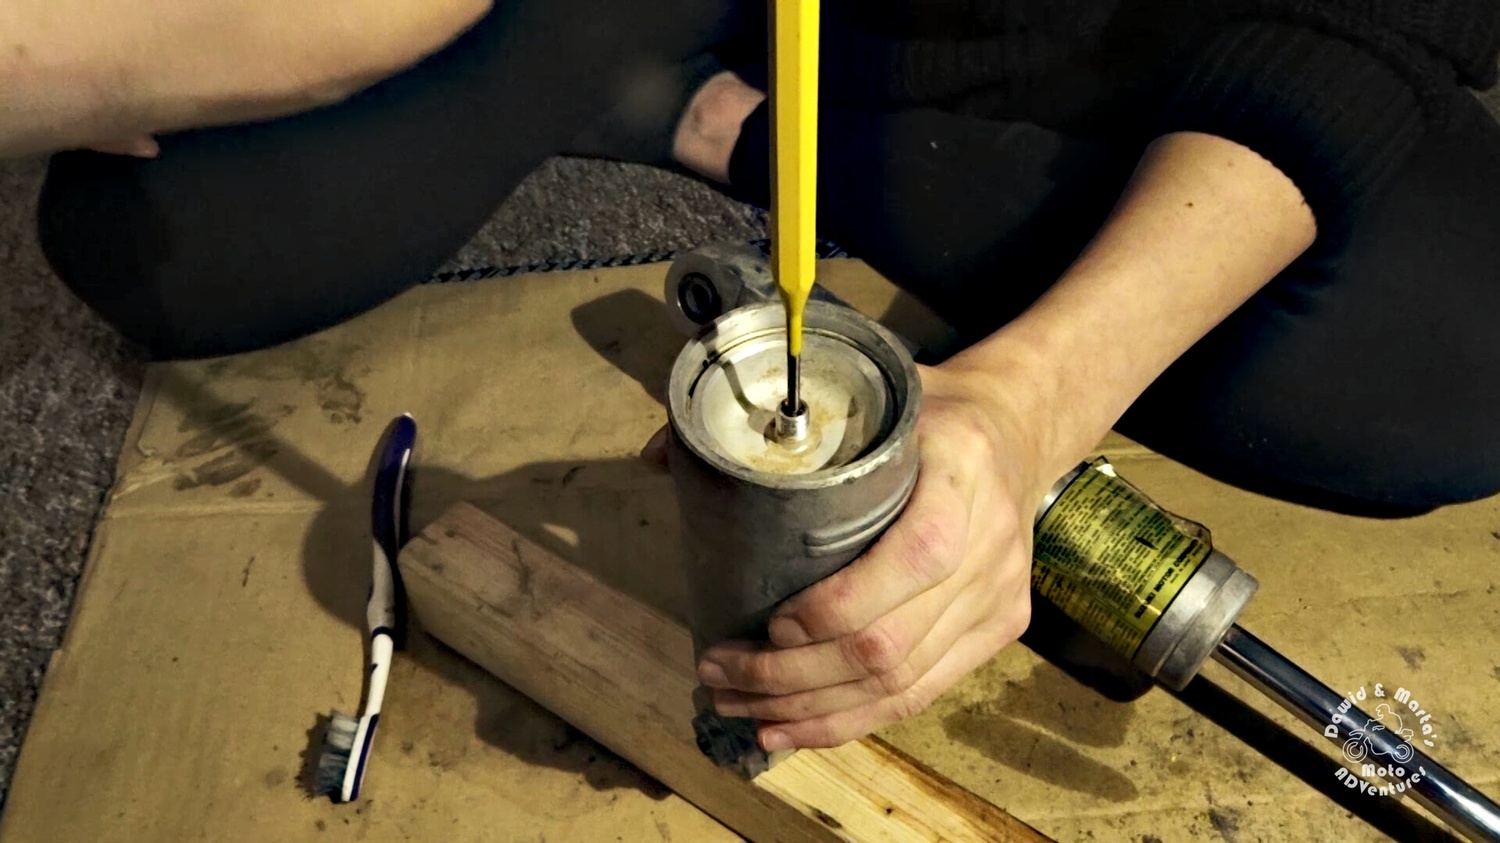
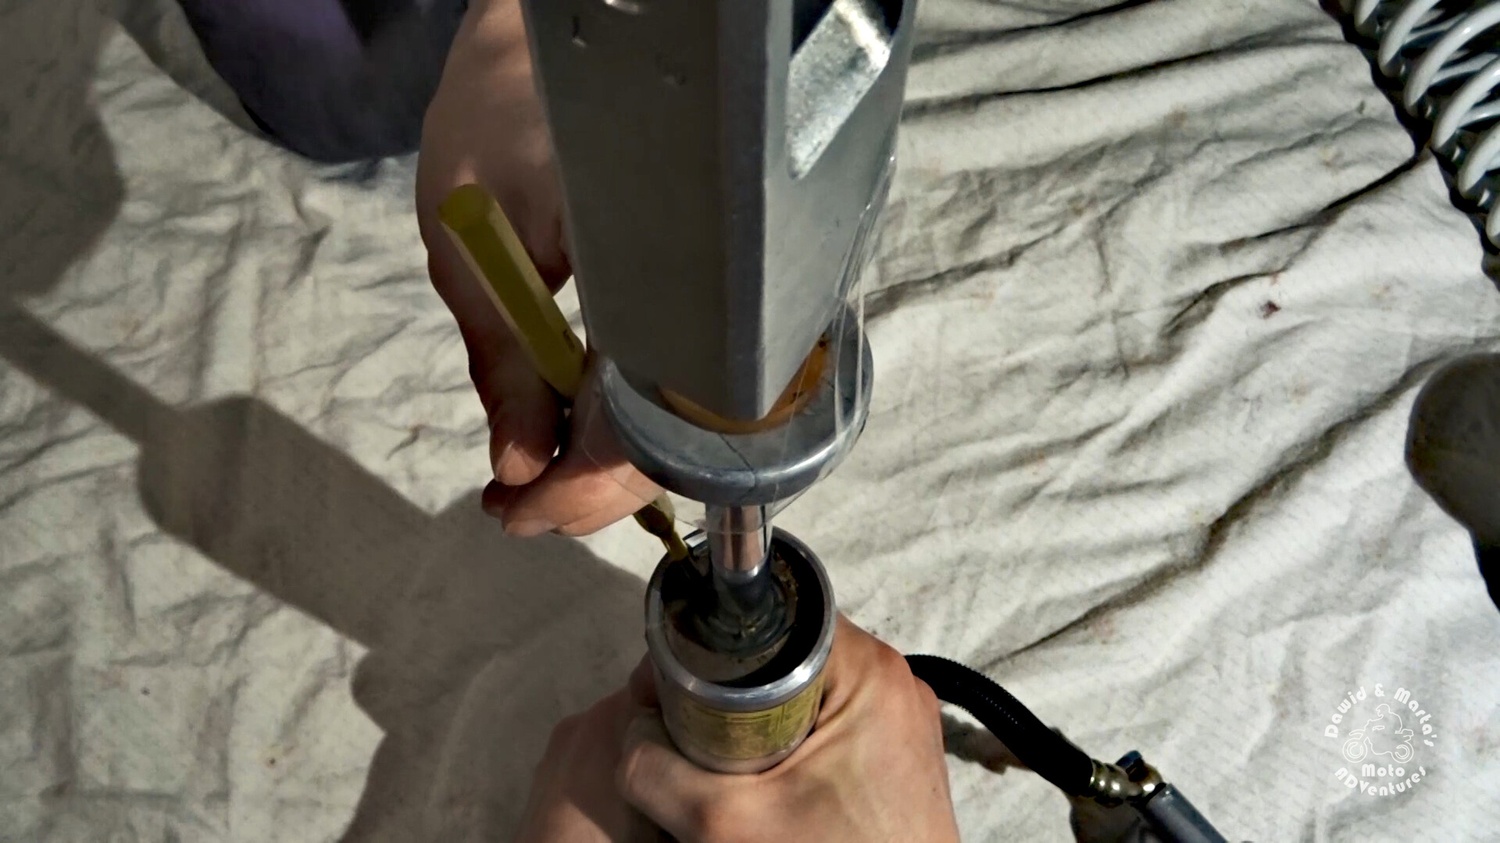
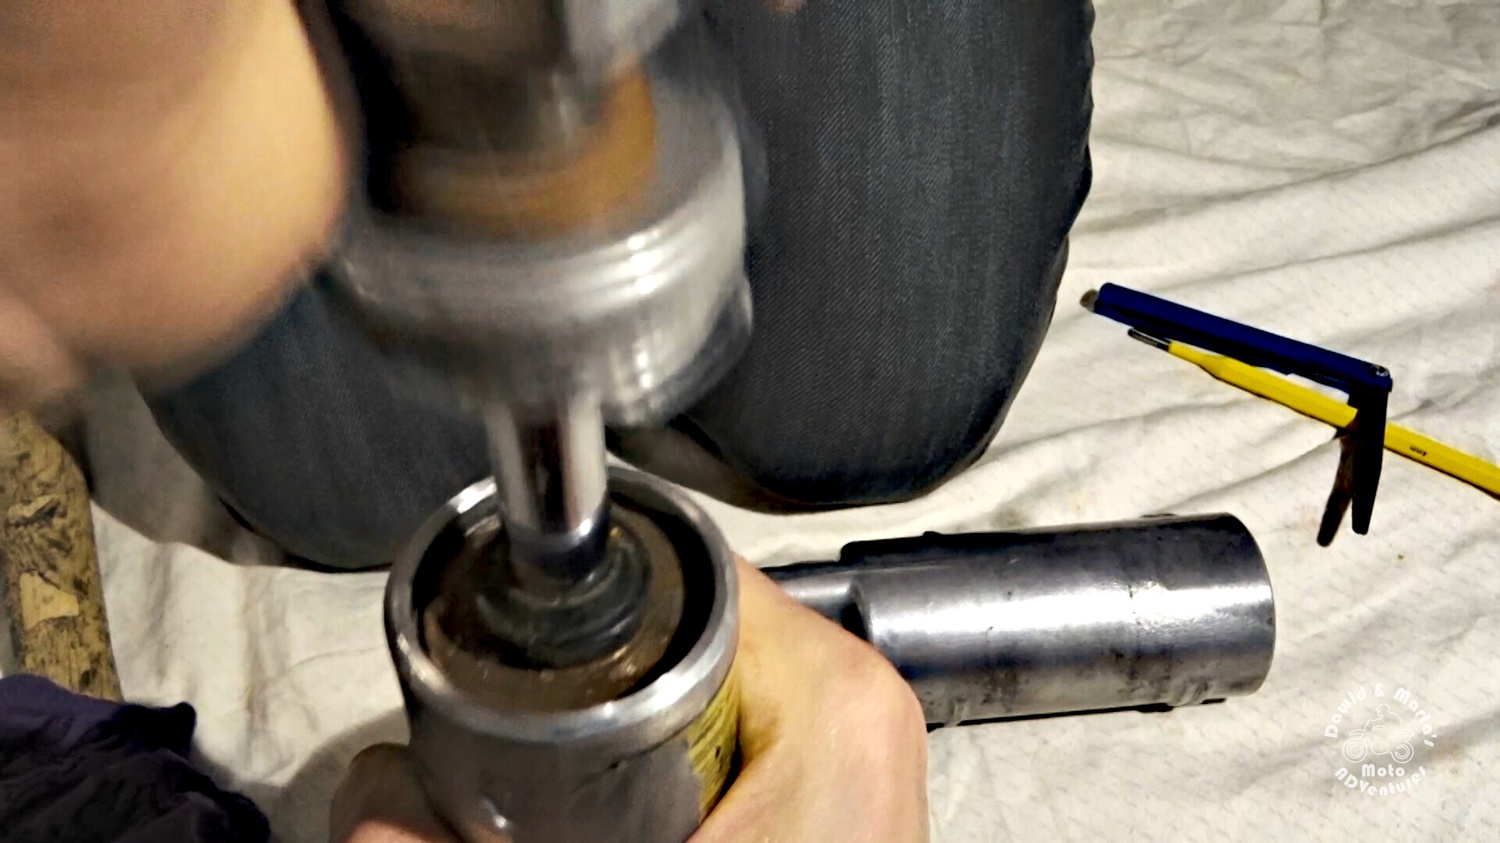
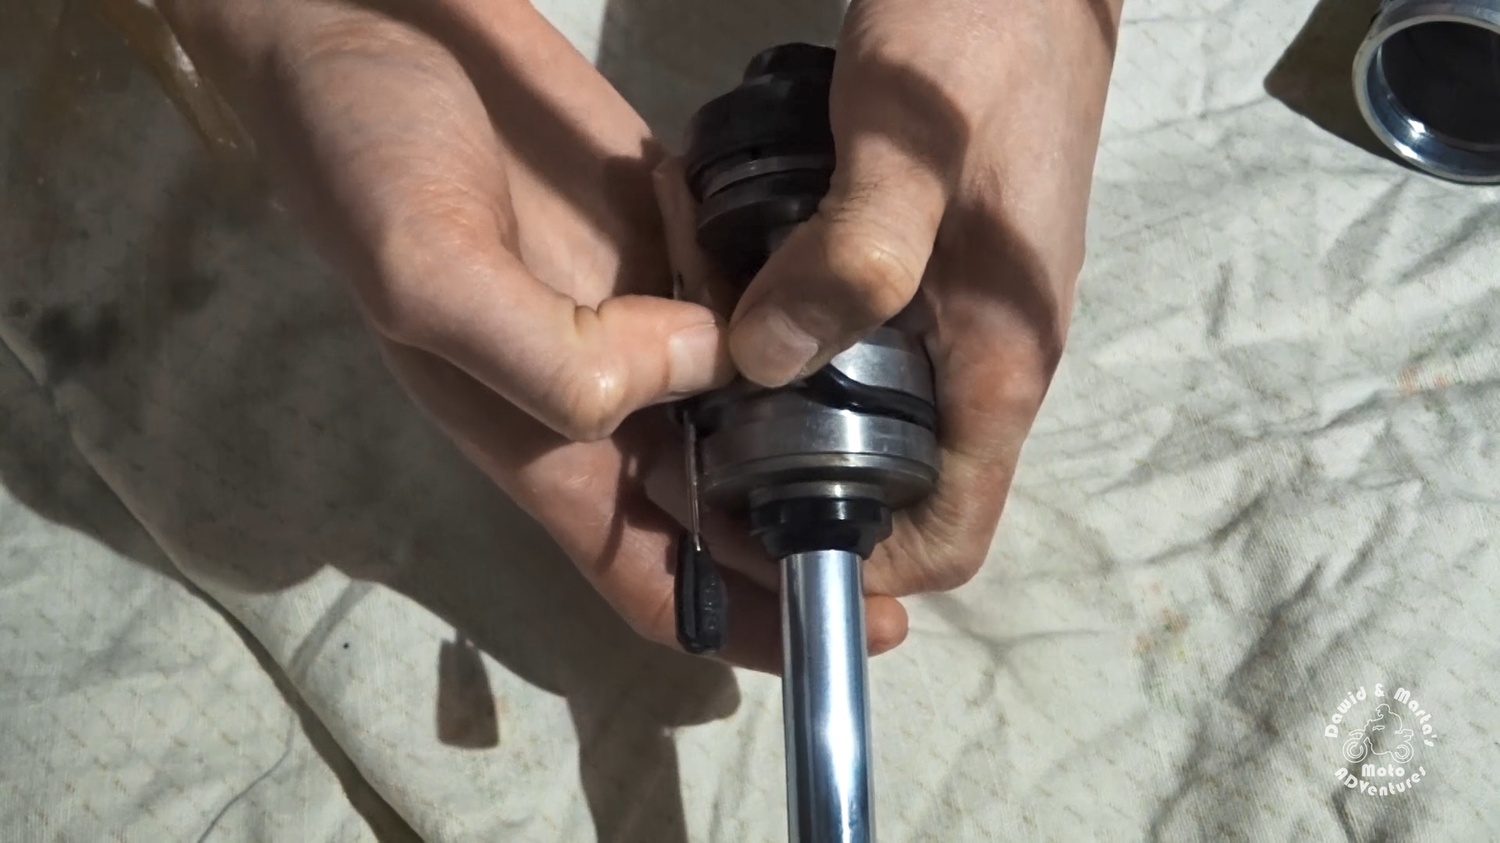
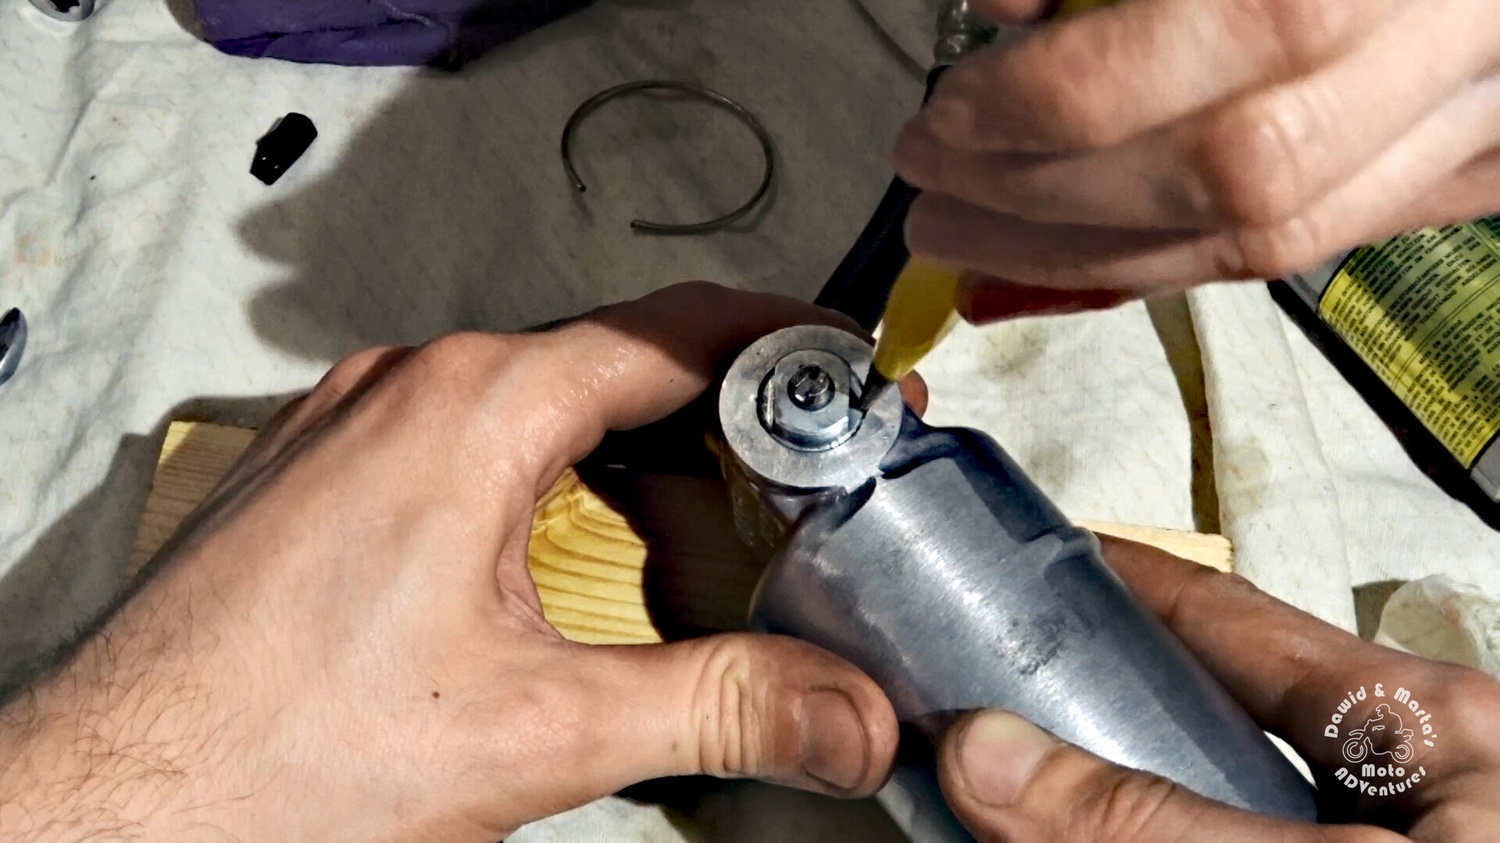
First we need to remove the tube cap. As you will see below, I just put a drill bit in the small hole in the cap and gently punch it with a hammer.

25 Removing tube cap from the rear shock cylinder body of DR350
Putting the drill bit in place
25 Removing tube cap from the rear shock cylinder body of DR350
Putting the drill bit in place
25 Removing tube cap from the rear shock cylinder body
And now few gentle hits
25 Removing tube cap from the rear shock cylinder body
And now few gentle hits
25 Removing tube cap from the rear shock cylinder body
Voila
25 Removing tube cap from the rear shock cylinder body
Voila

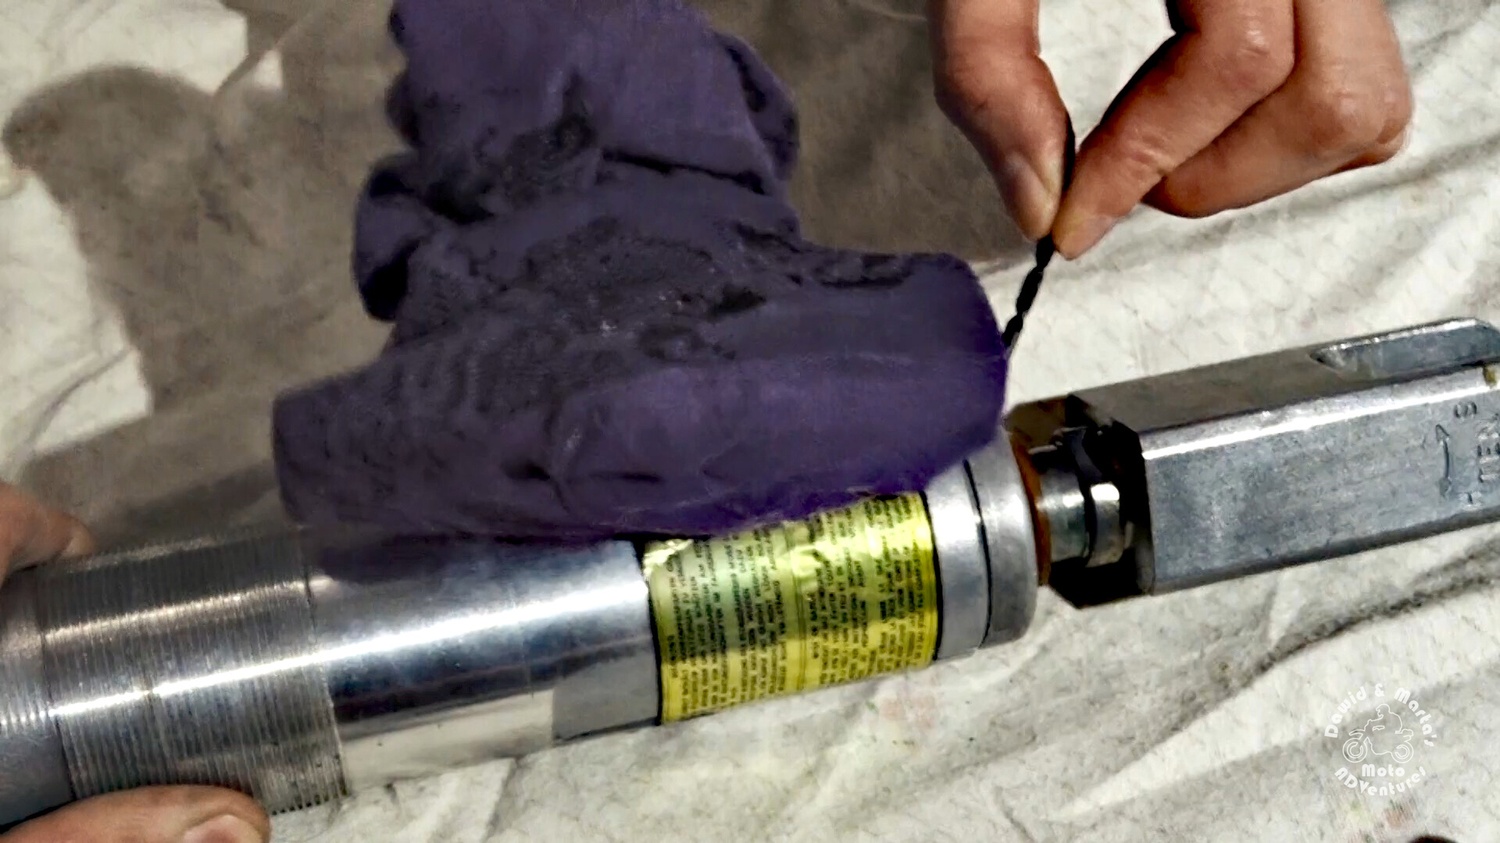
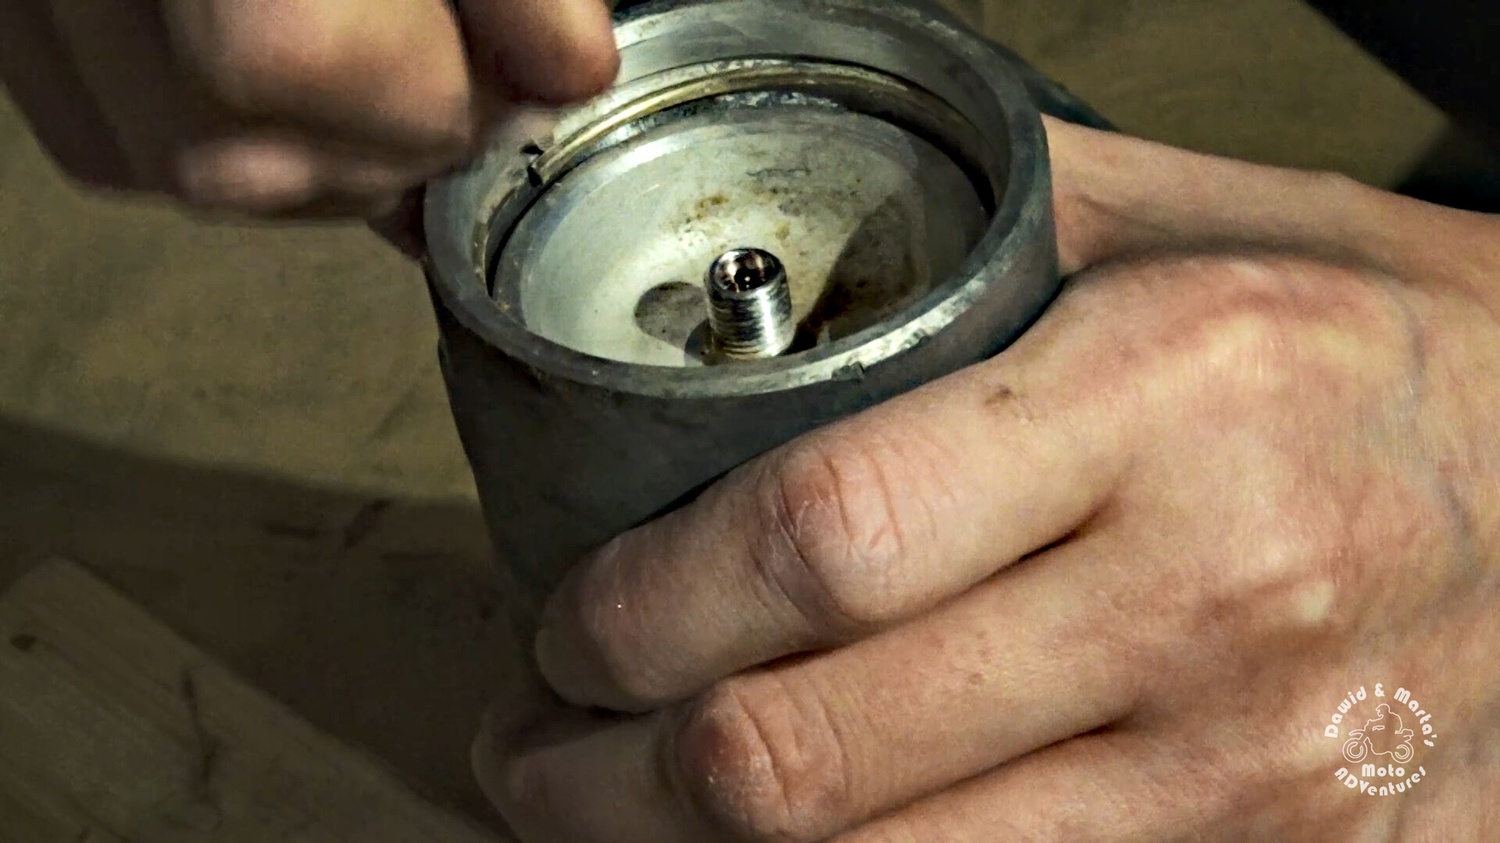
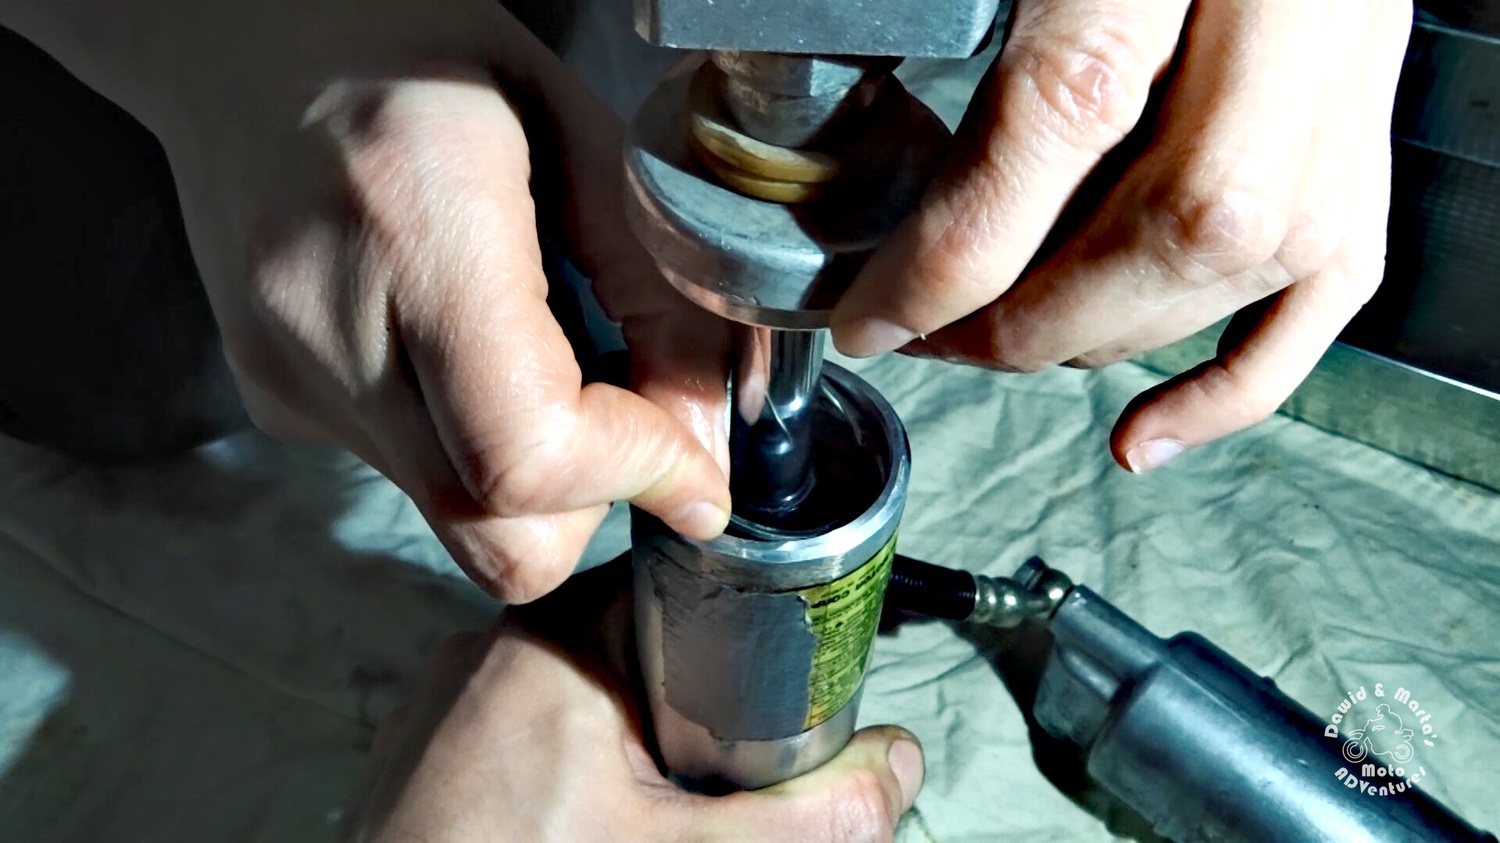
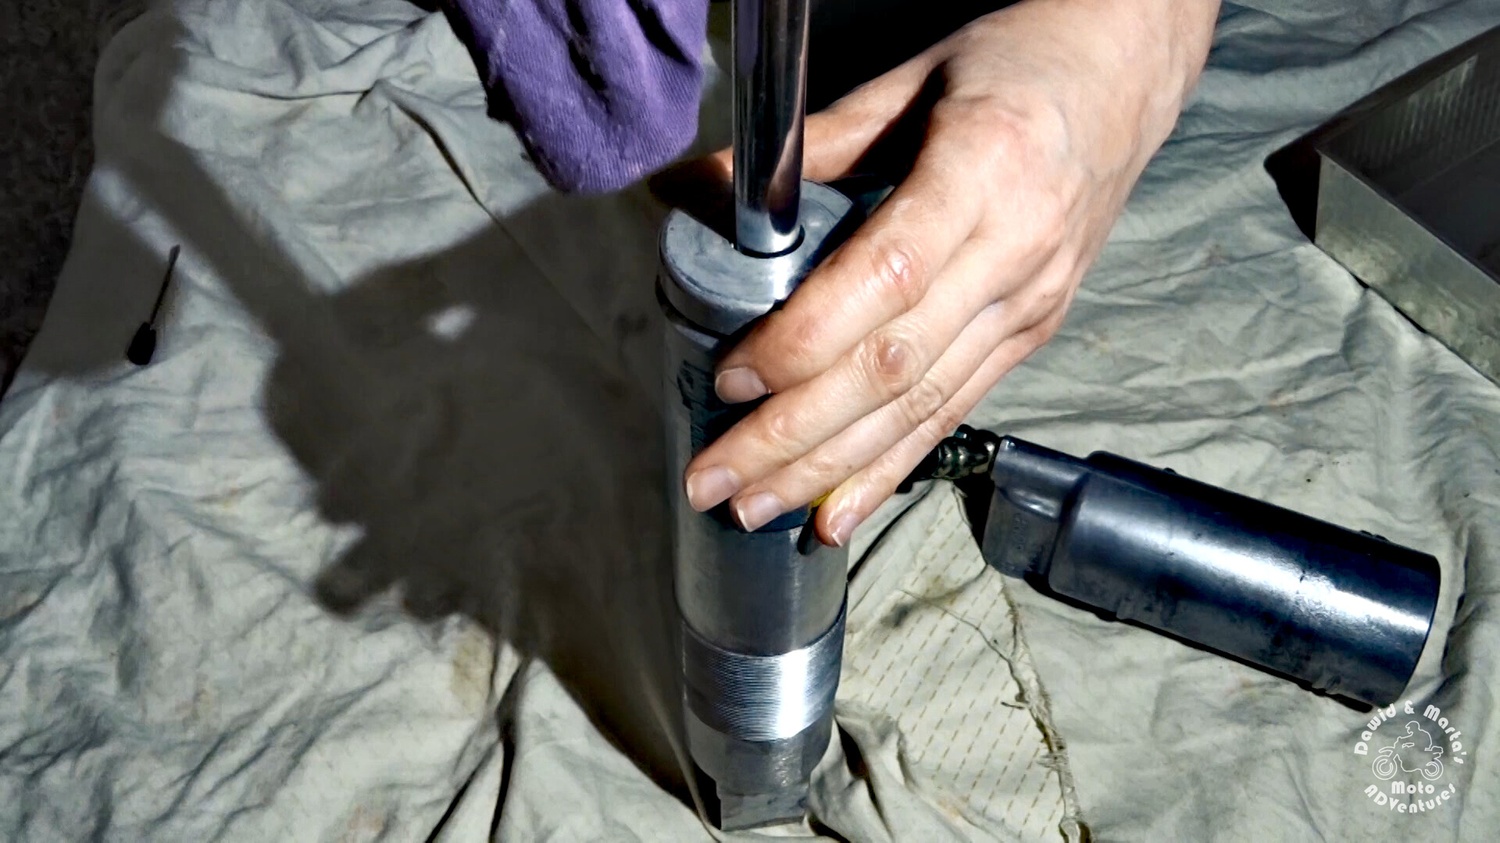
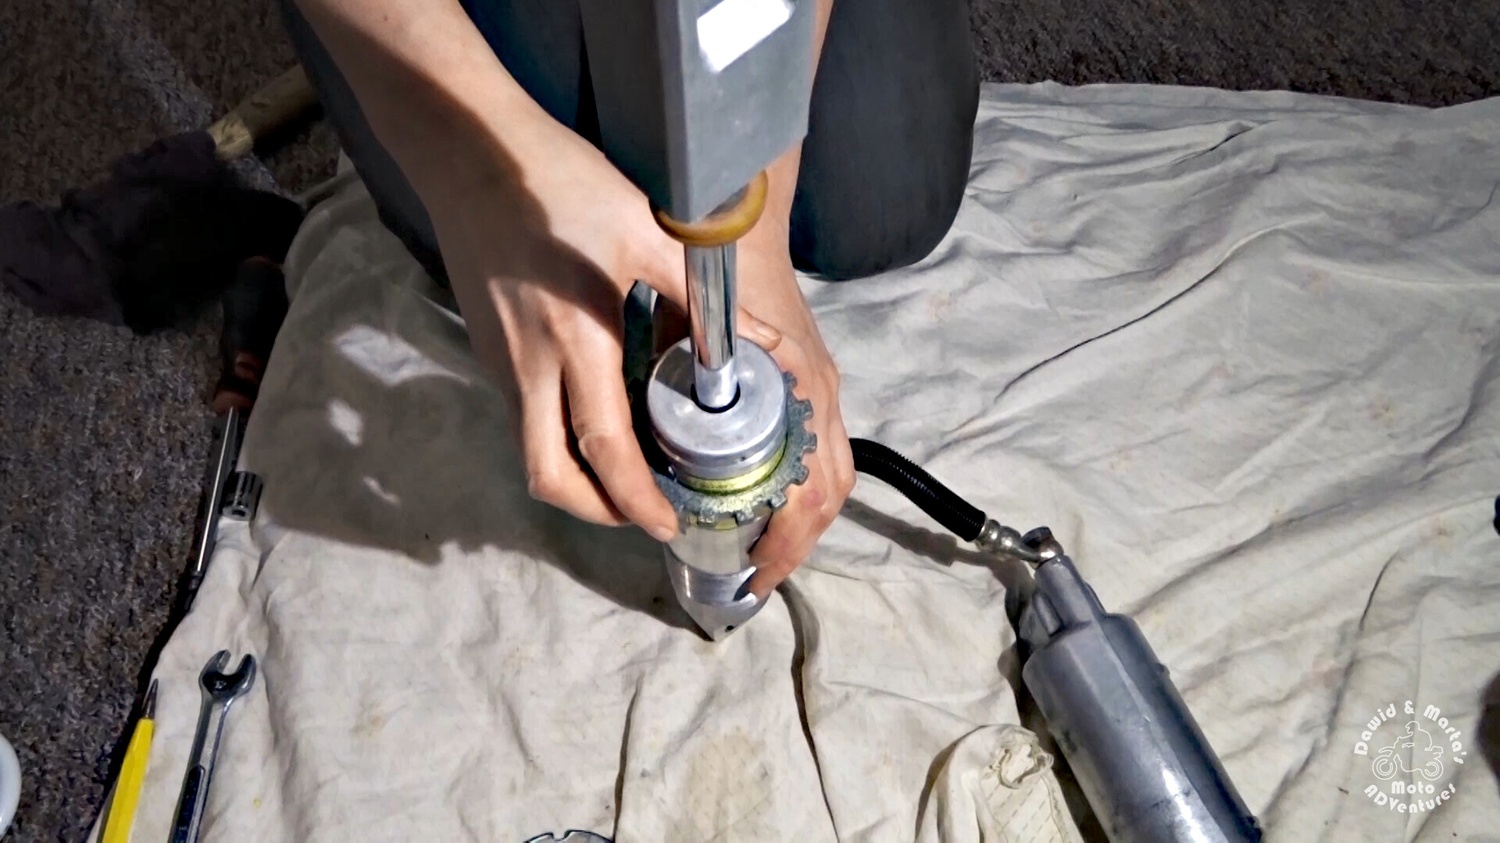
After that, like with the air can, we have to remove the securing ring, hiding under the sealing head, to open the body.
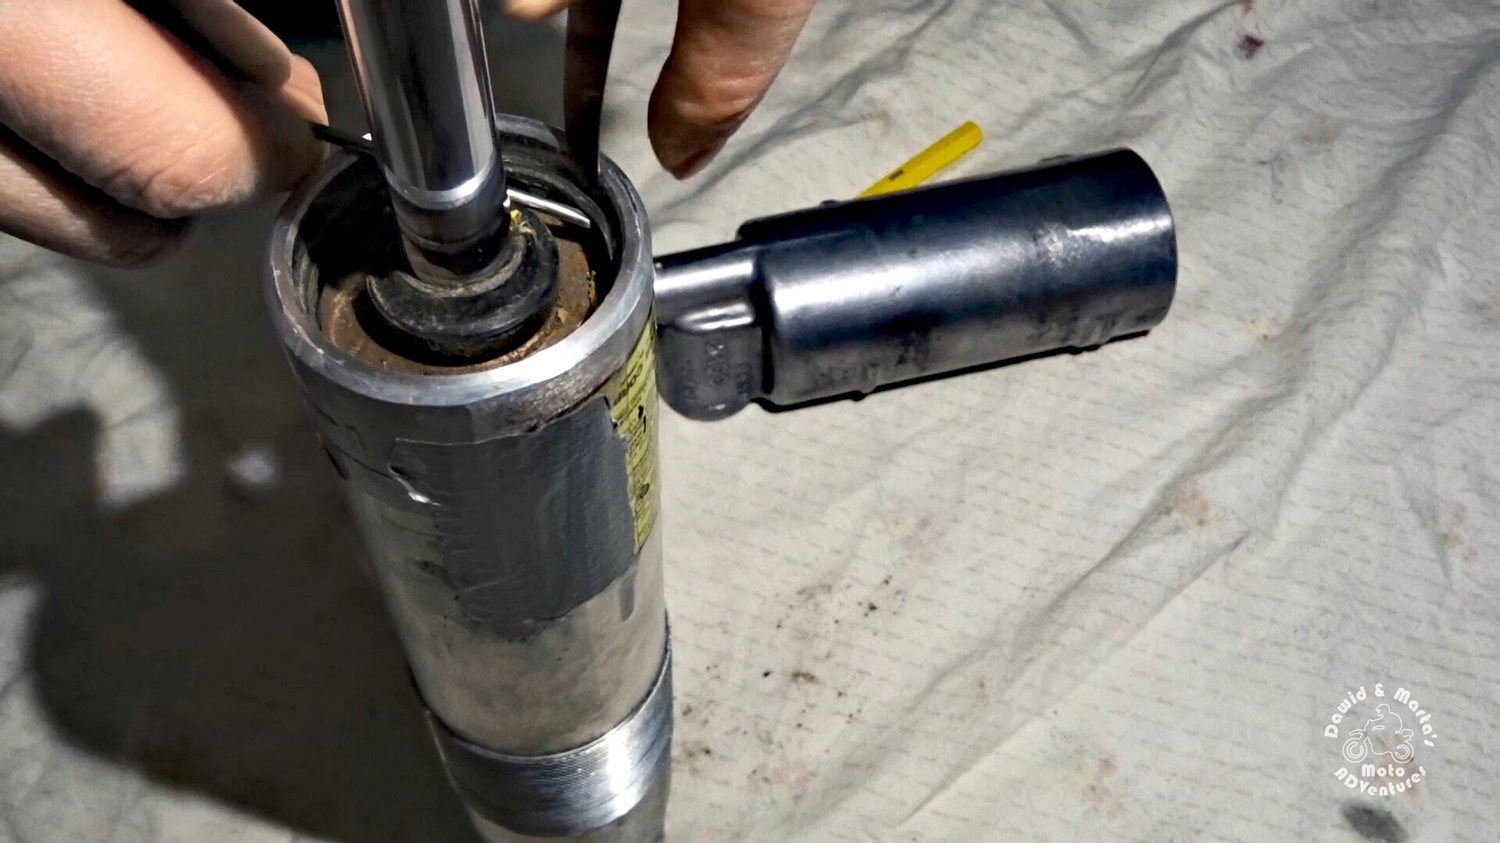
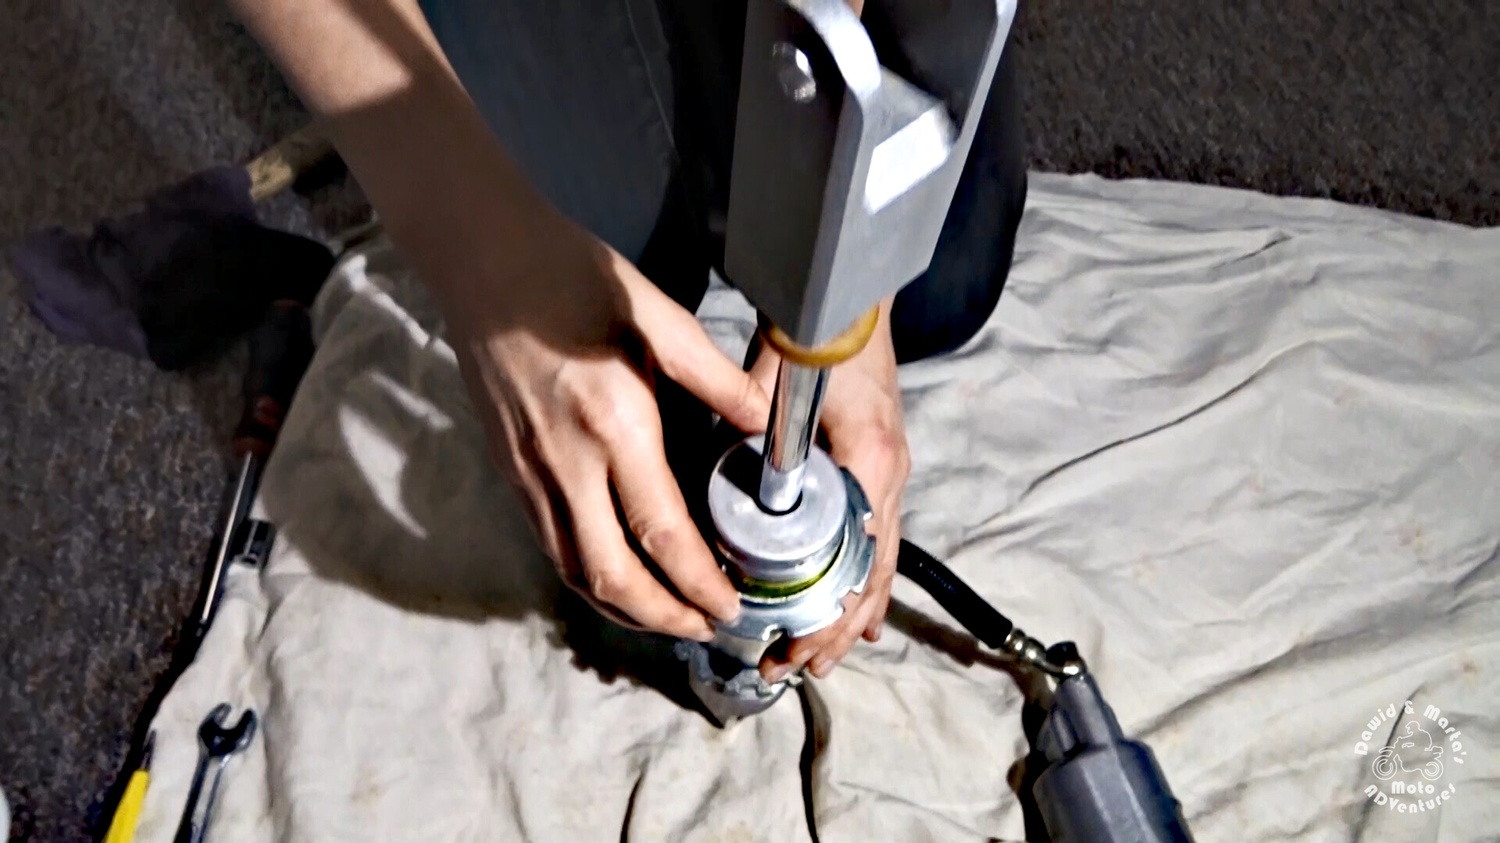
So we punch the sealing head using a punch tool until there’s enough space to take out the securing ring.

26 Removing the DR350 rear shock cylinder body securing ring
Hit gently and evenly across the surface
26 Removing the DR350 rear shock cylinder body securing ring
Hit gently and evenly across the surface

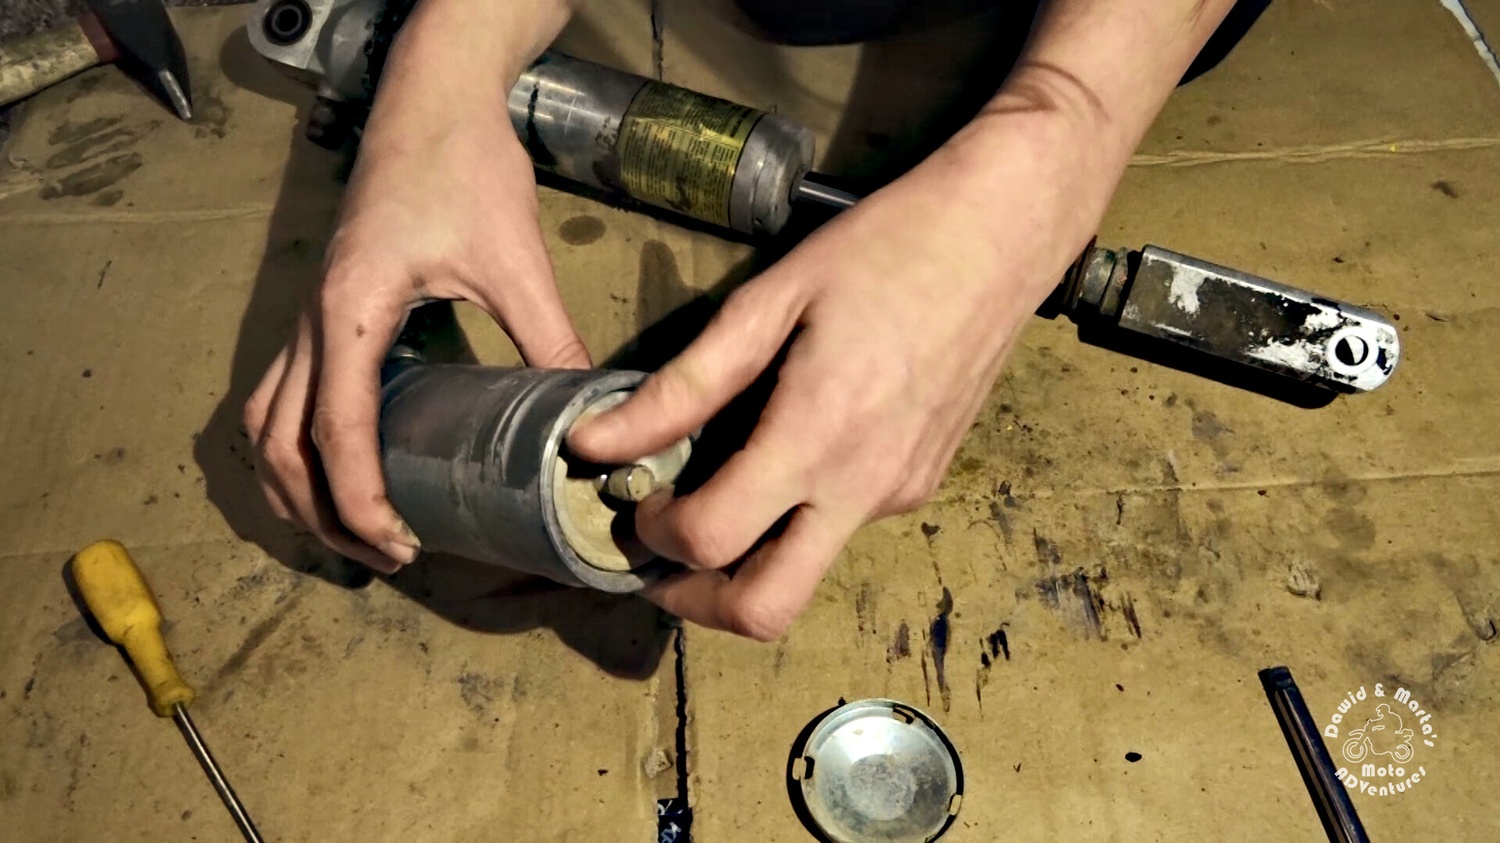
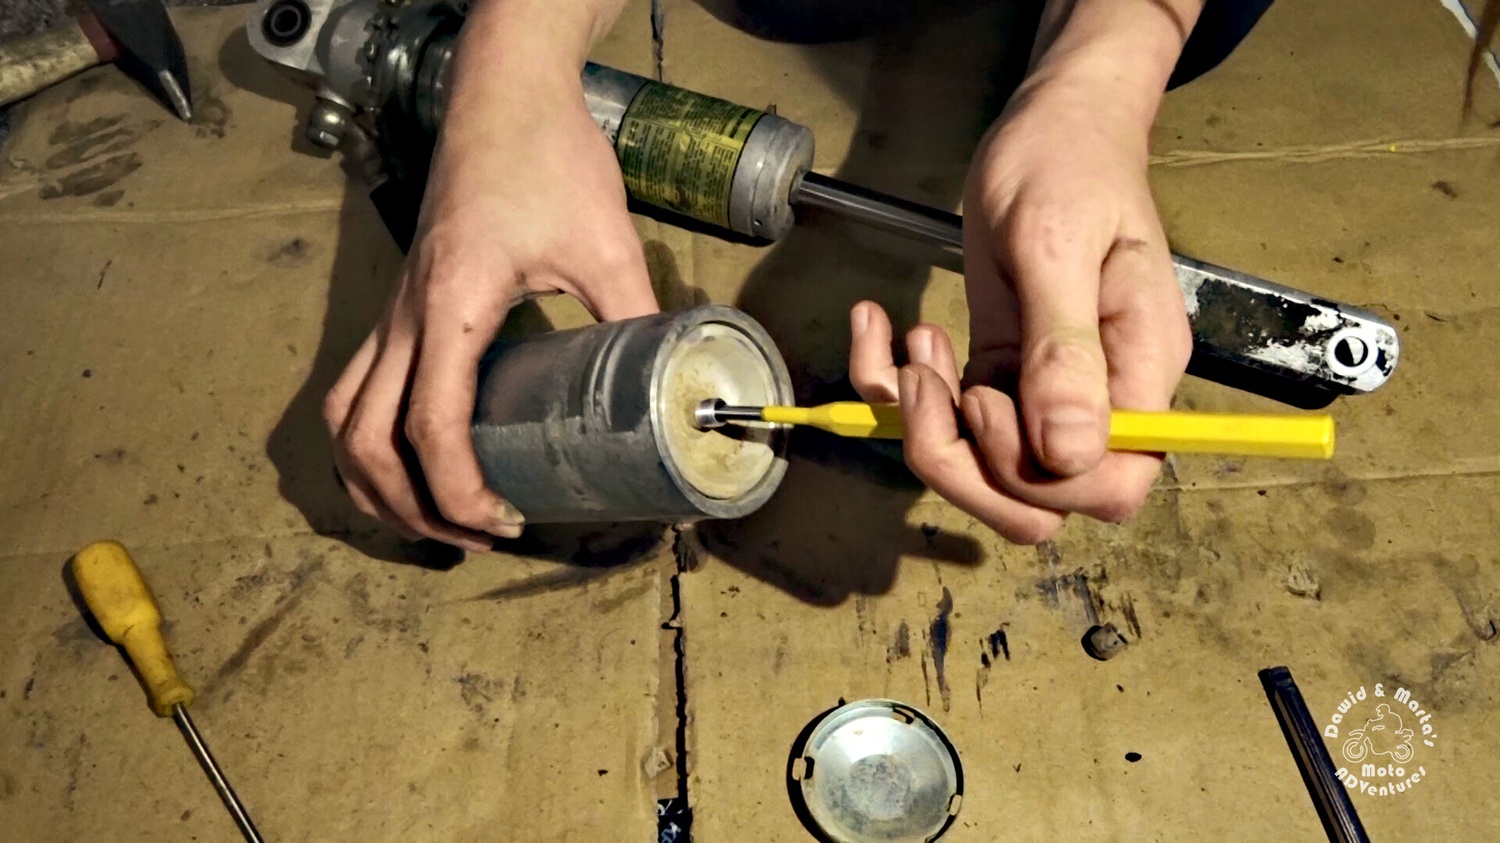
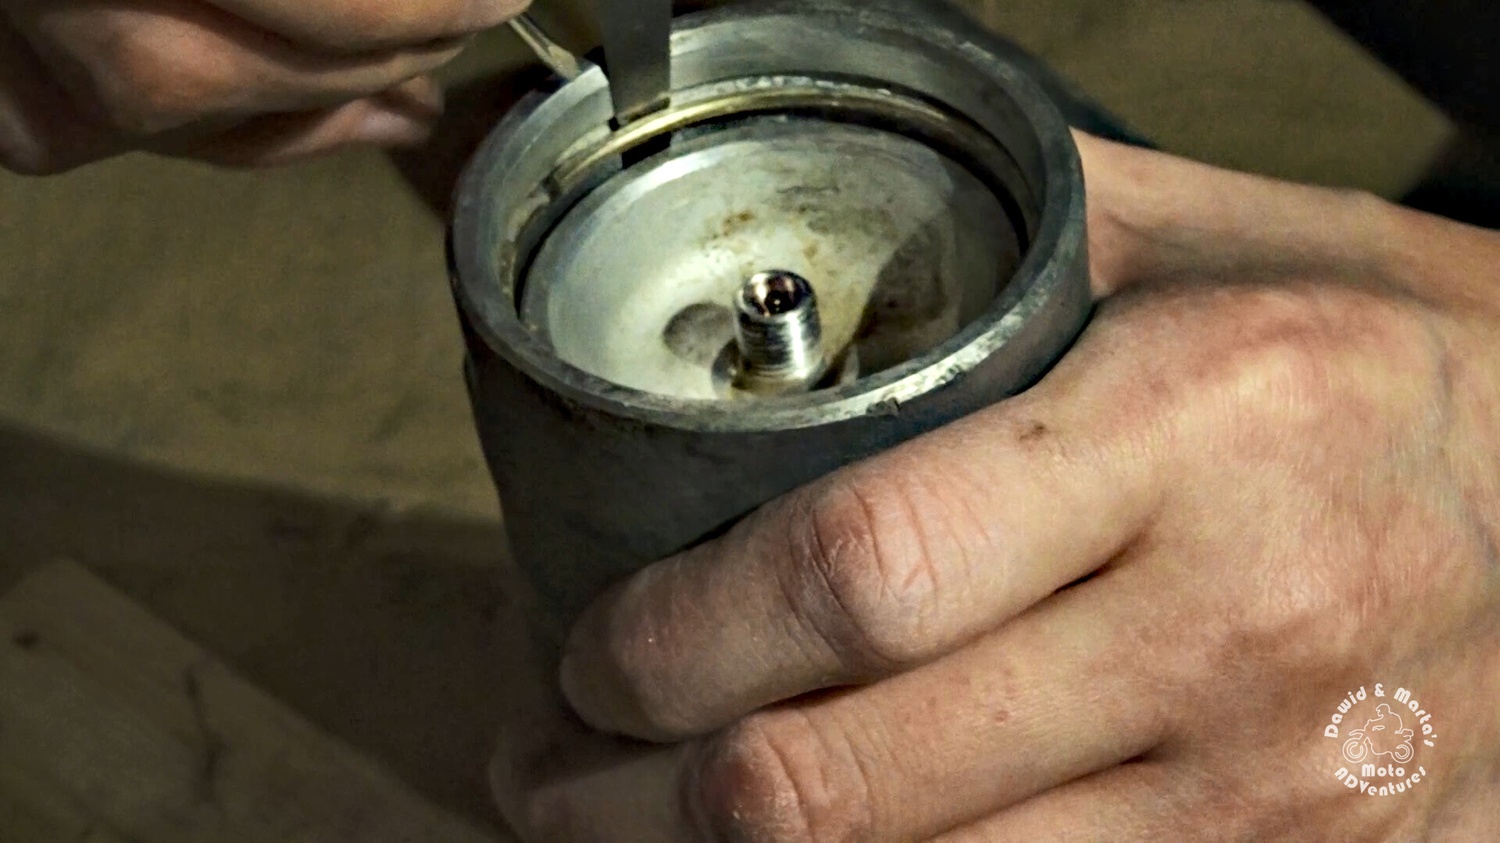
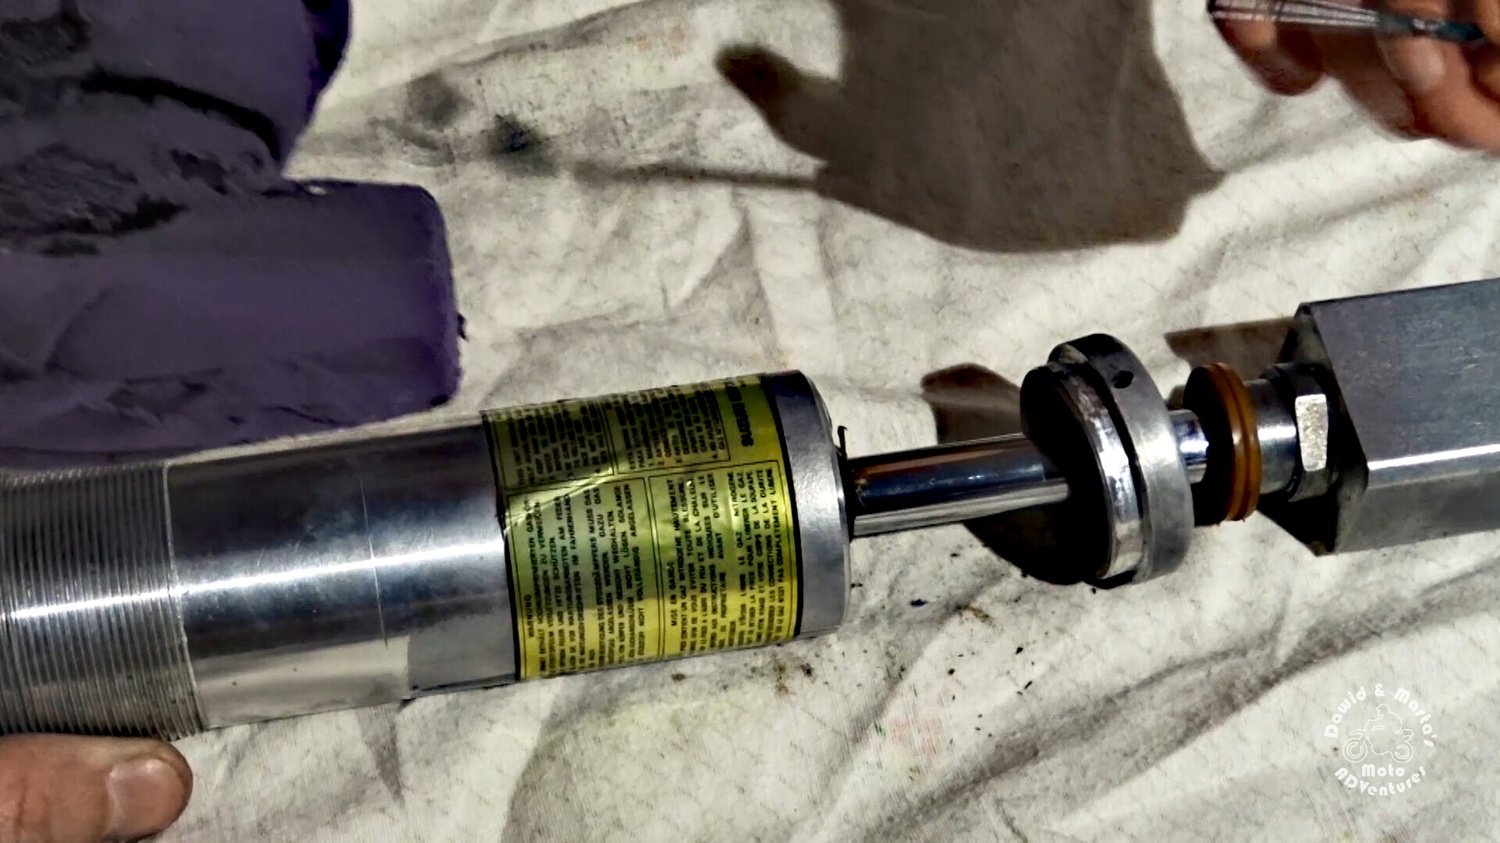
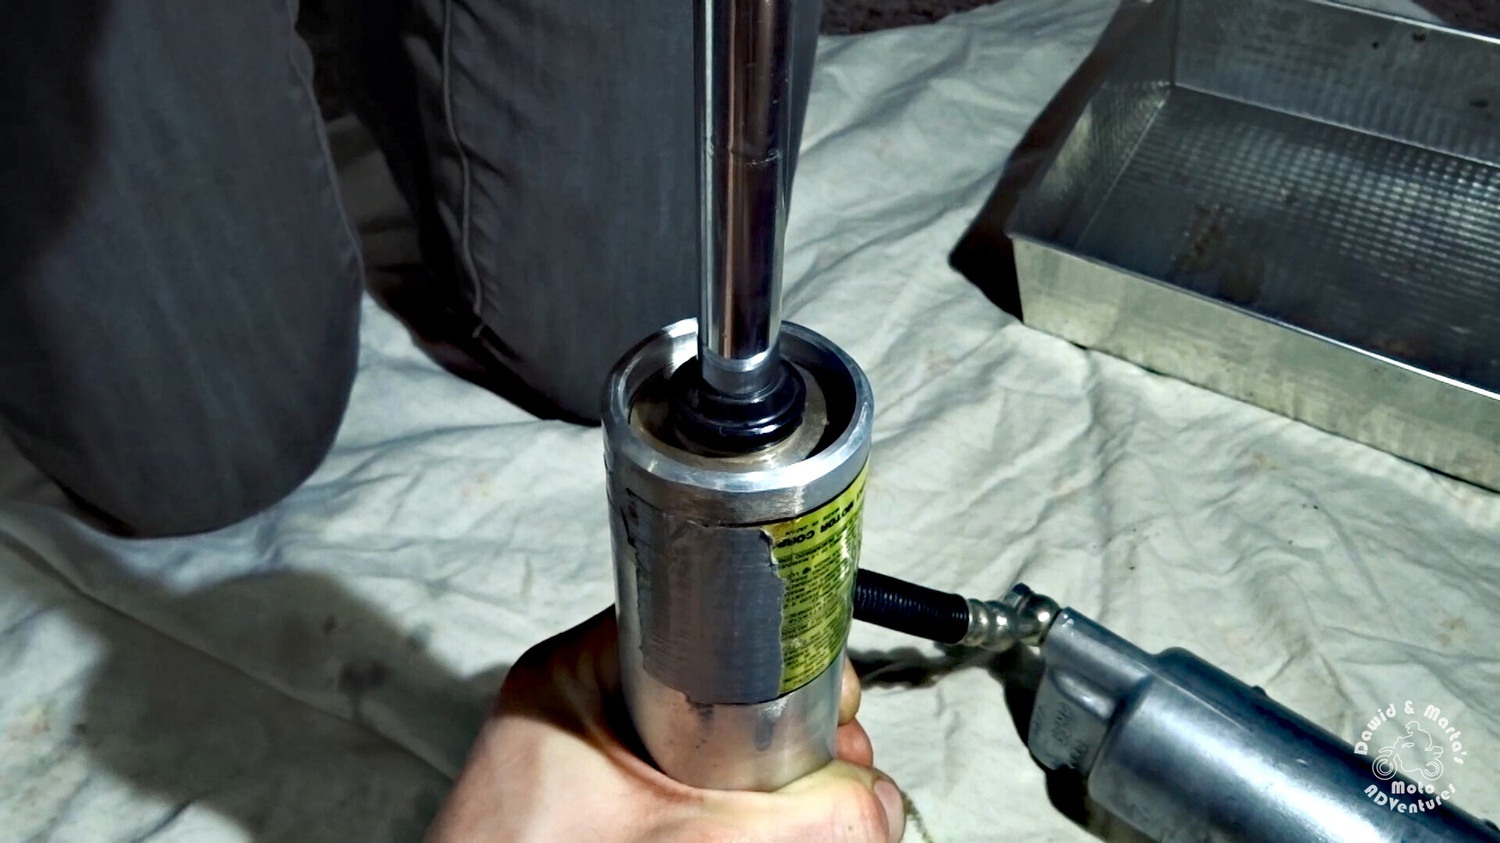
Again, just like in case of the air can, I use a flat screw driver and a thin plate to make life easier and remove the ring.

27 Removing the rear shock cylinder body securing ring
A little screwdriver help to get around the ring
27 Removing the rear shock cylinder body securing ring
A little screwdriver help to get around the ring

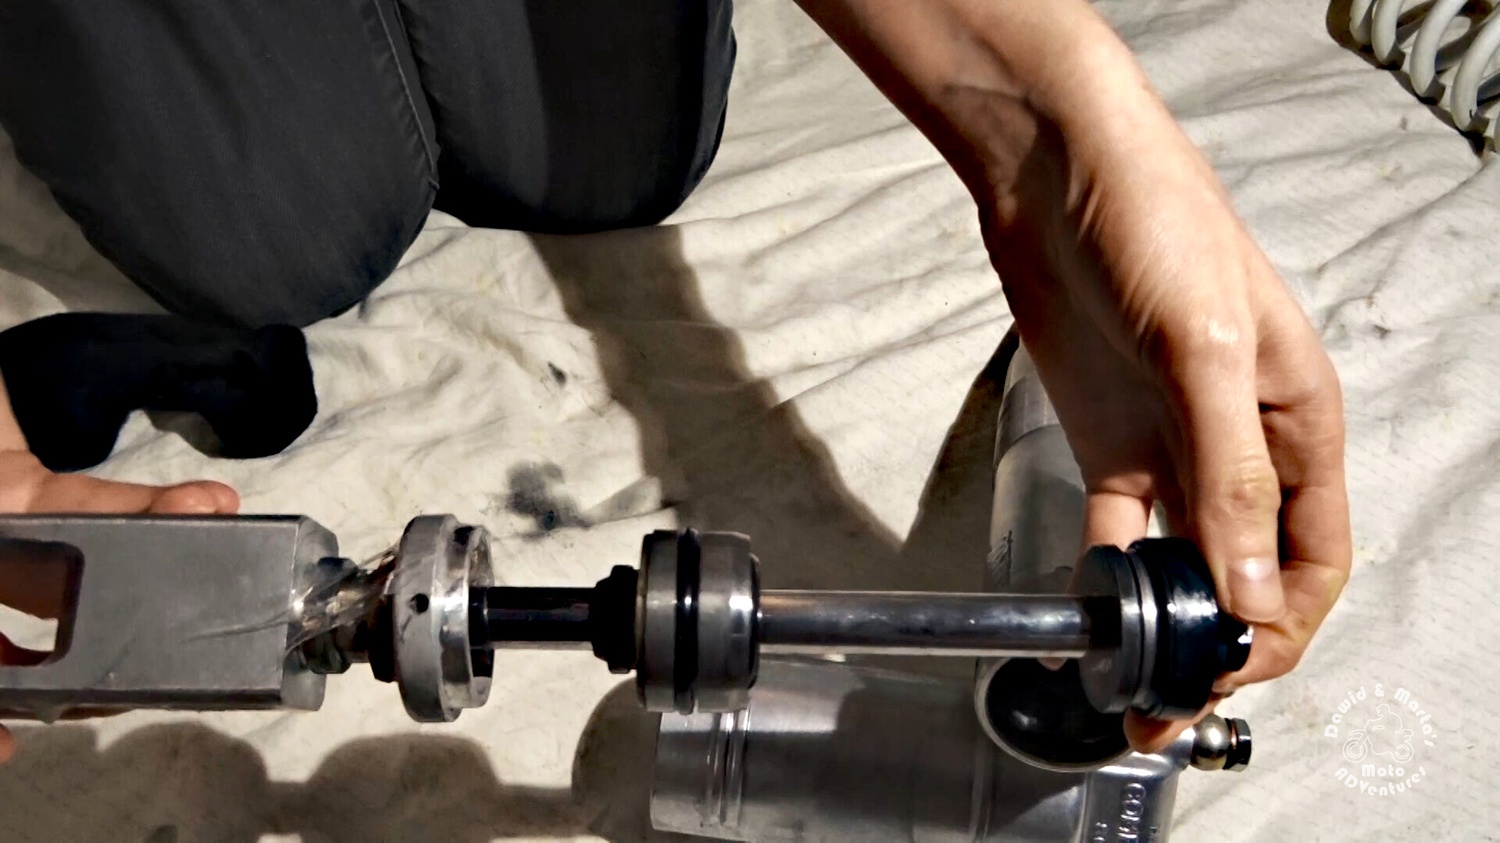
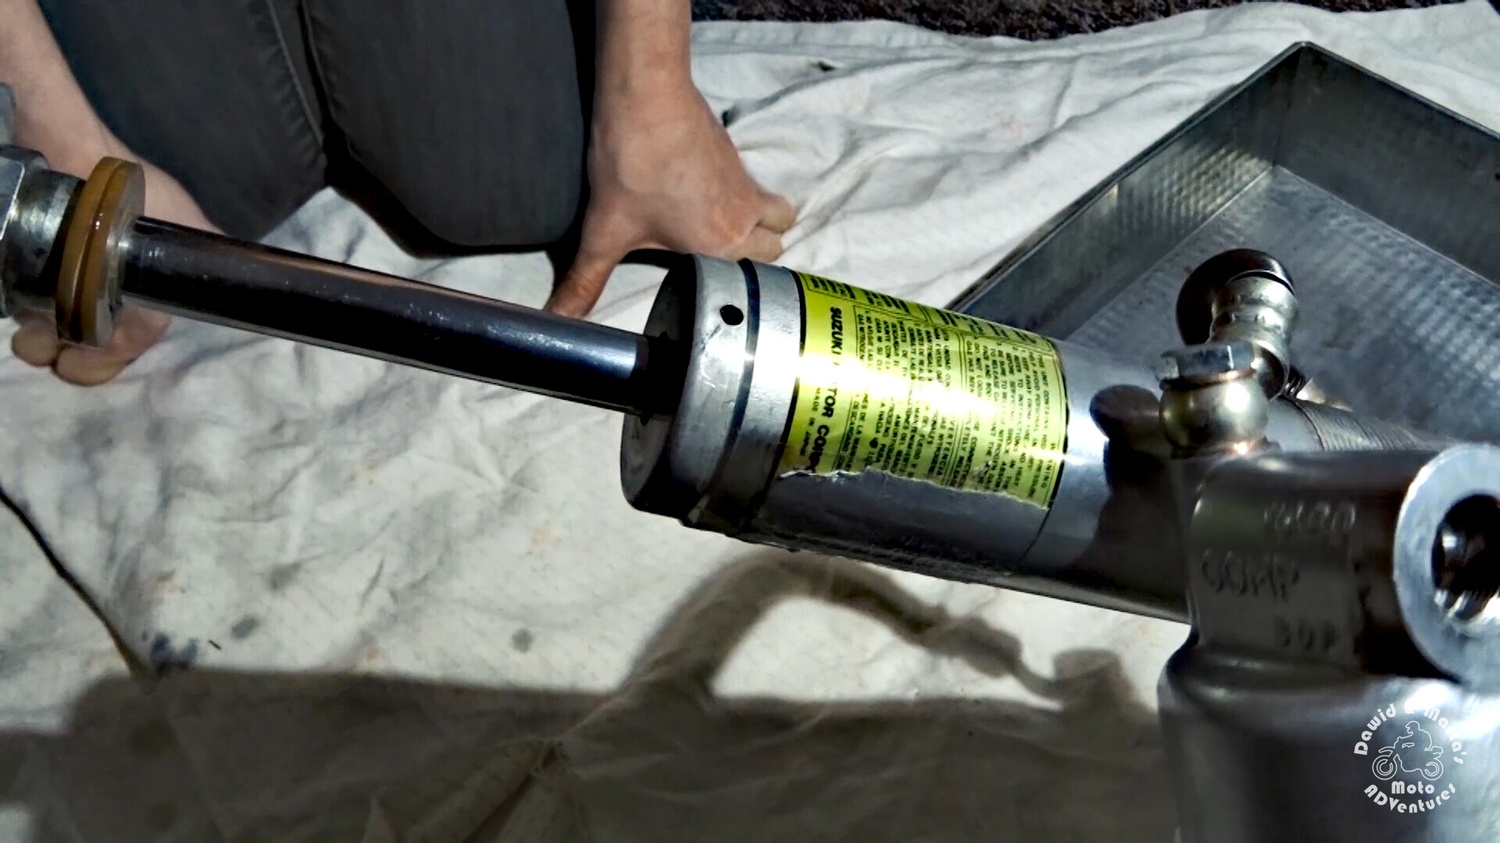
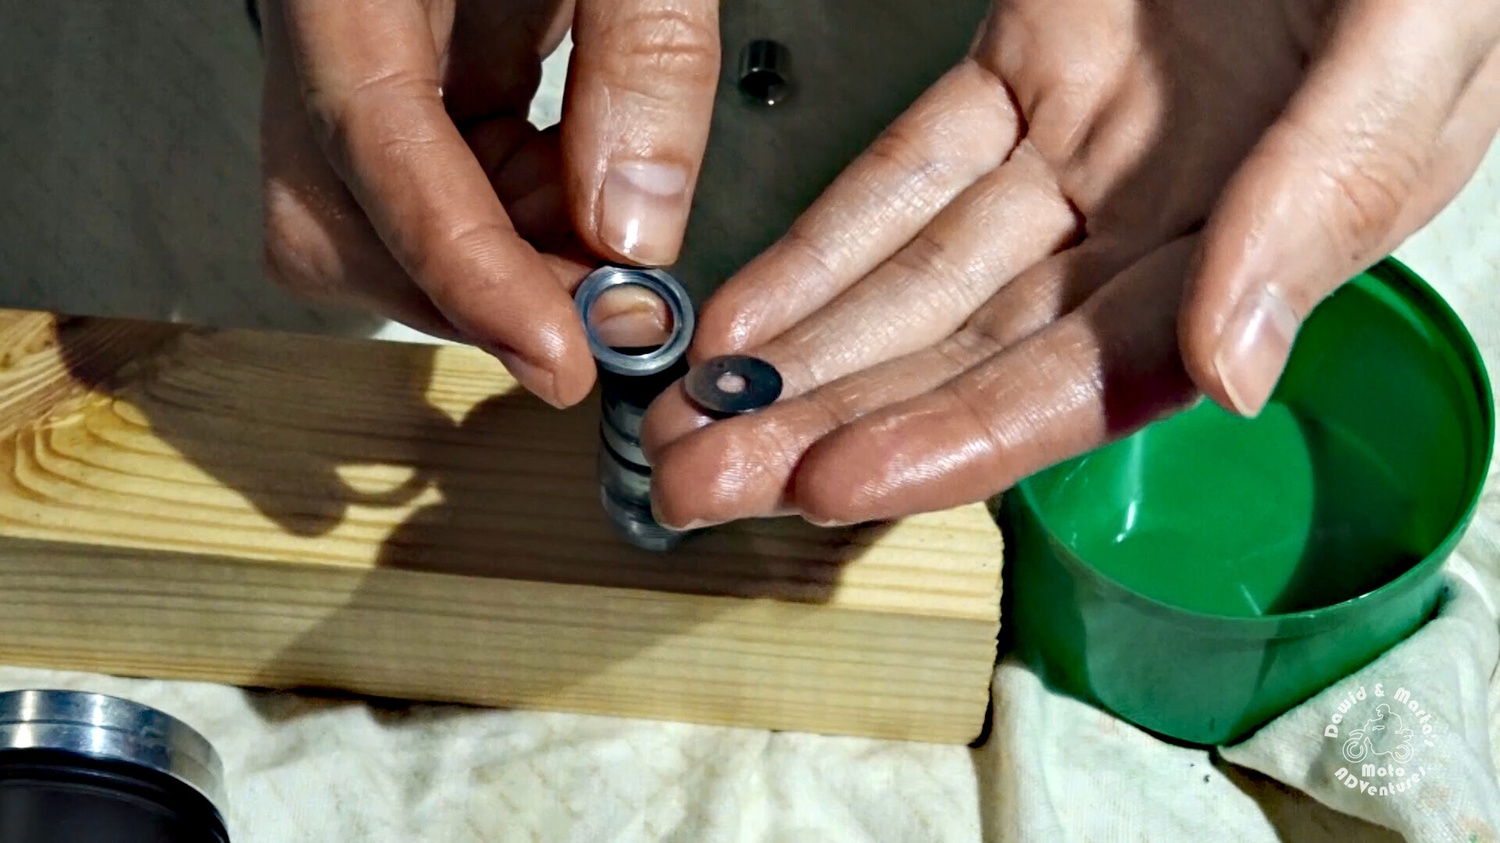
Next we slide the piston up and down to pull out the sealing head. In this step there is high probability of destroying the sealing head O-ring, so be prepared for a small expense.

28 Removing the rear shock cylinder body sealing head
Some more force required in this up and down sliding step
28 Removing the rear shock cylinder body sealing head
Some more force required in this up and down sliding step
29 Removing the rear shock cylinder body sealing head for DR350
And it’s out
29 Removing the rear shock cylinder body sealing head for DR350
And it’s out

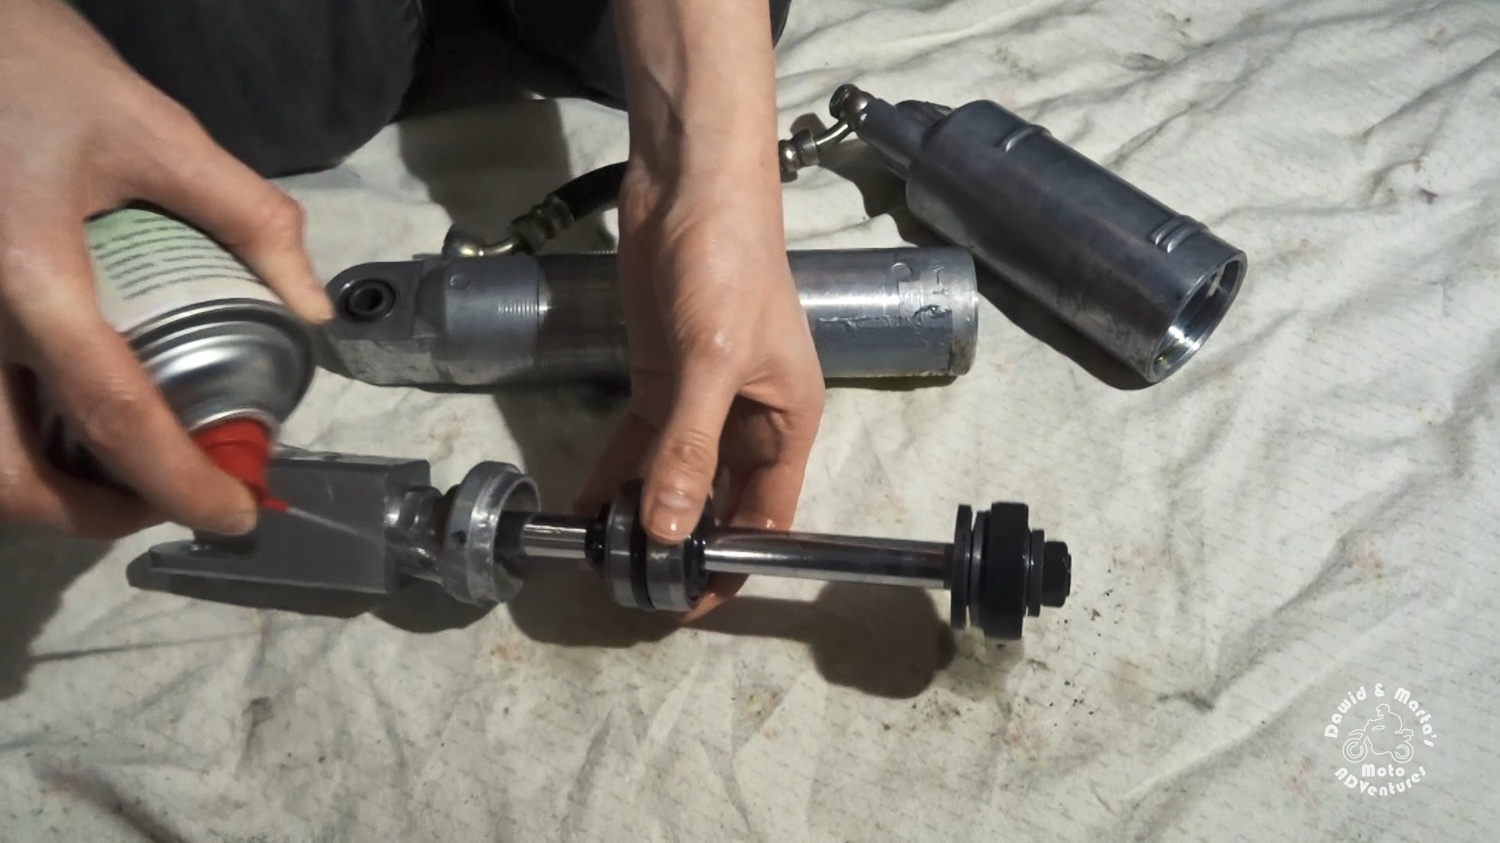
To finish our disassembly, I clean the piston, shock cylinder body and the air can using a brake cleaner.

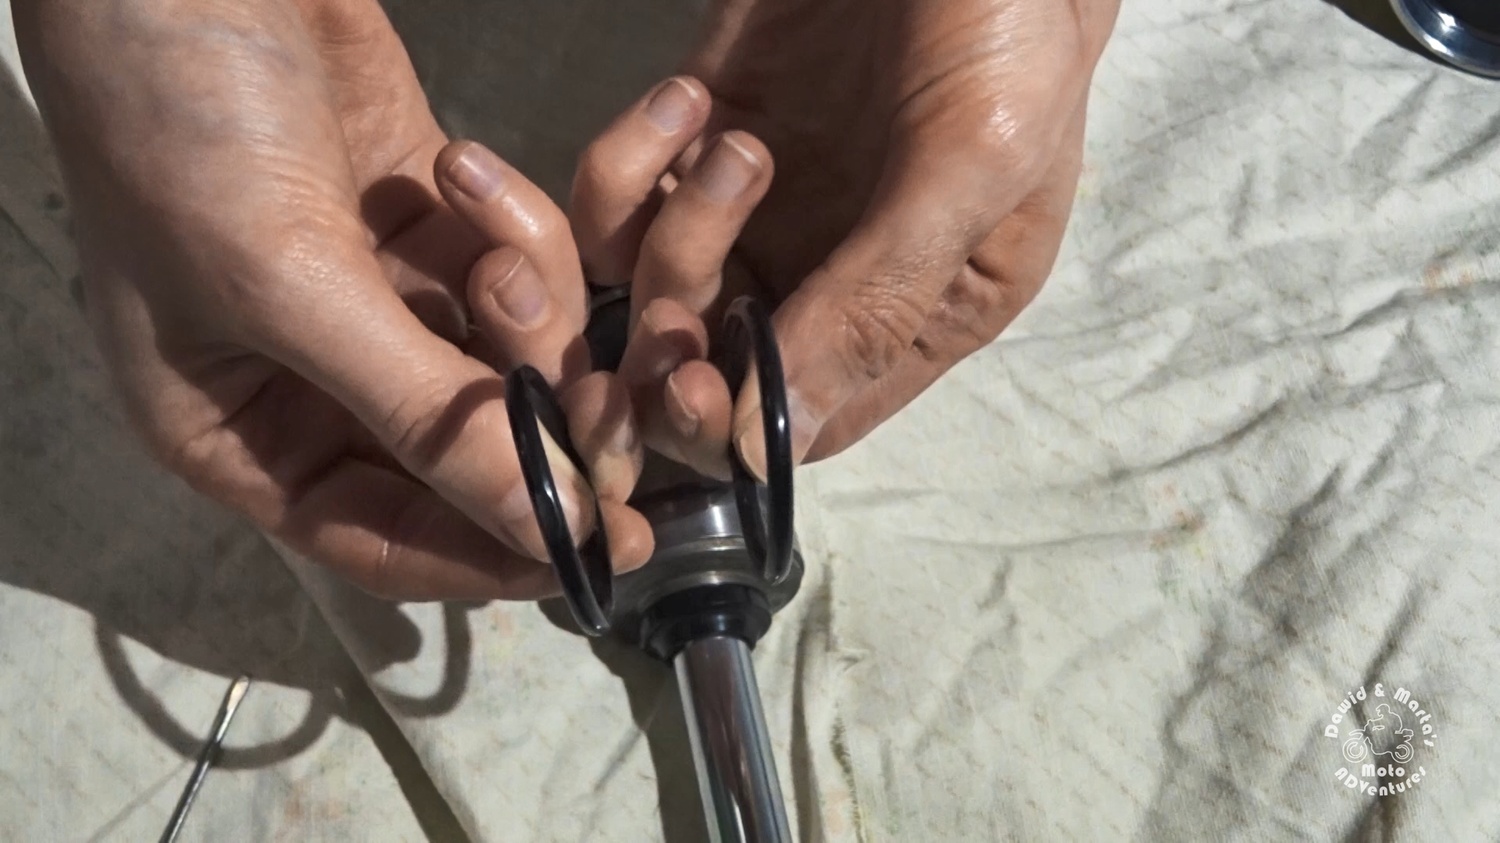
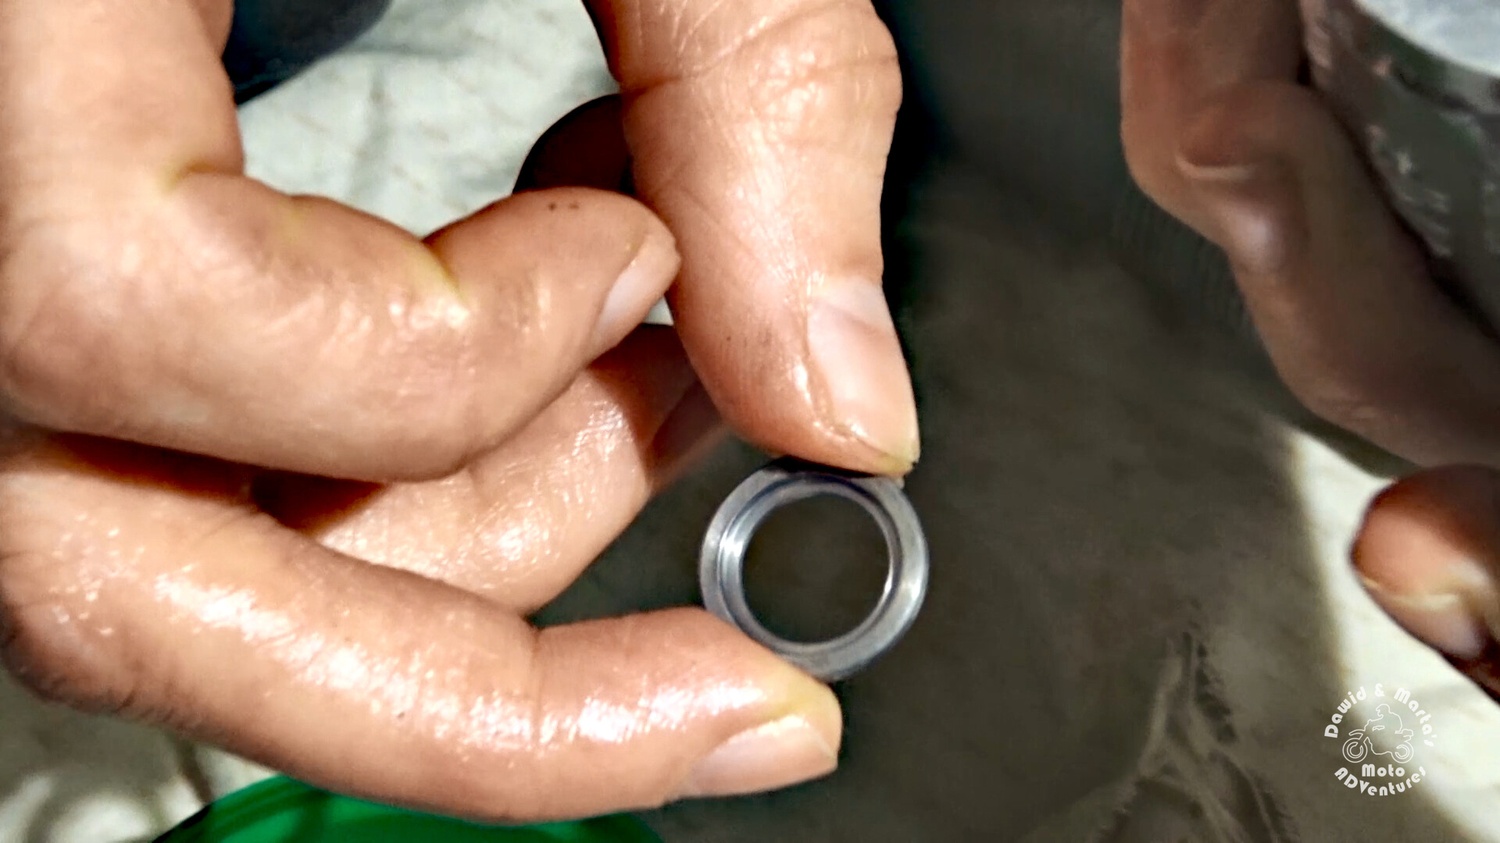
Now the only this left is inspecting the sealing head O-ring.

31 Taking off the damaged O-ring from the rear shock sealing head
Taking the O-ring off
31 Taking off the damaged O-ring from the rear shock sealing head
Taking the O-ring off
31 Rear shock sealing head O-ring inspection
It’s damaged :(
31 Rear shock sealing head O-ring inspection
It’s damaged :(

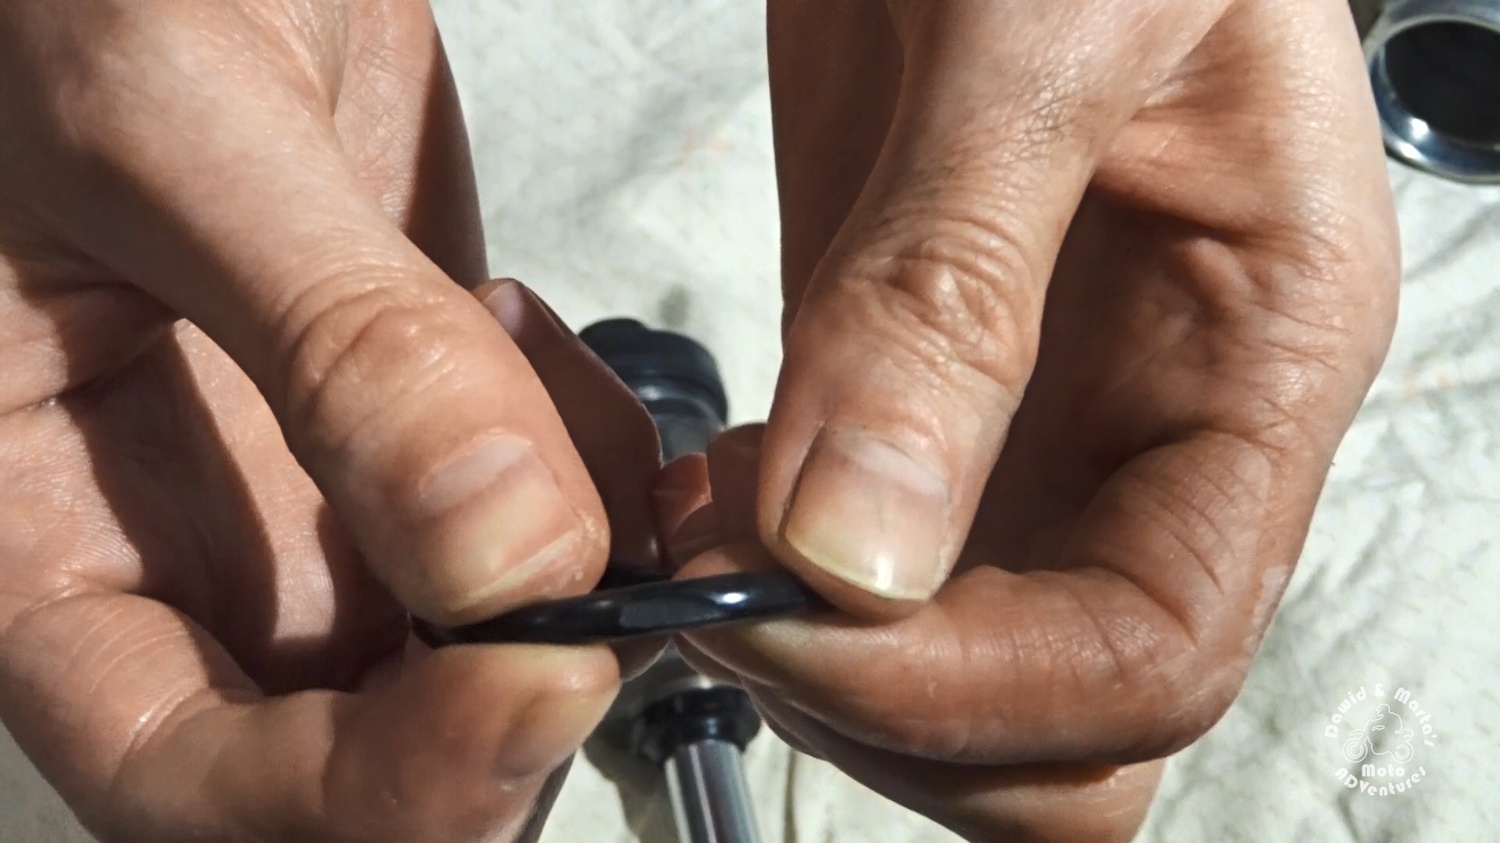
As you can see we cut off a small piece of it. So wee will now replace it with a new one.

32 Rear shock sealing head O-ring replacement
Fortunately, we were prepared
32 Rear shock sealing head O-ring replacement
Fortunately, we were prepared

Assembling the rear shock cylinder body back together

Now only the shock assembly is left ᕕ(☉‿☉)ᕗ

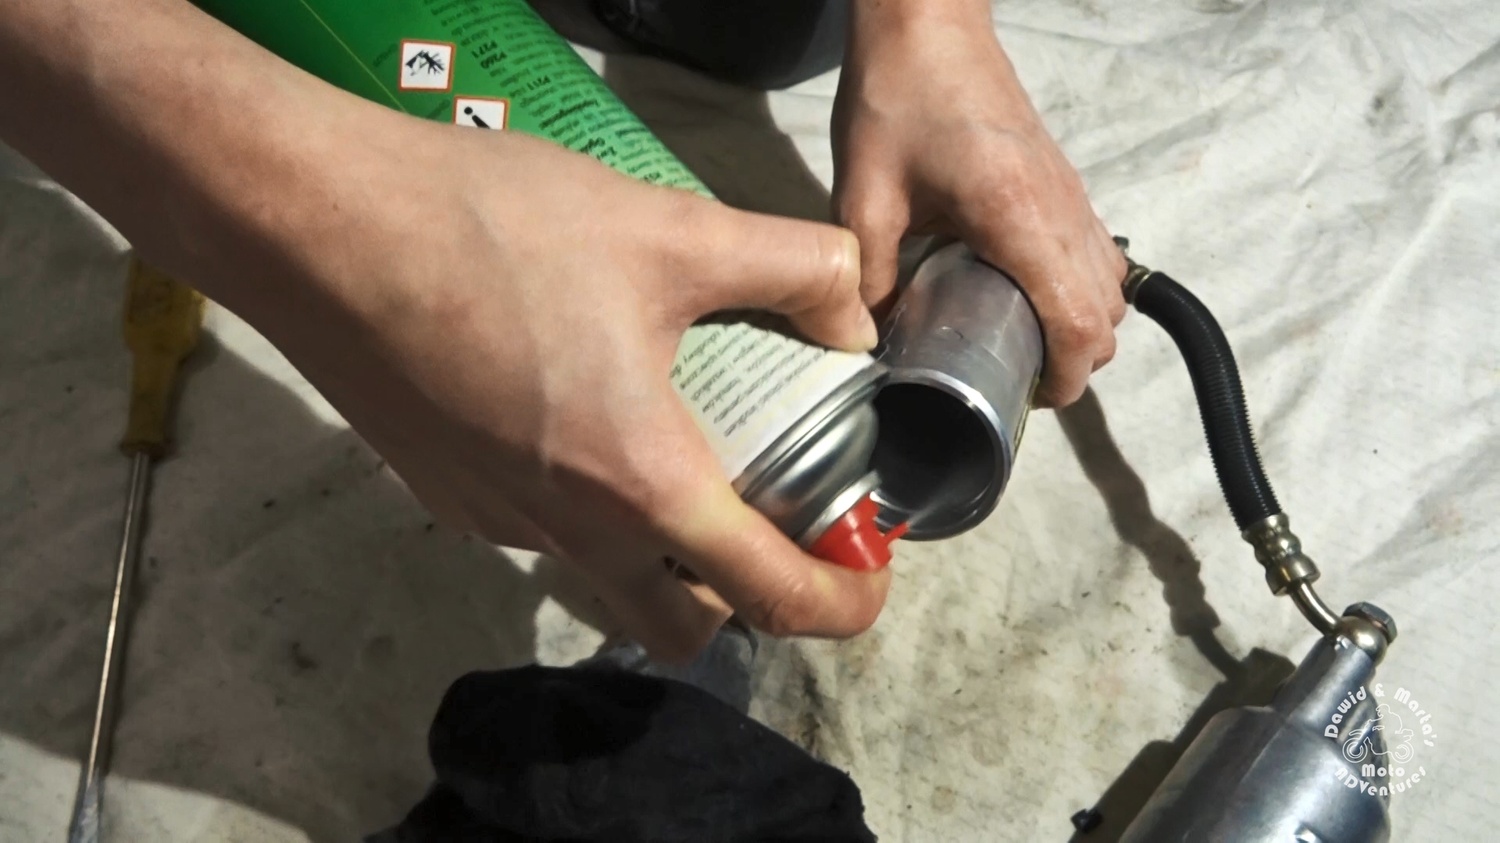
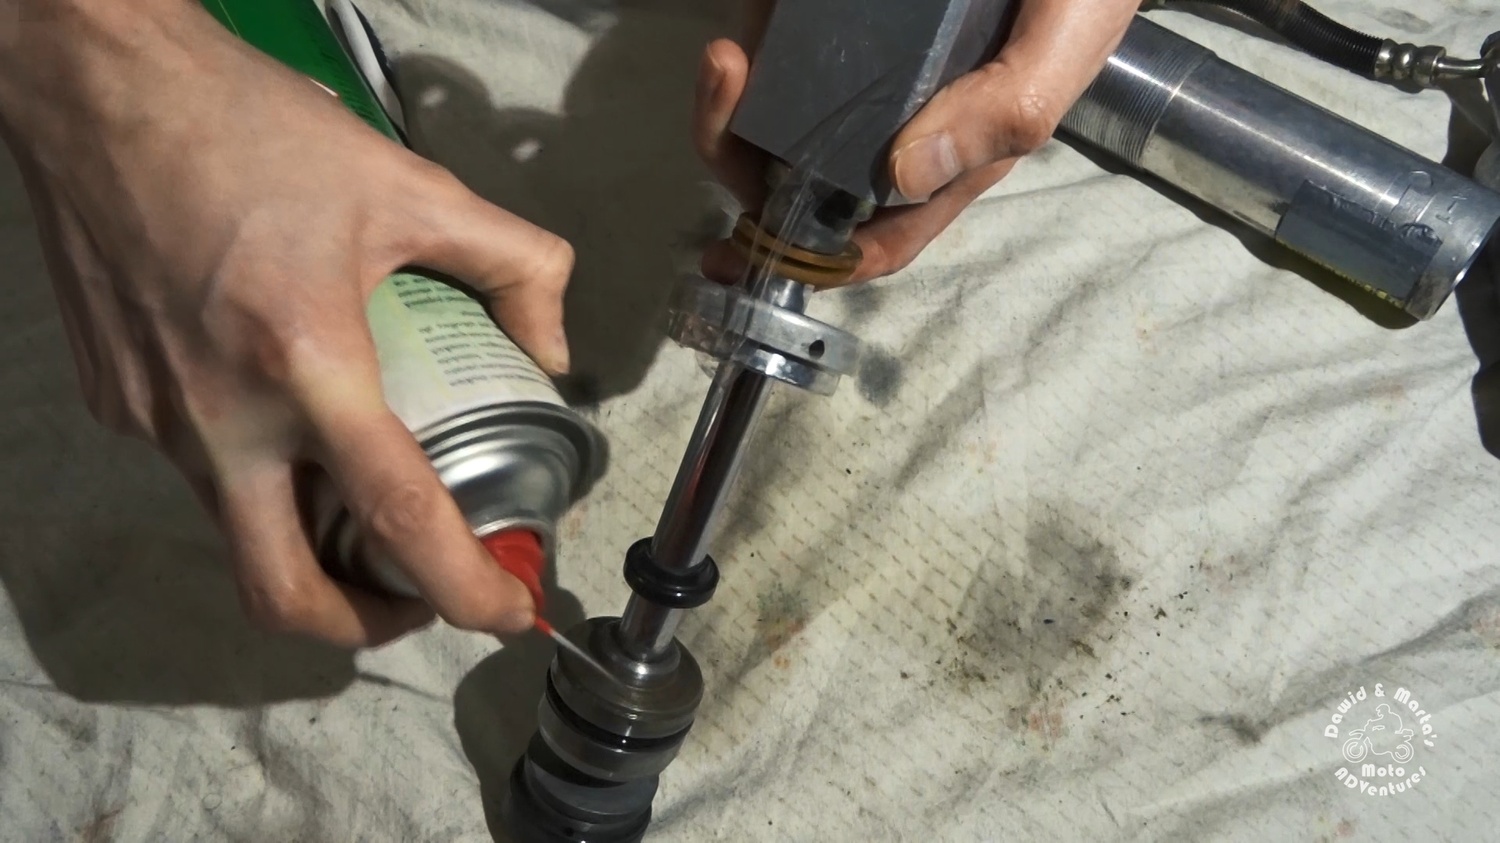
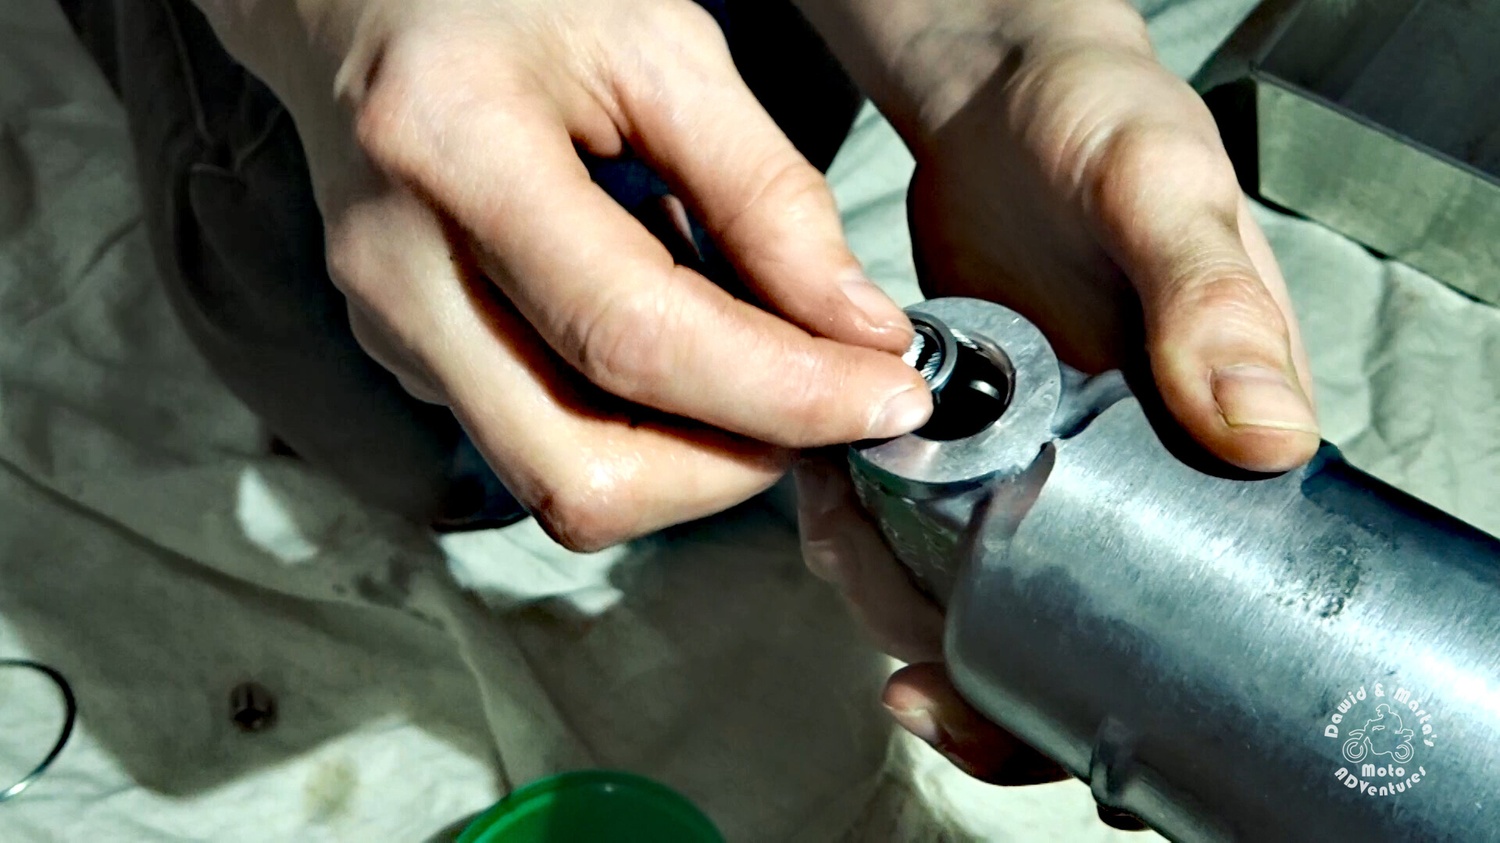
First we lube the sealing head with a rear shock oil and we do the same with the piston.

33 Lubing the cylinder durring rear shock assembly for DR350S
The cylinder
33 Lubing the cylinder durring rear shock assembly for DR350S
The cylinder
33 Lubing the piston durring rear shock assembly for DR350S
And then the piston
33 Lubing the piston durring rear shock assembly for DR350S
And then the piston

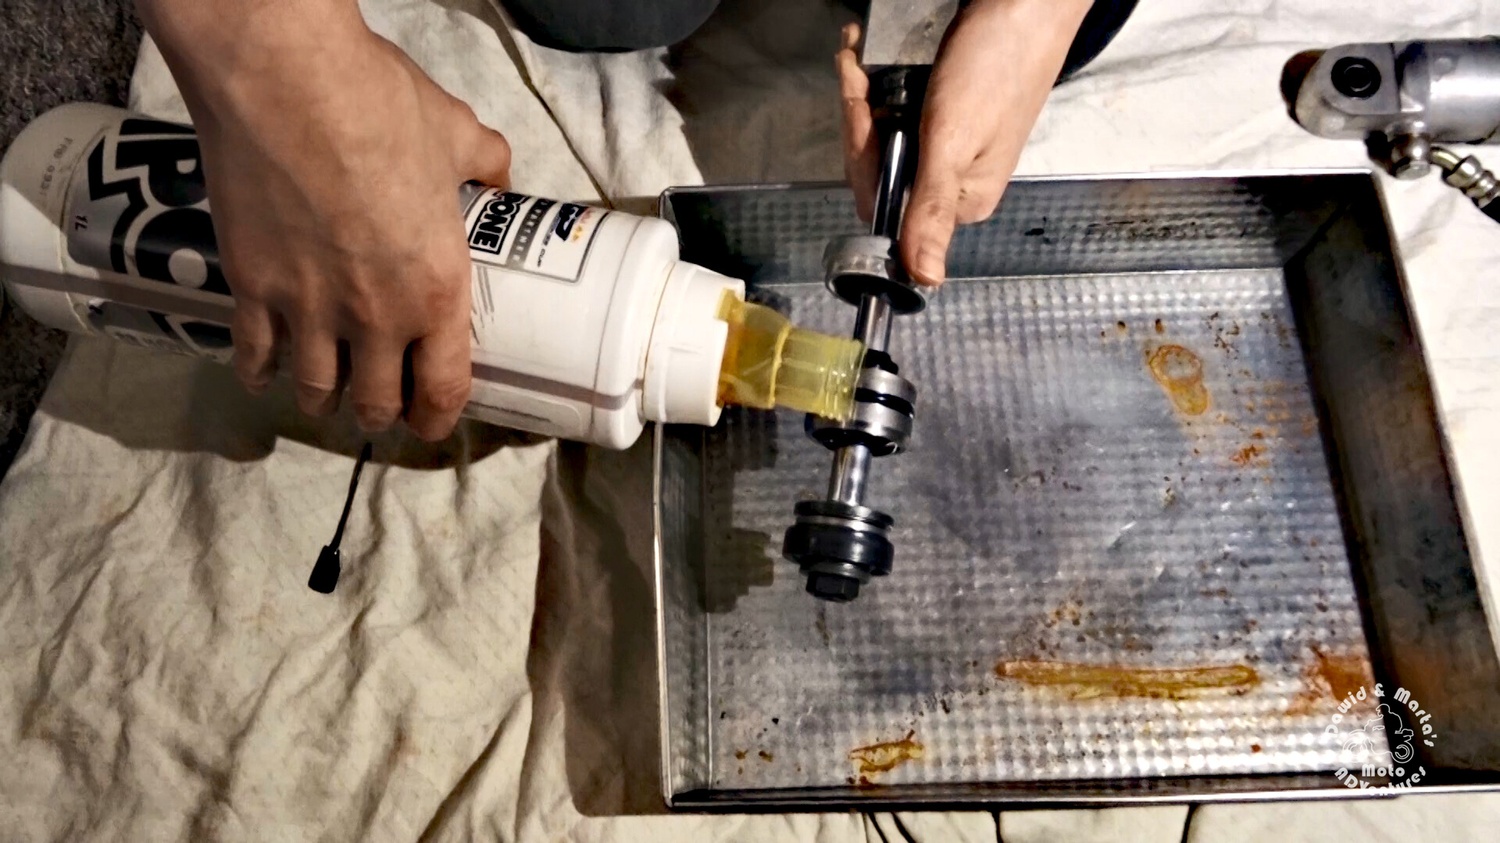
After that we can insert piston and cylinder head back into the tube.

34 Inserting piston into the body
Inserting piston into the body
34 Inserting piston into the body
Inserting piston into the body

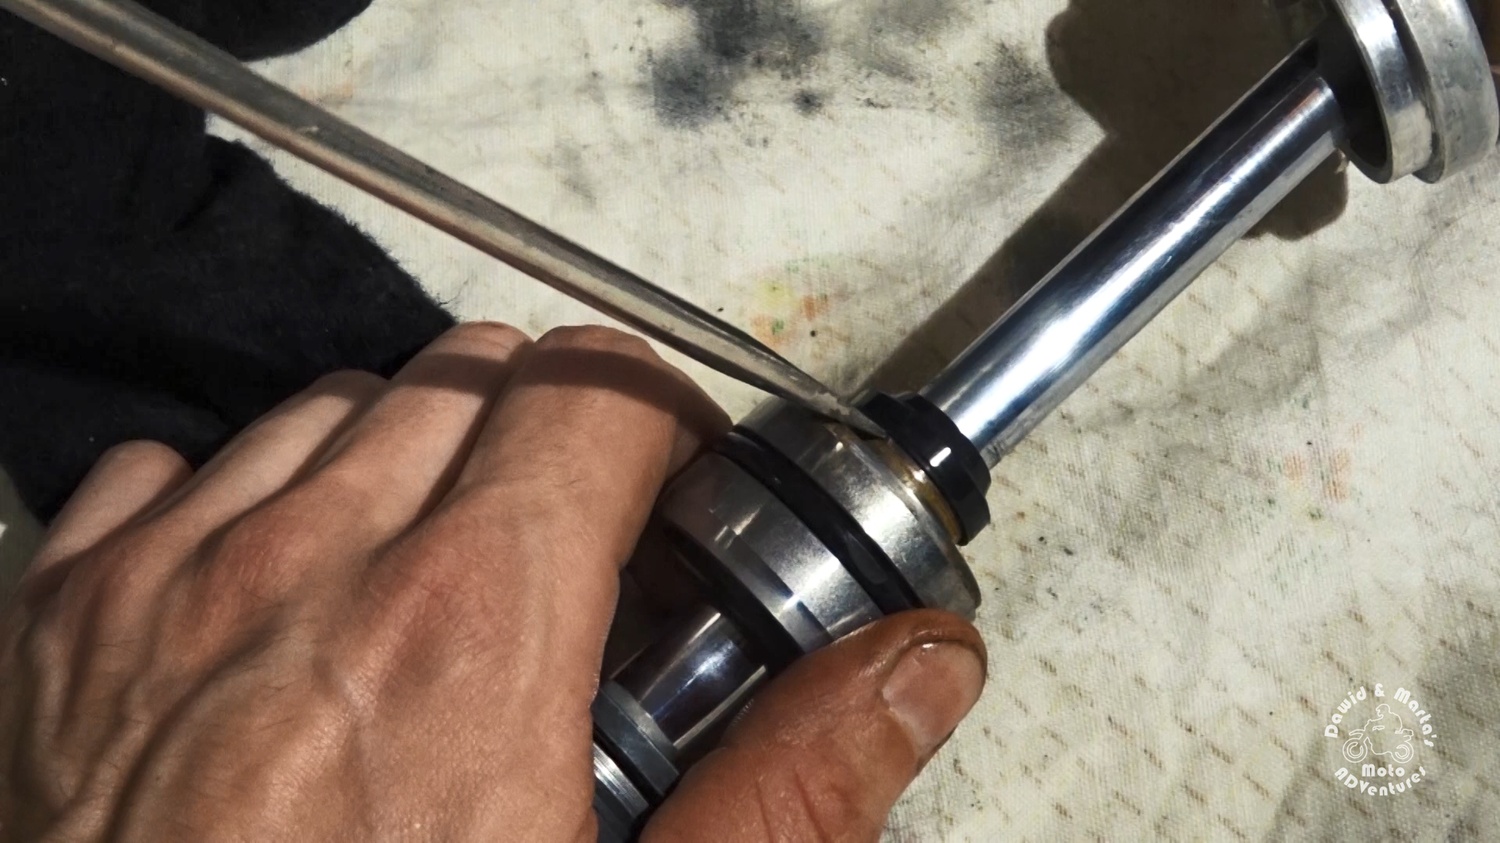
Then comes the securing ring. (Remember to make sure it is sitting well in its groove.)

34 Inserting the cylinder into the body during rear shock assembly for DR350S
Putting the securing ring back
34 Inserting the cylinder into the body during rear shock assembly for DR350S
Putting the securing ring back

After that we draw back the piston all the way up to lock the sealing head in its place.

35 Blocking the sealing head in its place
Blocking the sealing head
35 Blocking the sealing head in its place
Blocking the sealing head

Next we put back the cover using hammer.

36 Putting back the DR350 rear shock cylinder body cover
Don’t be too harsh with the hammer
36 Putting back the DR350 rear shock cylinder body cover
Don’t be too harsh with the hammer
36 Putting back the cylinder body cover
In the end cover looks like this
36 Putting back the cylinder body cover
In the end cover looks like this

Assembling the compression adjuster

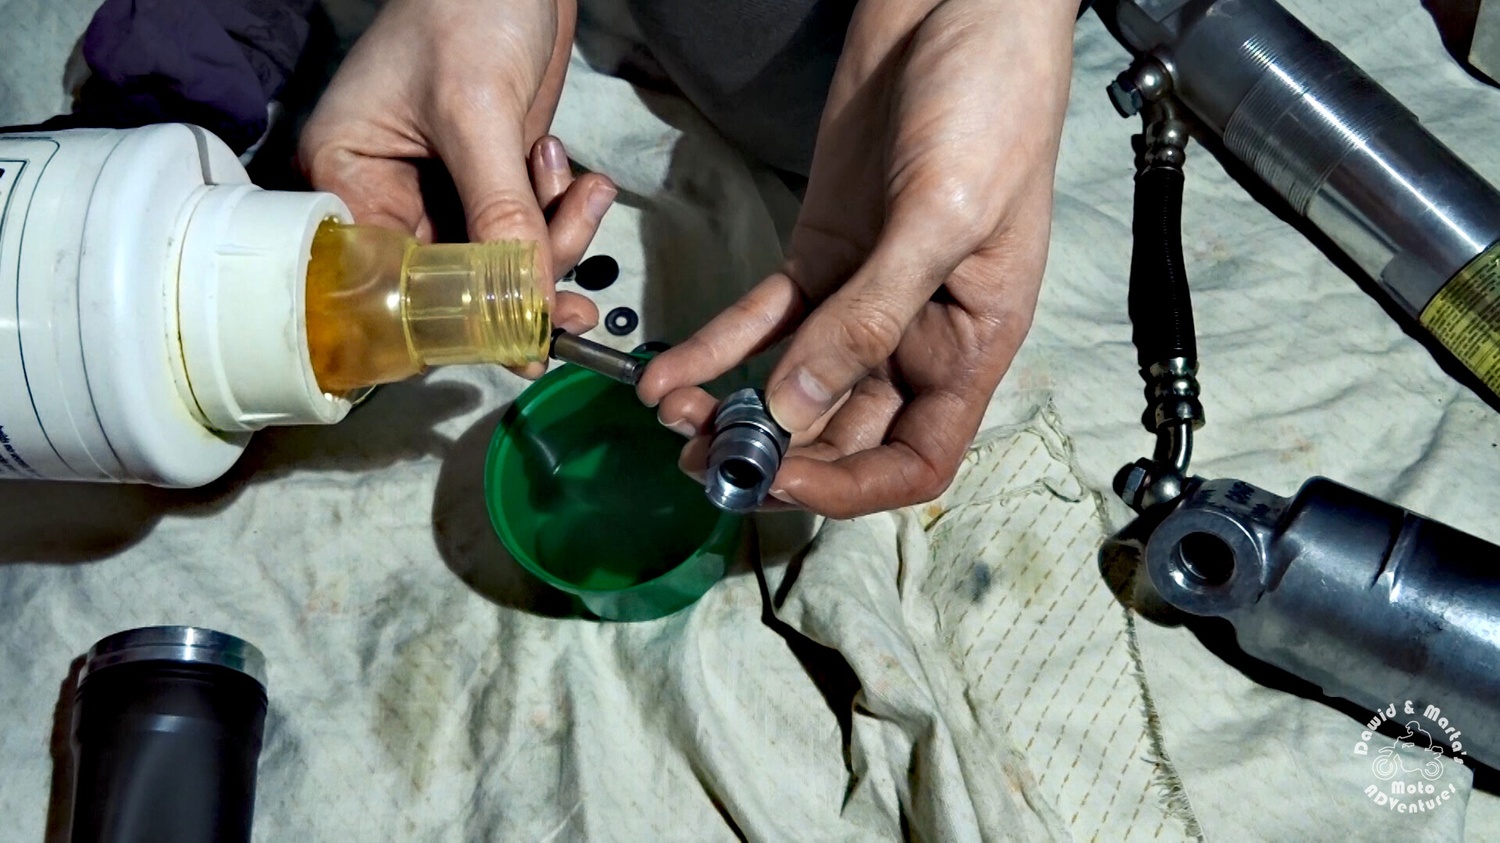
For now we’re done with the body. So we can put back together the compression adjuster.
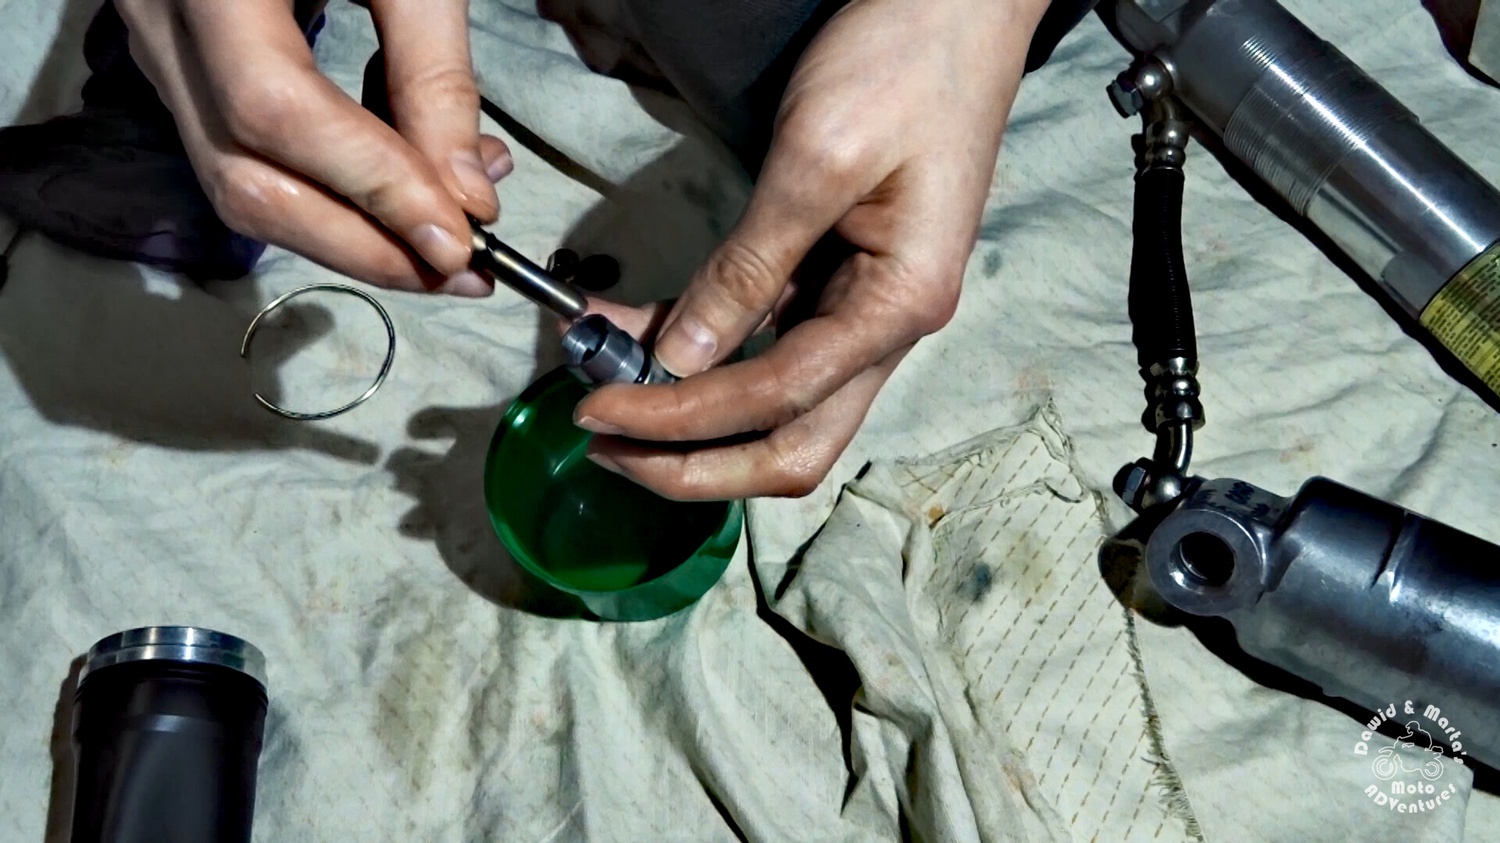
Before assembling the adjuster screw we lube its O-ring with oil.

37 Compression adjuster screw O-ring lube during rear shock air can assembly
A little oil will only help
37 Compression adjuster screw O-ring lube during rear shock air can assembly
A little oil will only help
37 Compression adjuster screw O-ring lube during rear shock air can assembly
Now we slide the screw back in
37 Compression adjuster screw O-ring lube during rear shock air can assembly
Now we slide the screw back in
37 Compression adjuster screw assembly during DR350 rear shock air can assembly
And use a screwdriver
37 Compression adjuster screw assembly during DR350 rear shock air can assembly
And use a screwdriver

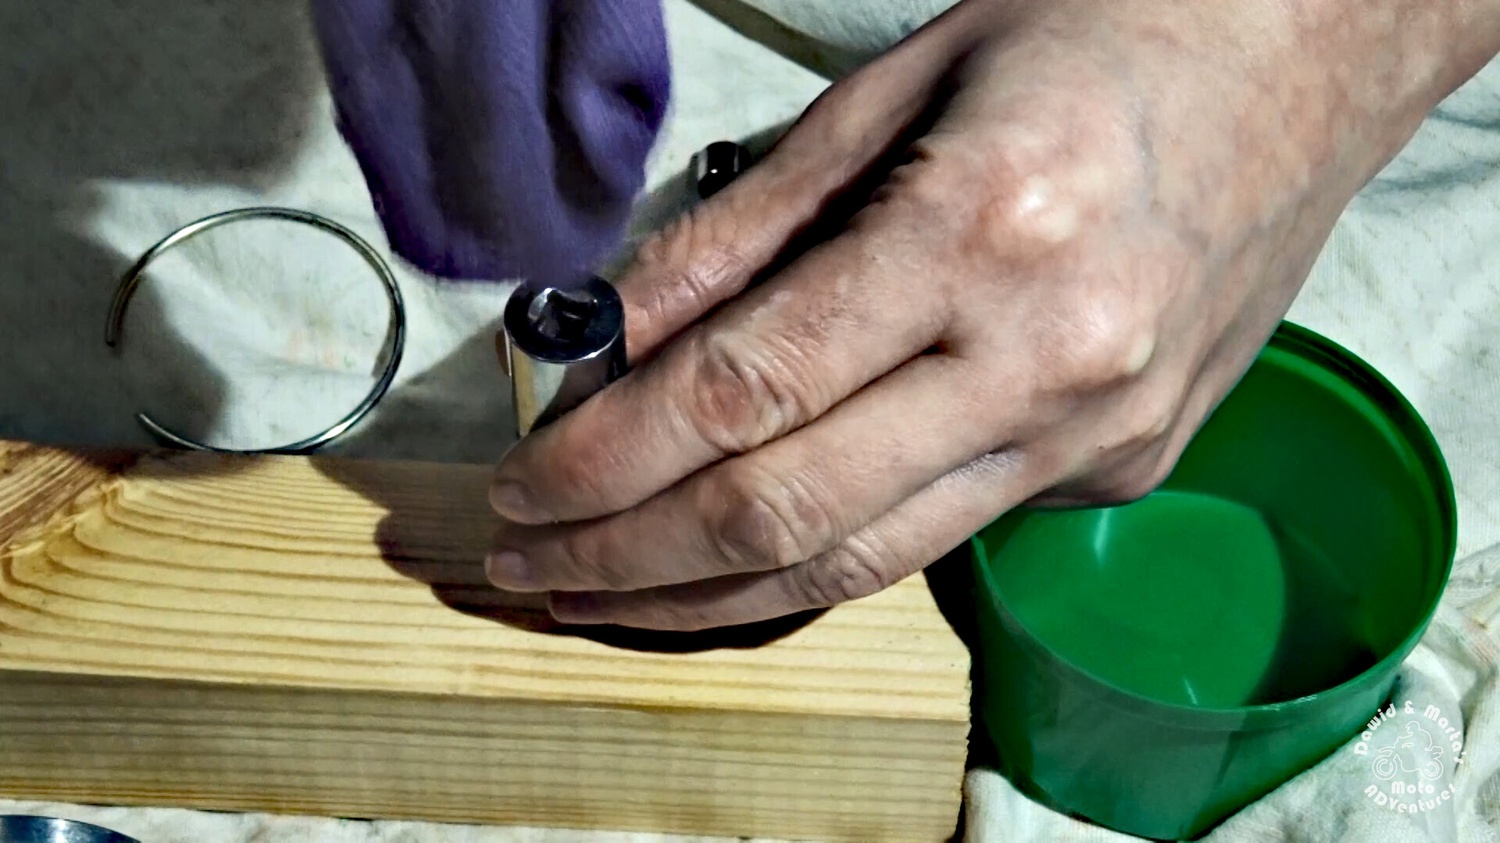
Next we put back the black cap using a socket and a hammer to lock it in it’s place.

38 Putting back the black cap on the DR350 compression adjuster
Bare hands would unlikely be sufficient here
38 Putting back the black cap on the DR350 compression adjuster
Bare hands would unlikely be sufficient here
38 Putting back the black cap on the DR350 compression adjuster
So we again make friends with the hammer
38 Putting back the black cap on the DR350 compression adjuster
So we again make friends with the hammer
38 Putting back the black cap on the DR350 compression adjuster
And its ready
38 Putting back the black cap on the DR350 compression adjuster
And its ready

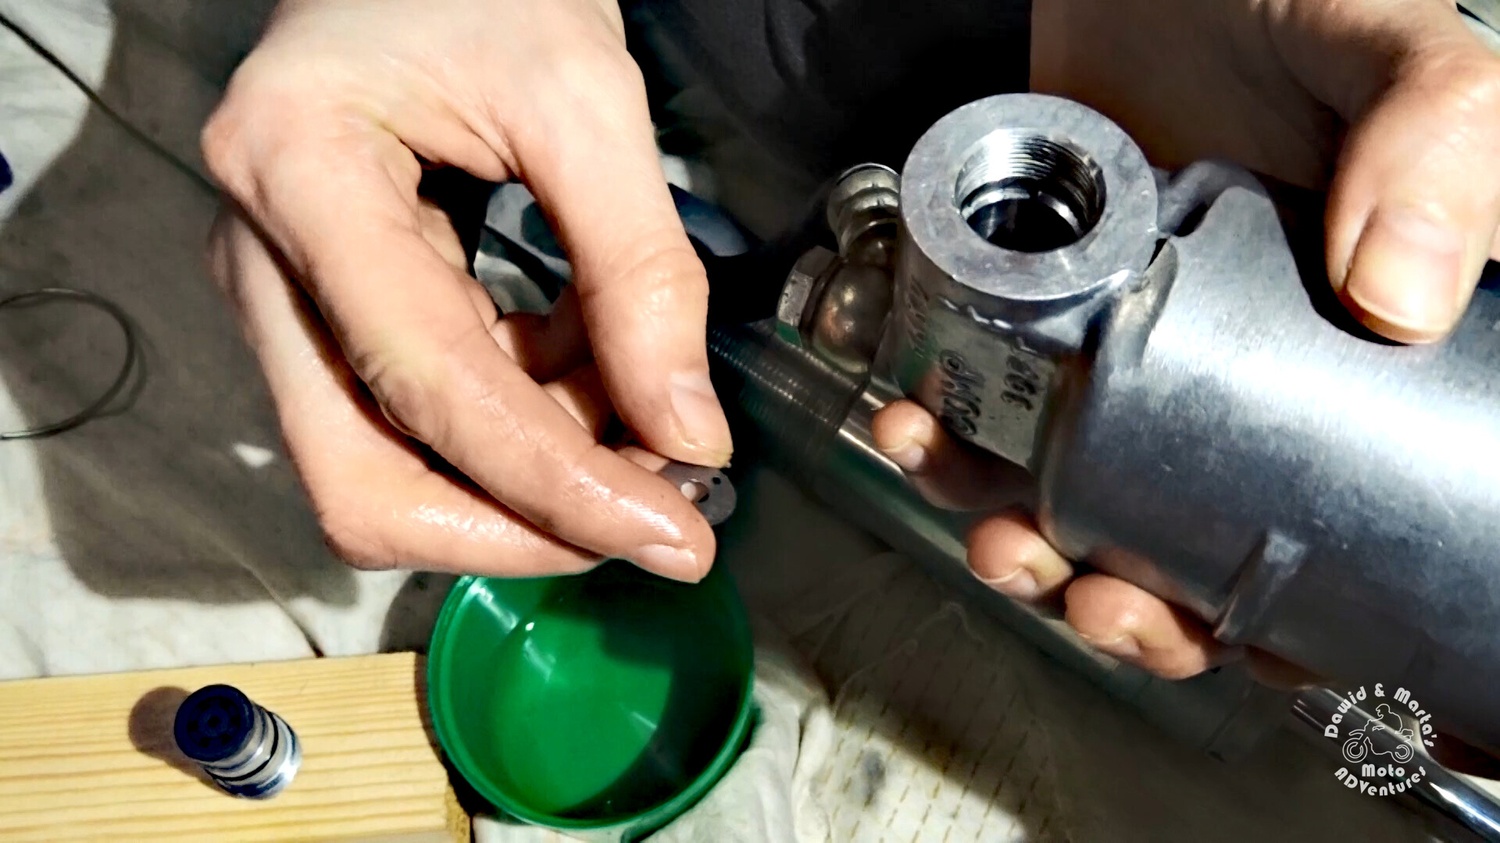
After that we put in the one way valve into the air can.

39 Assembling one way valve into the air can - DR350S rear shock rebuild
Our valve parts
39 Assembling one way valve into the air can - DR350S rear shock rebuild
Our valve parts

First we insert the washer on the pic below. It’s important to place it with its groove upwards.

39 Assembling one way valve into the rear shock air can of the DR350S
This guy goes first. Pay attention to the groove
39 Assembling one way valve into the rear shock air can of the DR350S
This guy goes first. Pay attention to the groove
39 Assembling one way valve into the rear shock air can of DR350S
The groove goes upwards
39 Assembling one way valve into the rear shock air can of DR350S
The groove goes upwards

As you might guessed, next we put the smaller metal washer inside this groove.

39 Assembling one way valve into the rear shock air can
Now the smaller fellow goes in
39 Assembling one way valve into the rear shock air can
Now the smaller fellow goes in
39 Assembling one way valve into the air can
In the end the valve inside looks like this
39 Assembling one way valve into the air can
In the end the valve inside looks like this

Because the one way valve is inside, we can put back in the compression adjuster.
So, naturally, we lube the adjuster O-ring with oil and screw the adjuster back to the air can.

40 Screwing back in the compression adjuster
Putting some oil…
40 Screwing back in the compression adjuster
Putting some oil…

Finally, the last touch – we lock the adjuster thread using a point punch.

41 Locking the rear shock compression adjuster with a punch tool and a hammer
Now it should stay in place
41 Locking the rear shock compression adjuster with a punch tool and a hammer
Now it should stay in place

Filling the oil and air

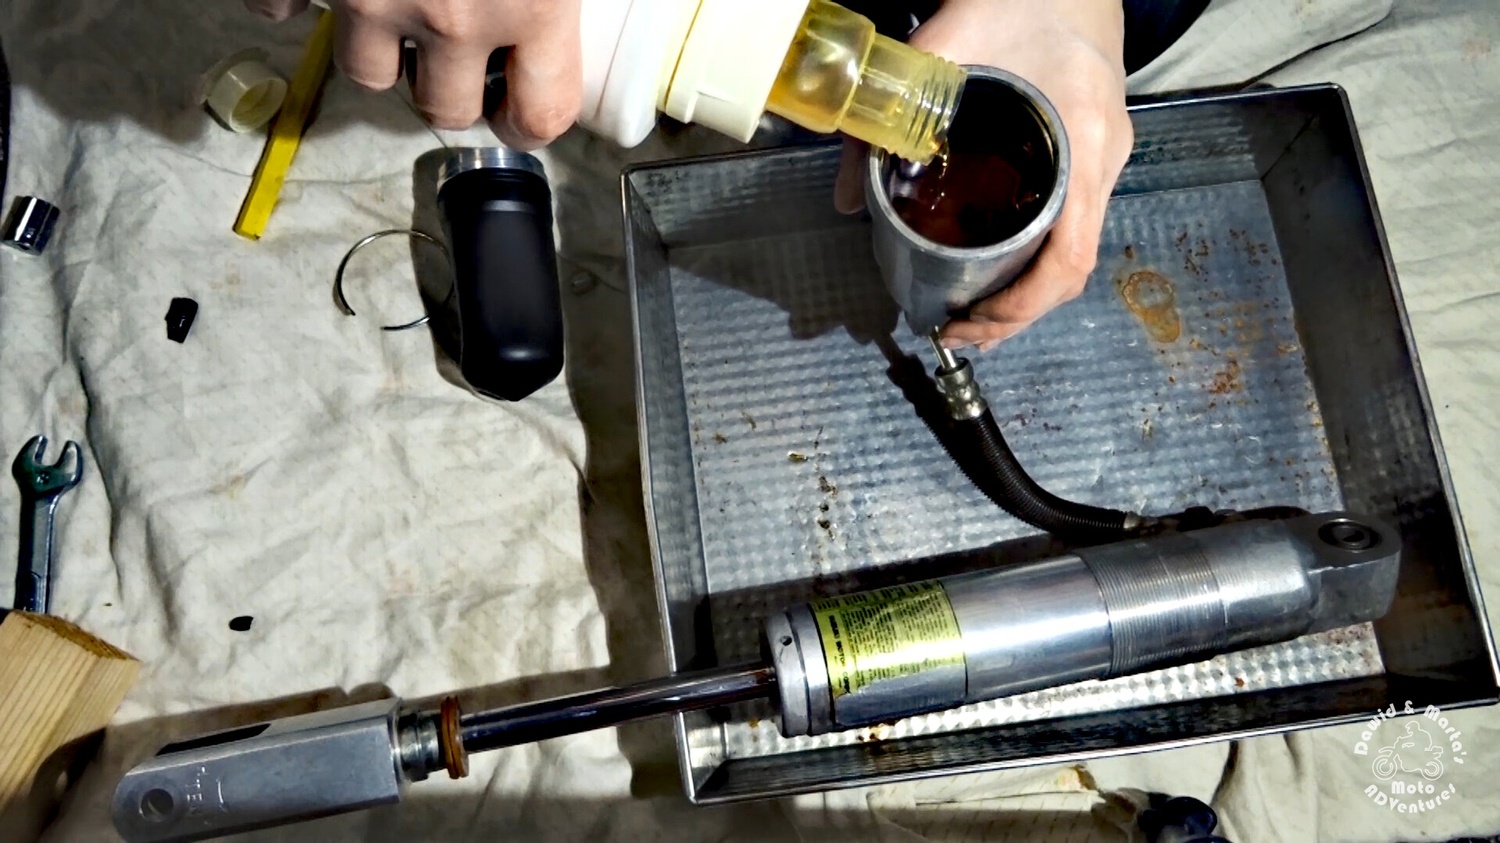
Now we are ready for pouring in the fresh oil to the can.

42 Filling the DR350 rear shock with fresh oil
Drink! ᕕ(☉‿☉)ᕗ
42 Filling the DR350 rear shock with fresh oil
Drink! ᕕ(☉‿☉)ᕗ

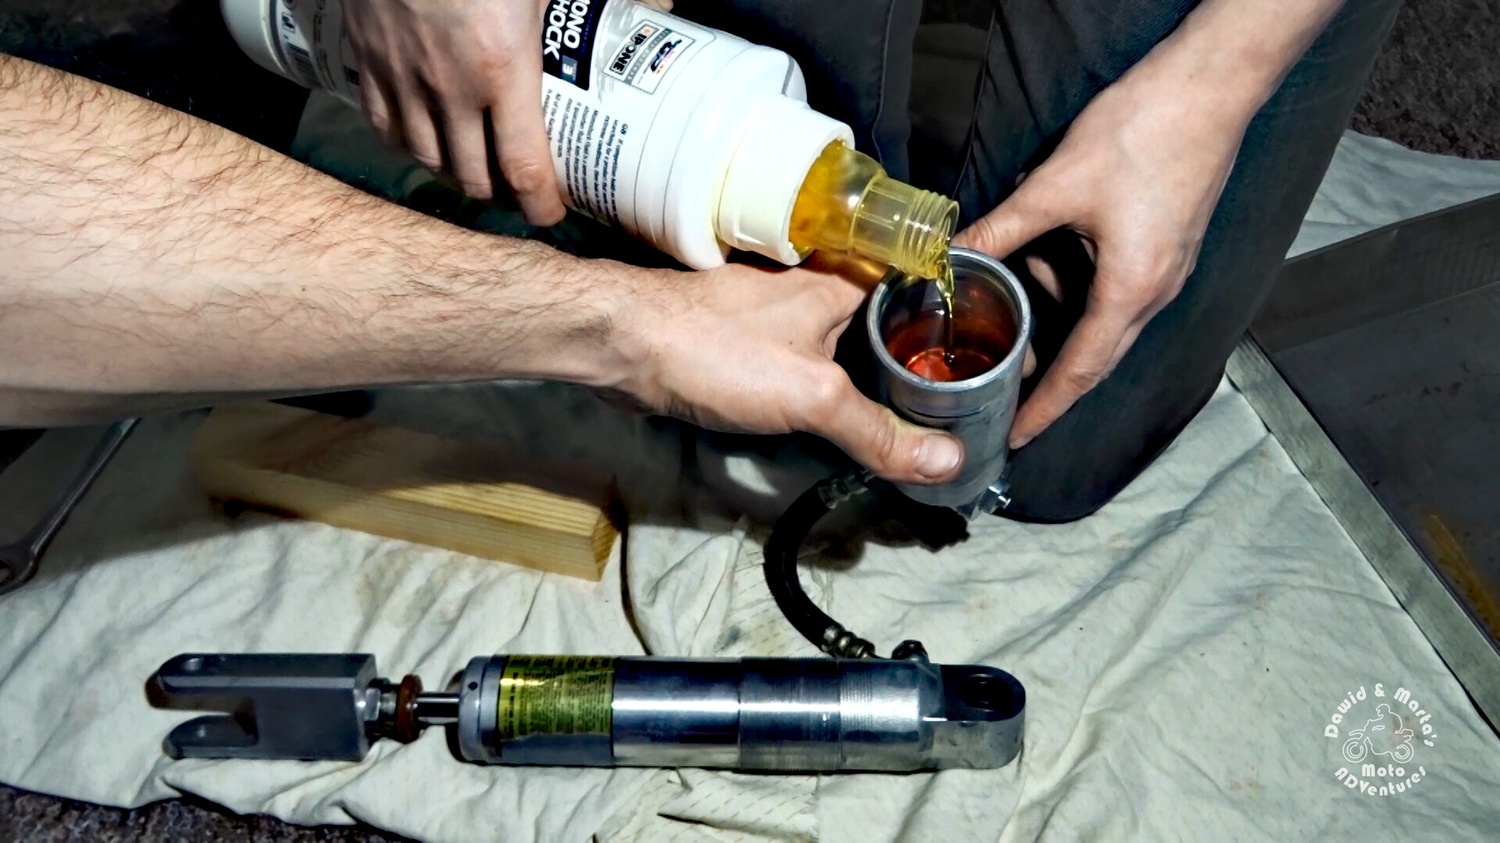
But we don’t immediately put back the rubber sleeve. First we pump the shock until we remove all of the air bubbles from the oil chamber. If need be – we pour some more oil.

43 Removing air bubbles form the rear shock oil chamber
Removing the air bubbles
43 Removing air bubbles form the rear shock oil chamber
Removing the air bubbles

In the end you should not see any little bubble coming  out during the shock compression.

After that we fill the whole can with oil up to its edge and insert the rubber sleeve.

44 Pouring oil to full to the rear shock oil chamber
Don’t stint the oil, be generous ヽ(☉‿☉)ノ
44 Pouring oil to full to the rear shock oil chamber
Don’t stint the oil, be generous ヽ(☉‿☉)ノ
45 Inserting the rubber sleeve into the rear shock air can
Inserting the rubber sleeve. The oil will spill out so be prepared
45 Inserting the rubber sleeve into the rear shock air can
Inserting the rubber sleeve. The oil will spill out so be prepared

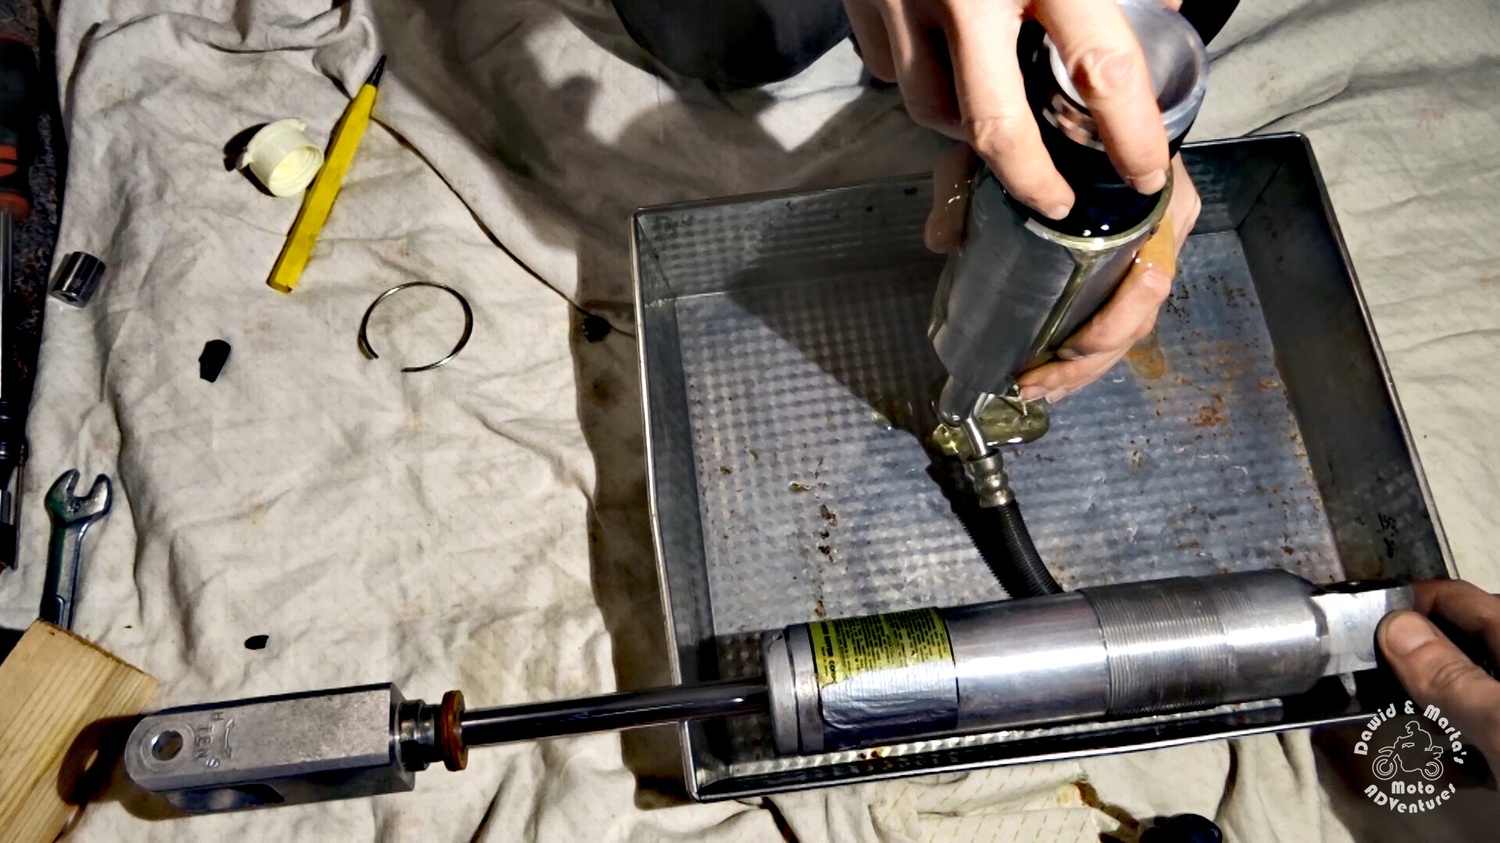
Next we push the air can cap inside the air can until there will be enough space to insert the securing ring.

46 Putting back rear shock air can securing ring
Putting back rear shock air can securing ring
46 Putting back rear shock air can securing ring
Putting back rear shock air can securing ring

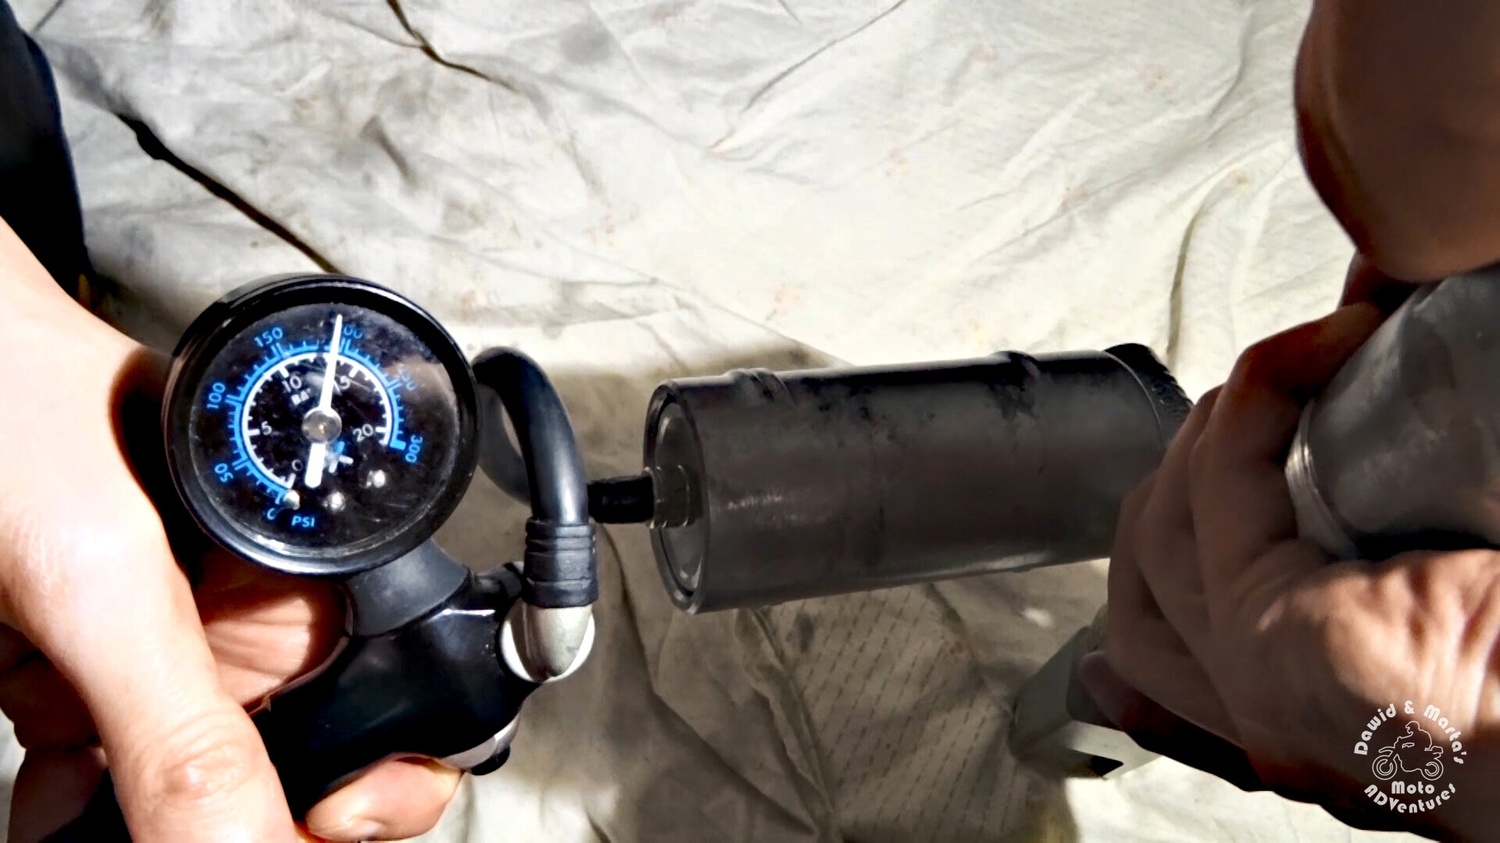
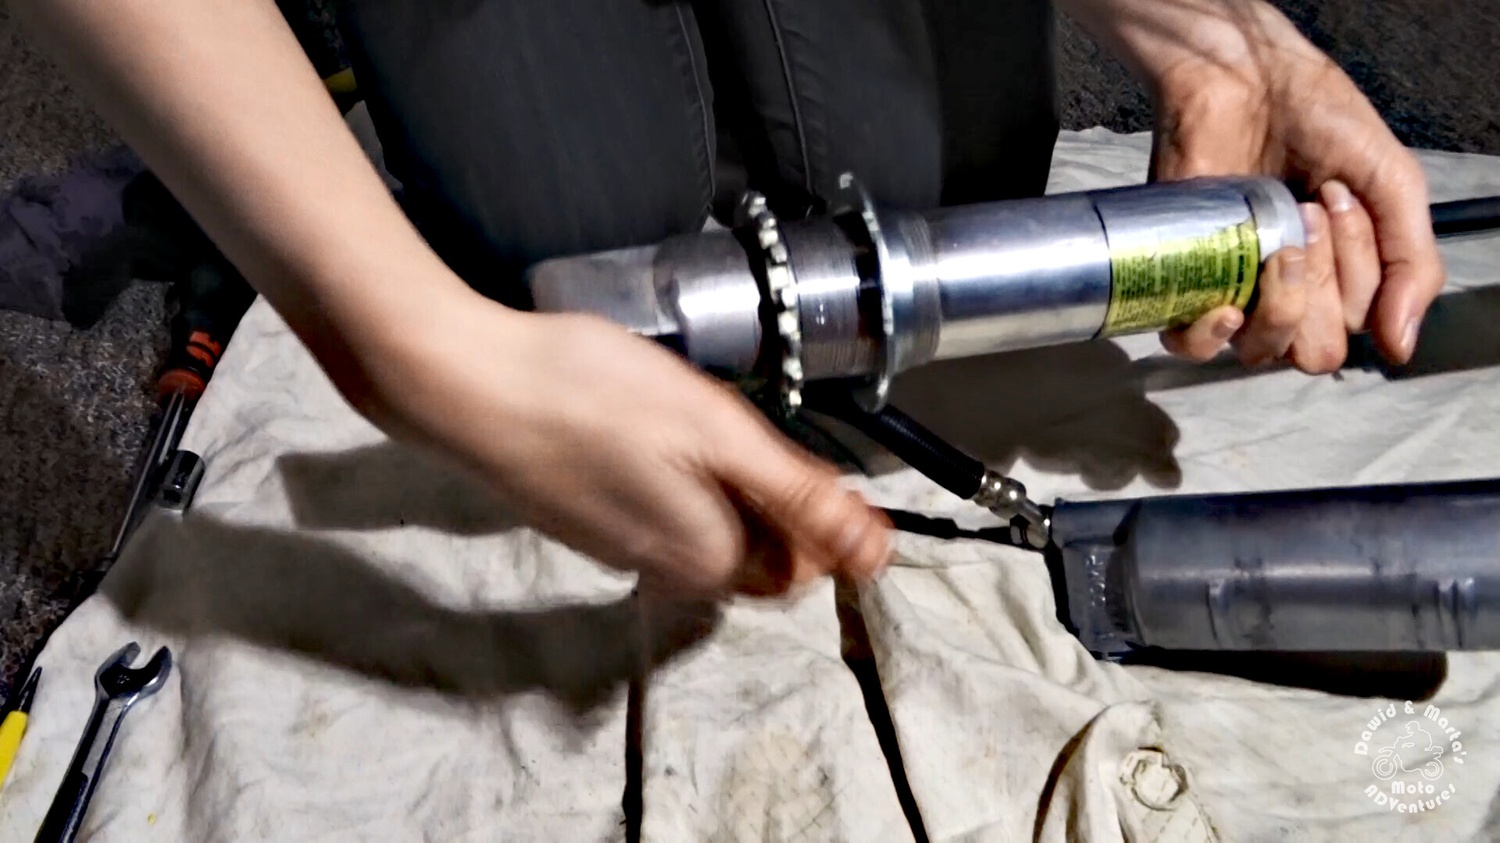
Now we should pump some air inside the air can air chamber.
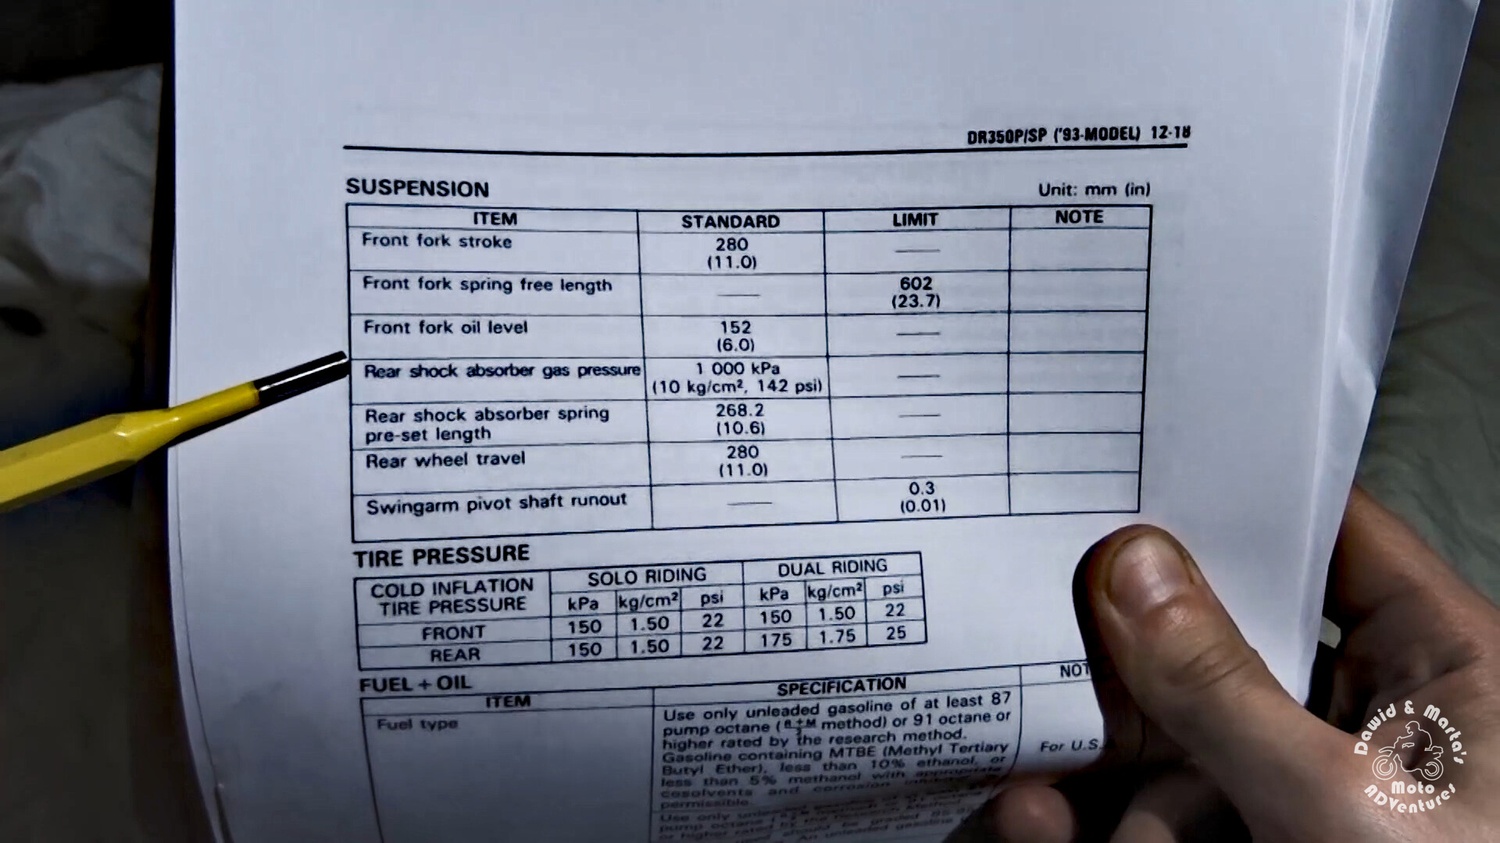
According to the service manual we should pump air until we reach 142 psi (uncompressed shock)

47 Rear shock absorber pressure from the DR350S service manual
Snippet from the service manual
47 Rear shock absorber pressure from the DR350S service manual
Snippet from the service manual

So we just connect an ordinary pump to the air can air valve and pump until we reach the value recommended by Mr Suzuki.

48 Filling the rear shock air chamber with air
Filling the rear shock air chamber with air
48 Filling the rear shock air chamber with air
Filling the rear shock air chamber with air
48 Filling the rear shock air chamber with air - result
Results
48 Filling the rear shock air chamber with air - result
Results

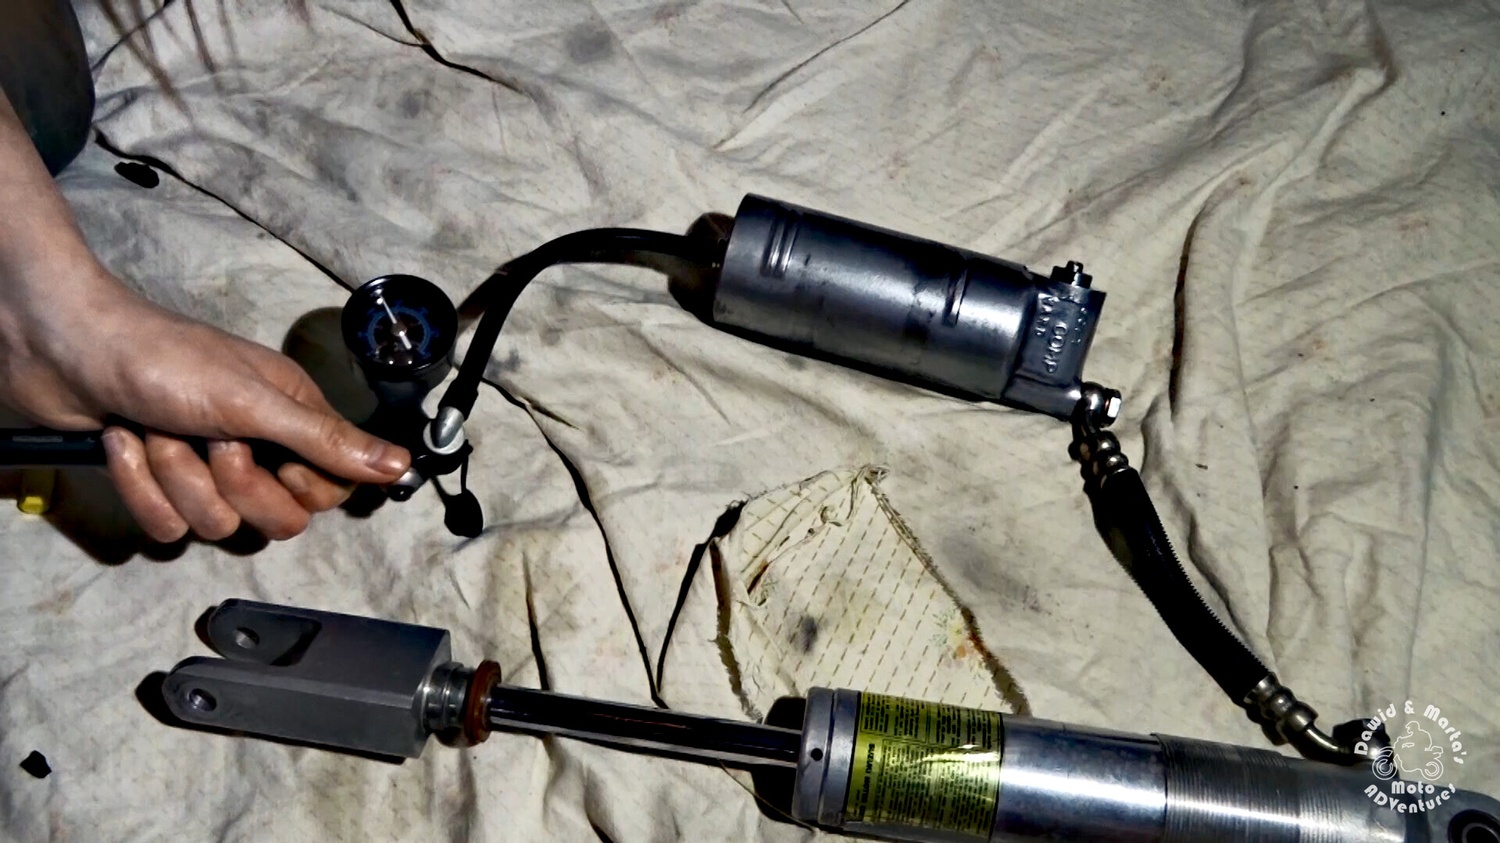
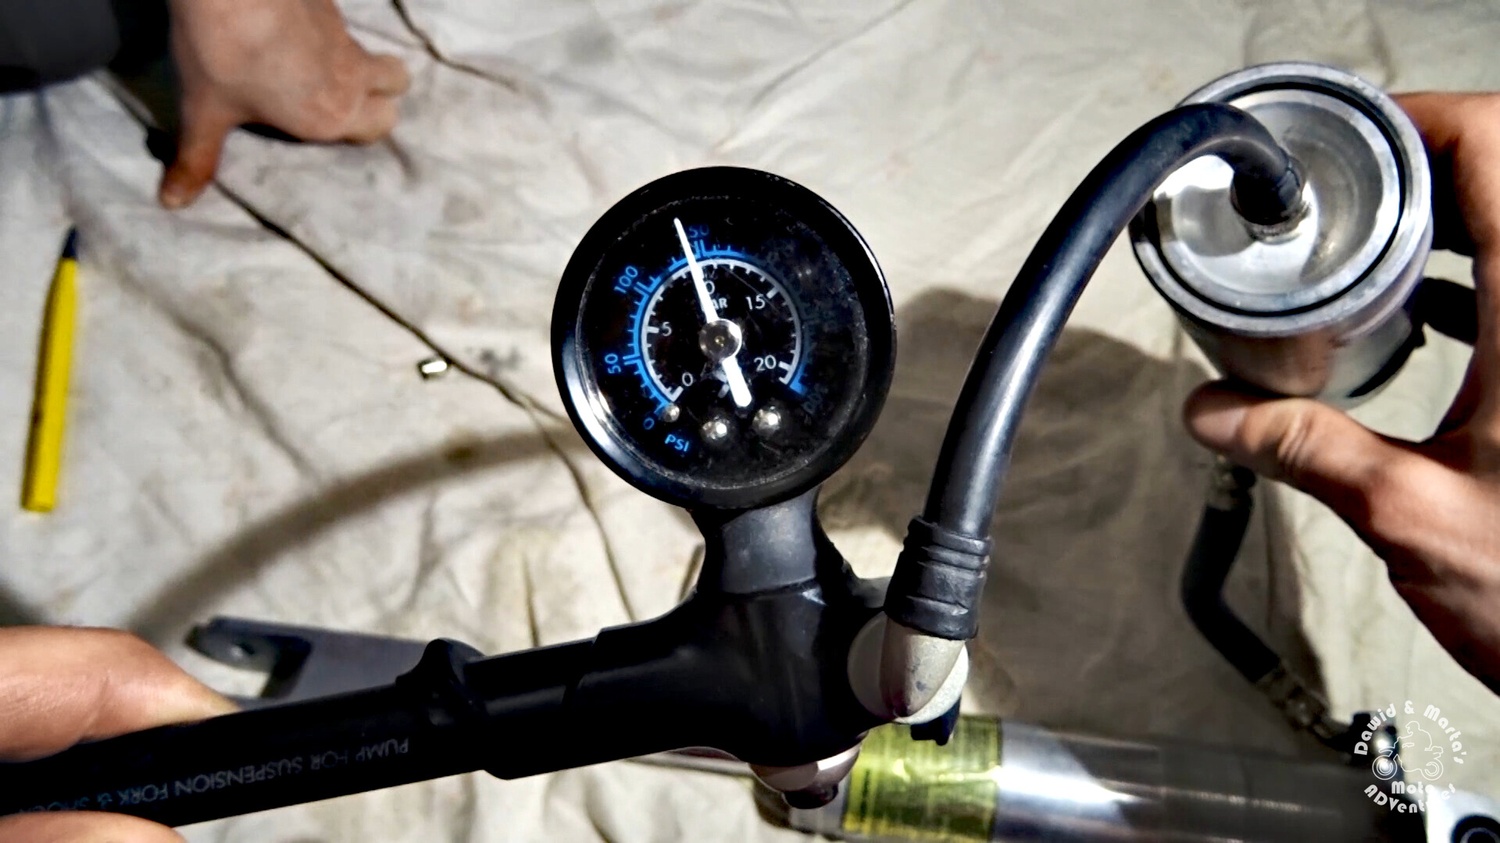
If you wonder how the pressure increases during the shock compression now, we got you back ;)

49 Filling the rear shock air chamber with air - result during shock compression
Results during maximum shock compression
49 Filling the rear shock air chamber with air - result during shock compression
Results during maximum shock compression

Finally we are ready to put back the air valve cap and the air can cap.

50 Putting back the rear shock air can cap
Putting back the air can cap
50 Putting back the rear shock air can cap
Putting back the air can cap

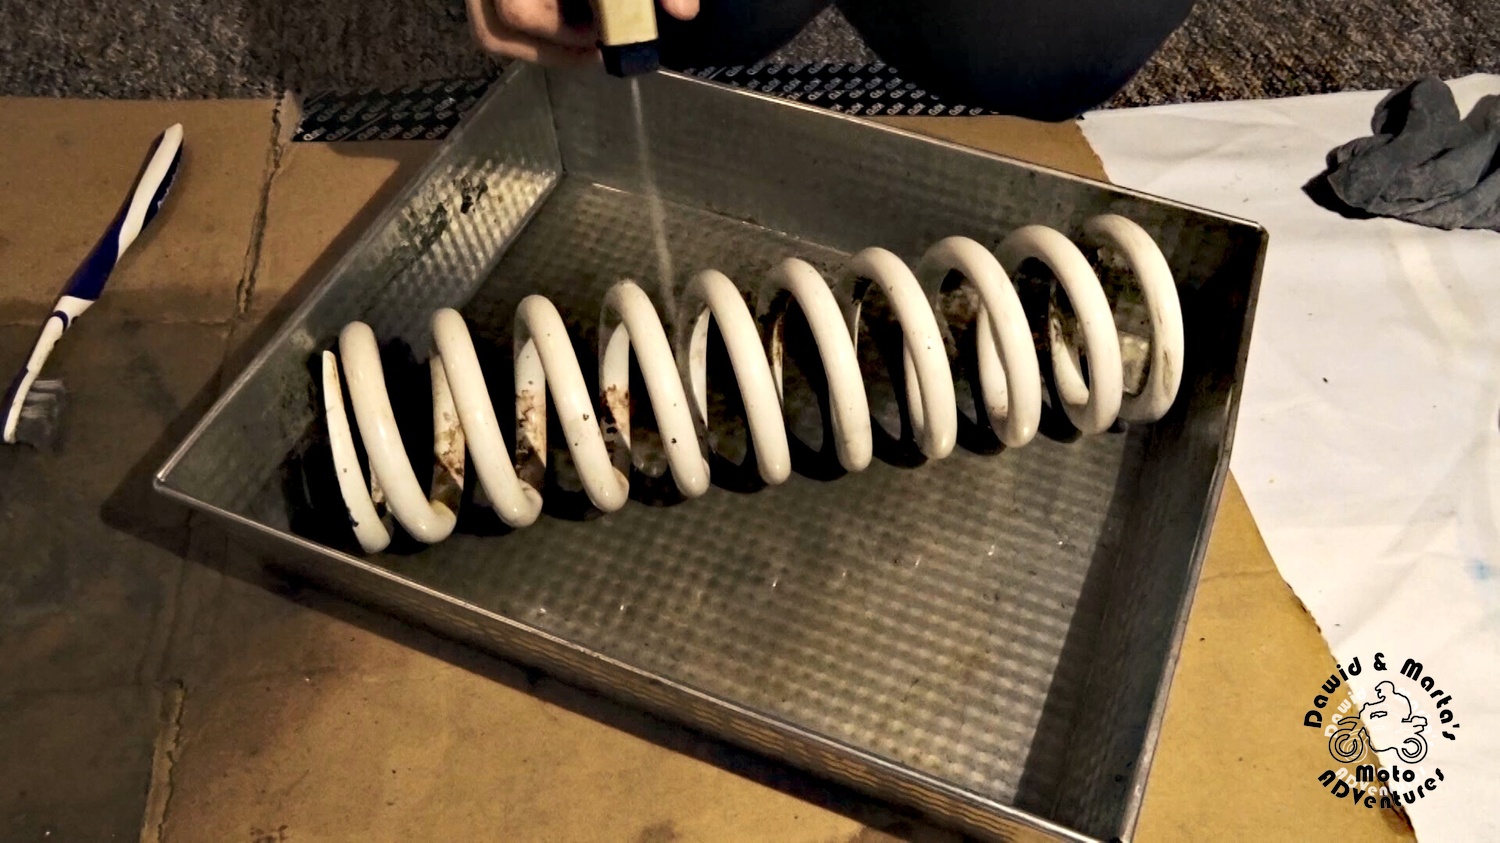
The last step is putting the spring back.
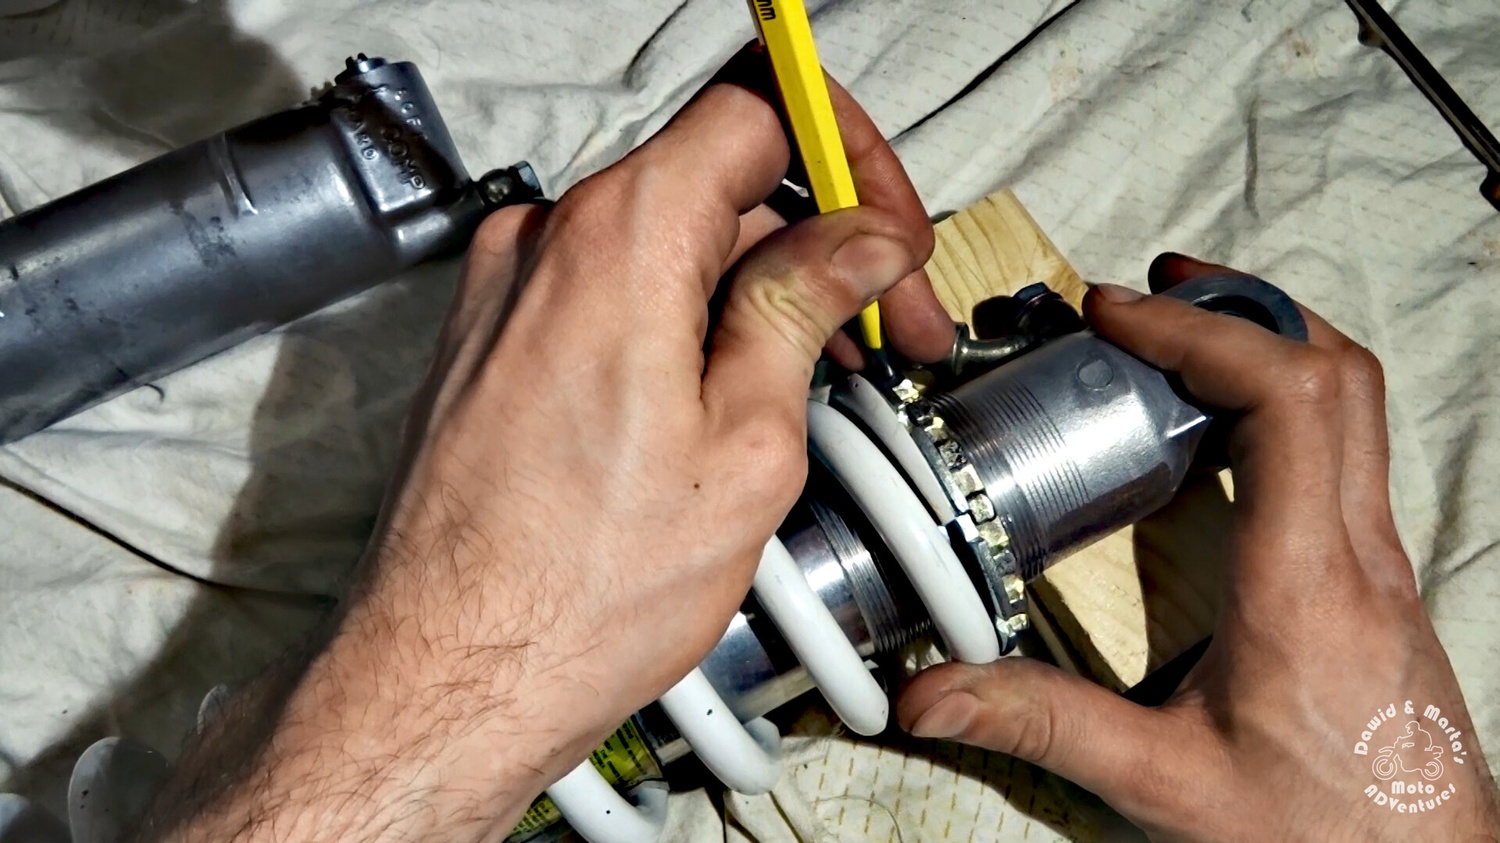
So first we screw back the adjuster nut and the locking ring.

51 Putting adjuster nut back on the rear shock body
Putting back the adjuster nut
51 Putting adjuster nut back on the rear shock body
Putting back the adjuster nut
52 Putting locking ring back on the rear shock body
And now the locking ring
52 Putting locking ring back on the rear shock body
And now the locking ring
53 Putting locking ring back on the rear shock body
Screw it in loosely, we will adjust this in a minute
53 Putting locking ring back on the rear shock body
Screw it in loosely, we will adjust this in a minute

Finally we put back the spring and the top spring collar.

54 Putting on the rear shock spring back
Putting on the rear shock spring back
54 Putting on the rear shock spring back
Putting on the rear shock spring back
55 Inserting the spring collar back
Inserting the spring collar
55 Inserting the spring collar back
Inserting the spring collar

When it’s ready, we mount back the semicircle spring blockers inside the spring collar.

56 Installing the rear shock spring blockers
Installing the rear shock spring blockers
56 Installing the rear shock spring blockers
Installing the rear shock spring blockers

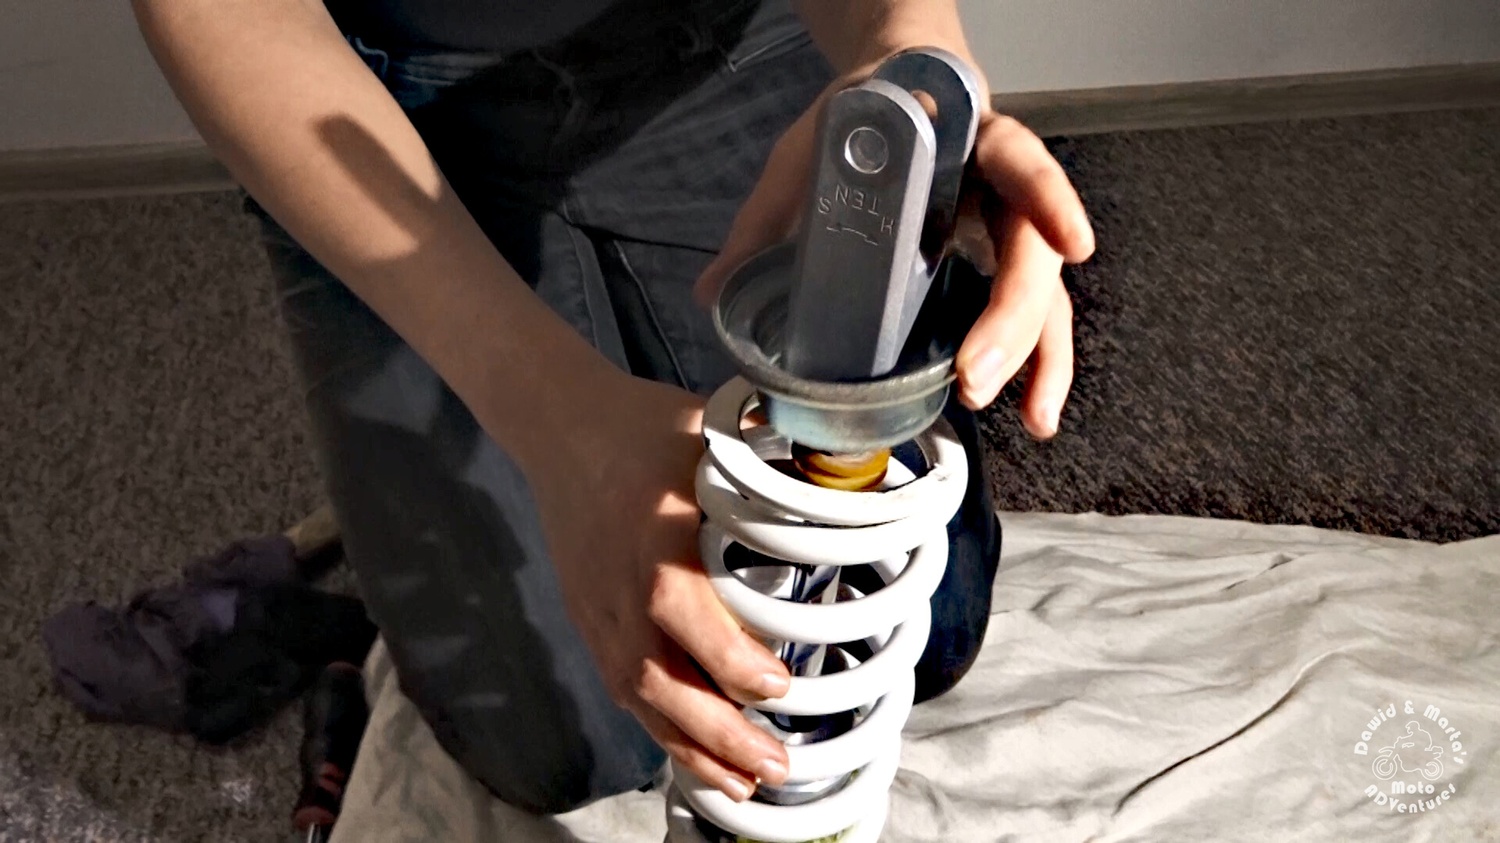
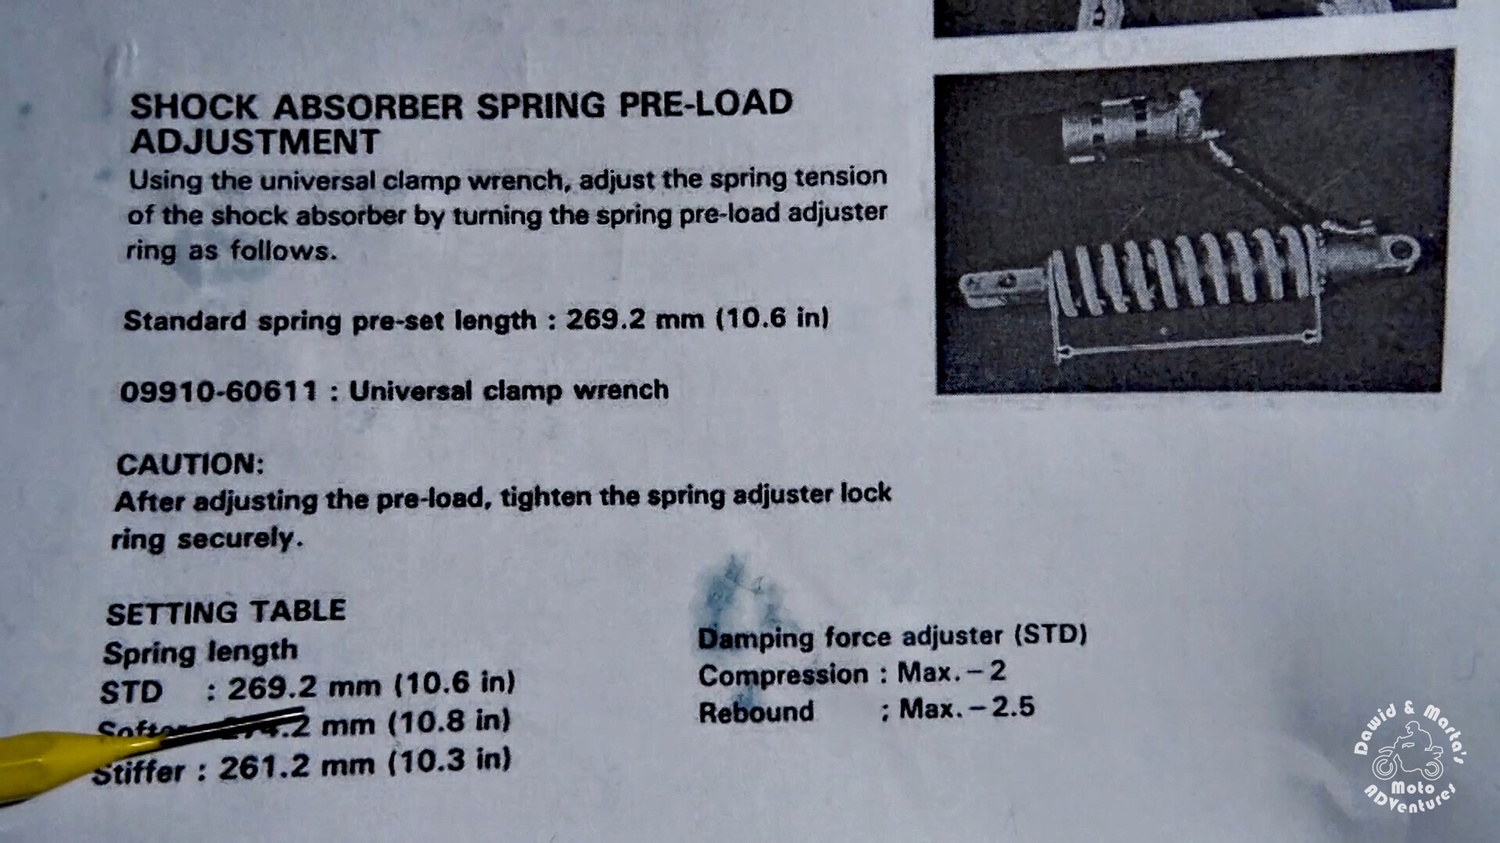
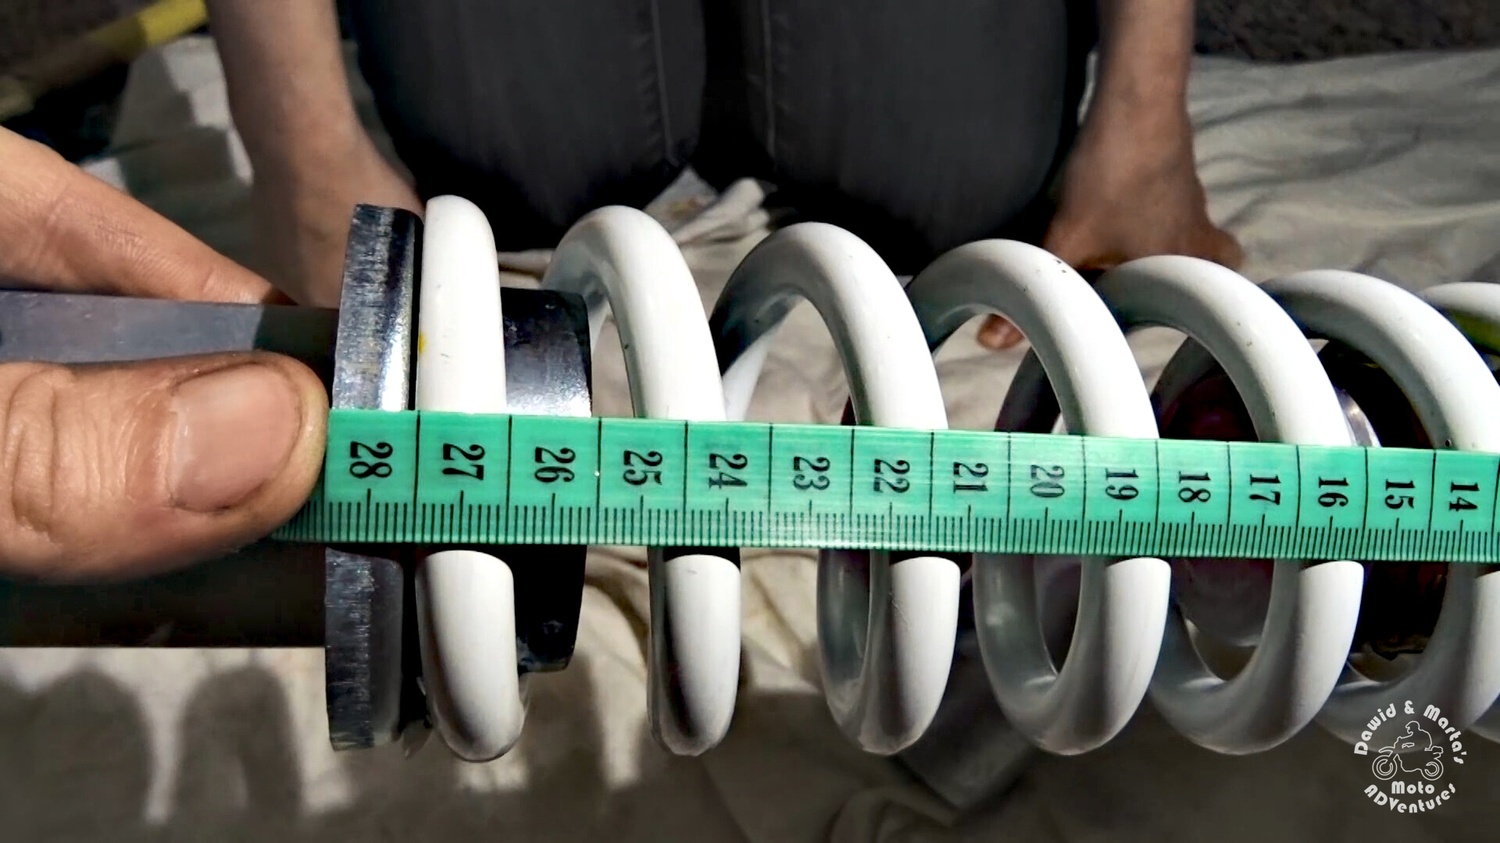
Now what’s left is setting the spring length using the preload adjuster. I set my spring to standard length, that is, 269.2 mm

58 DR350S service manual about spring preload adjustment
What the manual says about the preload adjustment
58 DR350S service manual about spring preload adjustment
What the manual says about the preload adjustment

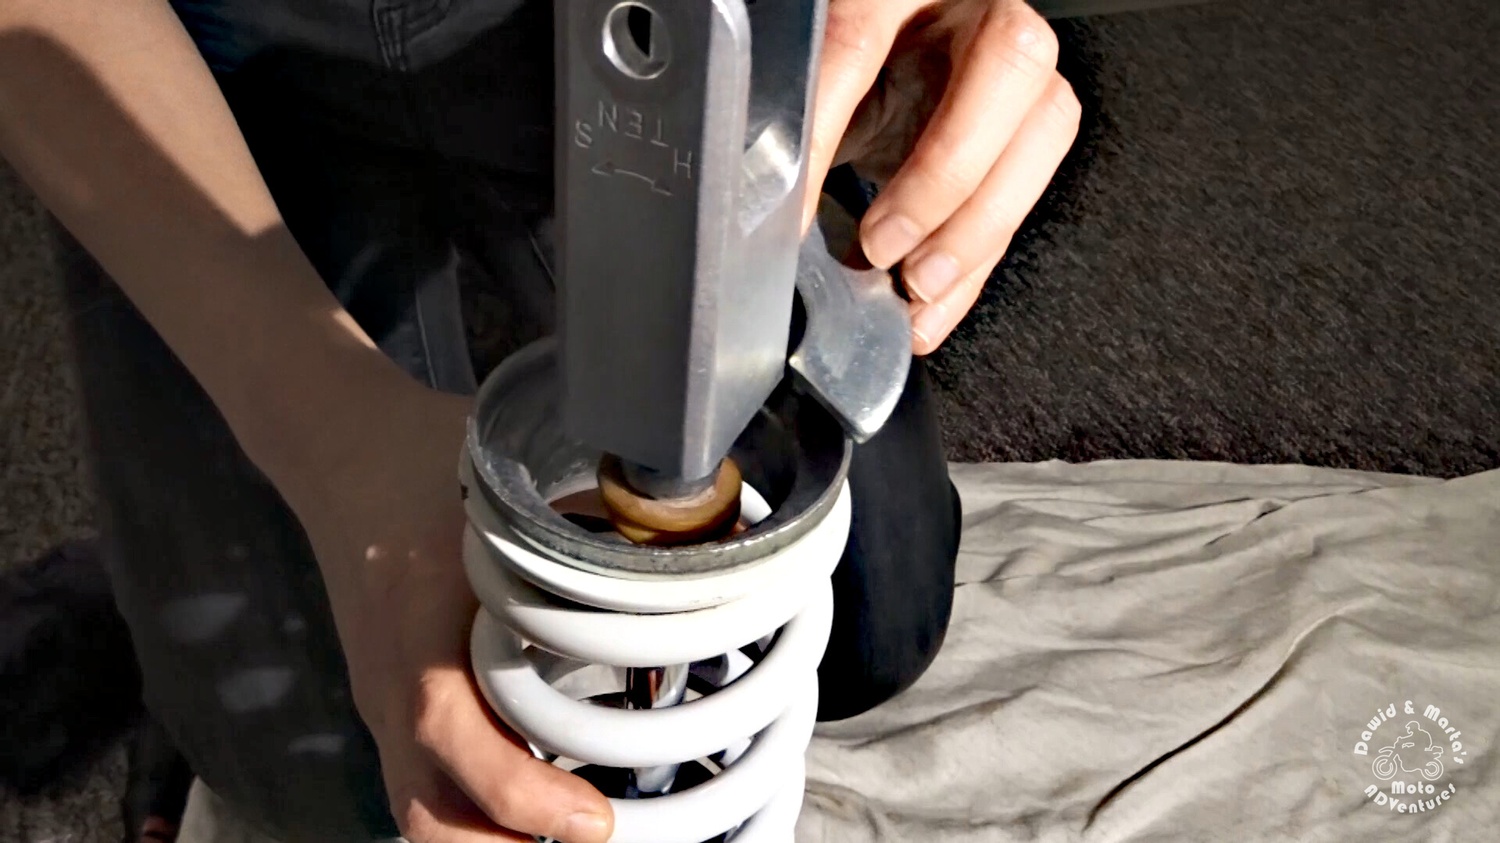
So we screw in  adjuster  and its locking ring until the spring will reach the desired dimension.

58 Rear shock preload adjustment result
Preload adjustment result
58 Rear shock preload adjustment result
Preload adjustment result

When we have the proper spring length, then we can lock it by locking the spring adjuster ring with a punch tool.

59 Locking the rear shock spring
Locking the spring
59 Locking the rear shock spring
Locking the spring

Now we put back the air can handle by tightening it in position with two clamps…

60 Putting back the rear shock air can handles
Putting back the air can handles
60 Putting back the rear shock air can handles
Putting back the air can handles

And we’re done! Congratulations ʕ•ᴥ•ʔ Our DR350 rear shock is ready for some tough riding again ᕙ(◉‿◉)ᕗ

61 Ready DR350 rear shock
Ready!
61 Ready DR350 rear shock
Ready!

If you feel like something’s missing here, let us now! \(ᴗ‿ᴗ)/

And if you more like in the TL;DR mode today (or any day :P) you can also check our video below, which also covers the whole procedure of the DR350 rear shock rebuilding:

[]

Ride safe! :)


Comments