If you wondered how to add an ignition switch to a bike that hasn’t got one, then today we got your back. We will add an ignition switch to the street legal, but ignition switchless Honda XR400R.
Before the ignition switch installation
Before starting anything we need a multimeter, some bracket to mount the ignition switch to the handlebar and, of course, we need some ignition switch.

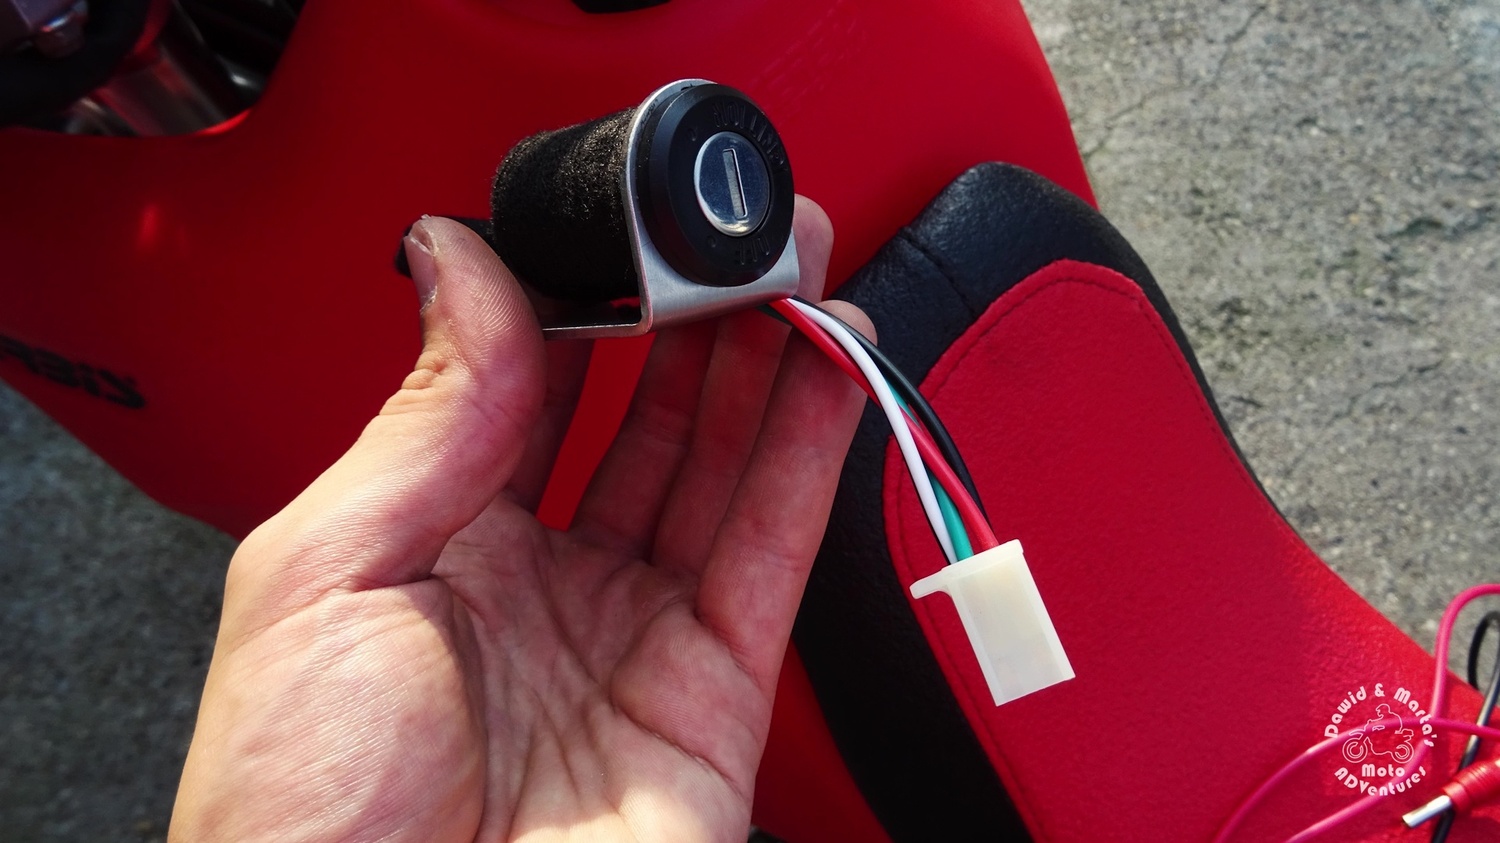
I bought a new ignition switch on Aliexpress.
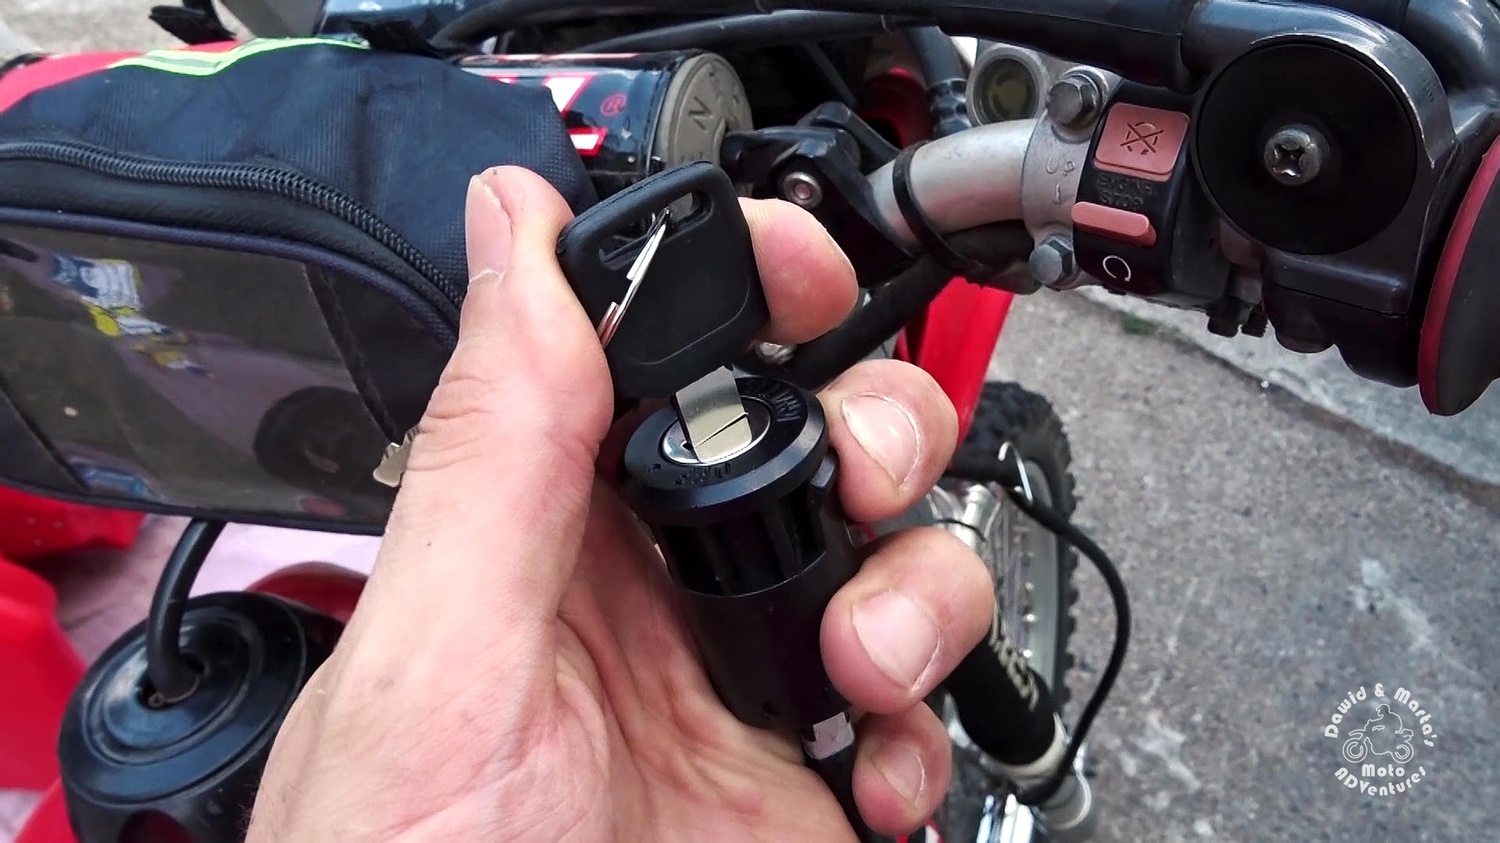
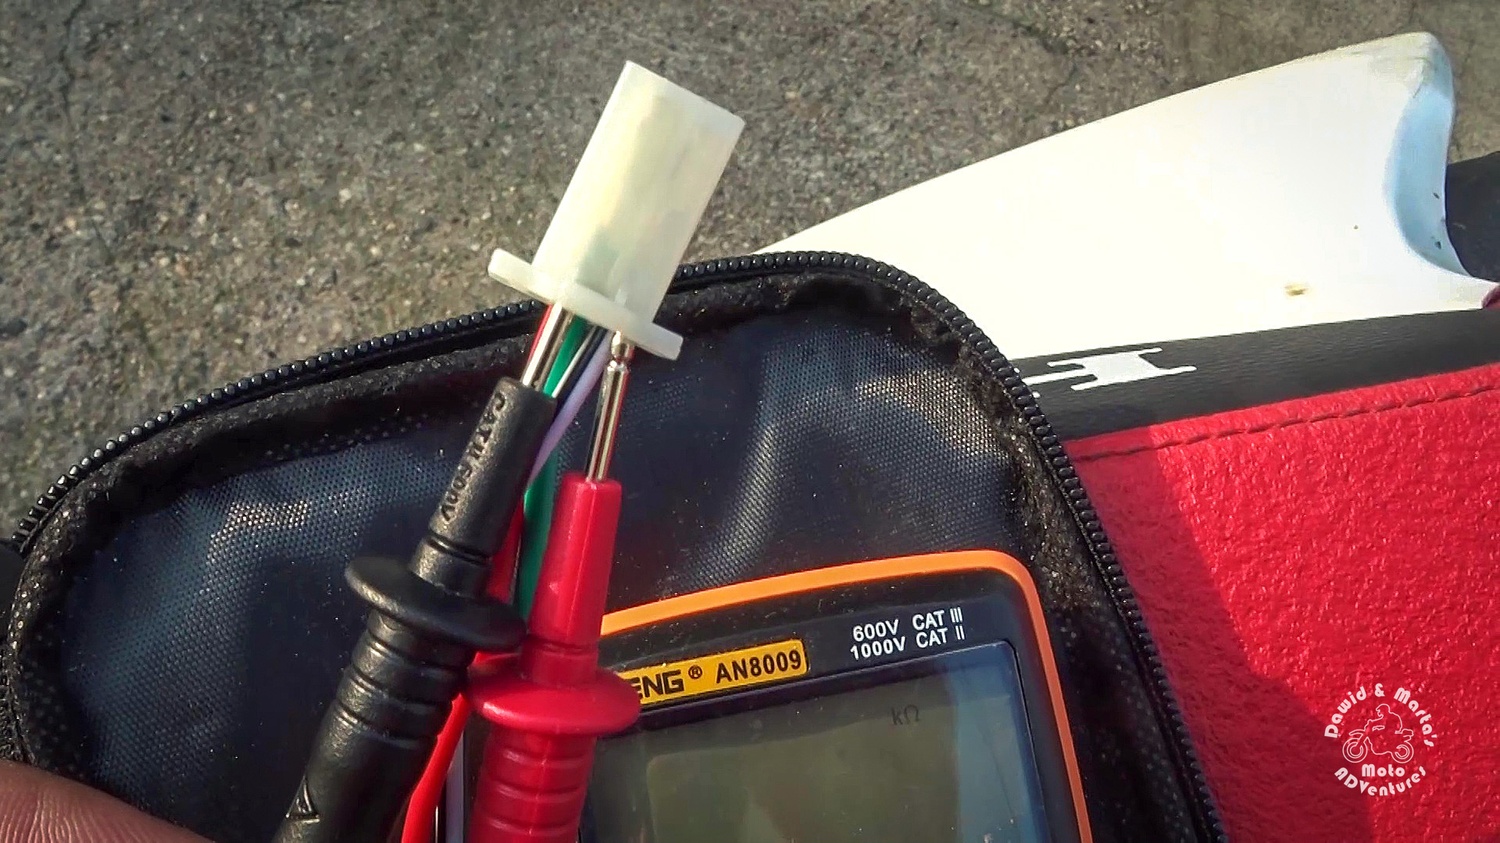
It has four wires. One pair is normally open and one pair is normally closed.

As for the bracket, I designed a simple one on my own.
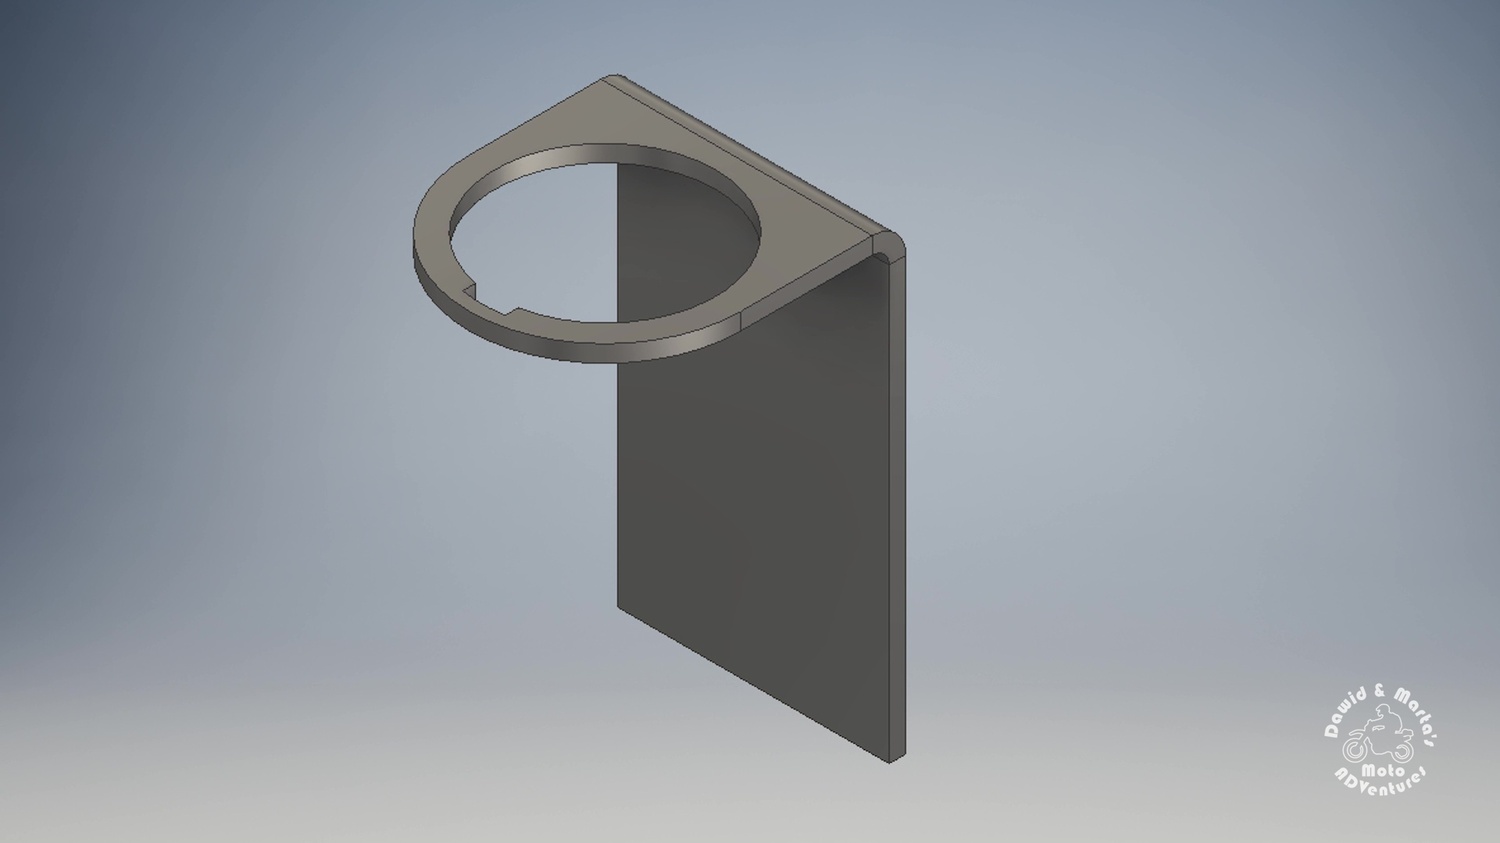
As I don’t have any laser cutter or bending machines at home, I’ve sent the project to one of the CNC workshops and they’ve sent me the ready bracket back.
In the end the ignition switch presents itself like this:
Where to connect the ignition switch?
Here’s where the multimeter comes to play.
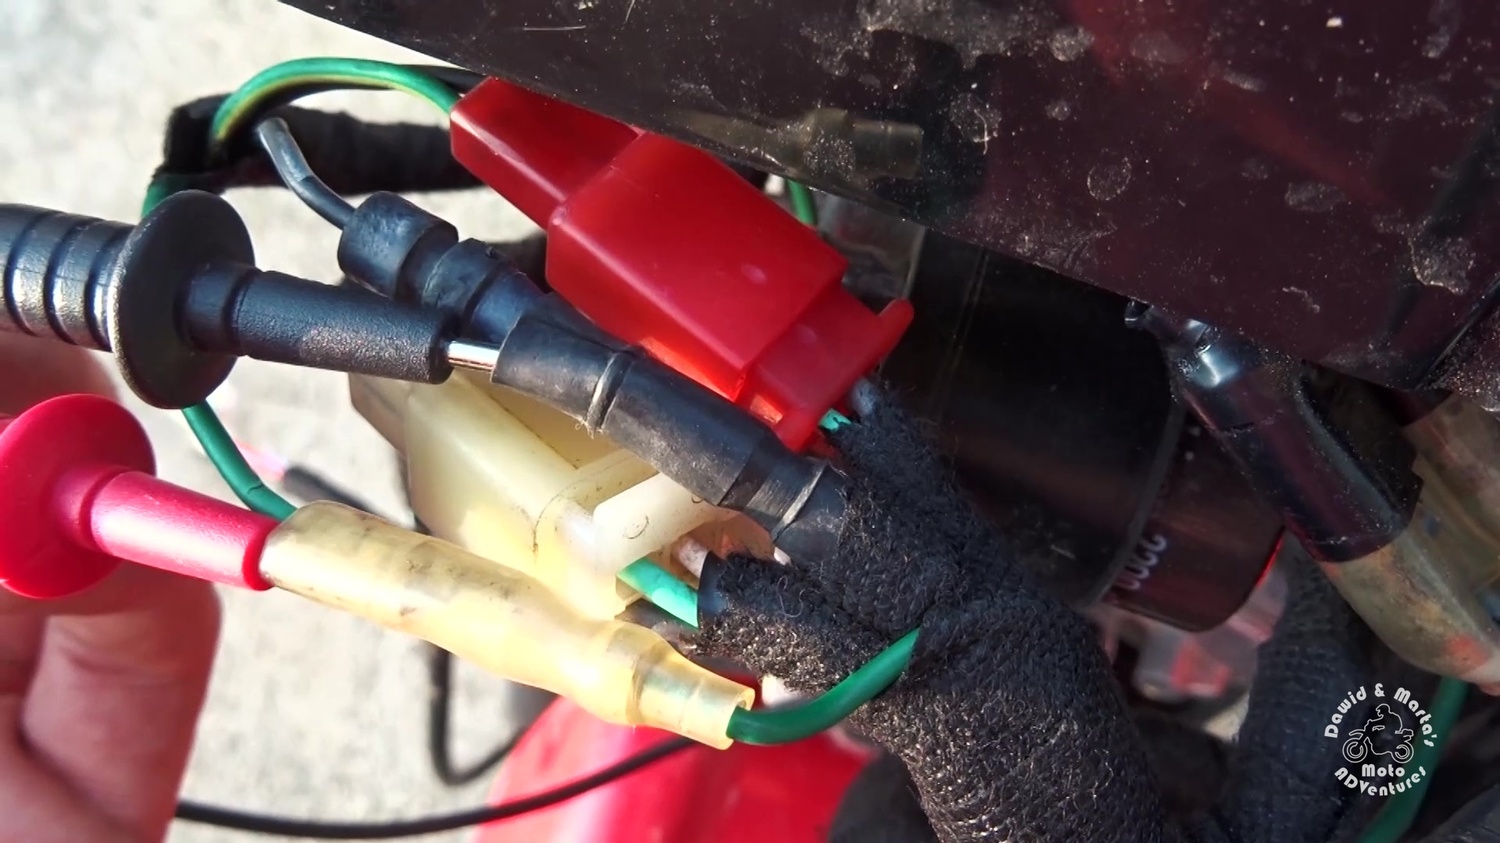
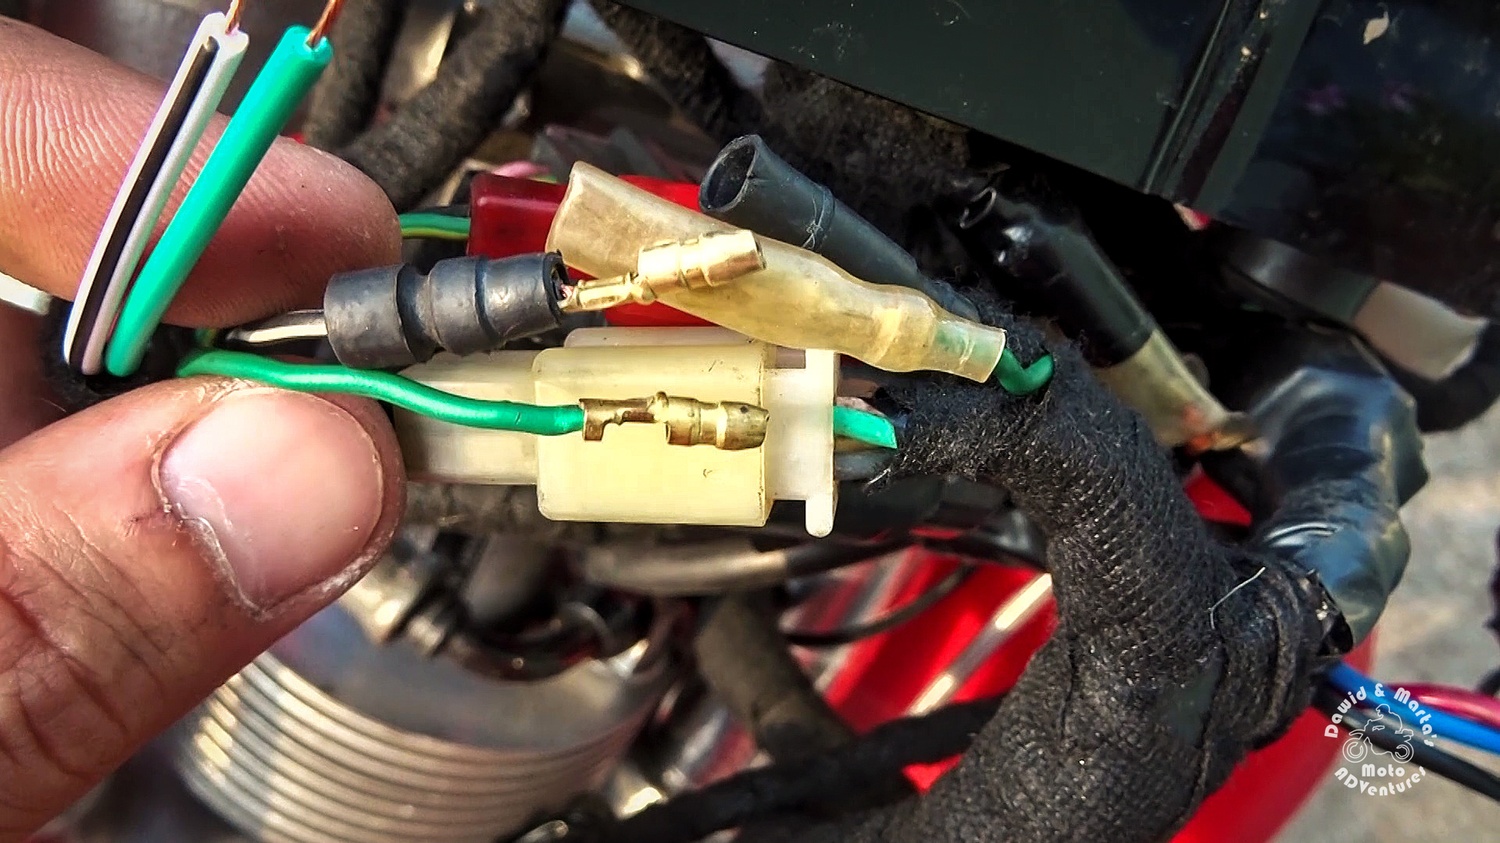
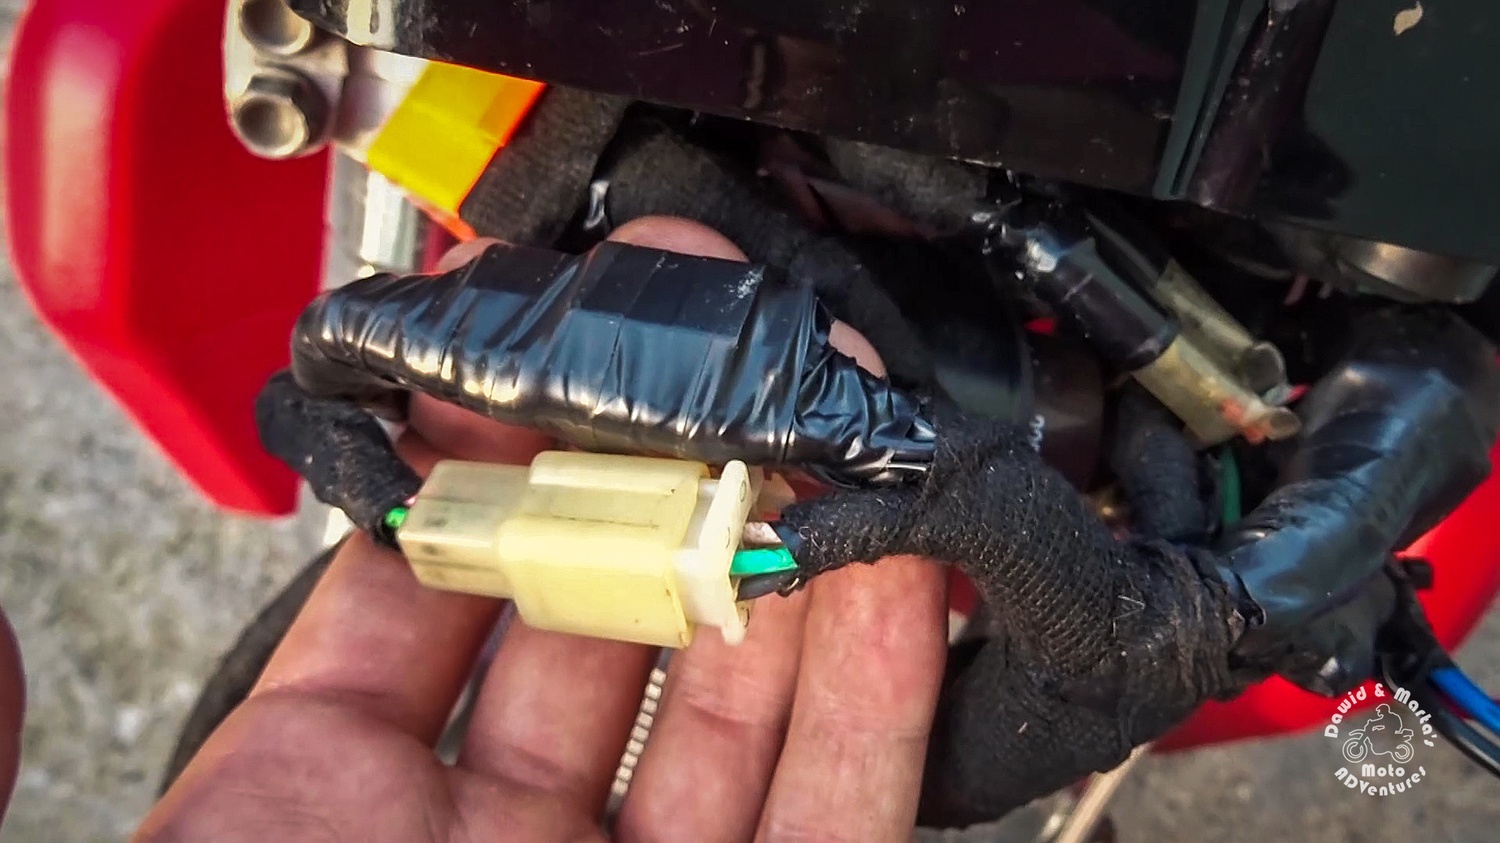
First we look for a kill switch connector.
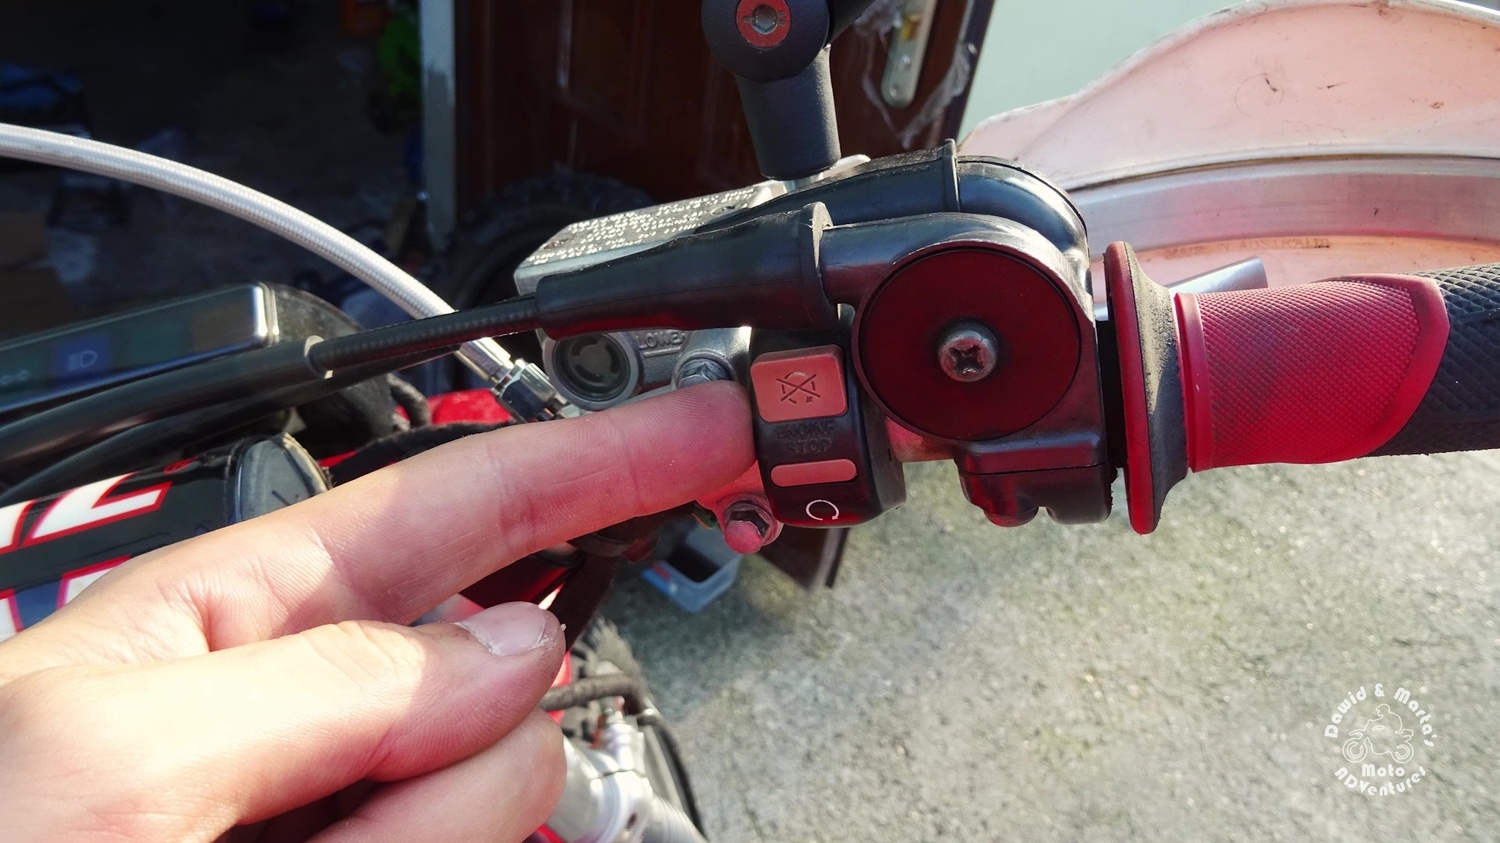
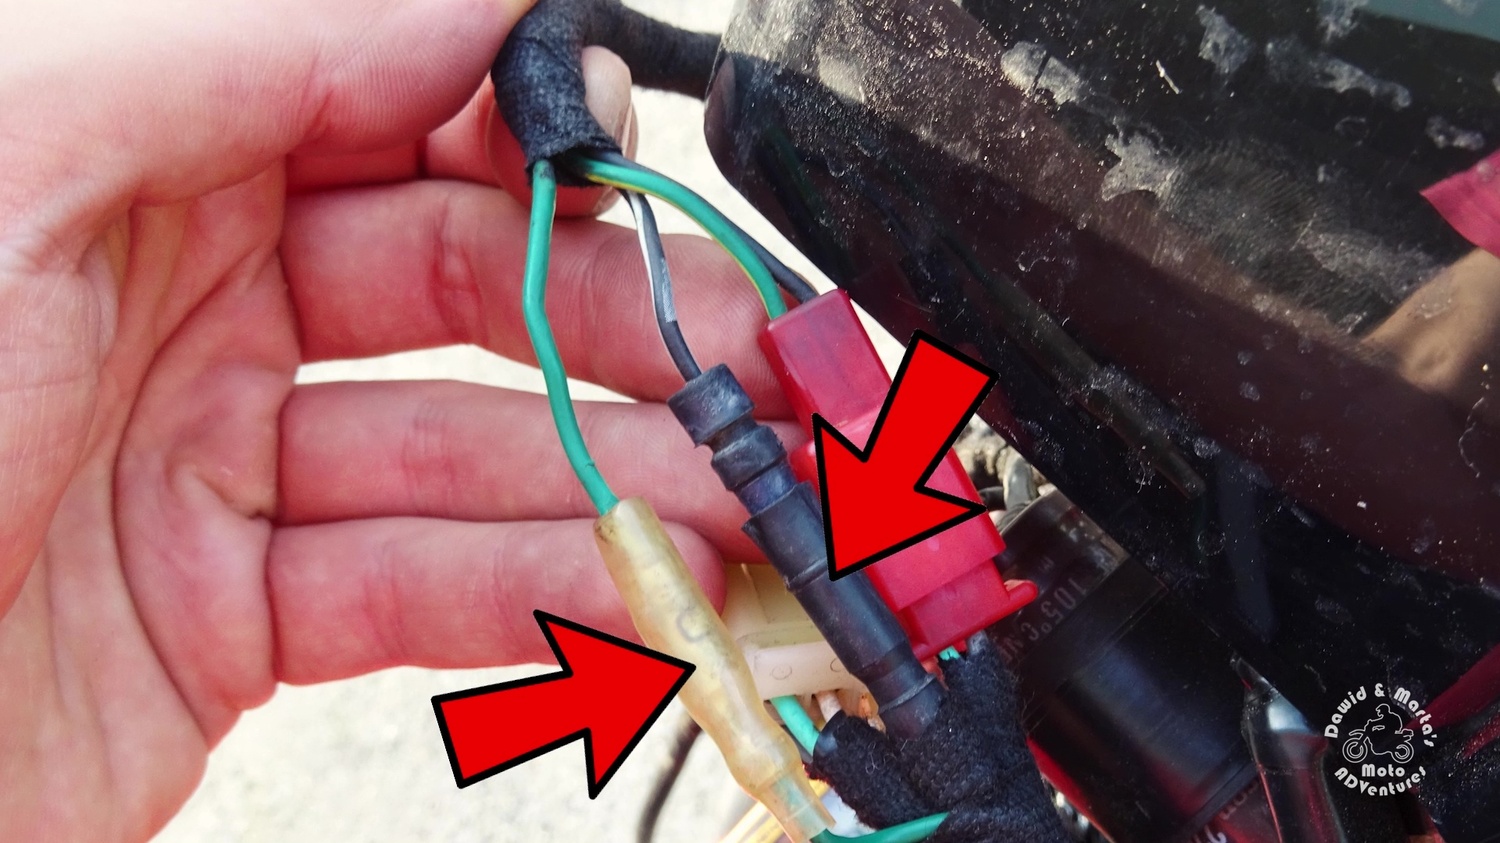
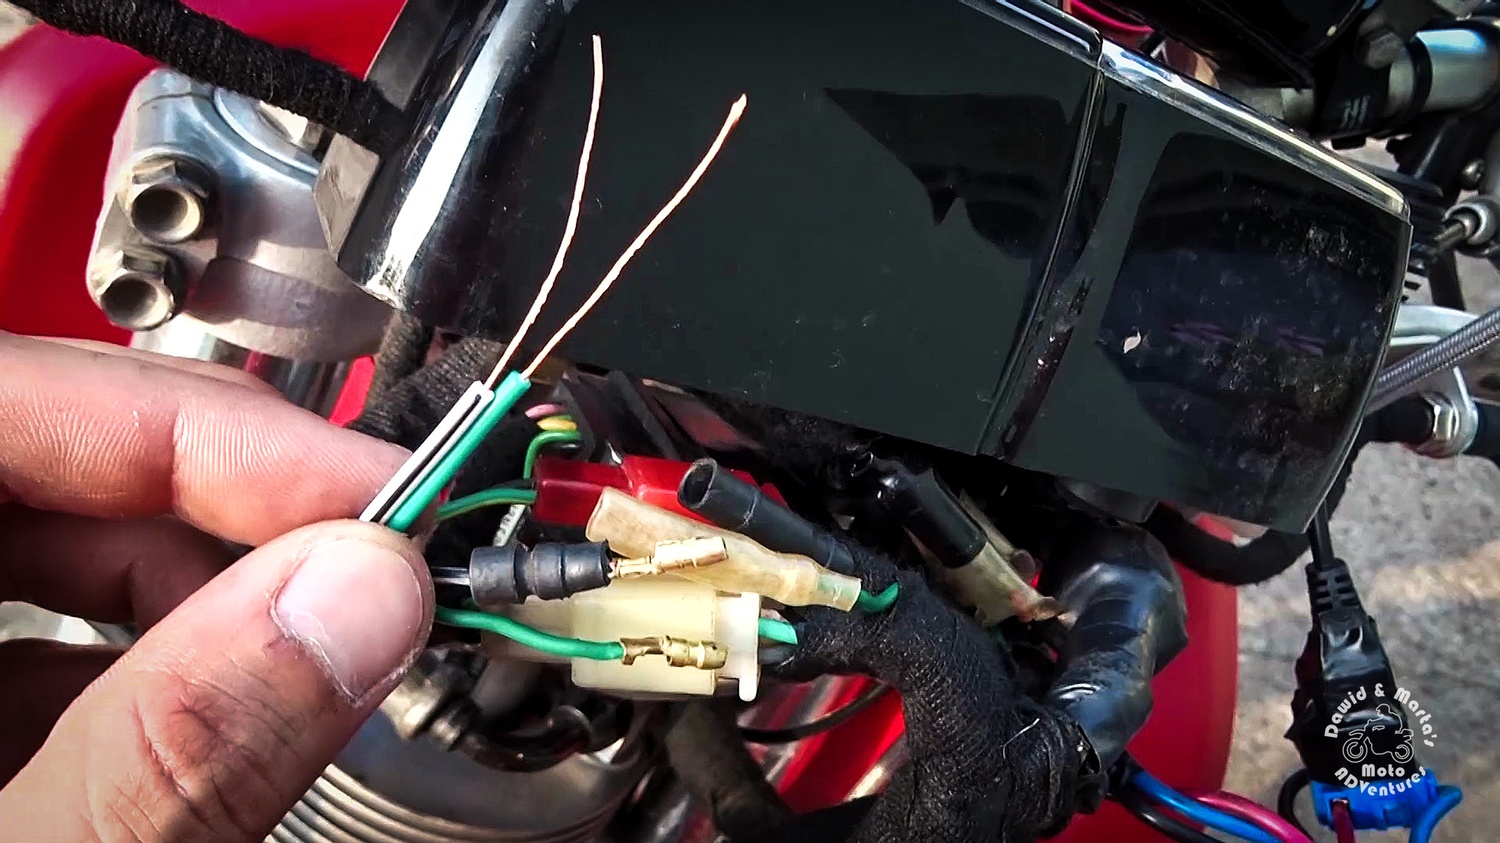
Starting form the kill switch button, we follow the green with yellow tracer wire until we find its connector. The connector has four wires and is located under the speedometer.
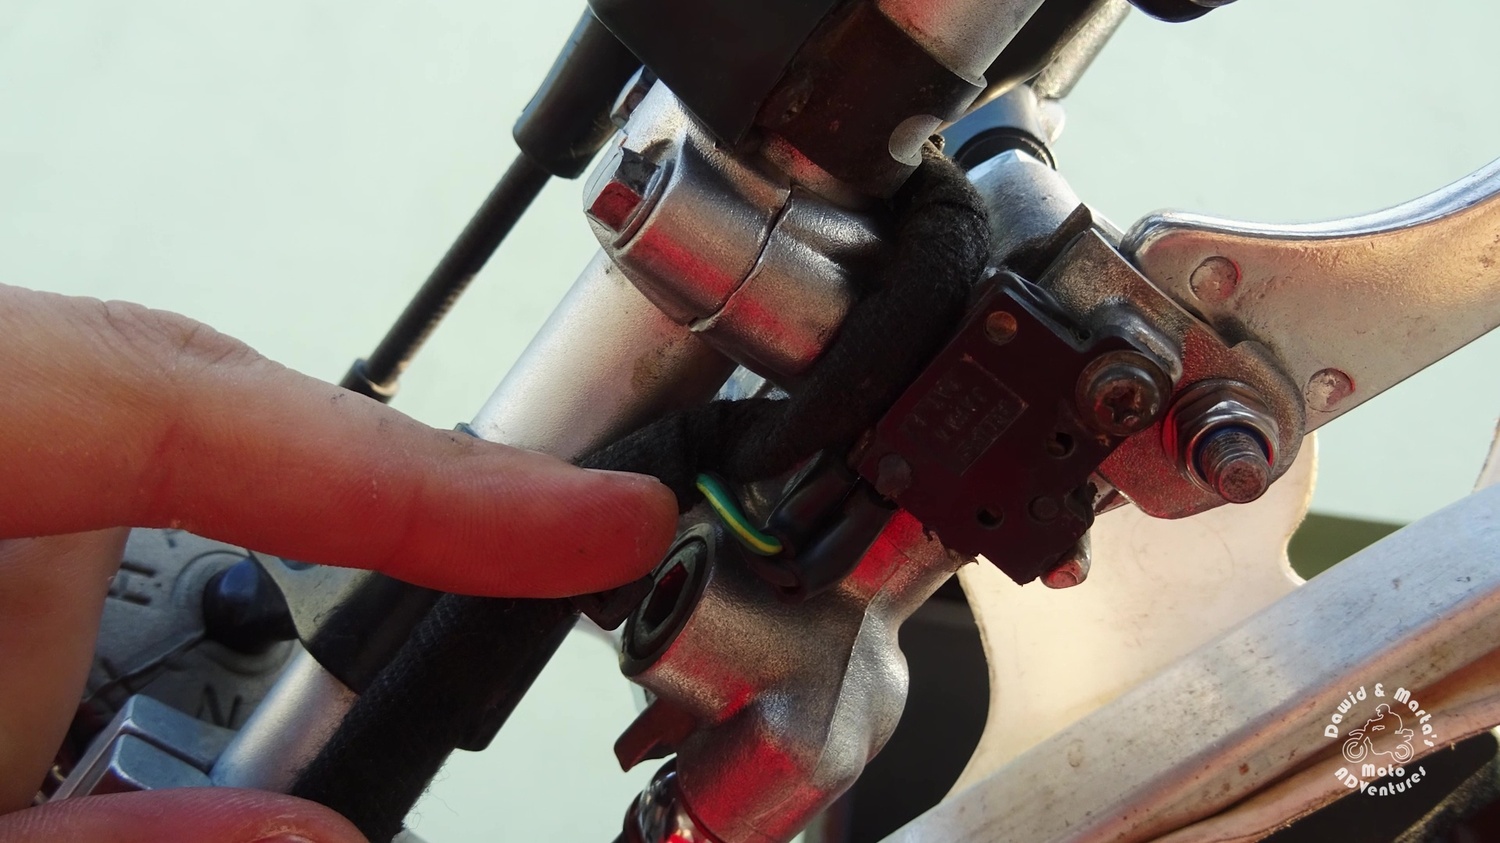
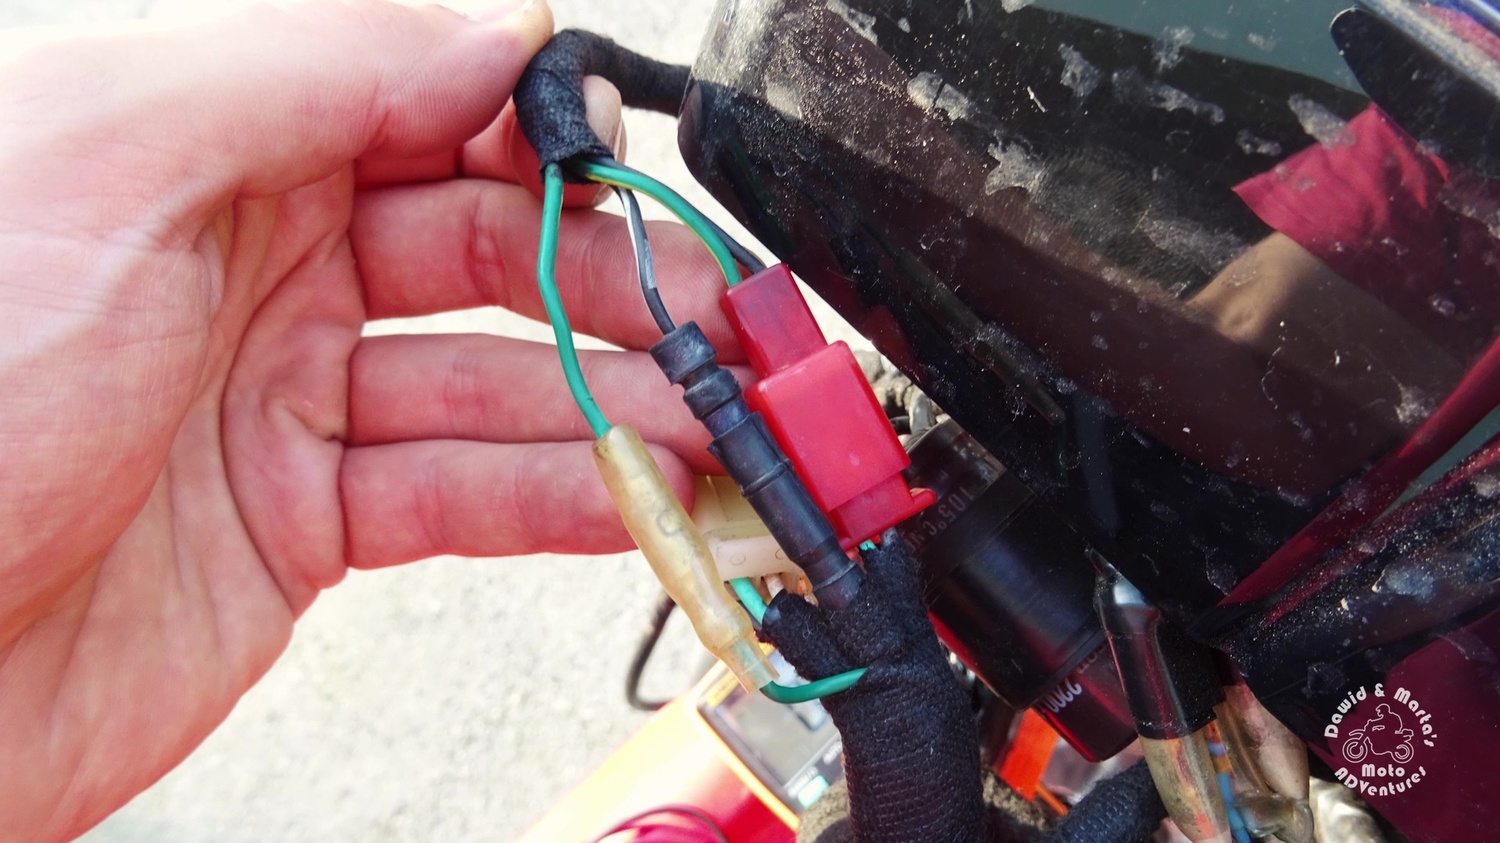
The red two-pin connector is connected to the brake lever sensor, so we leave it alone.
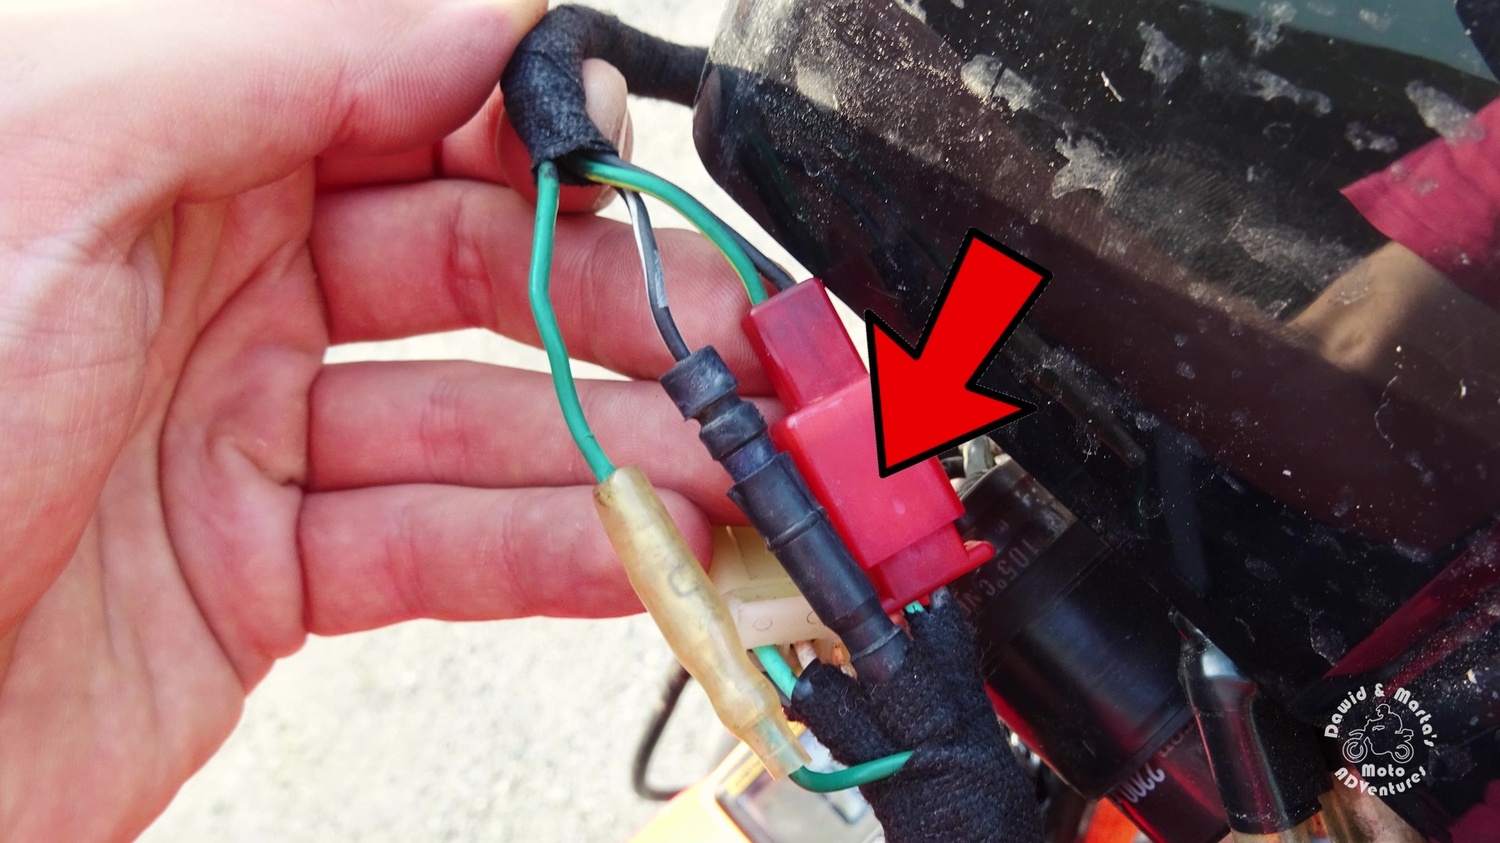
The brake lever sensor connector
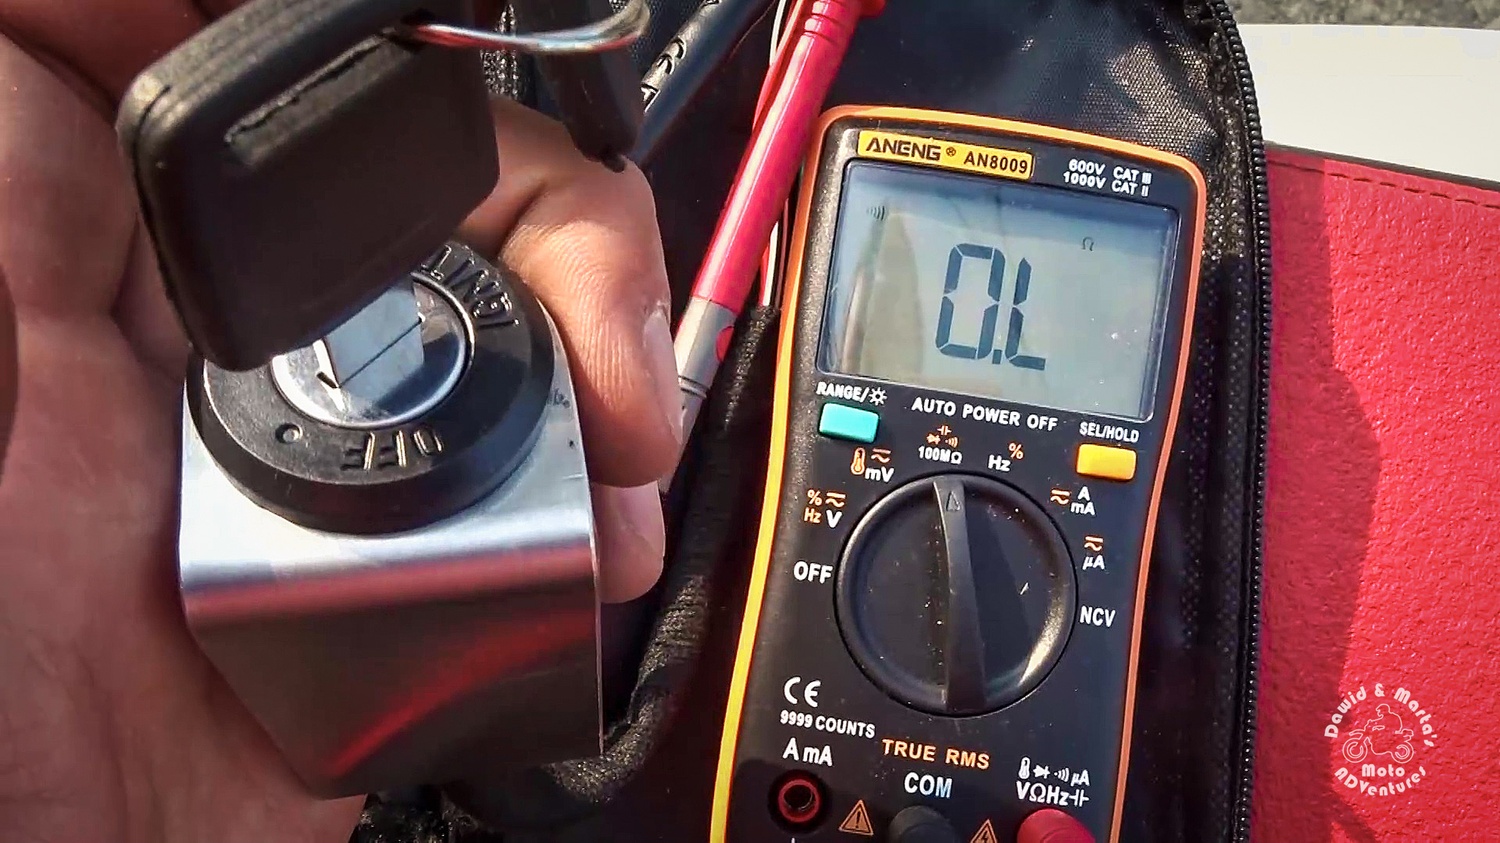
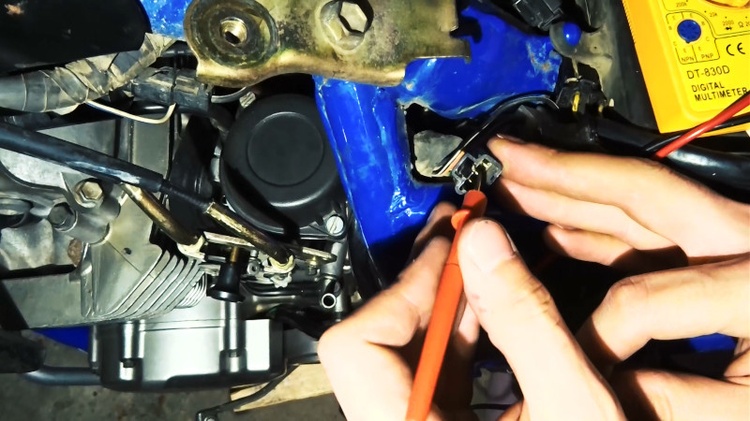
Now we want to see how the kill switch is working, so I use my multimeter to check the resistance when the kill switch is in ON and OFF positions.
In ON position the resistance is infinite, so there is no connection and the circuit is open.
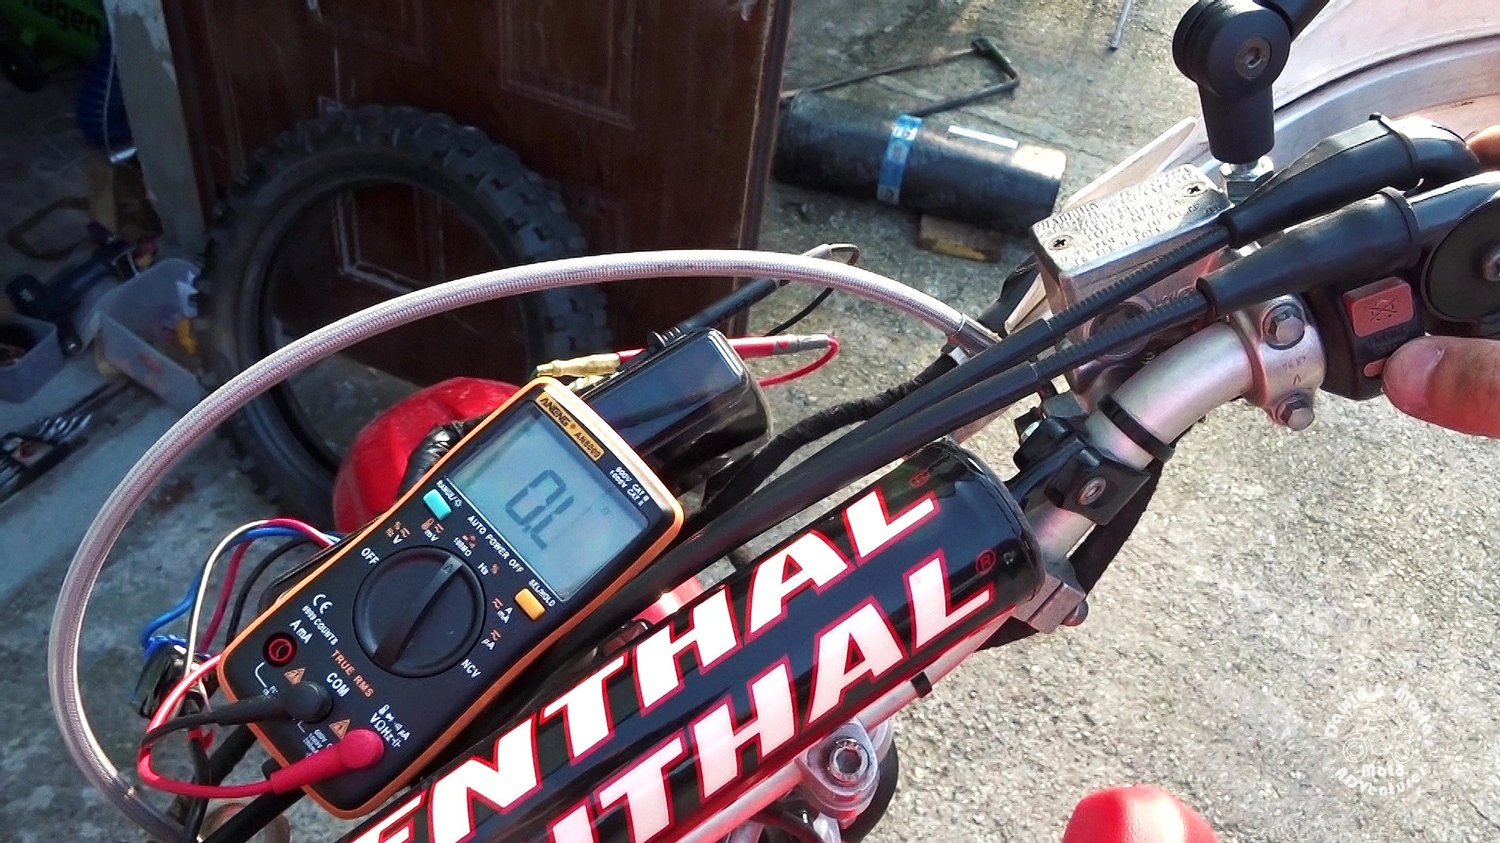
But when we turn the kill switch to OFF position, the multimeter shows some small resistance, so there is a connection.

From that we can see that the kill switch is closing the circuit in OFF position.
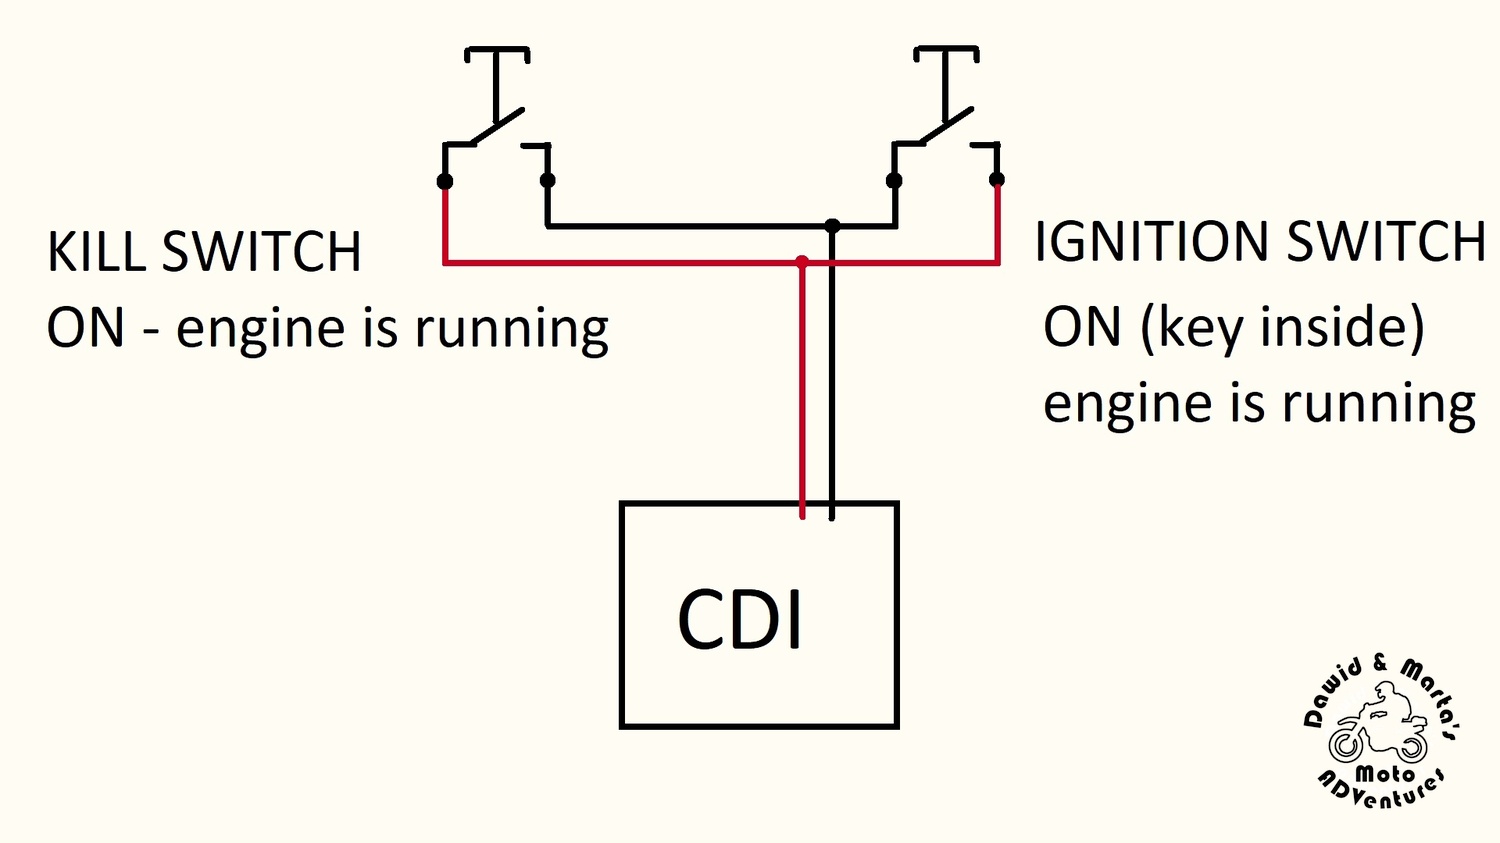
The kill switch is connected to the CDI by two wires. When circuit open you can start the engine.
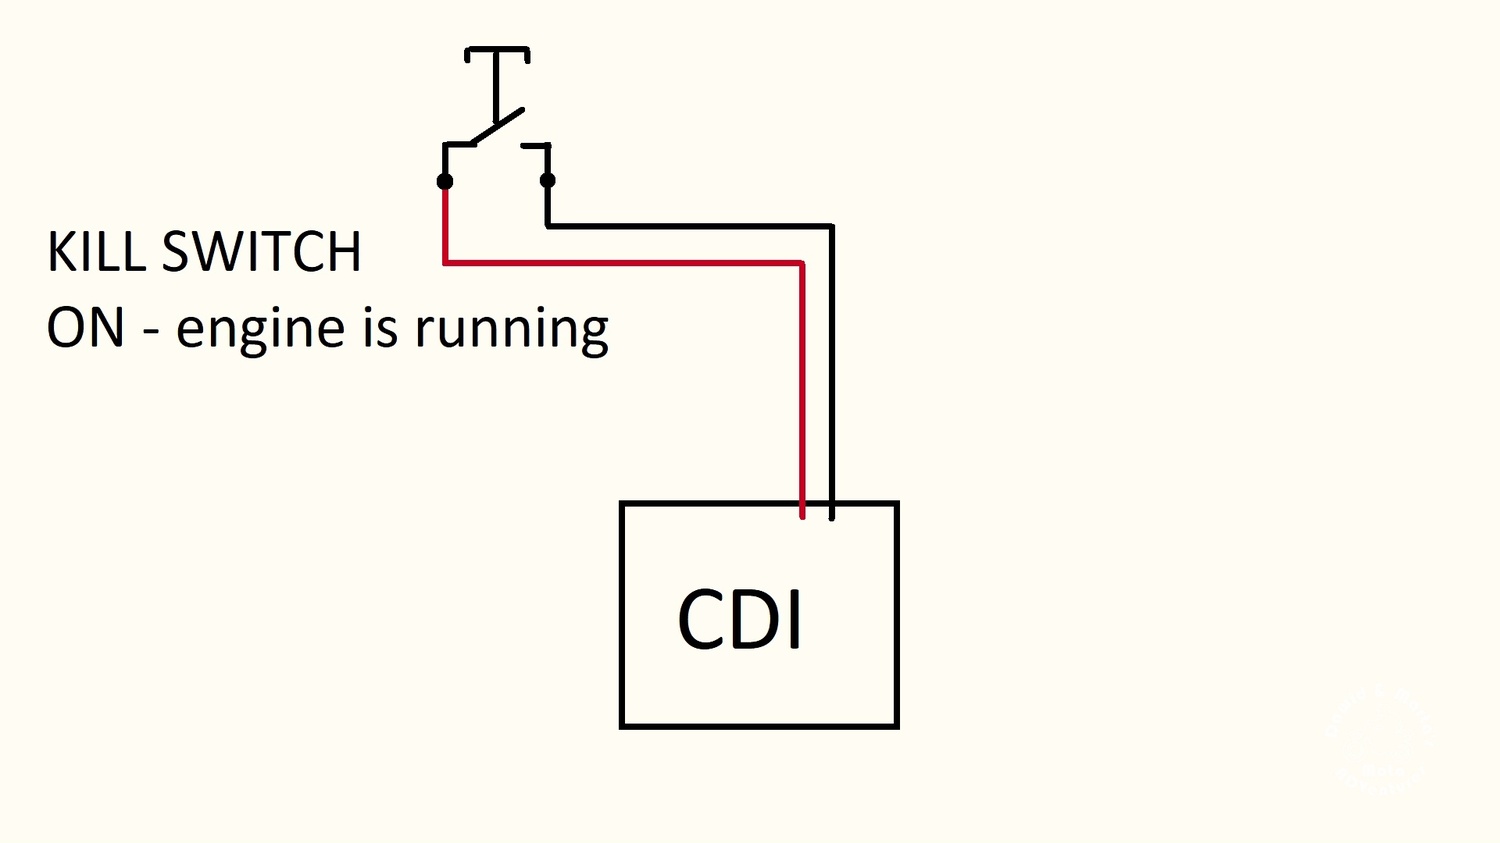
When kill switch is OFF position and the circuit is closed the engine is dead.

So it works very similar to the ignition switch and thanks to that we can connect this switch to the same wires in parallel.
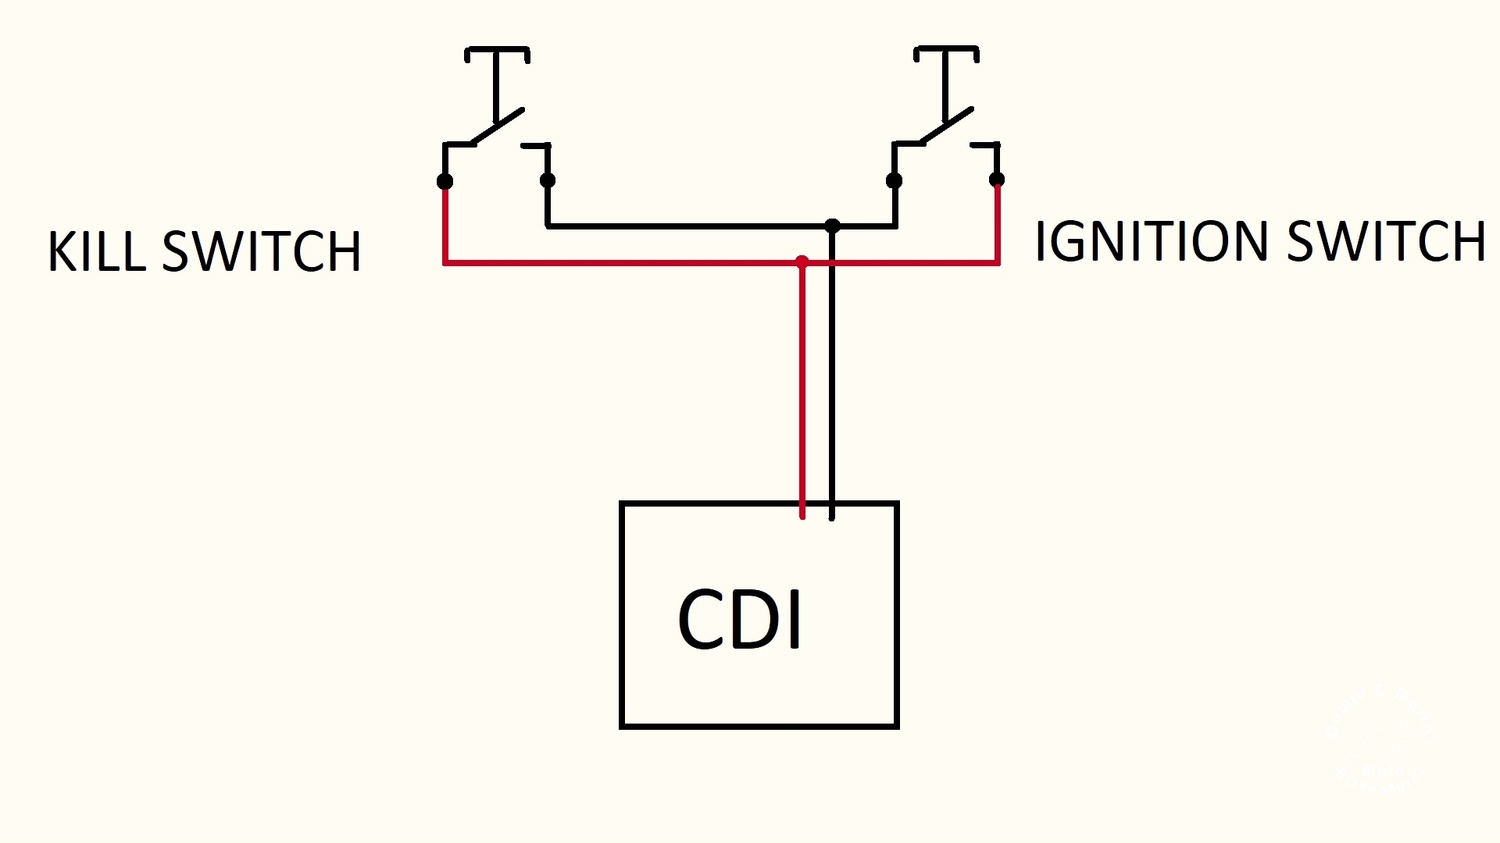
When the key is turned inside the ignition switch, the circuit is open and you can start the engine.

When there is no key the connection is closed, so you can’t start the bike.
The only way to start the engine is putting both switches to ON position.
Connecting the ignition switch to the bike’s wiring
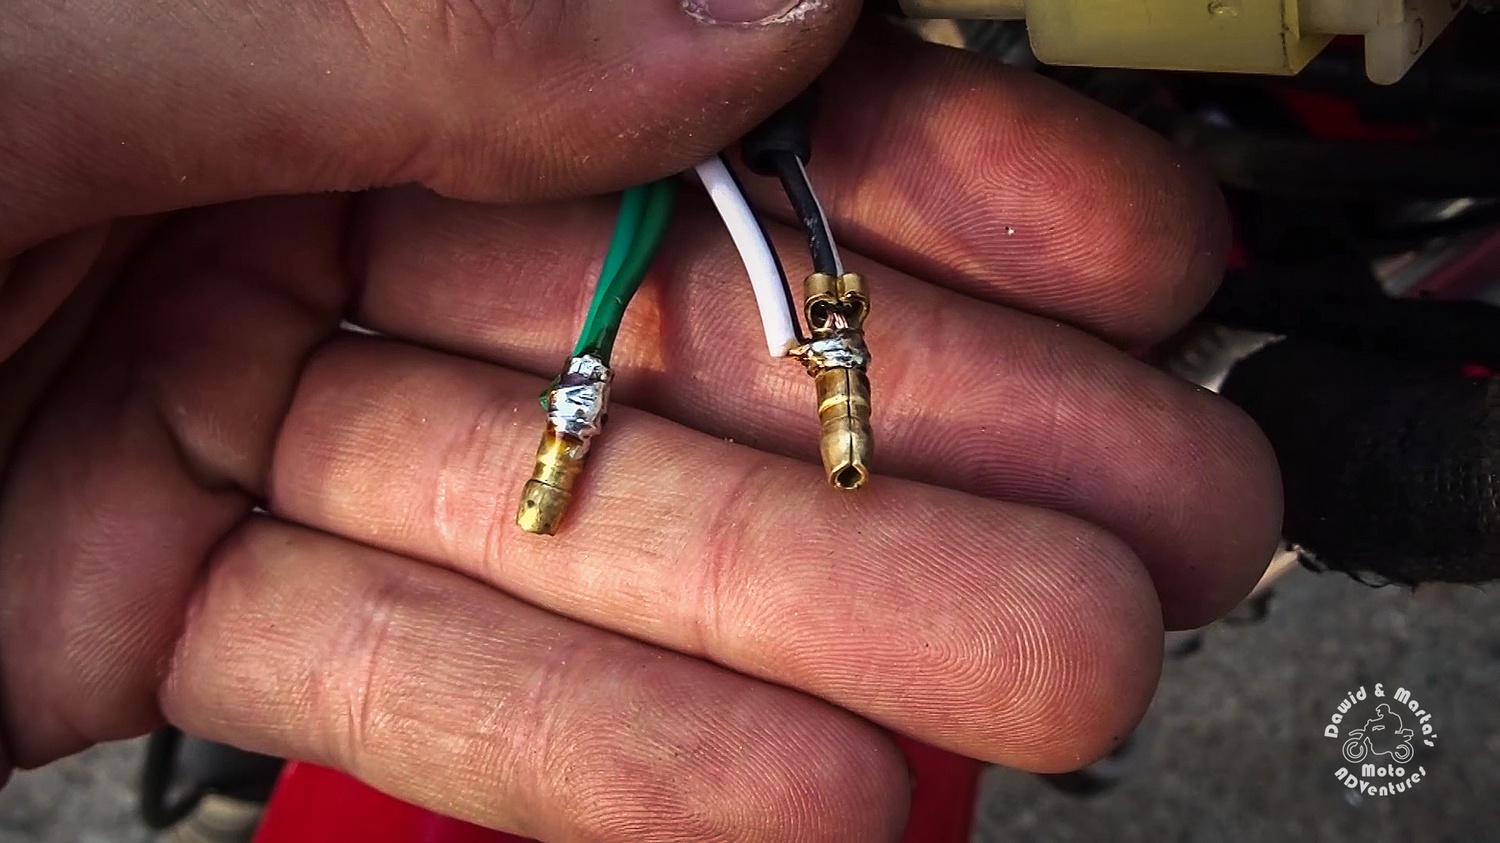
Before getting the wires soldered, in this type of ignition switch I have, first we want to check, which pair of wires, coming out from our ignition switch, work like the kill switch. That is, which one is normally closed, so closes the circuit, when it’s in OFF position.
First I check the green wire and white with black tracer wire.
In ON position there is no connection, but when we take out the key there is a connection. So it works as we wanted.

As we know now how to connect the ignition switch, we can put it into the prepared bracket and finally attach it to the handlebar.
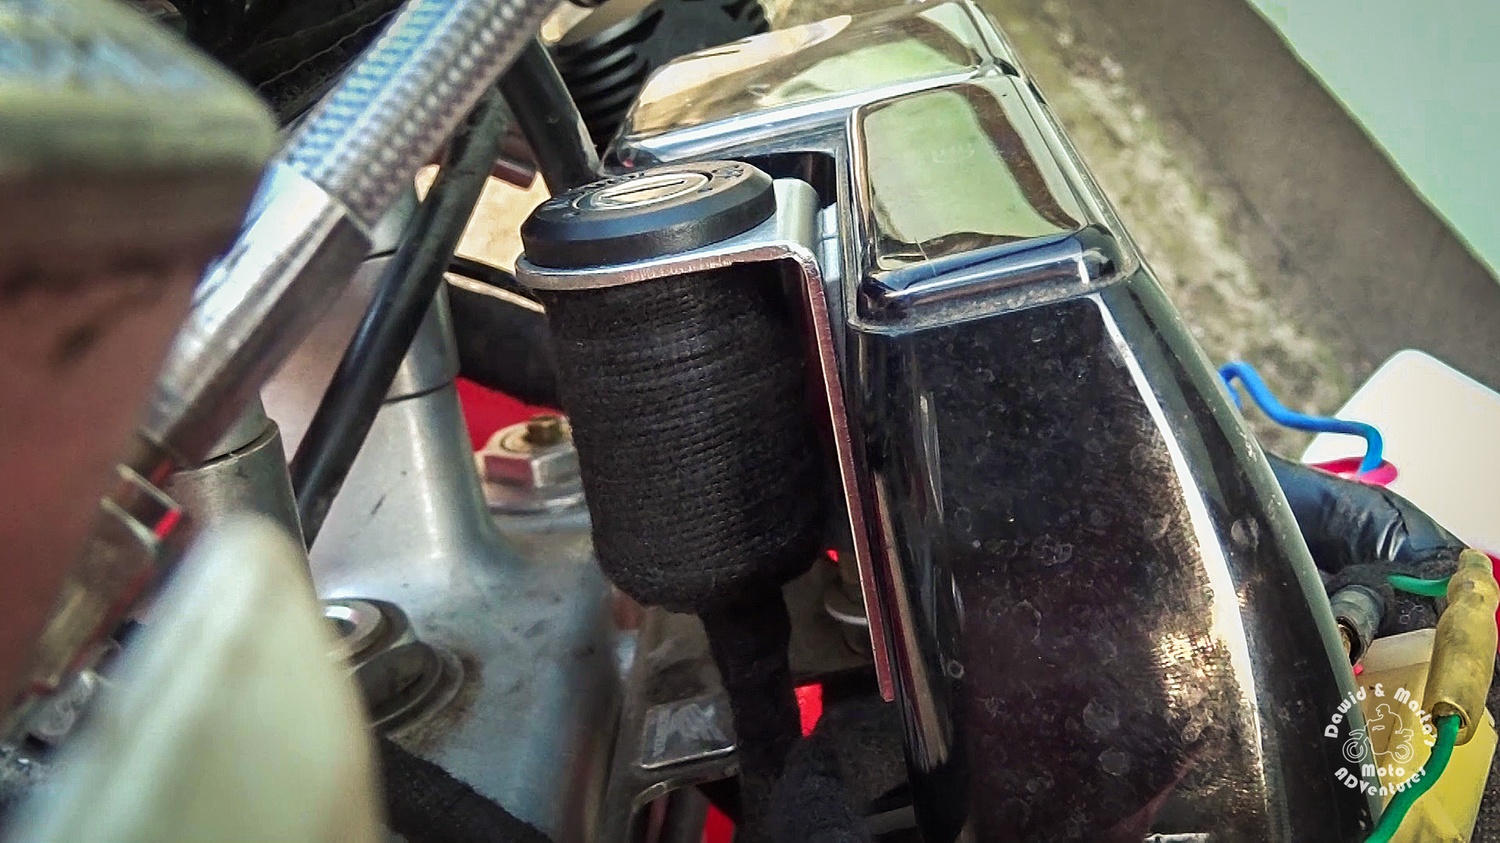
To do this, first I’m using a brake cleaner to clean and degrease the bracket and speedometer surfaces. Then I’m sticking the bracket to the speedometer on a double sided adhesive tape.
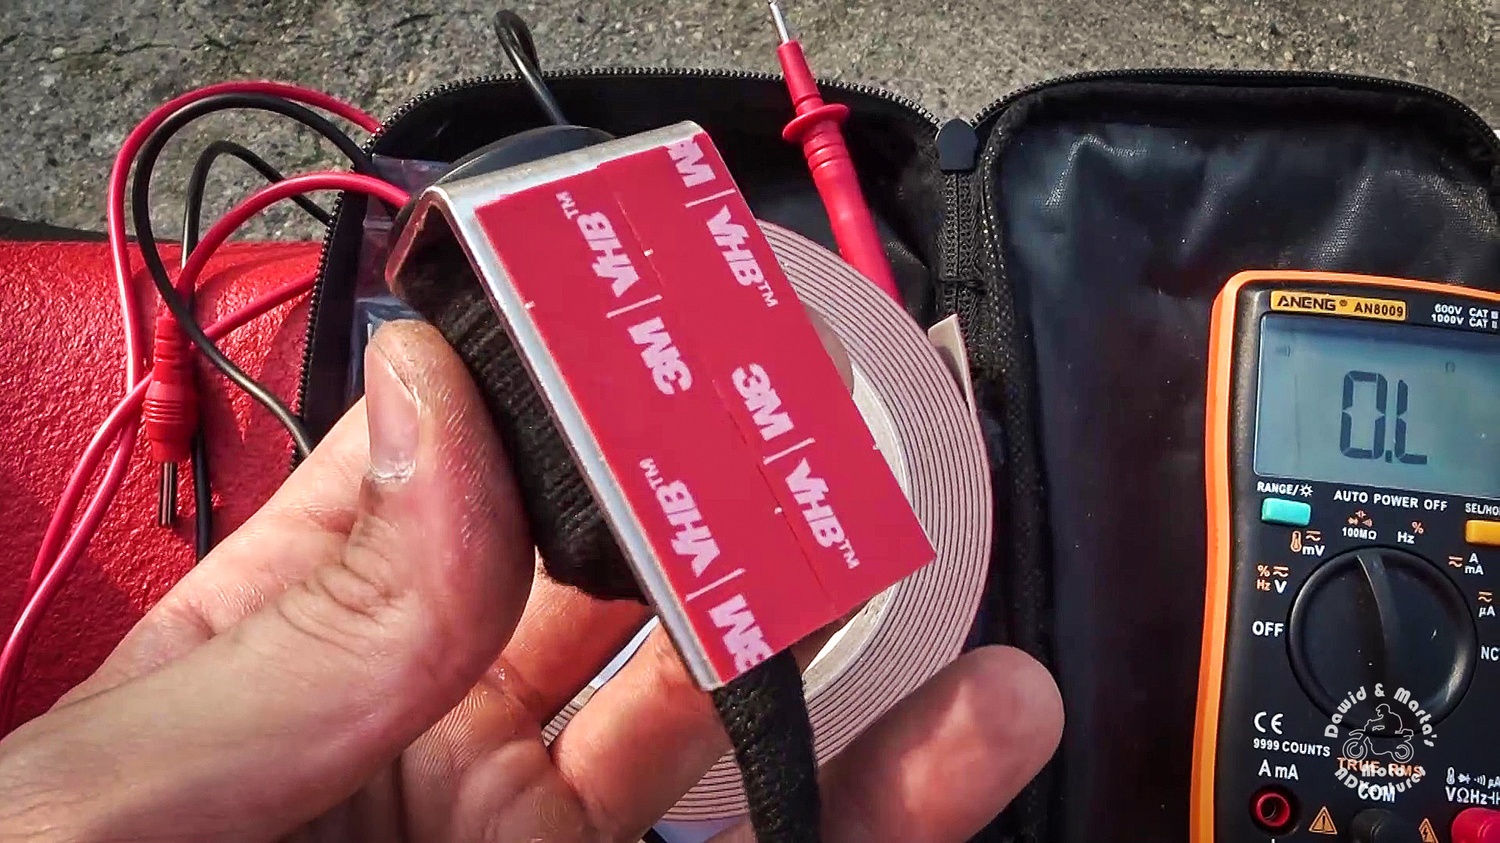
I think it is pretty solid and it should be fine. Up to this day the tape survived 4000 km of shaking and wobbling around :)
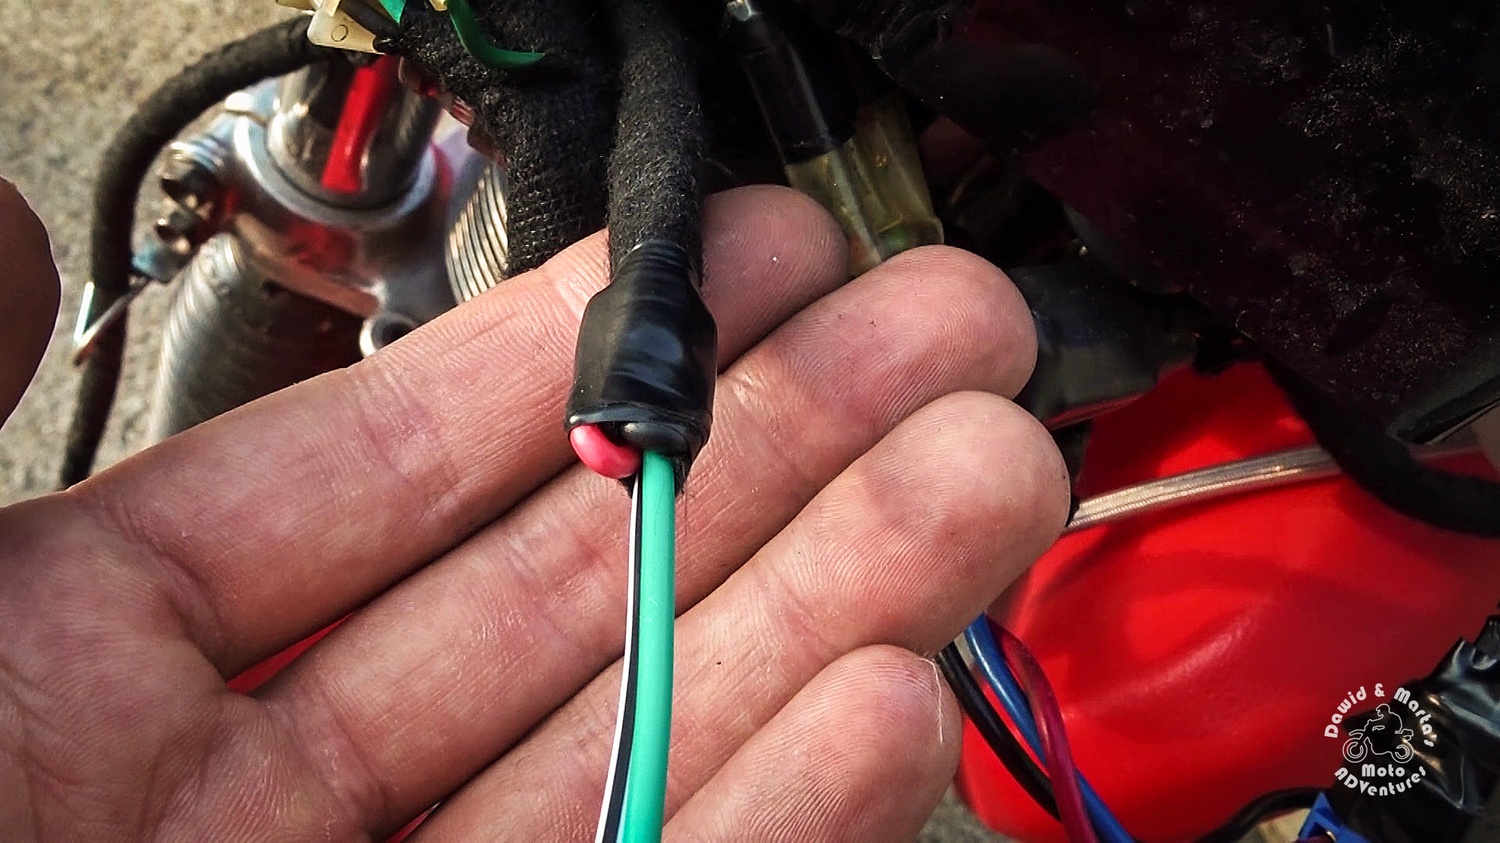
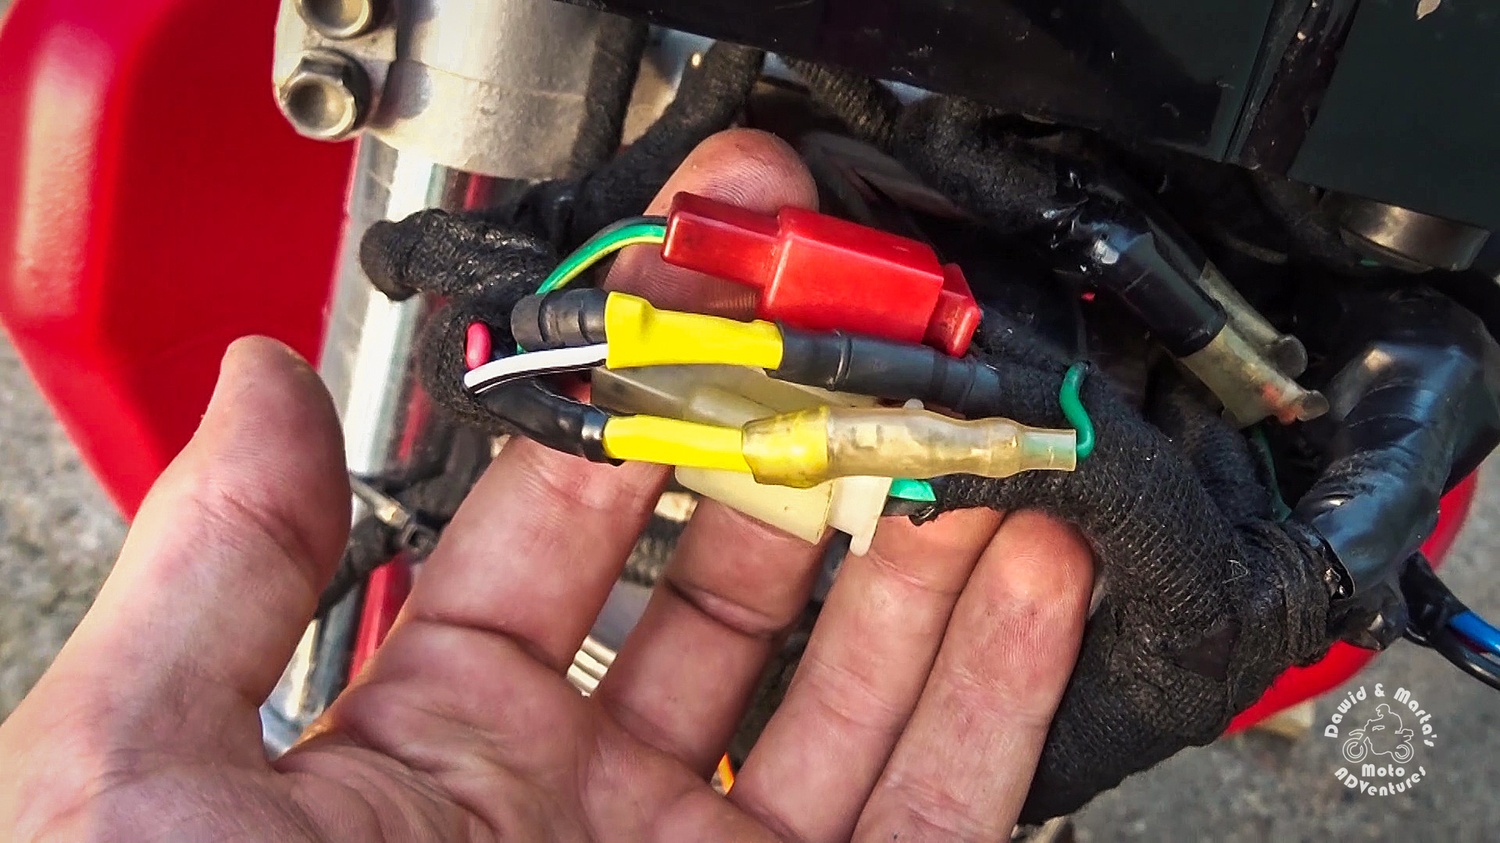
When the bracket is attached, we secure the ignition switch wires, which we are not using, with an insulating tape.
Next we can move to connecting the ignition switch to the kill switch.
We strip the green and white with black tracer wires and solder them to green and white with black tracer wires coming out from the kill switch.


After soldering we secure the solder with a heatshrink.
Finally we connect every connector as before and secure everything with an electrical tape.
The final new ignition switch test
In the end we should, of course, test our work. So we try to run the bike with four different combination of kill and ignition switches positions:
- ignition switch ON and kill switch ON
- ignition switch OFF and kill switch OFF
- ignition switch ON and kill switch OFF
- ignition switch OFF and kill switch ON
In my case everything turned out to work fine.
If you have some doubts, you can check our video below or let us know what’s missing :)

Comments