On our way to revive the spark in the disobedient DR, this time we dig into the details of the powers source coil.
What’s a power source coil?
Before we move to the test let’s have a quick intro on what a power source coil actually is.
The power source coil is rolled up on the magneto. As its name is indicating – its only job is powering the CDI (Capacitor Discharge Ignition) unit.
The lights are powered by a different coil, so if they’re flashing during kicking, it doesn’t mean that our CDI unit is properly supplied with power. But the lack of CDI power supply can result with no spark as there would be nothing to control the spark firing, when the CDI is dead.
This power source coil occurs in every Suzuki DR 350 version and is (I think) always a pair of white and brown wires.
Checking the resistance
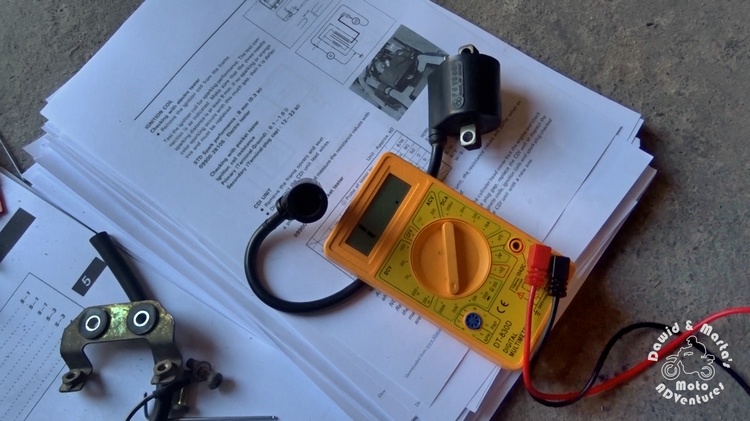
In the Suzuki DR350S service manual, the testing procedure is described in chapter 12, page 21:
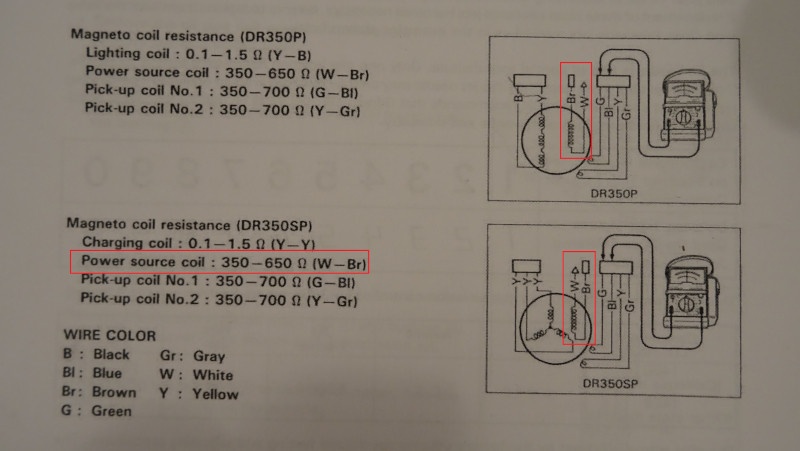
As you can see we want our multimeter to show value between 350 and 650Ω.
The resistance measurement can tell us a little about the coil condition. If the measurement result will be around 0Ω, it’s very likely that the isolation of our coil has melted and instead of pretty coil we have a nasty copper ball there.
On the other hand if the resistance will grow really big, to MΩ, it says that somewhere we have a defective cable and that the circuit isn’t closed.
Though, those are extreme cases.
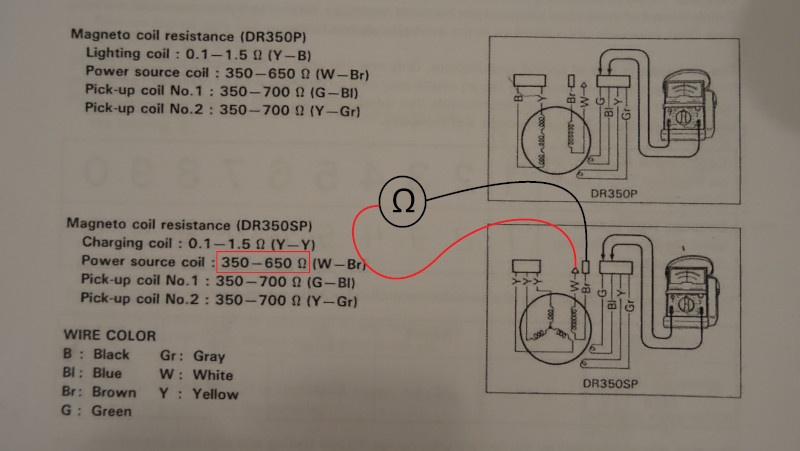
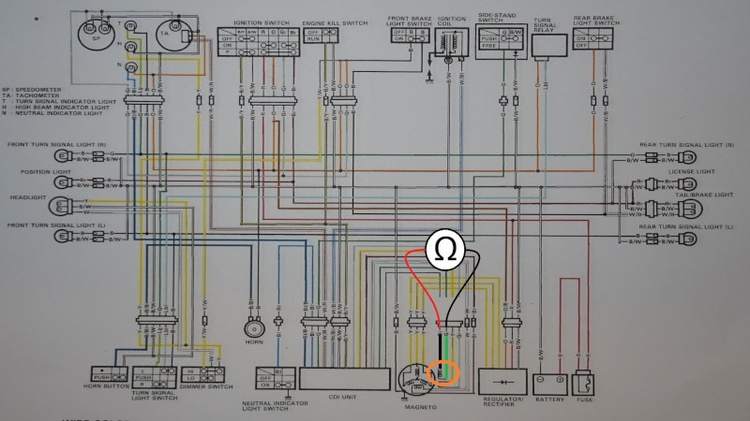
The test scheme looks like this:
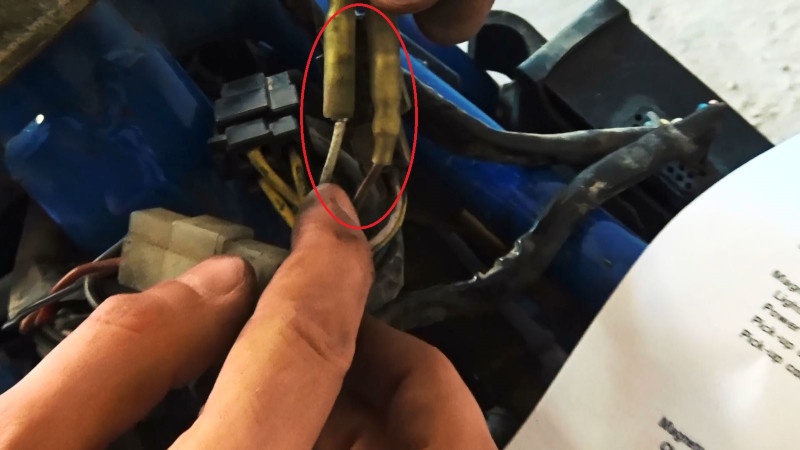
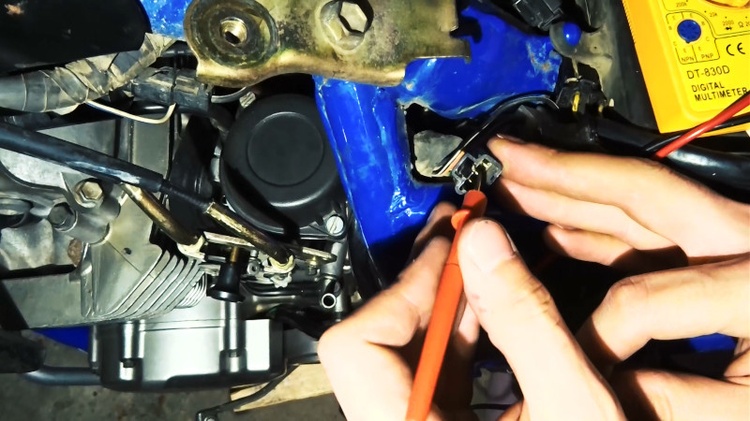
We pin up the multimeter near the CDI unit. Those two interesting us cables are the only ones, which have bullet connectors, not sockets/contacts. We marked them in the picture:
In our DR we’ve got 492Ω in this test. So the cable should be whole and the isolation – not burned.
Checking the voltage generated by the power source coil
The voltage test is not described in the Suzuki DR 350 service manual. We found it over the Internet and this lets you be 100% sure that the power source coil is ok.
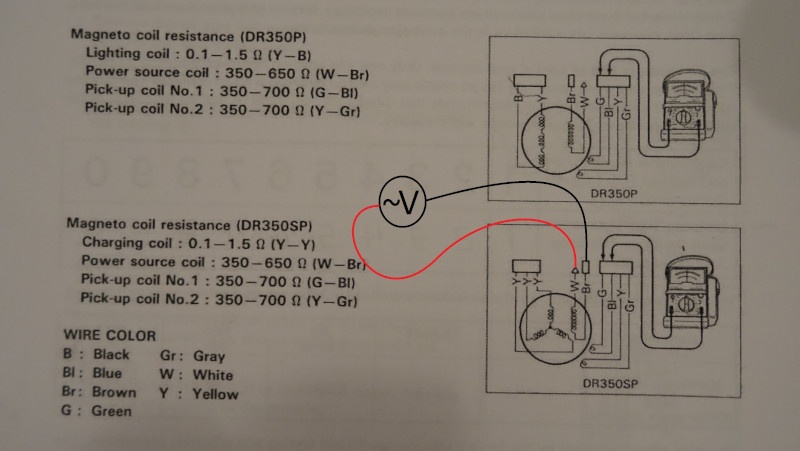
We pin up the multimeter just as before, during the resistance test. Just change the measurement mode to alternating current (AC). So it looks like this:
A whatever ;) sloppy kicking during the engine starting, should make the voltage reach from 50 to 80V AC. If you give the DR a neater kick, as if you would to really make it run, the multimeter should show about 100 – 130V AC.
For better picture you can also check our video if anything seems still blurry:
Summary
Our DR scored proper value in this test. Though, we find that it’s worthwhile to also clean the contacts with some brush and wash them with a contact spray. It won’t hurt anyway ;)
In the next post we will check the pick up coils :)
If you’re first time here and also have trouble with the spark – you might want to check the ignition coil test
Comments